Sheds, playhouses and outbuildings are classified as temporary structures so you normally do not need to obtain planning permission for these structures, unless you live in a conservation area.
The easiest method of building a shed is to buy a pre-made kit with full instructions, they are relatively simple to construct and can be placed just about anywhere provided there is a firm and flat surface. However if you want something a little more custom then you can build your own shed from scratch.
For the purposes of this guide we are going to construct a pre-made shed kit as this will generally be the most common form of shed that’s built, but before we run through the steps on how to build a shed there are some issues to consider:
- How big do you want your shed – the size of your shed should compliment the size of your garden. Try not to overwhelm your garden. Think about the colour and aesthetics of the shed
- The shed needs to be accessible with a pathway and a sensibly placed doorway
- Placement of the shed is important, your shed should not be in an awkward position, rather place it where it is out of the way but still accessible, a good place is often against the back or side wall – perhaps the corner
- Natural light is an issue in winter? Choose the correct side for the window/s to provide maximum light. Is there a danger of overheating in summer?
- Is the shed going to be powered? How will you get the power to the shed? Think underground cables
- Do you need running water in your shed? Is there a tap nearby where you can source water?
- Try and make your shed versatile – a children’s playhouse can later be made into a workshop or storeroom when they grow up
Building The Shed
A pre-made garden shed kit is fairly simple to build. In pretty much all cases each kit will come with full manufacturers instructions, however sometimes they’re not that comprehensive so our guide below aims to fix that by providing a full set of instructions.
Step 1 – Build a Shed Base
To ensure that the shed lasts and remains dry and free of damp and rot, it needs to be constructed on a suitable solid base.
The best type of base to place your shed on will be a concrete base or concrete pad as it’s also known that has a suitable damp proof membrane installed to prevent damp travelling upwards and rotting out the shed floor from below.
If the shed is to be used as a workshop, playhouse etc. where someone will be inside it for periods of time then insulation should also be included in the base to prevent cold penetrating upwards through the floor.
The slab itself should be 25mm smaller than the floor of your shed to ensure proper drainage, for the same reason the slab should also be slightly tilted to allow for drain off of any water. For more information on laying a shed base slab see our Building a Shed Base project here.
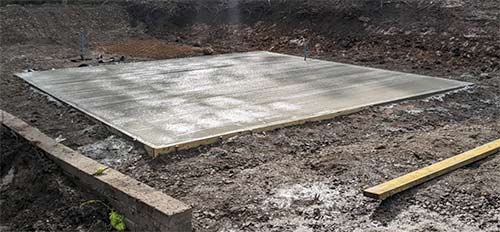
Concrete base with damp proofing ready for shed
However if casting a concrete pad isn’t an option as you are in a rented property or similar then there are a few other options that can be considered:
- Paving Slabs: A paving slab base is similar to a concrete base in that it will provide a good solid base for a shed, however, whereas a concrete base is pretty permanent, a paving slab base can be fairly easily removed. To build one a hole the size of the base is dug to around 50mm deep and then it’s filled with a sand and cement or gravel base that’s then smoothed and leveled. Once level paving slabs are laid and leveled within the space ready for the shed
- Timber Base: This is one of the most common types of base as it’s quick and easy to erect and can easily be removed. Timber posts or breeze blocks are set on the ground and levelled and then a timber frame is built on top for the shed to be placed on
- Decking Blocks: Decking blocks or decking cradles as they are known are essentially raised blocks that can be placed on the ground with no need for concrete or foundations and then timbers can be set into them to form a base for a shed. Again these can easily be removed
- Pier Base: Although similar to decking blocks and basically do the same thing in that you can set a timber frame on top of them, they differ in that they are concreted or set down into the ground, so are a little more permanent

Paving slab base for shed

Shed base construed on timber bearing beams

Decking block that can be used to form a base for a shed
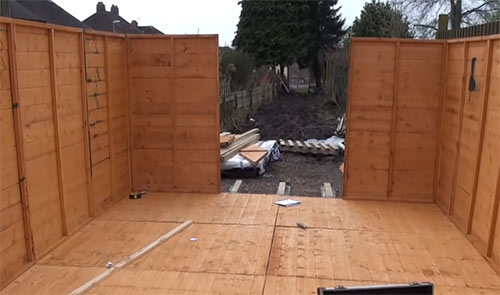
Step 2 – Lay Shed Floor
the next job is to lay out the shed floor and square it up ready for the walls.
Lay out all the sections of the floor over the base and butt them all up together. Make sure that any and all edges of each floor section are butted up tight together and flush with each other and also that the floor itself is central on top of the base.
Next, use a tape measure to measure across both diagonals from corner to corner. Both of these measurements should be absolutely identical to signify that the floor is totally square. If not you will need to adjust it until it is.
It is imperative that the floor is square as this will determine the rest of the build and whether the roof and walls will fit square.
Finally, the centre points of the side panels and the floor should all be marked so that they will line up in the next step.
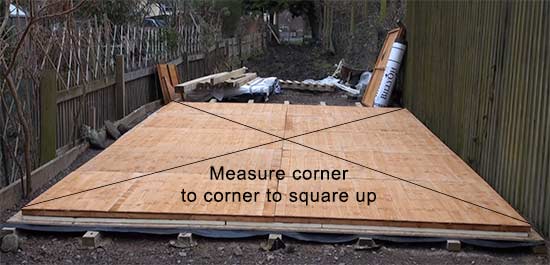
Centre shed floor on top of the base and square up
Step 3 – Fit Gable End Panel and Side Wall
With the floor laid the next task is to get the gable end up (the back wall) and also one of the side walls to hold it in place.
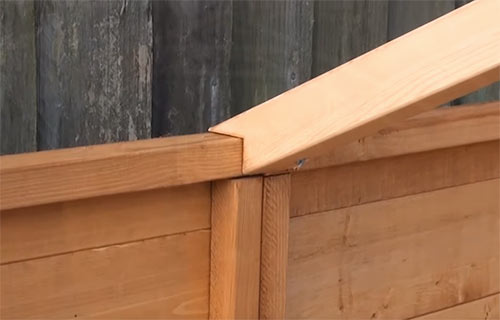
An important point to note with your walls is that they need to be fitted the correct way up. On one edge there should be a lip. This lip should fit along the base where the wall meets the floor to prevent water and moisture flowing into the structure through the joint.
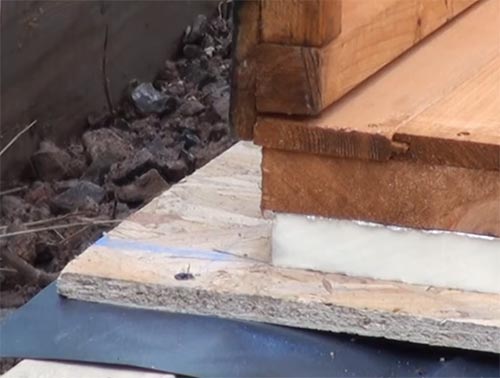
Lip at base of wall to protect floor and prevent leaks
Lift the rear gable panel and put it in the correct position at the rear of the shed. Make sure the lip (if there is one) is flush with any edges. To stop the wall falling, use poles or a spare length of timber to prop it up.
Now you can lift any one of the side panels onto the base and position it up to the gable end panel.
The gable end and the side panel need to be connected using the framing battens (either supplied with the kit or already fixed to the panels) where they meet.
Next, drill 3 pilot holes along one framing batten then screw in 50mm countersunk screws to join the gable panel and the side panel at the top, middle and bottom. Don’t skimp on pilot holes as generally the timber used to construct sheds splits very easily without them.
Note: Don’t fix the panels to the floor as yet, this job is left until all the panels are fixed in place and the roof is on.

Screwing gable end and side wall together
Step 4 – Fix Remaining Walls and Front Gable
All the remaining side panel walls can now be fixed in the same manner as the gable and side wall.
Which ever wall you start with, before screwing it up make sure it’s flush at the top and bottom with the wall you’re fixing it to and then screw it up tightly in 3 positions as before. Don’t skip the pilot holes!
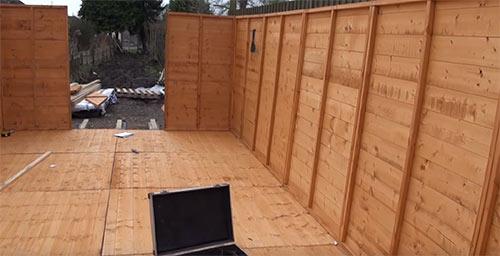
Remaining shed walls fixed in place
The final wall to go up is the front gable wall (with the door). Depending on the size of your shed this will either be a single piece, possibly featuring an apex or may be just 2 rectangular sides.
As before, drill pilot holes top, middle and bottom and then use 50mm countersunk screws to screw the wall panels to the side walls.
Position and fix the front gable end onto the other panels
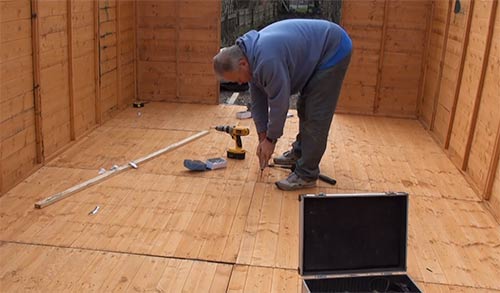
Step 5 – Screw Floor Down to Timbers
With the walls erected the next task is screw the shed floor down to the timbers bearers beneath it.
As it has had some foot traffic on it while the walls have been going up it may have moved slightly. You’ll be able to tell as gaps may have started to open up between the sections of floor if there are more than one.
To fix, ask a friend or family member for help and ask them to stand outside and hold a length of timber as a stay against the edge of the floor.
With the floor now pinned, use a hammer and drift (piece of wood) to knock the sections of floor together, making sure that the floor still sits evenly on the base below.
Finally, drill pilot holes and then screw the floor down to the timbers below, securing it firmly in place.
Screwing shed floor down to timber bearers
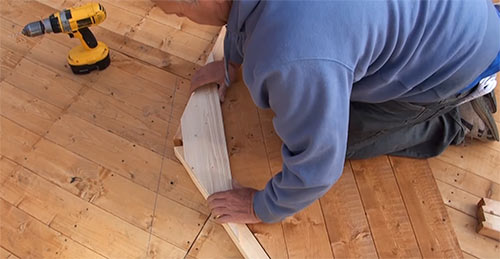
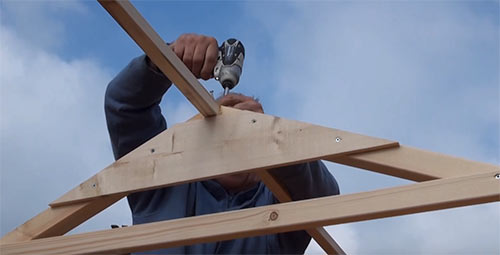
Step 6 – Install Roof Support Beams or Trusses and Ridge Beam
Fitting the roof support beams or trusses will give your shed some rigid stability and somewhere to fix the roof to.
Depending on the size and type of shed you have will depend on what type of roof supports you have. In most cases they will be 1 x 1 inch or 1 x 2 inch timbers cut with a mitre at either end to form an apex for the roof to sit on so it sits at an angle.
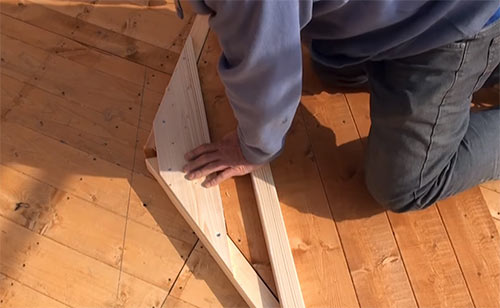
They will either be already assembled or as in our case, they will need assembling. Lay each side on a flat surface and mate the top of each side together. You should be able to tell the correct end as the top should have a notch cut for the ridge beam.
Now, place the supplied strut across the timbers and screw it in place with 3 screws either side (don’t forget the pilot holes). To ensure you have the correct angle, use the gable end apex pieces to set the correct angle. If these are part of the gable ends already erected you may need a friend to help you.
Assembling roof support beam or truss using gable end apex section
There may also be additional truss supports that need fixing, so fix these into place also.
Fixing additional truss support in place
Once all assembled the trusses then need fixing to the walls. Again depending on the size and type of shed you have will depend how many you have or whether you have any at all!
If you do then they will need to be screwed into place, normally at every wall panel joint (or as stated in the instructions). Make sure they are accurately screwed as if not this could cause issues with fixing the roof in place.
The birdsmouth cut will allow it to sit over the top of the wall. Screw it in place using a 30mm wood screw or as stated.
Shed roof truss screwed in place on to shed wall
With the trusses up the ridge beam now needs fixing in place. Again, depending on the type of shed you have will depend on the type and size of ridge beam you have, if there is one at all.
As this is a large shed the ridge beam is in 3 sections. Each piece is fixed to each truss ensuring they meet evenly in the middle and that the truss is leveled upright using a spirit level before the beam is screwed in place.
Once the ridge beam is screwed to all trusses it’s then fixed to each gable end, making sure any over hang is even at either end and that the gable is totally upright when it’s screwed in place.
As before don’t neglect the pilot hole and screw the beam into place using either 40 or 50mm wood screws.
Fixing ridge beam down to roof truss
With some smaller sheds that don’t have trusses there may not be a ridge beam, the roof may be screwed directly to the gable ends.
In the case that it does there also may not be any recesses for the ridge beam in the gable ends. The beam may be secured to each gable using an “L” bracket, but this will be stated in the instruction.
Step 7 – Fix Apex Pieces to Gable Walls
This step will probably only apply if you are putting up a large shed.
If this is the case, due to the size of the walls it is likely that the top apex sections will be included separately.
Each piece needs to be fixed to the top of it’s respective gable wall to form the slope for the roof. Generally a centre section is also fixed between the front gable wall apex pieces to form the door opening.
The rear gable wall apex will either be a single section or again 2 sections that fix to the top of the wall to form the triangular apex for the roof.
In terms of fixing, this is done by positioning the apex piece in place, drilling 3 – 4 pilot holes and then screwing each piece in place using 50mm wood screws
Fixing top apex section to front gable wall
Step 8 – Put the Roof on
Once the ridge and trusses are in place, the roof comes next.
The easiest method is to start at either of the gable ends and use the very top point of the apex to align the top edge of each roofing sheet to ensure both sides of the roof meet at the exact vertical apex point.
One further point to consider is how much, if any, each of the roofing sheets overhang either gable end. To work this out measure the total length of one side of the shed and then the total length of all roofing sheets for one side.
Deduct the figure for the shed length from the roofing sheet figure and if any is left divide this by 2 and this is how much overhang there should be at either end.
Using a second pair of hands, lift the first roof sheet into place and position it according to the above. Once in place drill pilot holes down the gable edge and across the ridge beam and screw the roof sheet in place using 40mm screws.
Repeat this for the remaining sections of roof making absolutely sure each is square and that all edges are level with each other.
Roof screwed to shed frame
Step 9 – Fix the Door in Place
As with most other things, depending on the type, size and specification of shed you have will depend on the type, size and number of doors you have, but in majority of cases this will only be one, possibly two.
As we have two, first place each door together as they would be on the shed on the ground with the front facing upwards. Look on the rear for the position of the top and bottom ledges (the pieces of timber running horizontal and joining the sections of the door together) and see if there are any pre-marked screwing points (small holes) and do the same on the outside of the front gable end of the shed.
To make fixing the doors in place easier, sometimes in the factory they pre-drill the pilot holes for you. If there are then these are the points that the hinge should be screwed to.
If not, position the hinges on the front of the gable end of the shed and screw them on, making sure that the hinges are fixed square and that the joint of the hinge is just on the lip of the door opening (so that the door doesn’t bind) and also that their position lines up with the ledges on the inside of the door so that you can screw into them.
Next, take one of the doors, doesn’t matter which if there’s two and position it within the opening with the hinges on the outside (You may need an extra pair of hands here).
Where there are two doors, to ensure they meet nicely in the middle, measure the width of each and add them together and then measure the width of the door opening. Subtract the width of doors from the opening and then divide the resulting figure by two.
This will then tell you the size of gap there needs to be at either side of each door to ensure they meet nicely in the middle.
Using a second pair of hands get the door in position and then screw the hinges on starting with the top first and checking that all is square as you fix each screw in. Once fixed check that the door opens smoothly. If not you may now need to adjust the position of the hinges and screws.
Where you have a second door, repeat this process again and ensure they both open and close smoothly and meet in the middle without clashing.
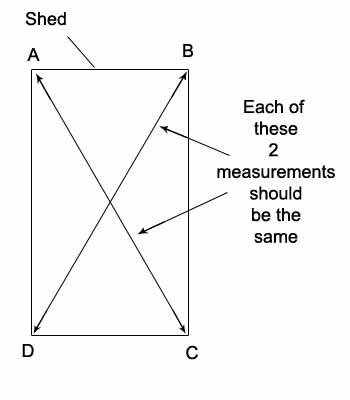
Step 10 – Square up and Fix Walls to Floor
With the roof on the structure should now be nice and solid with little to no flex so as the shed now sits is as it’s going to sit. The final job now is to screw the walls to the floor.
To do so, check again that the shed is square on the base before finally fixing it to the floor using the 50 mm screws. To check that the shed is square, the best tool to use is a framing square to check each corner of the shed or you can use a tape measure to measure the internal angles of the shed.
Mark out the four corners of the shed in a clock-wise direction by giving them each a letter – A, B, C and D. Now measure each diagonal angle to the corner between points A and C and points B and D.
As before, both of these two measurements should be the same and once they are this will ensure your shed is square.
Adjust corners C and D until both the internal diagonal measurements are the same. Again, you may need an extra pair of hands to assist you with this.
Using the internal diagonal measurements of a shed to get it square for fixing to shed base
Water Proofing a Shed Roof
Once you have your shed structure built and the roof in place, one of the final tasks now is to water proof it and ensure no leaks by covering it with a water resistant membrane.
For this you have 2 choices; use roofing felt or even better, rubber roofing.
It’s entirely up to you which you use. In most cases if you have purchased a full shed kit, it should have come with a roll or 2 of felt, enough to cover the roof. As this is supplied with the kit there is no additional cost.
However, felt isn’t renowned for it’s durability and will likely fail within 6 or 7 years or so. A better option is to use rubber as this will last for up to 40 years, but there will be an additional cost.
For a standard sized shed this is likely to be around £150, but considering the life span, will probably be cheaper in the long run.
Felting The Shed Roof
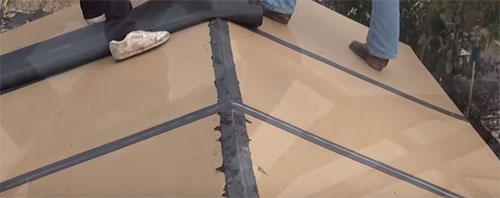
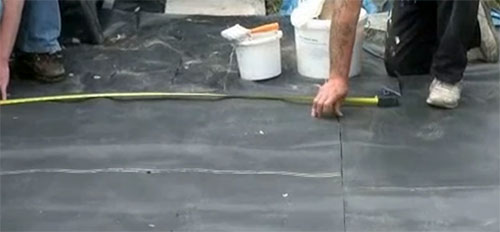
Step 1 – Cut Felt to Size
You will need to cut the felt to size with a sharp blade (Stanley knife or similar) and a straight edge such as a piece of timber or a spirit level.
In most instances you will need to cut three pieces of felt, two will be fixed at the bottom edge of each roof sheet up the roof and the third will be fixed over the apex and extend at least 100mm over the top edge of each of the other pieces of felt.
When cutting the felt, ensure you leave a 50mm overlap along all edges so that it can be tucked up under the edge of the roof and secured in place by fascia boards.
Cut felt into size with a sharp blade
Step 2 – Lay and Fix Felt to Shed Roof
Lay one of the pieces over one of the roof panels and nail it on using felt nails, leaving the correct overhang. Neatly fix the gable ends and eave ends with closely spaced (100mm) felt nails.
Lay the first piece of felt over one side panel
With one roof panel now felted repeat the process for the other roof panel, again measure the panel to find out it’s exact size and cut the felt slightly larger (50mm) for the overhang.
Step 3 – Fix Apex Felt in Place
Put the third piece of felt over the gap at the apex and ensure that the overhang at each end is the same and nail it down using closely spaced felt nails.
Step 4 – Add Additional Nails
It’s also a good idea that once all the felt is fixed into position to go back over it and add additional nails where you can. In high wind situations roofing felt can easily be ripped from a roof if it is not secured.
Step 5 – Tidy Corners and Fix Fascia’s
Tidy up the felt at the corners, trimming them up if needed. Try to fold them as“hospital corners” as these will then tuck up nicely and then nail them in place.
The final job now is to fix the fascia boards that should have been supplied with your shed kit over the gable edges and also along the top edge of each wall using 40mm wood screws.
This will then securely hold the felt in place with, preventing the wind from getting under any edges and corners and ripping it off.

Tidy up the felt at the corners and fix on the fascia boards
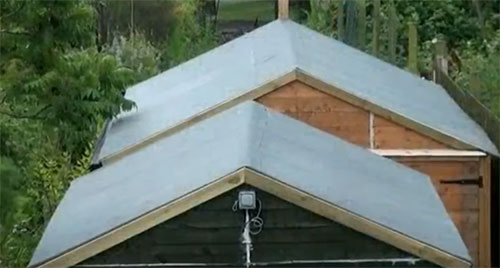
Using Rubber Roofing for Your Shed Roof
If you have the funds available then a rubber roof for your shed is the best way to go due to its numerous advantages of being available as one piece of membrane cut to size, there are no joins or overlaps to worry about that can cause leaks and it lasts for many years and is UV resistant.
Rubber roofing may seem a little overkill for a shed, but it will alleviate all potential worries.
DIY rubber roof kits are widely available today and the kit should include everything you need in order to cover your shed roof with a long lasting, EPDM rubber membrane (that also features a lifetime membrane guarantee), including the adhesive, trim and full installation instructions.
Step 1 – Cut Rubber to Size
If the company you have purchased the rubber from has cut it to the exact size you need or the rubber comes in the correct size for your shed there’s no need for any cutting and you can skip to the next stage.
When ordering rubber for a roof you should always order it slightly larger as you will need around a 200mm overhang at the gable ends and at least 100mm along the edges for the fascias. There should be enough rubber to tuck under the roof overhang and partially down the wall.
When cutting a rubber roof measure and mark your cutting points accurately and use a sharp knife and straight edge or pair of scissors to cut it.
If you are covering a small shed roof then trimming it to size should be fine, however if it’s a very large roof then you will find it easier to cut the rubber in to 2 pieces and do one side at a time with a strip placed over the cut at the apex to cover the joint, as the rubber is very heavy and will find it difficult to position accurately.
Rubber for roof measured and cut to size
Step 2 – Position Rubber on Roof
To get the rubber on to the roof, the easiest method is to roll it or fold it up.
Once on the roof, unfold or unroll it out and position it accurately with the correct amount of overhang all the way around
Finally fold or roll it back up again to the edge of one of the gable ends, making sure you don’t move it. Stop folding or rolling around 300mm from the end and then fold the remaining section over.
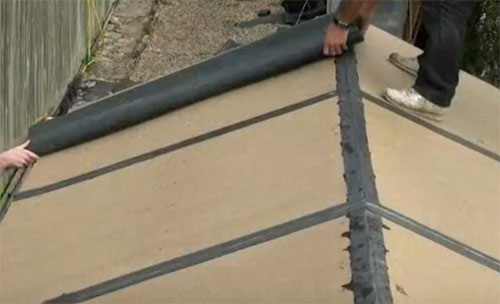
Rubber roof positioned accurately and folded back up again ready for adhesive
Step 3 – Apply Adhesive
Special high strength contact adhesive is required for rubber roofs and this should have been supplied with your kit. It can be brushed or rollered on.
Apply the adhesive to the area of the roof between the gable end and the folded rubber. Make sure every part of the roof is covered.
Fold the flap of rubber back over the adhesive and pull it tight, ensuring there are no air bubbles and every part of the rubber is in contact with the adhesive.
A rubber grout float is ideal for removing bubbles and pressing the rubber into the adhesive.
Now, fold the roll of rubber back over the section you have just stuck down and apply another 300mm or so of adhesive and again roll or fold the rubber over the adhesive, removing any bubbles.
Repeat this process until all the rubber has been stuck down and also for the other section of roof if laying your rubber in two sections.
One point to note is that if the surface you’re sticking the rubber to is porous then adhesive is only applied to that surface. If’s non-porous then adhesive needs to be applied to both the sticking surface and the rubber also.
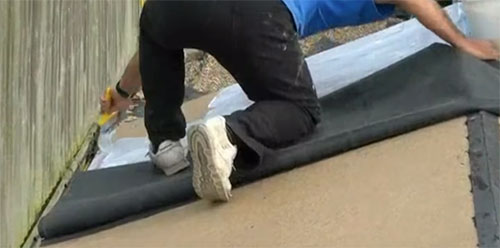
Apply adhesive and stick rubber roof down
If you need to join two pieces of rubber together by over lapping or applying a rubber strip over the apex when you have laid your roof in 2 sections you will need to use a seam tape or special rubber glue. Refer to the rubber manufacturers instructions for directions on how to do this.
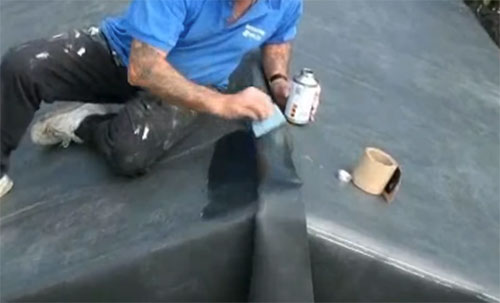
Applying seam tape and priming compound when joining two sections of rubber together
Step 4 – Fit Fascia Boards
To hold the rubber firmly in place and prevent wind from pulling up any edges, fascia boards are fixed to cover them.
Fascia boards or edging strips should be supplied with your rubber roof kit, if not, treated 3 x 1 or 4 x 1 timber can be used.
Push the rubber tightly under the overhang, into the joint where the underside of the roof meets the wall using your hand or a strip of timber and then position the fascia board in place, holding it firmly so the rubber doesn’t move.
Drill a pilot hole and then screw the fascia board in place using 30 or 40mm wood screws.
When making your own fascia boards ensure all mitre joints are cut accurately and fit tightly together.
Fascia boards fixed in place to hold rubber roof edges down
If there is any rubber hanging from under the fascia use a sharp knife to trim it off flush with the bottom.
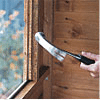
Fitting The Shed Windows
Most shed windows nowadays are Perspex or acrylic, which are very easy to install and obviously cheaper and safer than glass. They slide easily into their housing in the window frame and are generally held in place by a bead or timber strip.
The type and size of shed you have will determine the number of windows and how they’re fixed in place. This will either be a metal sill at the base or timber beads to create a recess.
Step 1 – Fit Metal Sill or Timber Bead
You need to be outside to begin installing the windows. Firstly slide the metal window sill (should be provided with your shed kit) into the grooves provided at the bottom of the window frame (or frames) and fix it in place.
If there’s no metal sill section then timber bead strips will need to be fixed around the inside of the window frame. These should be provided with your kit.

Slot metal window sill into position and fix
Step 2 – Fix Window Cloaks
Nail in the short strips of wood known as window cloaks, using four 40mm nails in each. This will secure the sill in place and hold the window, preventing it from falling out.
There should be 3 sections, top and either side to fix.
Nail in the window cloaks
Step 3 – Insert Perspex and Fix In Place
Moving inside, you will then be able to slide the Perspex into the frame so that it is resting on the sill and held by the cloaks.
To hold the Perspex in the frame, it’s held in place by beads and these are secured using 25mm nails.
Position the beading over the Perspex sheet at the top and sides of the frame and hammer them fully home. When hammering be careful not to hit the Perspex as you can easily shatter it.
Again like the felt, once in position it may be worth going back over and adding additional nails for further security to prevent high winds blowing them out.
From inside the shed, slide the Perspex into place and secure it with beads
Basic Shed Maintenance
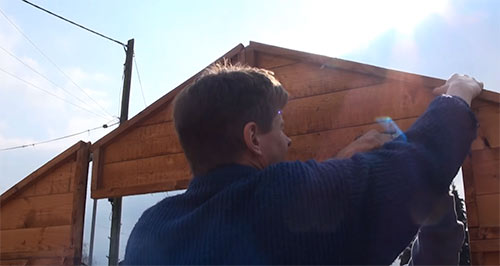
With your brand new shed now standing proudly in your garden you’ll certainly want to ensure is remains in this state.
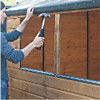
Although pretty much all shed kits should come either already treated or use treated timber, this generally isn’t enough so it’s best add your own treatment also.
There are loads of different shed and fence treatment options available today, but some of the best tend to be from Cuprinol, simply visit your local DIY store.
Shed treatment can be brushed on or sprayed on using a shed and fence paint sprayer which is generally much quicker.
To ensure a long life for your shed you should treat it every year, along with any other external timber.
You should now be well voiced in how to build a shed and the principles of this job can also be translated over to the construction of many other structures such as playhouses and outbuildings.