In this project, find out how to use Postcrete which is a premixed concrete that is simply tipped in a hole full of water to set fence posts and other types of post! It does not get easier than this.
The mix comes in very handy sized 20kg, waterproof bags and while it may be a little expensive for a long run of fencing it is absolutely ideal for a single fence post or the metal post for a washing line.
The video at the base of this page shows how Postcrete works and the information contained below is a step-by-step guide.
- Dig your hole to the correct depth relevant to the size of the post you are using. To make sure you have the right sized hole for your fence post take a look at the table in our digging fence post holes project. Also, if you are creating a run of several fence posts then it is a good idea to mark your posts out using a plumb line to ensure that they all run in a straight line and that the face of each post is level with the post next to it
- Once you have dug the hole to the correct depth, place the post in the hole using the plumb line as a guide to ensure that the face of the post touching the plumb line is flat against it and in line with the other posts if there are any. To ensure that the post remains upright you may need some help from a family member or a friend to hold the top of the post upright in the hole. If there is no one around to assist you, you can use 4 timber battens that you can position on each face of the post to hold it upright in the hole. With the post positioned roughly in the hole use a spirit level to fine tune and ensure that it is true
- Fill the hole with water to one/third of its depth (see visual instructions below or instructions on the reverse of the bag for more details)
- Pour in the Postcrete evenly around the post until no water is visible. The mix should cover the water. Then sprinkle a little water on top of the mix. As mentioned above you may still require the assisatnce of a family member or friend or several battens if no one is around to assist you in the final positioning of the post to ensure that it is upright in a true position
- Again as above, using a spirit level, make sure the post is upright and in the centre of the hole, adjusting if required. The mix will take 5 – 10 minutes to set hard enough to remove any supports. Periodically check the posts position using your spirit level to ensure that it remains upright
- Once you have ensured that the Postcrete mix has set hard cover the top of the mix with soil and grass if required
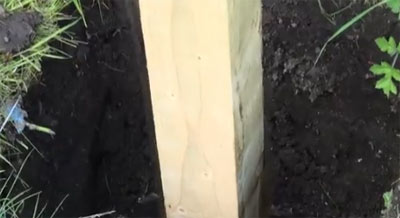
Hole dug and post inserted ready for concreting
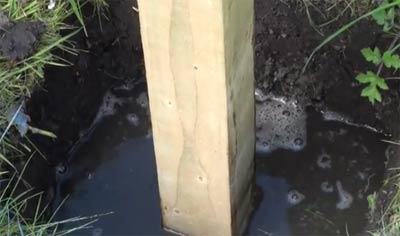
Filling hole with required amount of water ready for adding Postcrete
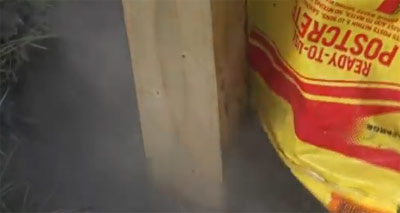
Adding Postcrete to water in the hole
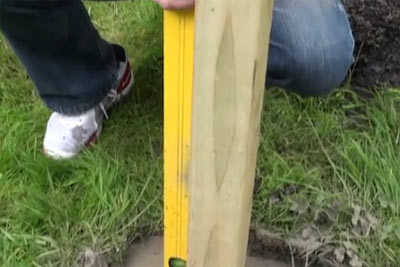
Using a spirit level to check the upright level of the post
See the instructions below for using Tarmac Postcrete or if you would like more information on Postcrete and the other pre mixed and ready mixed concretes available from Tarmac visit the DIY Cement website
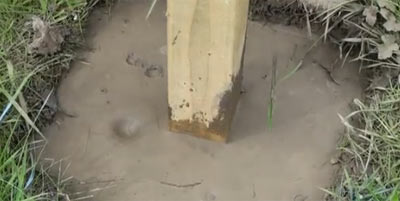
Postcrete setting in hole around post
For a longer run of fencing or a lot of fence posts, click here for our concreting fence posts project