Coving or cornice as it’s sometimes known is a decorative finish that is fixed around the top of room to hide the joint between top of the wall and the ceiling.
Although not commonly fitted these days it can create a classical and stylish finish to a room if you decide to retro fit it, so with this in mind this guide covers how to fit coving, read on to learn how.
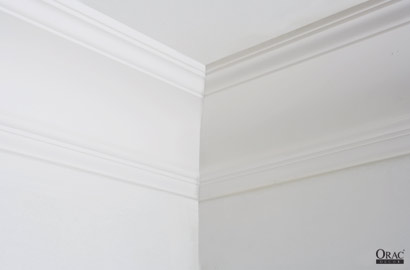
Putting up Coving Really Finishes Off a Room
The Different Types of Coving
Coving comes in many different styles but there are also different types of coving material: Plaster, polystyrene and duropolymer coving.
The most traditional is plaster coving, and the first part of this project deals with putting up plaster coving and is also suitable for installing coving made of polyurethane – also called duropolymer coving such like the ones made by ORAC which we explore in more detail below. Scroll further down this project to find a step-by-step guide to installing coving with images.
The same method can be used to fit polystyrene coving, which is the cheapest coving, although not as durable or as versatile.
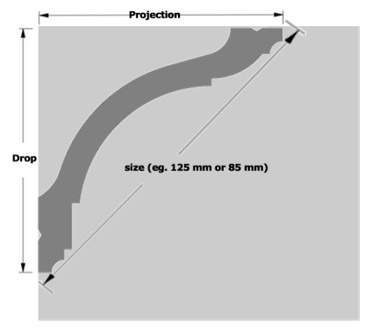
The most common sizes of coving are 125 mm and 85 mm. The sizing can be confusing because the size of coving is stated as the imaginary line across the coving, rather than the physical height or projection – think of it as the hypotenuse of a triangle, with the wall and ceiling forming the other two sides. See the image below under the “Differences Between Coving and Cornice” section to illustrate what we mean.
Comparing Plaster Coving to Orac Polyurethane Coving
| Orac Decor | Plaster Mouldings | |
| Weight | Lightweight | Very Heavy |
| Strength | Non fragile/Clean cuts | Very fragile/easily broken and chipped |
| Installation | Simple, quick and easy | Complicated, dirty and messy, time-consuming |
| Labour Costs/Skills | Minimum of labour (one person) | Skilled labour necessary, 1-2 people |
| Painting | Only 1 application | 2-3 coats necessary |
| Repairs | Needs no repair work | "Making Good" required after installation when cracking occurs |
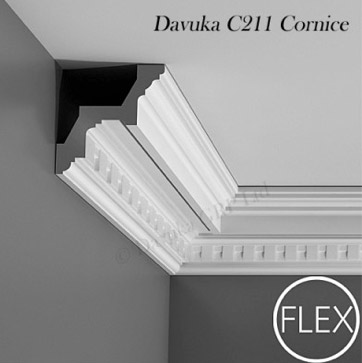
Orac Polyurethane Coving
The following step-by-step guide Cutting Coving with a Mitre Saw features pictures provided by ORAC who make a range of decorative mouldings and finishing products in a lightweight flexible and durable polyurethane material.
Their collection comprises a vast array of decorative features which offer numerous advantages over ‘traditional’ plaster based products. The revolutionary nature of the material and the modern moulding process enables a sharper level of detail to be incorporated in the designs, making it perfect for the home, especially where distinction and elegance is the theme.
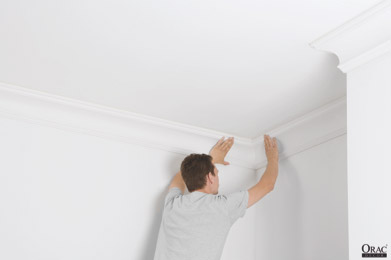
Weighing just a fraction of the weight of plaster, polyurethane coving it is remarkably strong and resilient to knocks or damage on site, or during installation. Consequently these ornaments are quick and easy to install, (typically in around half the time compared to plaster, without the need for a second person) and with none of the difficulties, mess or wastage: Saving the installer time and money.
Additionally there are none of the usual concerns about cracking or shrinkage normally associated with plaster – ORAC ornaments will flex with the building as it moves with the seasons, and will enhance the look of your home for many years to come without need for repair.
Orac products have been introduced to the UK from Belgium (where it has been successfully made and supplied to more than 50 countries worldwide during the last 25 years), by a number of British stockists, including Davuka.
They also sell a range called Axxent which is an extruded impact resistant and water resistant, high-density polymer resin called Duropolymer. You can find out more about this by watching the video here.
We like working with these products because they are easier for the DIYer to get a good result. They are also much easier to cut, and to handle with just one person. "I can’t believe how quick and easy it was to install, and how fantastic it looks" is the typical reaction from people installing the ORAC Decor and Axxent range of products for the first time.
These products are cut and fitted in exactly the same way as the plaster or Gyproc coving and cornicing products.
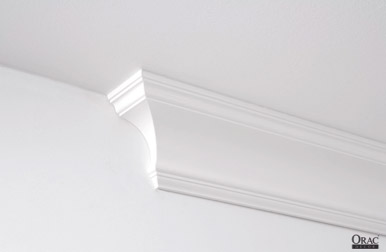
The Orac Décor range is pre-primed, ready to paint or stain to the desired finished effect, with only a single coat of paint required. All of the coving and panel styles are also available as a ‘flexible’ that enables mounting to curved walls and bays or for circular patterns to be created – see the images below for examples.
Tradesmen and DIYers alike are realising that without doubt this is a much better material to work with. In fact it is becoming the new “traditional” product material to replace plaster mouldings.
You can get a hard copy of the brochure or a request a sample of the material, as well as getting further information about these products on the Davuka FAQ page.
The Difference Between Coving and Cornice
There is some confusion about the difference between cornice and coving. They are both decorative mouldings but the words are not different ways of saying the same thing. Coving is designed to fit into the corners of a room, usually in the corner between the top of the wall and the edge of the ceiling.
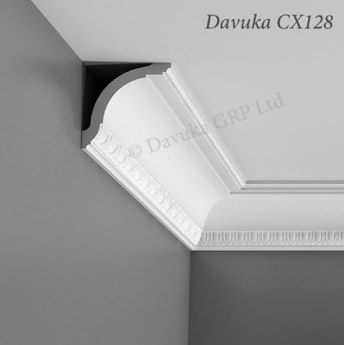
Coving usually has a uniform profile, with similar moulding on the top and bottom lengths, meaning that it is symmetrical when viewed from the side. (Therefore if it projects across the ceiling by 10 cm then it would drop down the wall by 10 cm too.) Coving is also usually fairly simple in design, although not always.
A side profile of a section of coving
Cornice is a decorative architectural moulding used to add visual interest to a room, or a feature in a room. Cornicing can be added to cupboards, or used instead of, or in addition to, coving to make a decorative room border. There are even cornices which are designed to hold uplighters so that you can wash light across a wall and ceiling, giving a softened indirect light, which is great for mood lighting.
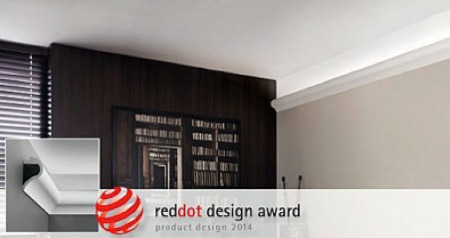
Wave Uplighter Cornice Makes an Impact in this Modern Room – Image courtesy of Davuka

Profile of the Wave Uplighter Cornice – Image courtesy of Davuka
Find out more about the differences between cornice and coving in this handy article by Davuka.
Cornice and Coving Profiles
A profile is the design of the coving and cornicing. In the same way as a persons’ face has a profile so do these decorative mouldings. Looking at them from the side you can see the profile, which could be a simple curve or an ornate series of curves and patterns.
Coving profiles have some great names: Egg and Dart, Dentil, Cove, Rope and Twisted Rope. You will also find those designs on Cornice profiles, as well as Swag and Bow, Acanthus Leaf, Swan Neck and Flemish Scroll among others.
Example of Egg and Dart Coving – Image Courtesy of Davuka
Georgian Style Dentil Block Cornice – Image Courtesy of Davuka
We also use the term “profile” for skirting boards, the most common skirting board profiles being Torus, Bullnose, Lambs Tongue and Blenheim.
Tools for Putting up Coving
The following list of tools are really all essential to ensure that your job goes smoothly and the finished article is top notch:
- A Hand Saw – Choose a fine or medium toothed saw with a stiff blade to ensure a straight cut
- Mitre box (also called a mitre block) or you can use a mitre saw or a coving mitre template as a cutting guide such as a Wonder Mitre (see below)
- Adhesives – You can use any coving adhesive, either ready-mixed or powder adhesive which you mix yourself. You can also use a silicon based adhesive and sealant gun
- Pencil
- Spirit level or chalk line – for marking out the walls
- Hammer and panel pins – to support the coving while the adhesive sets
- Sponge or cloth and water – for cleaning up excess adhesive
- Filling knife
- Trimming knife – also known as a utility knife or generically as a Stanley knife
- Paintbrush – for blending sealant into joints
How to Mitre Cut Coving
If you would like additional information on fitting coving in the form of a Word Document you can print, click here.
Additionally, if you scroll down the page a bit there are further images and diagrams walking through the process of cutting coving.
TIP: Cutting coving is a skill that requires practice, so the very first rule about coving for the novice is: Please buy an extra length to practice on!
Mitre joints are formed in the corner of rooms or where the coving is going to finish part-way along a wall, and the end needs to be finished off with a piece of coving that returns towards the wall to give a neat finish (see image below).
External mitre joint
Internal and External Mitre Joints
External mitre joints are formed around protrusions into a room, such as chimney breasts. Internal mitre joints are formed in the corners of the room (see below).
Fitting an Internal Mitre Joint – There is an external mitre joint visible on the chimney breast on the right
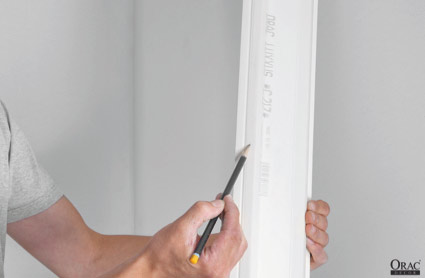
When measuring coving for a cut, make sure you measure along the edge that will be placed against the wall.
TIP: To help you keep track of which is the wall edge scribble along that edge in pencil or write the word wall at various intervals along that edge on the back of the coving.
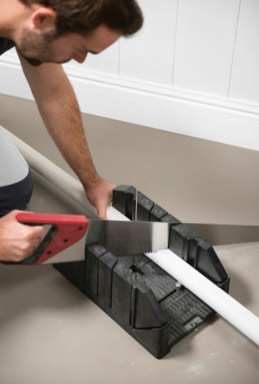
When cutting the coving place the length of coving upside down in the mitre box, in other words with the wall edge pointing up. See the images below for an illustration.
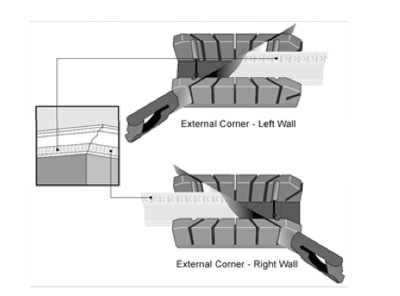
Illustration of cutting external left and right corners
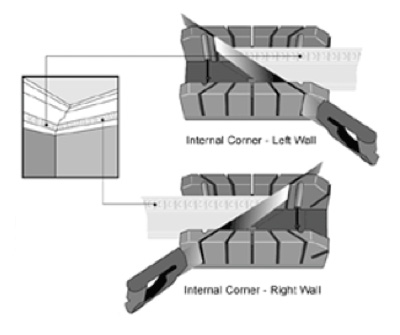
Illustration of cutting internal left and right corners
As you can see, from the images above, this means that when you take the coving out of the mitre box you will turn it the other way up before placing it on the wall.
Angles are peculiar things, and we know it can be tricky to get it right. We get hundreds of questions on our forum about how to cut coving. One tip we can give you is that cutting coving is made considerably easier by using the right tools and taking your time to measure carefully: Then measure again.
If you do this carefully you will be amazed at how easy it is to add a beautiful feature to the room.
Cutting Coving Using a Mitre Box or Mitre Block
Mitre Block for cutting coving mitre joints
The first thing you will need is an accurate cutting guide. The traditional way of cutting an angle for a corner is to use a coving mitre block, also known as a mitre box. These are made especially for coving and will come in a variety of sizes.
Some mitre boxes have an adjustable gauge to secure the material while it is being cut. We use a 125mm box which will accommodate the largest standard size of coving, and then we use a wooden batten fitted inside to secure smaller coving.
TIP: Make sure you secure the coving in the mitre box. The material needs to be held tightly in place to get a good professional finish.
If your coving does not fit snugly into your mitre box, you run the risk of it moving when you saw. Even a small movement can throw the mitre join out and make it very difficult to get a neat job.
As you can see, mitre boxes come with a straight, or butt joint slot for the saw, and two 45 degree slots for making internal and external corners. The slots have numbers on them as you can see. This is to avoid confusion when cutting, and believe me it is easy to get confused!
More about how to use this numbering to make the joints you need in the “How To Plan Your Room for Coving” guide below.
Finding Angles in Your Room
Putting up coving in a square room is a relatively easy job. Where you have chimney breasts or other features to work round you will need to cut more mitre joints.
If you are lucky, your rooms will be square, or nearly square. Unfortunately many rooms do not have walls at 90° to each other when you check the angles, and some areas might be far from square. When cutting coving odd angles will affect the mitre joints you need to cut for the corners.
For rooms that have odd shaped corners you can buy an “angle finder” like the one below – also available from good DIY stores and builders’ merchants.
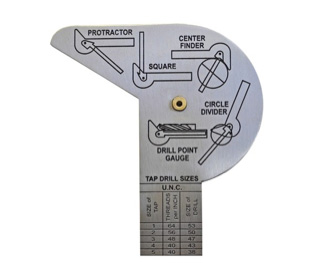
Angle finder to help you cut mitres for odd-shaped corners
Place the angle finder in the corner of the room and find its angle by pushing it into the corner, with the arms against the walls. Read the angle from the indicator.
Divide that angle by two and mark this on the mitre box. Cut a groove at that angle into the mitre box working gently with the saw and you will have the template for making this corner neat as well.
Use the same groove for cutting both sides of the mitre, but where you are using coving with an asymmetrical coving just turn the material over when you make the second cut; i.e. you will have the top edge facing towards you on one mitre cut and the bottom edge facing towards you on the other.
Fitting coving is not difficult. It is a question of taking your time and getting things set out as you would like them. Be prepared to sacrifice a length of coving as a practice piece to understand how the tools work, and use it to get the mitres right. It will save you money in the long run.
How to Plan your Room for Coving
The mitre box is numbered in the way that if you are facing any wall, the right hand mitre is number 1 if it is an internal angle or number 3 if it is to an external angle and the left hand mitre is number 2 or 4 respectively.
Do not be put off by any of this. Use your practice piece and all will become clear. Number the walls as described above and shown in these pictures below:
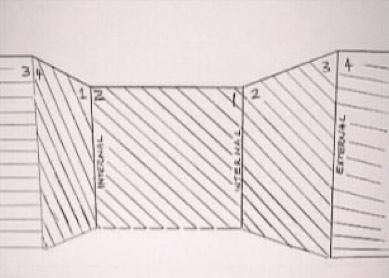
Number the walls according to the numbers on the mitre block
You need to make sure that you carefully plan the cuts you need, to avoid spoiling and wasting material.
Measuring Up and Marking Out
Measure each section of the wall and write it onto your room plan, you can also write it directly onto the wall.
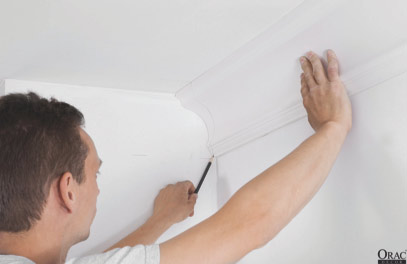
Take a small “template” piece of coving and place it flush against the wall and ceiling, mark the wall and ceiling along the top and bottom edge of the template at various intervals around the room (about a metre apart, depending on the length of your spirit level).
Make sure that the piece of coving is sitting in the correct position in relation to the walls and ceiling. That is making sure the coving is equally spaced between the the wall and ceiling, with the edges sitting flush on the wall and the ceiling, not skewed or angled.

Measuring for Coving and Marking Walls for Coving
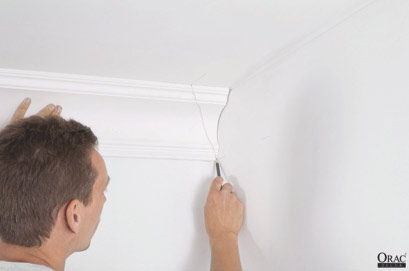
Using these lines as a guide, mark along the wall and ceiling using a spirit level to make sure your line is level and straight. Alternatively you could use a chalk line held between two panel pins at either end of the wall). These lines are what you will work to when it comes to sticking coving later.
You may want to offer up a full length of coving, to make sure it looks right by eye too. This is particularly important where you know that your walls and ceiling have odd angles, are not straight, or not at right-angles to each other. Don’t try to fit the coving to any imperfections, just make sure it is sitting straight. You can always fill gaps between the coving and the wall or ceiling later.
Make sure you remove any flaking paint or plaster and any wallpaper from the wall and ceiling between the lines.
Use a Multi sensor and mark the position of any pipes or cables in pencil below the line you have drawn on the wall.
TIP: If you are sticking coving to fresh plaster, paint dilute PVA onto the wall using a brush and allow to dry before you try to stick your coving up. This prevents the dry plaster sucking the moisture out of the adhesive to quickly, and gives you time to work with the adhesive before it goes off.
TIP: If you are working onto a painted surface, use a Stanley knife to score the area nearest your pencil marks to provide a key for the adhesive to grip to.
Start with the longest section first. Check the width of the wall you wish to start on.
TIP: It is always a good idea to work into all the internal sections first otherwise you may find yourself “boxed in”.
Mark the measurement you have taken from the wall onto the wall edge of the first length of coving.
Cutting the Coving
TIP: It is always best to start with the longest lengths first to avoid waste.
If you have a wall that is longer than a length of coving you can join two lengths with a butt joint (a straight joint) or, to make a neater finish and a stronger joint, you can use a mitre join at a 45° angle using the mitre block as a guide. (You will need to cut one internal mitre and one external mitre to join two lengths together in a straight line.)
A butt joint is formed by making a straight cut
TIP: Choose a fine-toothed saw to cut smoothly through the plaster and avoid making the backing paper ragged as you cut.
Let’s start with the back wall in our illustration and work around clockwise.
Start with an internal left hand mitre: The coving will fit into the mitre box from right to left, with the wall edge facing up – so the material you are using is the left hand piece of coving and the waste material is on the right.
Make the first cut in the groove marked 2 on your block. This will fit into the left hand corner of your wall.
Mark the length you need for the wall onto the coving. (Remember to measure along the wall edge of the coving). Slide the coving through the mitre box from right to left. Make your second cut in the slot marked 1 on your mitre block. This will fit into the right hand corner of your room.
Offer up the length you have just cut to make sure the coving will fit. Make any adjustments you need to then sand the ends with fine sandpaper for a neat finish.
Now for the left hand internal mitre to fit into the right hand corner of our illustrated room. Check the measurement of the wall, mark the length you need onto the coving, slide it into the box from right to left and cut one mitre using the groove marked 3 on the box to create the left half of the external corner.
The next joint in this example is a right hand external mitre on the chimney breast so you need to cut the piece to length using the groove marked 4 on the box.
Secure the Coving in the Mitre Block for an Accurate Mitre Cut. Note the sliding metal pins that are holding the coving in place
Once each piece is cut, put it in place without any adhesive at first to check it will fit and the joint is correct. Adjust each cut if necessary then sand down the end for a smooth finish.
Continue to work your way around the room in this way until all the coving is cut.
You can stick each piece of coving in place as you go if you prefer.
See Fixing Coving Using Adhesive below – after we look at a couple of alternatives for cutting coving.
Using a “Wonder Mitre” to Cut Coving
If you don’t want to use a mitre block to cut coving, then you could try a coving mitre tool called a Wonder Mitre which is a simple guide that sits on the inside of the cove and has shaped notches that grip the plaster, holding it securely while you cut. It is suitable for all sizes of coving up to 125mm.
The manufacturers have worked out the angles so providing you place it securely inside the coving it will give you a good accurate angle cut for your corner, and providing your walls are square you will find it creates a neat job with little finishing required. They are available in a metal trade model, and a DIY plastic version.

Wondermitre Trade cornice mitre cutting guide
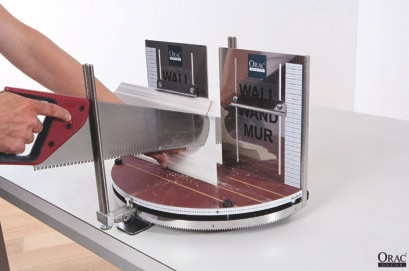
Cutting Coving with a Mitre Saw
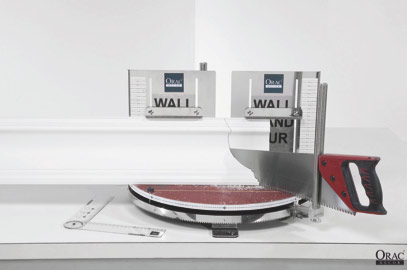
A coving mitre saw works in a similar way to a mitre block, but after the coving is secured in place the blade guide is adjusted to the correct position for sawing an accurate cut at the correct angle.
The back guide of the mitre saw is marked ‘wall’ and has stops to rest the edge of the coving against. The base of the saw is marked with the standard sizes of coving, so you can easily position the length of coving correctly into the mitre saw.
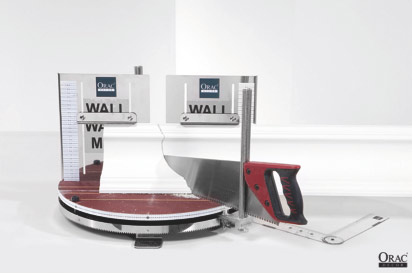
Cutting coving using a mitre saw
Fixing Coving Using Adhesive
Mix up the adhesive to a thick paste, following the guidelines on the packet, or use a ready mixed coving adhesive.
Spread adhesive evenly along both long edges using a filling knife, like the one below.
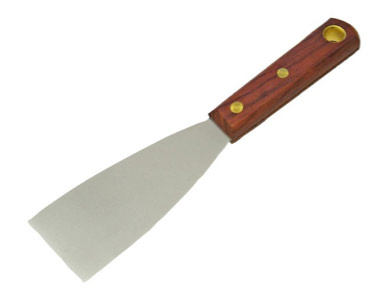
Filling knife with a flexible blade makes spreading coving adhesive easier
Alternatively you can use a tube of silicone-based adhesive and a sealant gun to apply adhesive.
Whichever method you use to apply adhesive, there is no need to add adhesive to the centre of the back of the cove – this does not make contact with the wall or ceiling, so you would just be wasting it.
TIP: Don’t be frightened of putting on too much adhesive, you will be able to scrape it off easily using the filling knife and a wet cloth or sponge to clean the wall. You want it to just be squeezing out from the edges as you press the coving into position.
Line up the coving with the lines you marked on the wall and ceiling. Make sure the left end is just a couple of mm from the left hand wall.
Press firmly into place along the whole length of the coving.
For the second and subsequent pieces of coving you will also need to apply adhesive to the mitre joint you are forming.
Use your filling knife to press adhesive into any gaps, pushing adhesive into any joints that do not quite meet and any undulations in the surface of the wall. You might find it useful to use a plasterer’s “small tool” to do this.
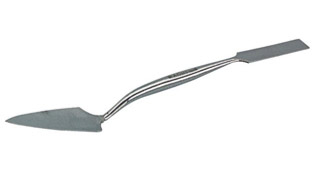
Small Tools come in various shapes and sizes
Scrape off any excess adhesive from the walls and ceilings, then clean off with a damp cloth, or sponge.
If you are concerned that a long length of coving will not stay up on the strength of the adhesive alone, tack in some small nails or panel pins underneath it to support it in place until the adhesive is hard. The nail holes can be filled later.
TIP: Always check for cables and/or pipes before nailing into the wall. Use a scanner to avoid costly and dangerous holes in pipes or electicals.
Fitting Coving Step-by-Step in Images
Marking out walls and ceilings for coving
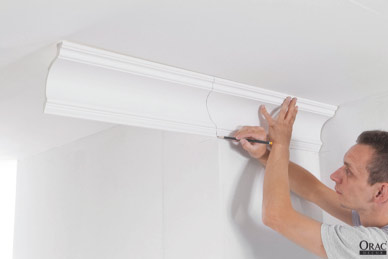
Measuring Coving for a Right Hand External Mitre
Measuring coving for a left hand external mitre
On the back of the coving mark the wall edge
Marking a right hand internal mitre on coving
Marking a right hand internal mitre
Cutting an external corner for the right wall with a mitre saw
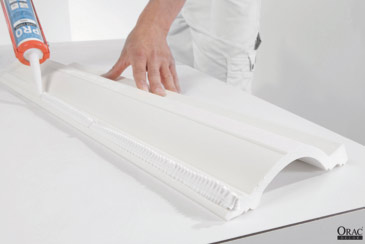
Applying adhesive to the back of the coving
Applying adhesive to the back of the coving
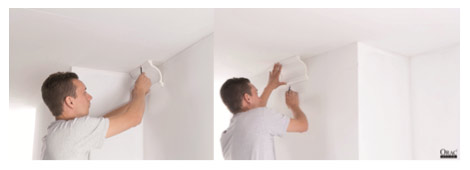
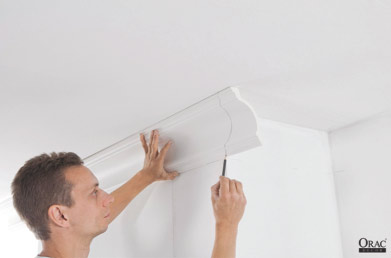
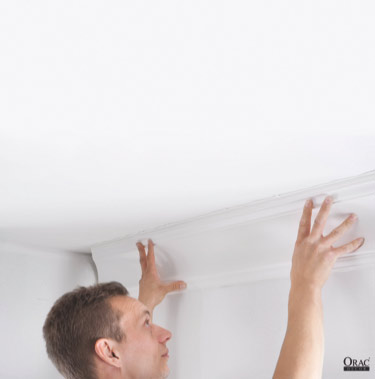
Line Up The coving with the guide lines on the walls and ceiling
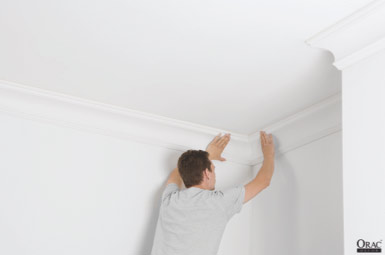
Line Up The coving with the guide lines on the walls and ceiling

Remove excess adhesive from the edge of the coving

Mitre joints and gaps between coving should be filled
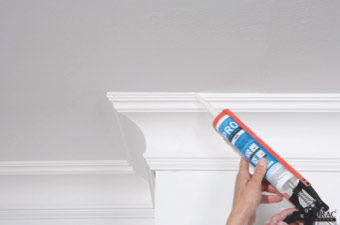
Apply decorators caulk to the edges of the coving
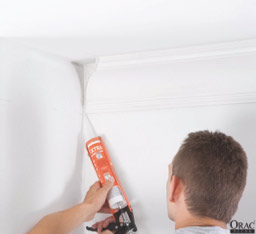
Apply decorators caulk to the mitre joints

Allow adhesive to dry then decorate the coving
Finished internal corner in coving