One of the biggest problems with fitting a letter box is the fear you face when cutting a huge hole in your door and what would happen if anything goes wrong!
To avoid any unnecessary stress, work through our easy-to-follow guide below and you won’t go far wrong. Always remember – measure twice, cut once!
Where Should a Letterbox be Positioned?
In pretty much all cases, a letter box will generally be fitted in the centre of a door, into the centre rail in line with the door handle.
This generally provides the optimum placement for both ease of posting letters to allow space for any boxes or cages to be fitted on the rear to prevent any pets attacking what’s posted.
However this isn’t always the case as there are many different types of door and configuration. Some doors may be all glass which is obviously hard and expensive to cut and some don’t have a sturdy enough central rail to fix to or are made from long slats.
In these instances, most choose to install in any other suitable location such as the side stile or bottom rail.
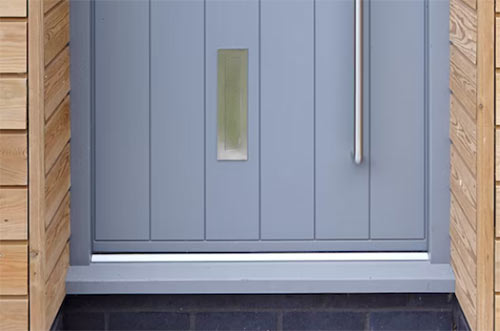
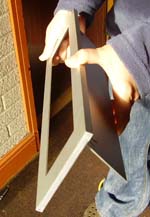
Letter box fitted on side due to slats – Image courtesy of urbanfront.com
Can you Fit a Letterbox in a UPVC Door?
Yes, you can certainly fit a letterbox to a UPVC door no problems at all, but when it comes to purchasing a suitable letterbox, it’s generally best to use one made specifically for UPVC door as they tend to fit better.
Also, due to the varying range of thicknesses of doors, a UPVC letterbox is telescopic to allow for the range of door thicknesses and also different fitting location thicknesses.
UPVC door letterbox
Types of Letterbox
If you have not yet selected your new letter box or are looking to purchase a new door, there are many differing styles and finishes available today so you’re certain to find something that suits your tastes.
Each different letterbox can be made form a range of different materials that include brass, stainless steel, plated steel, aluminium, cast iron or plastic.
Although each type can generally be fitted to any type of door regardless of what it’s made from, it’s best to stick with what each material-type is designed to be fitted to, not only because they tend to fit better but also as they are styled to suit their particular door-type:
- Brass: Most suited for use with standard solid timber doors. Fairly neutral in style so will suit a range of different door styles
- Stainless Steel: Again, best for solid timber but can be used on UPVC, aluminium and composite doors. As they are pretty neutrally styled they suit most doors
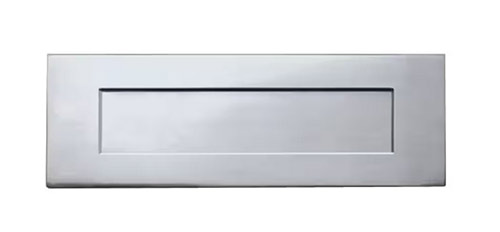
- Plated Steel: Generally used with solid timber doors or composite doors. The plating used is normally chrome or another similar coating to make it weatherproof. As above, they are normally neutral in colour and styling
- Aluminium: Best suited for use with aluminium doors but again can also be used with solid timber doors or even UPVC
- Cast Iron: Most suited for use with traditional solid hardwood doors as they suit the styling
- Plastic: Generally, only used with UPVC doors or with composite doors as they can be coloured to suit standard non-white doors
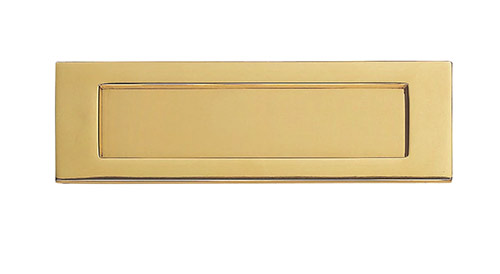
Brass letterbox
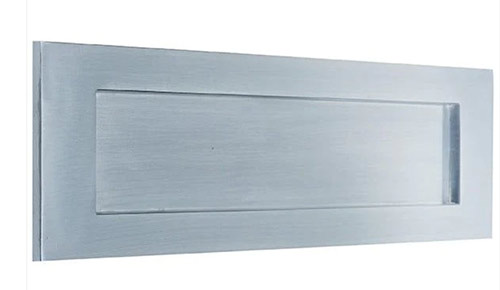
Stainless steel letterbox
Plated steel letterbox
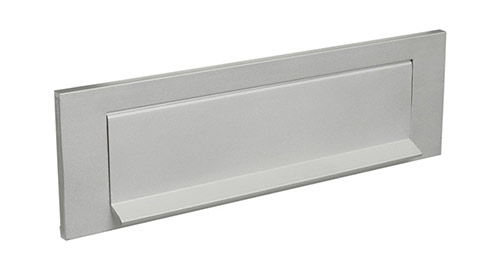
Aluminium letterbox
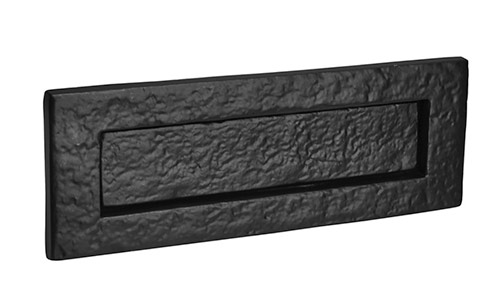
Cast iron letterbox
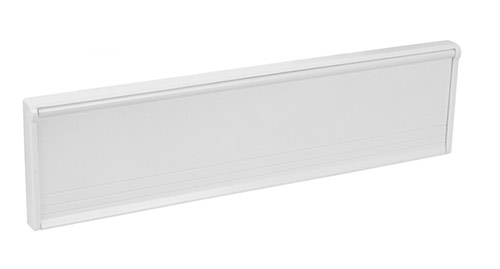
Plastic letterbox
One of the one big downside with installing a letter box is the fact that you have to chop a hole in an otherwise solid, secure and airtight door. Although it’s not weakened much, unless sealed correctly, it can let a huge amount of cold air in your home and also warm air out.
Because of this, some choose not to fit a letterbox to their door but rather install a wall mounted or even standalone letterbox outside.
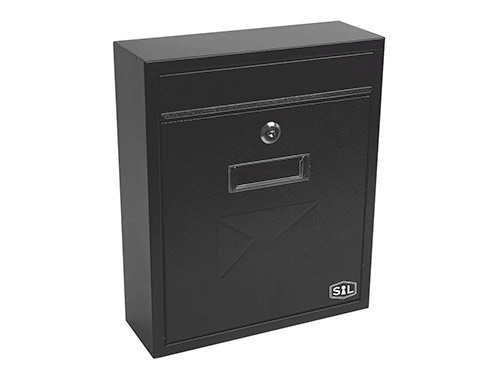
Secure wall mounted letterbox
All of these provide a great safe and secure solution to storing delivered mail and are in most cases, generally easier to fit than a standard letterbox.
Their one downside is that as they are installed outside you will obviously need to go outside to retrieve anything that’s delivered, not so bad in the summer, but not great in the colder months.
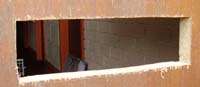
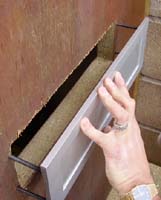
Another similar solution is the “through the wall” type of letterbox. As I’m sure you can gather from the name, rather than being fitted through a door, it’s fitted through a wall!
To aid with security they are generally S-shaped or slanted so the mail drops down and and out, into the room it’s installed it.
As you might imagine, they are fairly expensive and involved to install and also suffer the same problem as the traditional letterbox in that they allow cold air in and hot air out.
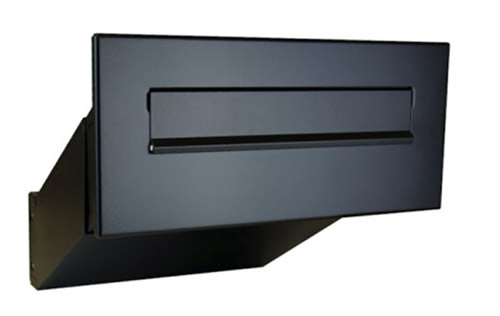
Through the wall-type letterbox
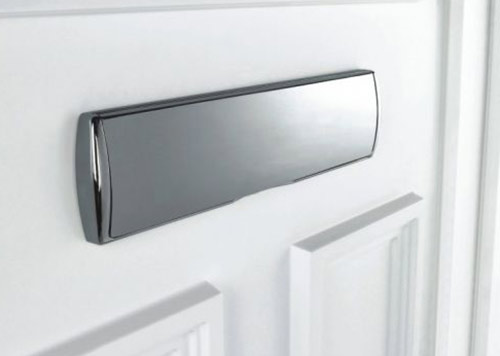
Whichever type of letterbox you go for, always make sure that you go for a Stormguard or sealed version. This will feature either a brush or rubber seal internally to stop any draughts.
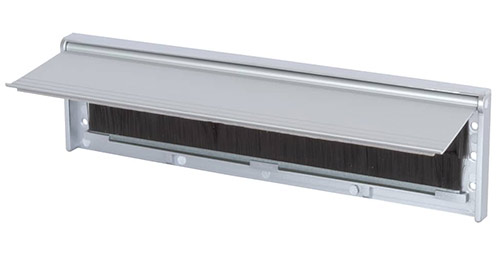
Sealed or Stormguard letterbox
Sizes of Letterbox
When it comes to sizes, there is generally only 1 standard size of 254mm x 38mm used in the UK, however, there are also other sizes used and the 3 most common of these is: 10 inch, 12 inch and the newer 12 inch slimline.
What these other sizes equate to in actual size of aperture is generally around the following.
- 265mm x 70mm – 10 inch
- 305mm x 70mm – 12 inch
- 317mm x 50mm – Slimline 12 inch
As the most common size is the standard 254mm x 38mm or 10 inch x 1.5 inch it’s generally best to go with this, unless you are expecting to receive larger mail items, in which case go with a size that allows for this.
How to Measure for a Letterbox
To make sure you purchase the right size of letterbox it’s essential that you measure up correctly, especially when replacing one.
When replacing one, the best measuring method is to unscrew the internal face of your existing box and then take 3 measurements of: width, height and depth (as indicated in the image below).
If you are fitting one in a new door e.g. you need to cut the hole then you are pretty much free to fit whatever size you wish to, so no measuring required.
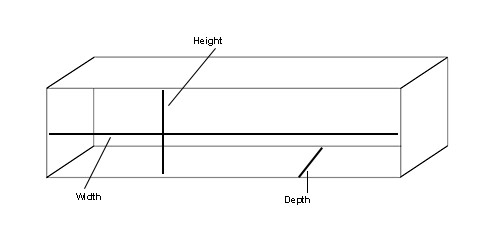
Measuring width, height and depth for new letterbox
Tools Needed to Fit a Letterbox
In order to successfully fit a new letter box you will need the following tools and products:
- Drill or cordless drill/driver
- Suitable sized drill bits – one for drilling stud holes, one for drilling holes to get jigsaw blade into – generally 10mm and around 6mm
- Jigsaw with blade for cutting chosen door material e.g. timber blade or PVCu blade etc.
- File or rasp for smoothing cut edges
- Sandpaper for finer finishing and smoothing
- Spirit level
- Pencil or pen
- Straight edge or ruler
- Mallet or hammer
- Old cloth
- Spanner/socket or screwdrivers for tightening letterbox studs
- Letterbox kit of your chosen style
How to Fit a Letterbox in a Door
Fitting a letter box is not the easiest of DIY tasks especially if you are a bit of a DIY newbie, but approached with care there is no reason at all why you can’t get as good result as the pros. Simply work through the steps below.
For the purposes of this guide we are fitting in the middle of the doors central rail and using an industrial office letterbox as this makes it a little easier to see how it’s fitted, but on the whole.
Despite this, regardless of the type of door you’re installing into and the type of box you’re fitting, the principles are the same regardless.
Industrial letter box
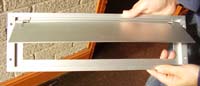
Letter box opening
Step 1 – Choose Fitting Location
As we have stated, in almost all cases the letterbox, where possible, is fitted to the middle of the central rail of a door in line with the door handle, which should also be at the vertical centre, so that is exactly what we will be doing here.
Using a tape measure, measure the width of the door, divide it by 2 and mark a short line at this point. This is the horizontal centre.
Next, measure the height of the centre rail around the mark you just made and again divide by 2 and mark along the line. This is the vertical centre.
The 2 marks you have just made now mark out the exact centre of the door so this is where you will want the centre of your letterbox to go.
Step 2 – Mark out the Hole for Your Letterbox
Next you will need to find the absolute centre of the letterbox so that you can place on your door markings made above and draw around it to depict the exact area that needs cutting out.
Using a second pair of hands may help, position the outer face plate of the kit over the marks on the door and use a tape measure to position so that the face plate is dead centre over the marks then use a spirit level to level it up.
Use a pencil to draw around the inside of the opening.
Most boxes open inwards so the flap pushes into the hole. Due to this you will need to make sure the hole is wide enough for the flap to do so, making it even more important to cut the hole accurately.
Once the initial hole is marked, mark the hole again outside the original markings a couple of mm larger than the opening required to push the flap into. Use a spirit level to get the markings absolutely level.
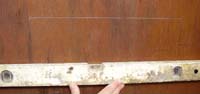
Mark opening for letter box
Step 3 – Drill Holes in Each Corner
With the hole to cut all marked, the next job is to drill a fairly large hole in each corner to allow you to get a jigsaw blade in to cut the hole out.
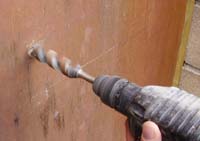
Drilling holes in hardwood door
If you have a multitool then you can use this instead and therefore won’t need to drill any holes so can skip this step.
Drill 4 holes large enough to get a jig saw blade into, normally around 10mm will be fine. The edge of the holes should be touching both lines near each corner. Make sure you keep the drill level in your hand so the holes are level on both sides.
Holes ready for jigsaw
Step 4 – Cut the Hole for Your Letterbox
This part is now the trickiest part of the job and depending on how well it’s done, will ultimately decide whether the job is a success or not!
To make the job as easy as possible, it’s often better to take the door off so you can lay it flat and make cutting as easy as possible. If this isn’t possible then you will need to cut it in situ. This is tricky but not impossible if you take your time.
As said, if you have a multi-tool then this is often easier to use.
Push the jigsaw blade through a hole and line the blade up with your cutting line, start the saw and very carefully cut along the lines you have marked. Don’t hurry, let the saw do the work and don’t push it too hard.
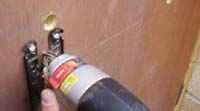
Using jig saw to cut opening for letter box
Cut the hole inside the lines and when you have finished, push the middle out leaving you with a nice clean hole. As said, cutting straight lines with a jigsaw is just about the hardest thing to do in woodwork so take your time!
Hole ready to insert letter box
Step 5 – Tidy Hole up
With the hole cut, take your file or rasp and run it over the inside edges of the hole. Keep it flat on the surface as you work so that you don’t round or bevel the edges.
Smooth evenly across each surface so that you don’t create any depressions or high spots that can affect the fit.
Once you have smoothed evenly off over each of the internal edges of the letterbox hole, use some 120 or 240 grit sandpaper to cary out any final smoothing off.
Step 6 – Check the Hole is the Right Size
Next, you now need to make sure that the hole you have made is the right size for your letterbox.
To do this, simply take the outer face plate and place it over the hole evenly, hold it firmly in place and then push the flap open to ensure it doesn’t catch anywhere. If it does, use your rasp to fine tune the hole and remove anything causing an obstruction.
Next, simply screw in the threaded studs provided with the kit to the back of the outer face plate and then place the letter plate with the studs in place over the hole isn’t too big and there is plenty of room to drill the stud holes.
Try letter plate in hole to get size correct
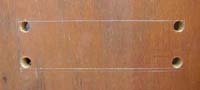
Step 7 – Mark and Drill Holes for Fixing Studs
There are various ways to accurately mark the fixing stud positions on a door but the best way we have found is as follows.
With the studs still in place on the outer letterbox face plate, position it on the door in its exact position ensuring it’s level.
Using a mallet or a hammer with some cloth over the face to avoid damaging the letter plate, tap the plate at each corner where the studs are.
This will make a small indentations in the door to enable you to accurately drill the holes for the studs to go through.
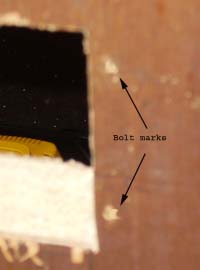
Letter box bolt holes through door
Once marked, use the correct sized drill bit, normally around the 5-6mm mark (should be stated in the instructions) and drill the holes for the studs through the door and then push each stud through until the letter plate is right up against the face of the door.
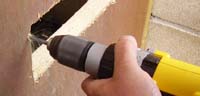
Using a cordless drill to drill letter box bolt holes
Push letter plate bolts through holes in door
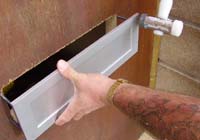
Step 8 – Screw up the Nuts and Tighten
With the outer faceplate and studs now fitted in place, push on the inner face plate and any washers and then screw on each securing nut at each corner.
If the studs are too long, use a hacksaw to cut off any excess, however if the nuts you are using are capped (have a domed cover) then you will need to mark and cut off excess stud before screwing them on.
Tighten each nut as required and then you are pretty much finished, good job!!
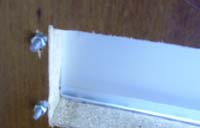
Letter box bolts tightened on the inside of the door
Fitting a letter box to a door if you are new to DIY isn’t the easiest job and can quickly go wrong, but if you ensure you take your time and work carefully then it’s certainly one that can be completed to a high standard.