Yale Lock, Night Latch or Cylinder Night Latch?
The commonly known Yale lock has another two names. Yale is a brand name which has become synonymous with the night latch, which is also called a cylinder night latch. We will explain why in a moment but for now we will call this type of door lock by its common name of a Night Latch or Nightlatch.
What is a Night Latch
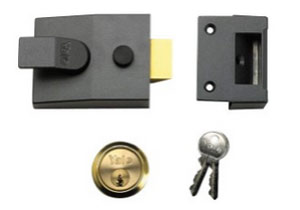
A cylinder night latch, of which the Yale lock is the most common sort, is an easily fitted lock that locks itself automatically when the door is closed. It is fitted to doors which open inward.
The cylinder night latch can only be opened with a key from the outside but can be closed, and locked, from the inside using the locking button.
It has to be said that the cylinder night latch is not the most secure of lock and is one of the most easily forced. Its “grown up”, more secure partner is the cylinder rim lock with a deadlock.
These locks are fitted in the same way but can be “dead locked” by turning the key twice which makes sure the locks bolting mechanism cannot be forced back into the lock.
Nightlatch backset and keys
Buying a Night Latch
You will find details on how to asses the size of the Night Latch in the description below. You can choose between chrome, nickel brass, brasslux, polished brass and many other types of night latches in our toolstore where you can also find dead locking night latches.
A dead lock night latch is a normal cylinder night latch which, when the key is turned twice in the lock, becomes a dead lock meaning the door is no longer just “on the latch”.
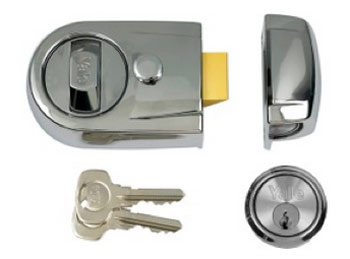
Modern contemporary Yale nightlatch
What Sizes do They Come in?
The size of a Night Latch is measured from the centre of the keyhole to the edge of the door where the night latch should finish. This particular image below shows a very badly fitted lock where the night latch has been fitted at a very slight angle making it not line up with the keep on the door frame properly.
It still however shows (Marked as an A) the distance that determines the size of the Night Latch back set.
Backsets come in either 60mm or 40mm size. The 60mm is generally the one used as it is a little more secure than the 40mm backset because the hole required for the cylinder is further away from the edge of the door making it much less likely to break off when force is applied to the door.

Night latch backsets can be 40 or 60mm
The Parts of a Night Latch
These are the main parts of a night latch:
- F are the screws needed to fix the lock to the door and the keep to the frame
- E Is the Keep or the Staple of the Night Latch. This part fits onto the door frame and “keeps” the latch in place when the door is closed
- D is the Backset which houses the spring which clips the latch into the staple or keep when the key opens the lock. It also houses the hold button which allows you to hold the latch in the open position when you do not want the door to lock
- C is the securing plate or mounting plate which acts as both a washer to hold the cylinder (image below) in place when the screws (B) are tightened at the back of the door. The securing plate also helps hold the Backset to the door
- A is the cylinder washer which holds the cylinder in the centre of the hole drilled for it to pass through in order to fit into the Backset
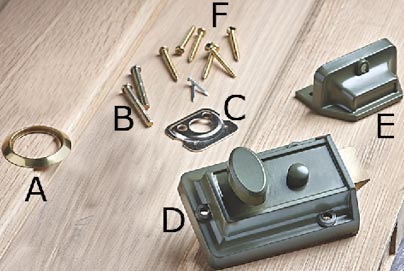
The main parts of a cylinder night latch or Yale Lock
The Night Latch Cylinder
The night latch cylinder is a small cylinder in which the key is inserted at the front of the door. It passes through the hole drilled in the door after being inserted into the securing washer.
The metal tail of the cylinder is also called a cam bar. The cam bar is turned by the key and it operates the latch, via the spring to open and close the door. The cam bar can be cut down to suit thinner doors.
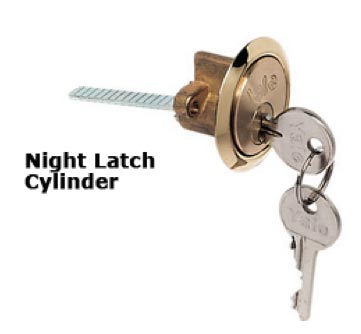
Night latch cylinders can be replaced
Tools Required for Fitting a Night Latch
You will need:
- A drill or drill/driver
- 3mm, 8mm, 13mm and 32mm wood drill bits
- Hacksaw (possibly)
- Pencil
- Hammer
- Chisel
- Screwdrivers
- Tape Measure
How to Fit a Night Latch
Usually (complain if it does not!) a cylinder night latch comes with fitting instructions and even a template for marking the door.
If you are lucky enough to have a template, fold it over the door edge at point A.
An important point to remember when fitting all door locks and latches is to hold the drill level when you make any holes.
If any holes, especially holes for latch cylinders, are drilled at an angle through the door, the two faces will not line up and the key or knob will be very tight which leads to a malfunctioning lock in no time.

Fitting a night latch is easier with a template
1. Positioning the Latch Template on the Door
There are two positions for a night latch to be fitted, depending on the size of the latch. The larger latches are set back from the door edge by 60mm with the smaller latches being set back 40mm. The thickness of doors can vary so you may have to cut down the cam bar to suit your door.
When it comes to what height the fitted latch should be when installed, the usual height is about 1500mm from the ground but there are no rules.
2. Drilling Holes for the Cylinder
Look at the instructions for the diameter of the hole you need to drill in the door to put the lock barrel through. This hole is usually 32mm and should accommodate an 8mm offset so that the cam bar also aligns correctly and a flat wood bit, or an auger bit will be used for this hole but make sure you drill the hole from both sides of the door with a level drill.
If you push a drill bit this big through the door it will split the timber coming out the other side. Using a flat or auger bit makes this easy as you will see the very fine point of the drill bit emerge from the other side of the door first.
Once you see the tip, withdraw the drill and put the tip on the other side in the small hole it created. This ensures that both halves of the hole will line up perfectly as long as the drill bit has been and remains level.
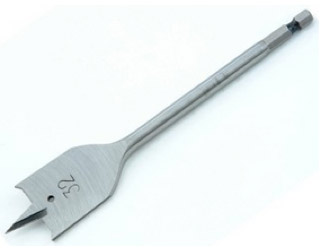
Night latch cylinder holes can be drilled with a 32mm flatbit
3. Fitting the Cylinder
Insert the cylinder through the front plate and onto the door. Fix the mounting plate to the back of the door. The cylinder will fix to the mounting plate with the two long screws provided. These screws are marked as B in the image above
4. Fitting the Backset
Put the back set over the mounting plate and mark round the door edge overhang. Chisel this out using a sharp chisel.
Once done, try the lock in position and chisel out more from the recess if necessary.
Drill pilot holes for the screws which attach the body of the lock having checked the length of the locking bar. If the bar is too long it can be easily cut with a hacksaw. Fit the lock body and tighten.
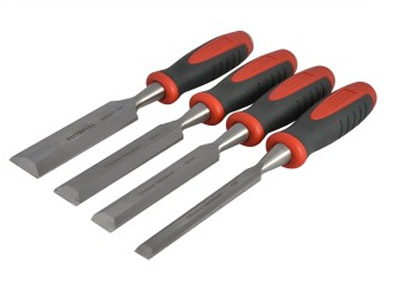
Fitting night latches requires good chisels
5. Fitting the Keep or Staple
Push the new lock towards the door frame and mark the height and position for the latch. Place the keep against the frame and mark out ready to chisel out the required amount of frame.
Chisel a little at a time remembering you can always take more out, but you can’t put it back. Sit the latch in the recess and screw in.
Replacing the Cylinder of a Night Latch
If you ever need to change the locks to a house a cylinder night latch is the easiest to replace. By removing the back set from the door and undoing the screws from the mounting plate, the cylinder can be pulled out easily and replaced. Most new cylinders come with two keys when you buy them.

Replacement rim cylinder barrel for Yale nightlatch
Can This Latch be Fitted to a Door Which Opens Outwards?
Yes it can but it means turning the latch round in the backset. This involves removing the holding plate and being very VERY careful that the spring which retains the latch does not fly out across the room as they can be pretty tricky to get back together again.
The spring needs to be removed before the latch can be turned over. Night latches are designed for inward opening doors and while reversing the latch can be done, we do not recommend it.
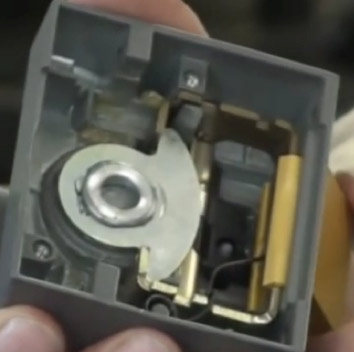
Night latches and Yale locks can be reversed for outward opening doors – Image courtesy of Locksonline