The Cost of Laying a Patio in the Garden
Building or laying a patio or even laying decking will probably be the most money you spend in the garden.
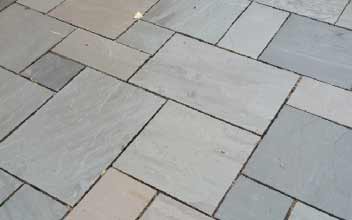
Indian Sandstone slabs come in a range of sizes and types as do other slabs, so buy the best you can afford
With regard to laying paving slabs and the actual slabs you will be using, you will, as with all products in the building trade, only get what you pay for. It is possible to buy cheap concrete slabs for little money in deals on the internet etc…., but beofre you do, just consider the following.
With cast concrete slabs, the concrete is poured into a mold and vibrated to settle them flat. This process makes a wet cement layer to the top of the slab and this forms a cement skin on top.
The skin is very thin and a couple of power washes later, the stone (or aggregate) in the slab becomes visible and unsightly.
Cheap concrete slabs are usually pretty poor, and additionally, poor quality slabs usually have lots of air bubbles in.
If water gets into these air pockets and freezes when its cold, this ice expands and forms tiny little cracks in the concrete, which in turn fill with water and this process continues until the paving stone literally falls to pieces but on the journey the face of the slab “blows” off making the whole patio very unsightly.
This process is called Freeze-Thaw action and more about it can be seen here.
Types of Paving Slabs for Patios
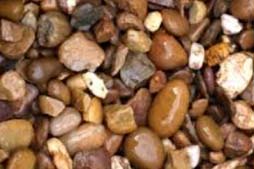
Pea shingle used in cast concrete slabs
Cheaper cast slabs are usually composed of pea-shingle, sand and cement. This combination makes them very hard to cut.
The best quality slabs are usually composed or reconstituted stone (i.e. natural stone which has been crushed, then mixed with sand and cement) or natural stone cut into slabs. They are much more expensive but far less subject to the weather and normal wear.
To summarise and expand on this, types of slab include:
Natural Granite
A very hard wearing slab.
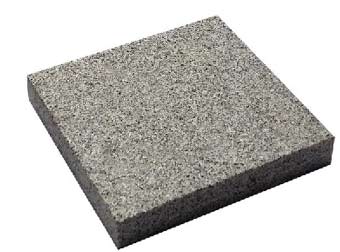
Natural Granite is a very hard wearing paving slab
Natural Slate Paving Slabs
A beautiful finish with a riven surface
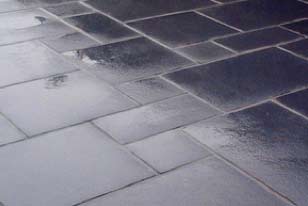
Natural slate gives a riven finish which almost shines when wet
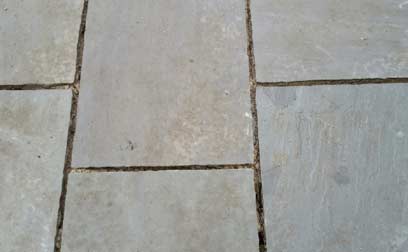
Natural Sandstone Paving Slabs
Lovely variations of shade in each slab. Hard wearing slabs and the colours will stay in place without excessive fading.
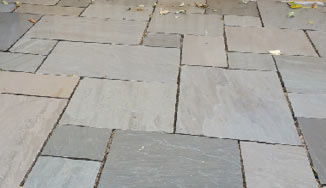
Natural Sandstone gives a variation of shades in each slab
Natural Limestone Paving Slabs
A variety of colours with the main fashion being black. Be careful with Limestone in the darker colours as these colours do fade in the sunlight. A great hard-wearing slab however

Darker natural limestone can fade in the sunshine
Porcelain Paving Slabs
A highly waterproof ceramic slab or tile, manufactured for outdoor use. The patterns are printed on the porcelain slab and textures can be added in the casting process.
Essentially an outdoor tile but hard wearing and, because of the uniform shapes and thickness, easier to lay than standard paving slabs. They are rarely more than 20mm thick.
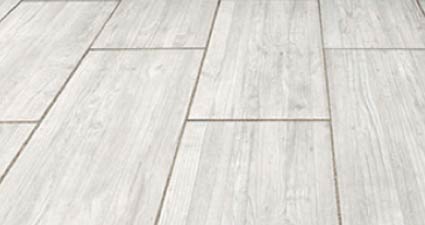
Porcelain slabs have a huge variety of finishes
With the exception of porcelain, the above slabs can be bought in a reconstituted state where older slabs, or sections of the raw material, not suitable for a natural slab, have been crushed, mixed with sand and cement and cast into slabs.
Patio Foundations and Beds for Slabs
There is a lot of nonsense talked about on a lot of web sites about the construction of a patio and the hardcore bed it must be laid on. Not every patio need a hardcore or scalping base, it depends totally on your soil conditions.
If the earth in your garden is undisturbed, the odds are it has been there for many thousands of years. It certainly is not going to move anywhere just because you have laid a few paving slabs on it.
It may need levelling out a bit, and you will need to lay some weed fabric down before laying slabs, but it really is okay to lay slabs on undisturbed ground.
Always lay weed fabric under a patio
Hardcore or Scalping Bases for Patios
A hardcore bed (shown as D) in the diagram below, is only necessary if the removal of the loose topsoil or lawn reveals very soft boggy ground.
If this is the case, all soft areas should be dug out and filled with hardcore or scalpings. More information can be seen about excavating for patios, drives and paths in our patios and driveways project.
Laying a Patio
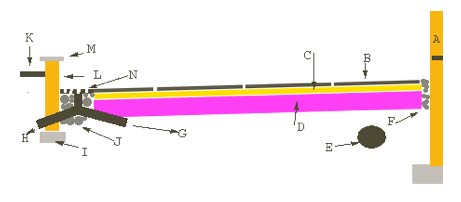
Cross section of components that make up a patio
The diagram above shows a cut through of a typical patio. In the first instance, two things must be remembered. The top of the patio nearest the property must be at least 150mm below the level of the damp proof course shown as A in the diagram.
The other thing to remember is that the patio must slope away from the building. The various parts outlined in the diagram are discussed below and are identified from right to left which is not to be taken as any order of events:
A – The House Wall
showing the foundations at the bottom and the horizontal black line representing the DPC.
B – Paving Slabs
Slabs can vary greatly in thickness. Not just different varieties, but each slab!
A riven slab (that is a slab with a surface which is deliberately uneven to give a random patterned effect) can be as thin as 25mm in one corner with the full thickness of 38mm being seen at another corner.
This can make riven slabs more difficult to lay but the same technique as flat slabs can be applied (see below) with the spirit level reading being taken from where it touches the slab.
The slabs can be seen to be sloping away from the house and a slope, or fall, of 15mm per 1.5 metres is a good fall for a patio. For an average patio reaching 3m away from the house, the fall would be 30mm or just more than an inch.
Instead of slabs one might decide to use block paving for a lovely patio and an example of how good these can look is seen to the below.
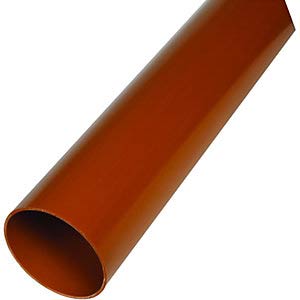
F – Distance From House Wall
We always start our patios 3 or 4 inches (100mm) away from the house. We do this for two reasons.
If there is a downpour and strong winds the water can splash against the house wall and with riven slabs especially, can form little pools in the sunken areas of the individual slabs.
Leaving this gap, and filling it with Pea Shingle as shown, will allow any water to drain away down to the foundations of the house where it will not do any damage.
Also, leaving this little trench can make it so much easier to hide reinforced electricity cables if you want to install outside lighting or pumps for fish ponds etc.
E – Surface Water or Storm Water Drain
Normaly found in the back garden of most properties, This is the drain, or one of them, which takes the water from your gutters to the main drainage system.
When a patio is built in a garden consisting mostly of clay, where the surface water does not easily drain away, it is sometimes necessary to direct water from where it has run (because of the slope of the patio) through a drain and into a surface water pipe.
This may seem like a great deal of work but it solves all of the drainage problems in a great many cases.
Drainage channel for draining a patio
D – A layer of scalping stone
This may or may not be necessary. As mentioned before, it depends entirely on the ground conditions.
If the ground is soft and spongy, you need hardcore or scalping stone. If it is not you can lay the mortar bed ( c ) directly on the soil once loose topsoil and lawn/weeds have been removed.
We also strongly advise the use of a layer of weed fabric either between D and B or under B if D is not to be used.
To test the ground to see if any hardcore or scalpings are required you can do the foundation test used to establish the quality of the ground when getting ready for a concrete foundation. This test is also outlined in our driveway and path project.
The test is also specified in Approved document A1/2 in section E1 of the building regulations so if anyone argues with you, or another web site publishes information that you must use hard core, they are completely wrong!
C – A Layer of Sand Mortar on Which the Slabs are Laid
The mortar mix for paving slabs varies from company to company but this is how we do it. We use sharp sand or flooring grit. No soft sand, or builders sand is used in this bed.
The mix is 8 sand to 1 cement and it is mixed in a mixer, or by hand, so it is damp, not wet. The test we do is the same as the one we do when we are floor screeding.
A handful of the mix is squeezed. It should stay in one lump in your hand without any moisture seeping out. This is a damp mix. Laying it as a bed is dealt with later in this project.
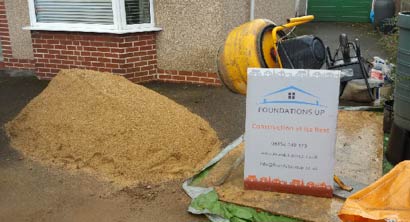
Our patio mix is 8 sharp sand to 1 cement
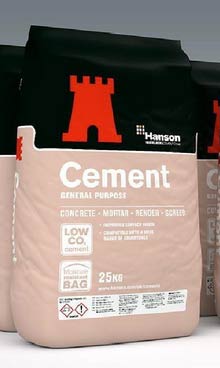
Ordinary Portland cement is fine for patios
There are two types of bed used generally when laying patios. One method is called dot and dab where small heaps of mortar are laid under the slab. Usually one heap is laid in each corner and one in the middle.
We do not like, or use this method at all because after a huge rainfall it is possible for water to get through the patio joints.
When this happens, it is possible for running water to cut channels in the ground under the slabs which can undermine the dots and dabs and then makes the patio loose and wobbly.
With a solid bed under the slabs the water is restricted to the joints. With dot and dab there is no bed under the joints so when you point (or repoint) the patio, the jointing mixture just keeps disappearing into the void.
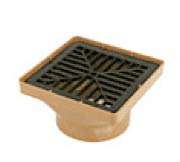
N – A Gully and Grid
This is a drainage product which, as long as the patio is sloping towards it, will collect all the surface water and direct it to where ever it needs to go.
The gully is connected to a 100mm drain pipe and this is laid on shingle to go to either a main drain as described above and shown by the directional arrow G.
It can also go further away from the house and be laid into a soakaway. This is shown by the directional arrow H.
A soakaway is simply a pit full of hardcore which allows the water to collect and slowly soak away through the soil.
If the soil is solid clay however, a soakaway is of little use.
If the patio is huge you may need more than 1 gully and special drainage channels are available which can run along the length of an area to be drained.
These are very often found under garage doors when the drive slopes towards them and they stop water getting into the garage. A drainage channel and grate can be seen below.
Make sure your patio has adequate drainage
Do not use a smaller diameter drainage pipe than 100mm for your patio
J – Concrete for Drainage
The concrete into which the gully or drainage channel will need to be set.
I – Wall Foundations
The foundations of a small retaining wall.
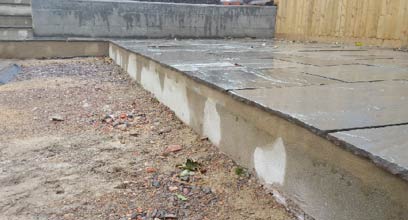
Split level patios can be built using retaining walls
K – Existing Ground Level
The existing ground level which has been dug out to accommodate the slope or fall of the patio and its base or bed. Obviously if left, this ground would fall away onto the patio.
The easiest way to tidy it up is to build a small retaining wall. The retaining wall however acts as a stop for all the water flowing towards the end of the patio so this is why the drainage gully or channel is required.
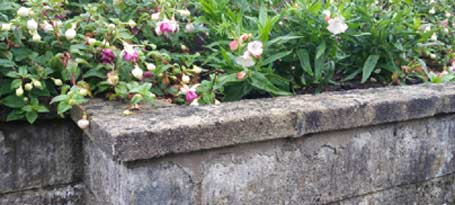
Use coping stones to throw water from masonry face
M – Coping Stones
These perform two jobs. Coping stones are a decorative way of finishing off a wall while at the same time they act as a “hat brim” to any rainwater. The water lands on the coping stone and runs off dripping straight to the ground rather than running down the face of the wall and causing stains, or efflorescence.
There we have all the individual components of a patio and an explanation of them.
How to Lay a Patio
The sequence of events to ensure your patio is laid correctly is that first we establish whether its necessary to put in a hardcore or scalping sub-base.
We then excavate down to the correct level using the numbers we know. Start from the DPC.
We then have 150mm clear space, add to that the thickness of the slab, say 38mm, then the thickness of the mortar bed, 50mm and then the hardcore if we need it, 150mm.
This gives us a total depth, from the damp proof course of 388mm.
We can dig a trench about 300 mm wide along the house wall to that depth using a spirit level to keep the base level all the way along.
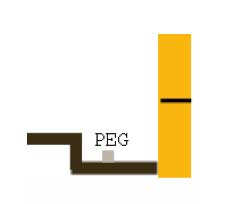
Dig a trench and put a wooden peg or a steel pin in
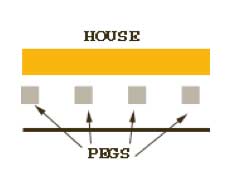
Level pegs or pins along trench
Pegs or pins all over garden
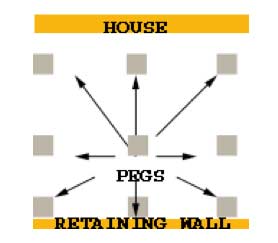
Making Sure the Water Runs off Your Patio
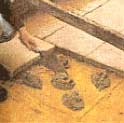
The image above shows the trench along the house wall. In the centre of this trench we bang in a small wooden peg or steel pin and leave it 25mm proud of the bottom.
Using a spirit level we bang in more pegs, about a metre apart, all along the trench so we know our trench is level as each peg should be showing about 25mm above the ground.
Now we start excavating away from the house banging in pegs every 1 metre and using the spirit level to identify a slope of 15mm every 1.5metres as described above, which is the correct fall on a patio.

Use your level to get a fall on the patio slabs
A little trick of the trade for getting this slope or fall easily (as you will be using it when you lay the slabs also) is to set up two pegs 1m apart.
The required fall over 1 metre is (15mm divided by 1.5m = 10mm) 10mm so set the pegs level and then bang one down 10mm.
Put the spirit level across them now and note where the back of the bubble comes to on the level.
You can see from the image above that our bubble is up against the black increment line on the level.
This would be easy to use as every peg we banged in we know that if the bubble is on the back line we have the same fall or slope.
If yours does not work out quite so simplistically, just stick a piece of electrical tape or masking tape in the place where the bubble shows a fall of 10mm per metre.
Once the area is dug out we can start laying slabs. The first row to lay is along the wall of the house, but as said before, 100mm away from the actual wall. This line of slabs needs to be level.
Lay your bed as shown below. Although we never use it, we have shown the dot and dab method also.
Laying the Sand and Cement Bed for Your Patio Slabs
The bed will be approximately 50mm thick but there is no need to get it flat and smooth before laying the slab down. The bed should maintain an average thickness of 50mm but should be almost ploughed in its finished appearance. Just the same as the mortar bed when you are laying bricks.
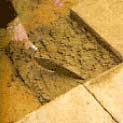
Laying a bed of sand and cement
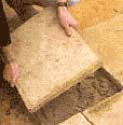
Dropping a slab onto the bed
Dot and Dab mortar bed
Laying the bed this way allows the high spots to be flattened out when the slab is laid down and allows some flexibility when the slab is tapped down to the correct level with the handle of a lump hammer.
Never hit a paving slab with metal to level it. Either use a rubber paving mallet or hold the metal end of the lump hammer and tap down with the handle.
Lay each slab to level along the house and leave a gap of about 12 – 15mm between each slab. This is the optimum gap for making absolutely sure you can point the joints well.
Any larger and they may crack, any smaller and it will be hard to get the mortar into the gap. See our project here on pointing paving slabs and repointing a patio for more on this.
Joints Between Your Patio Slabs
When this row is laid you can now start moving down the garden. No pro uses a string line due to the fact that patio laying, unlike brickwork, is not an exact science.
The patio slabs are never exactly the same thickness, they are never 100% square, and they are never exactly the same size either.
Keep your patio slab joints to a decent width (say 20mm). This gives you a little room for manoeuvre when the slabs differ slightly.
Keep patio slab joints to a width allowing room for manoeuvre
Using a Spirit Level for Patio Slabs
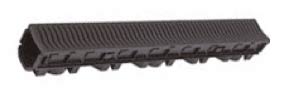
Use your level on the top of the slabs to get the correct fall. If you can buy or hire a 6-ft spirit level, so much the better.
Use your level, on its side, up against the edge of the slabs to get a straight line as can be seen in our project on laying bricks.
Another reason a patio layer never uses a line is because they are forever being tripped over and in the end they get ripped out!
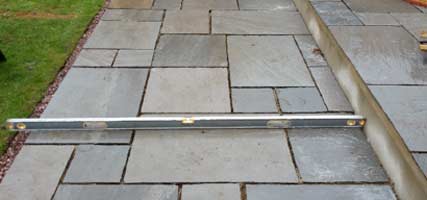
A 1.8m level used for laying patio slabs
Getting the Bed Right for Your Slabs
Take your time laying the slabs. It would not matter how many words we write here, laying the base and the slabs is a matter of feel.
You will get to the point where you know the bed of mortar is level and you will know how much to “plough” it about to get the slab to sink down to the correct level without too much banging.
Cutting Paving Slabs Using a Disc Cutter
There will be obstacles in the garden, like manholes and sheds, that you need to cut slabs round. This can easily be done with an angle grinder or disc cutter.
If you have only one patio to do, it would be more cost efficient to hire a cutter. If you have more to do, you can buy one.

Use a petrol 300mm disc cutter for ease
Please wear all the appropriate safety equipment when using an disc cutter and check to make sure you are using stone cutting discs, not metal.
It is a weird fact in the building world that a cutting disc that is used for cutting stone, can also be used for cutting metal, but a cutting discs for metal will not cut stone.
If you have a lot of slabs to cut it is really worth getting a diamond cutting disc as they are so much quicker and do not wear out. A diamond disc will come with a 300mm cutter if you hire one.
A hired petrol disc cutter will have a water feed to the wheel. This is to keep dust to a minimum and allow the blade to last a little longer by keeping it cool. This is now obligatory on diamond disc cutters.
If you have never used one before they can be a bit daunting, so see our project here on how to use a petrol disc cutter for full instructions.

Diamond discs will cut patio slabs quickly
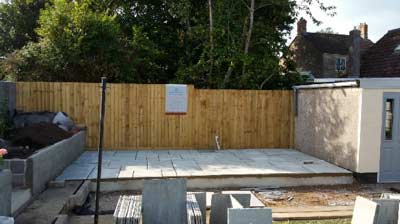
Patios do not have to be all on one level
When you have laid the patio to the end of the garden, see our foundations project, and also check out our laying bricks and blocks project and, additionally, our retaining wall project to finish it off and enjoy the summer.