Cracks in concrete, whether it’s a pathway, driveway, set of steps or concrete pad not only look visually unappealing but can be the sign of something more serious going on.
In this guide we look at the causes of concrete cracks and how to repair them properly so they don’t occur again, read on to find out more.
What Causes Cracks in Concrete?
There can be a variety of causes for cracks appearing in concrete surfaces but by far the most common cause is due to settlement or simply shrinkage due to curing.
Both of these are fairly natural and once settled or fully dried should then stop.
However, if they continue to increase in size over time then this can be the sign of something much more serious such as structural issues.
Structural issues can come in quite a range and include things like the fact the ground supporting the foundation, path, slab etc. is sinking, the foundation supporting the given structure, path etc. has failed or the fact that the concrete mix that has been used to create the object isn’t strong enough and is now failing.
Other reasons for failure can come from chemical damage to the concrete and also where any steel reinforcement in the concrete fails due to corrosion.
As a general rule of thumb, narrow hairline cracks that don’t change over time can be repaired using a crack repair mortar of some kind, however if a crack is continuing to get bigger then it’s essential that you get a professional structural engineer to take a look asap!
Why Repair Cracks in Concrete?
If you have cracks in concrete surfaces it’s essential that you get them repaired as soon as possible.
Although a given crack may not be the result of any structural failings and pose the immediate threat of failure, if it’s left it will certainly get worse and potentially cause a whole host of other issues.
Even a very slight hairline crack will allow quite a bit of water in and during colder months if this is allowed to happen, any water sitting in the crack will freeze. When water freezes it expands and through this will force the crack open even more. This is known as the freeze-thaw effect.
As this happens over and over again the crack will get bigger and bigger, allowing in more water that in itself can then cause subsidence, damp and a whole host of other issues.
So with this in mind, you can see that if left, a small simple crack that poses no threat can become a major issue.
The above scenario is for a crack that is fairly innocent so you can imagine what would happen if a serious structural crack is left! Ultimately this can mean complete failure and collapse, so with this in mind, get any cracks sorted as soon as possible!
Methods for Repairing Concrete Cracks
In terms of how a concrete crack is repaired will ultimately depend on what’s causing it in the first place:
- Structural: Structural engineer pinpoints the cause of the issue and a fix is put in place to stop any further subsidence and cracking. Once cured the crack can then be filled and repaired correctly
- Non-Structural: With non-structural cracks, these can simply be repaired by using a proprietary epoxy mortar or similar repair mortar used to fill the crack in full and then smoothed off over the top
If it turns out that the cracks you are repairing are structural in nature then these should only be repaired by a professional that knows exactly what they are doing, to ensure that it’s done correctly.
If it’s not done correctly and subsequently fails again and causes significantly more damage then there is a good chance that this will also void your home insurance.
With this in mind also ensure that any professionals that carry out the work are fully insured.
How not to Repair Cracks in Concrete
Repairing concrete is not as easy as one might think. The perceived wisdom out there is to look at a crack in a concrete path or drive and try to force some kind of cement-based mortar or concrete into the existing crack. This does not work for two reasons.
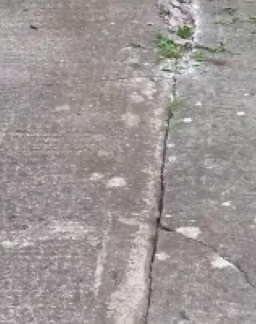
Concrete paths crack easily if not laid properly
- Repairing concrete in small areas cannot easily be done with a normal concrete mix as the aggregate is too large for small areas and the stones in the mix make it very difficult to get a good finish. The concrete or mortar mix cannot be forced down into small cracks or fissures easily and you cannot be certain you have even filled the crack. All you can see is, that the top of the crack is indeed repaired, but 1mm below the surface, you very likely have the void still in place
- When concrete dries, it shrinks. As it shrinks it pulls away from the edges of the crack it is supposed to repair. This leaves another crack, albeit a very small crack. This new crack lets water in which in very cold weather, freezes causing the afore mentioned freeze-thaw issues
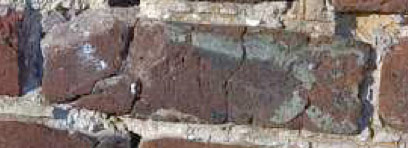
Concrete and brickwork can be damaged badly by Freeze-thaw
As we have stated above, as water freezes it expands into ice and, as those who have seen Titanic will know, ice is a pretty unstoppable force. The expansion of the ice introduces more/larger cracks into the concrete which, in turn, fill with water.
Incidentally, this is the reason why you see the surface of a lot of bricks and render “blown” off. This process is called Freeze-Thaw action and more about this can be seen on our project page on freeze-thaw action on masonry.
What Compounds are Used for Repairing Cracked Concrete?
Latex patching compound, epoxy patching compound, mixed mortar patching compound,
Despite the obvious solution of using a concrete-based mortar mix to repair cracks in concrete there are in fact, much better solutions that can be used:
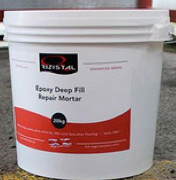
Epoxy Repair Mortar
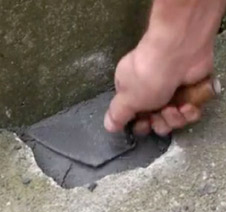
Cracked concrete is not properly repaired with more concrete or cement mortar. It does not matter whether this is a concrete path, slab, base or drive. Unless the crack or hole is more that 1 cubic foot or 0.1 cubic metres, the correct method of repairing damaged concrete is to use an epoxy repair mortar.
Epoxy repair mortar used to fix cracks in concrete
As we have already mentioned, concrete isn’t ideal due to the size of aggregate used in the mix, in that much of it is too large to fit down into smaller cracks and often causes blockages and subsequently voids.
Also, as concrete dries out and cures it shrinks and when used to fill a crack, this again creates another crack, albeit much smaller and harder to fill.
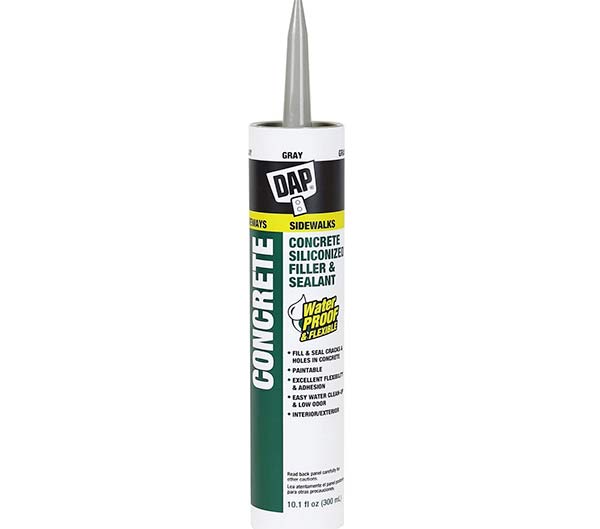
In terms of what epoxy mortar is, it’s simply aggregate mixed with a resin and hardener which, when cured, forms a flexible, waterproof plug which (as there is no drying out involved) does not shrink.
It is also completely waterproof as it has a resin base and will withstand any temperatures without crumbling. It will (usually) accept foot traffic after about 4 hours and is fully cured after 24 hours. Please do however read the instructions on the individual containers as some epoxies vary a little.
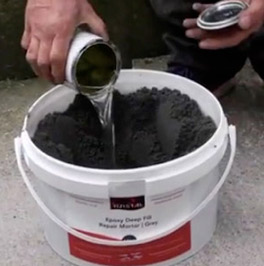
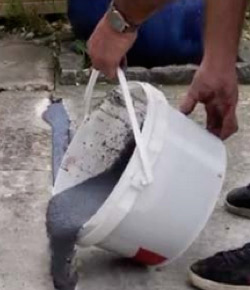
Mixing an epoxy concrete repair mortar by adding the hardener
Latex Patching Compound
Despite epoxy, there are also other solutions for repairing cracks in concrete, the first being latex patching compound.
Latex patching compound is very similar to its epoxy counter-part in that it is designed specifically for filling cracks in concrete and mortar surfaces, mainly floors and solid concrete pads.
However, whereas epoxy is a resin-based compound, latex is rubber-based. Due to this it does share very similar characteristics in that it produces a solid, water tight finish and also that it remains flexible.
Latex patching compound used to repair cracks in concrete
Mortar Patching Compound
There are several different forms of mortar patching compound, some that use both epoxy and latex but many are cement-based, albeit normally specially formulated cement that doesn’t require aggregate, bonds well to older mortar and has much reduced shrinkage.
Although many mortar patching compounds are good at what they do, they’re not quite as effective as their latex or epoxy counterparts, so if you can always opt for one of these.
Mortar patching compound
Tools and Products Needed for Repairing Concrete Cracks
In order to successfully patch damaged and cracked mortar and concrete, the following tools and products are needed:
- Chosen mortar repair compound
- Bucket trowel
- Finishing trowel
- Pointing trowel
- Paddle mixer (for mixing repair compound if needed)
- Clean bucket (for mixing repair compound if needed)
- Clean water
- Hammer
- Bolster
- Cold chisel
- Wire brush
- Stiff brush
- Old vacuum or wet and dry vac
How to Repair Cracks in Concrete
Now that you know the do’s and don’ts of repairing cracks in concrete surfaces and also what products are best to use, it’s now time to take a look at how to actually do it.
Step 1 – Make the Crack Bigger
Having explained, in reason one, above, that normal concrete has too large an aggregate to push into tiny cracks we are left with two choices. We either find something that can be guaranteed to fill up even the tiniest of cracks or we make the cracks bigger!
Choice one is not plausible given that even the finest mortar or concrete mixture will clog in small crevices, so choice two it is.
Take you hammer and bolster and position the bolster blade on the edge of the crack. Strike the bolster gently along its length, gently breaking the edges away. Work your way up and down both side to create a “V” shape that tapers in at the base.
For large cracks you can borrow (or hire) a concrete breaker and read our page on how to use a Kango Hammer or concrete breaker where you can also see a video on how to use the concrete breaker. Make sure you are wearing all the appropriate personal protection equipment (PPE).
Open the crack so it is about 15 – 50mm wide and around 30 – 75mm deep (depending on its size) unless of course the crack does not go down that deep!
Don’t go too mad though; often repair mortar is expensive and there is no need to use more than you have to.
Step 2 – Clean the Crack Fully
Using your wire brush, brush the joint out fully ensuring that you dislodge and remove any and all lose mortar that could affect the repair.
Once this is done, sweep the joint fully out using your stiff brush, ensuring you remove any remaining dust and bits of concrete. This is really important as any tiny piece of concrete left in the crack will prevent your repair mortar from bonding to the entire surface area of the crack. The repair then may not be effective.
Step 3 – Select Repair Compound
Once the crack or hole is opened up so all of the damaged area is removed and cleaned and you have found solid sides, you can look at which repair product to use.
As we have stated above, your best bet is to go for an epoxy repair mortar as this will generally give the best results.
Deep Cracks
For very deep cracks you may need to use a deep crack filling compound to fill the bulk of the crack first and then apply a finish fill on top, this will depend on the product and it’s fill depth will be stated in the manufacturer’s instructions.
Filling deep holes in concrete with repair mortar
Shallow Cracks
For holes of less than 50mm it is best to use an ordinary epoxy repair mortar. This repair mortar has a much finer resin aggregate and fills any voids in a much more complete way.
Shallow holes in concrete can be repaired with epoxy repair mortar
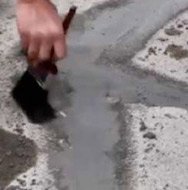
Longer, Finer Cracks
If you have a longer, finer crack to deal with then you can also try and use a thinner, more pourable repair mortar that is a little thinner and due to this can in some cases be poured into the crack as they flow much better.
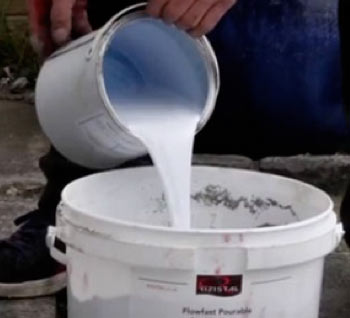
Mixing epoxy pourable concrete to repair paths
Step 4 – Mix Repair Compound
As most repair compounds are quite fast setting, regardless of what they are; epoxy, latex or cement based they will need to be prepared and mixed with either water or a specific hardener before they are used.
As most come in their own plastic container, this can be used for mixing.
First read the instructions of your chosen compound and follow them to the letter.
When using epoxy repair mortars, the hardener is tipped into the resin aggregate and (for ease) a mixer paddle is used to get a good, uniform mix. It takes about 4 – 6 minutes to mix a 20Kg tub of epoxy mortar.
For other compounds, mix in the required hardening substance according to the manufacturers specs.
Mixing epoxy repair concrete with a mixer paddle
Step 5 – Apply Compound to Crack
Once mixed up you will need to act fairly fact in getting it into the crack, as we have stated, most go off quite quickly.
Using your pointing trowel, scoop up some compound and drop it into the crack. Use the point of the trowel to work it all the way down to the base. Repeat this over and over until the crack is fully filled.
Use your finishing trowel to smooth the surface over.
Step 6 – Allow to Cure
Once you have completed the above steps and you are happy with the repair, it can be helpful to cover the area over with polythene (a bin liner will be suitable) to ensure that it cures correctly without any disturbance. Once cured, all epoxy mortars are as hard as nails and it will last you a lifetime
If you are repairing concrete cracks and joints in a rather high traffic area such as a walkway or path, then it may be a good idea to surround it with some cones or bollards to make sure that no one inadvertently stands on it and ruins the finish.
Step 7 – Clean Up
Whichever compound you use it will go hard fairly quick and stick to all of your tools like glue so you will need to get them cleaned asap.
Pretty much all compounds will include instructions on how cleaning should be carried out in their instruction so follow them closely.
Resin based materials are usually hard to clean and the solvents used to clean them are pretty harsh on the hands so take care when using such cleaners and wear gloves, masks, eye protection etc.
Dip a rag into the safer solvent and clean your tools easily. As they are all resin based, they tend to stick to the trowels which makes it hard to get the surface smooth.
Concrete is perishable, it will deteriorate very quickly when it is allowed to crack and the only method of repairing it properly is to use the correct repair compound. As commented, we recommend using epoxy-based mortars and concretes because we have worked with them for a couple of years but there are many others out there so please do go and have a look round.