
Having wet walls in your home can be an absolute nightmare, causing huge amounts of damage to surface coverings such as paint, wallpaper and plaster and also, more worryingly, can cause dangerous black mould that can pose a serious risk to your health.
In this guide, we explain the warning signs to look out for and share proven methods to dry out and protect your walls from any future issues.
What Are Wet and Damp Walls?
Wet or damp walls are walls affected by unwanted moisture, either originating from inside your home or from external sources. This moisture can build up over time or appear suddenly, depending on the cause. In UK homes, it’s a common issue, especially in older properties or those without modern damp-proofing systems.
Damp walls may look patchy, feel cold or clammy to the touch and sometimes even smell musty. You might see paint or wallpaper bubbling or notice black mould forming in certain areas. These are all signs that moisture is getting into the wall and not drying out properly.
There are two main types of damp commonly found in UK homes:
- Rising damp: This occurs when moisture from the ground travels up through walls due to a damaged or missing damp proof course (DPC).
- Penetrating damp: Caused by water entering from outside, often due to broken guttering, cracked render or faulty pointing in brickwork.
Another common cause of damp is due to poor ventilation indoors, especially in kitchens and bathrooms where condensation levels are higher. Understanding the type of damp affecting your walls is the first step in solving the problem and protecting your property.
Common Problems Caused by Wet, Damp or Cold Walls
Damp, wet, or cold walls can lead to black mould, structural damage, heat loss and general overall poor air quality. These problems often come from rising or penetrating damp, leaks or faults in the wall or cavity structure.
You may notice entire walls affected or just damp patches, cold spots or areas with visible mould growth.
How the issue shows up, whether widespread or localised, can help identify the root cause and the best way to fix it.
Start by identifying how damp your wall is. Use a damp meter for best results, or feel the surface with the back of your hand to locate affected areas. Pinpointing the problem helps determine whether the issue is minor or needs professional repair.
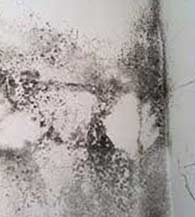
Wet wall areas are a common cause of black mould
Main Symptoms of Wet Wall Issues
Wet or damp walls often show early warning signs that something isn’t right. Spotting these symptoms early can help prevent long-term damage and, often, very expensive repairs.
Generally, the common signs include:
- Dark patches or staining: Discoloured or damp-looking patches on walls, especially near skirting boards—often indicate rising damp or leaks.
- Peeling paint or wallpaper: Moisture trapped behind wall coverings causes them to lift, bubble or flake off the wall.
- Black mould growth: Persistent damp encourages mould, usually in corners, behind furniture, or near windows where airflow is limited.
- Cold to the touch: Wet walls often feel colder than dry areas. This can also make rooms harder to heat and increase energy bills.
- Musty smell: A damp, earthy odour is a sign of trapped moisture, especially in older properties or poorly ventilated rooms.
These symptoms may appear gradually, but they’re usually a sign of a deeper problem, such as poor ventilation, a damaged damp proof course (DPC) or water ingress through external walls. Identifying and fixing the root cause early is key to preventing further damage.
Potential Causes of Wet Walls and Black Mould
Wet walls and black mould in UK homes are usually caused by unwanted moisture entering or becoming trapped inside the property. If left untreated, these issues can lead to serious structural damage and health risks. Understanding the root causes is key to solving the problem for good.
Condensation
One of the most common causes is condensation, which happens when warm, moist air hits a cold wall surface. This is especially common in poorly ventilated rooms like bathrooms, kitchens, or bedrooms.
Over time, condensation can lead to damp patches and, worse, black mould growth.
Penetrating Damp
Penetrating damp is another frequent issue. This occurs when water gets in from outside through damaged brickwork, cracked render, faulty guttering or leaky window seals. The moisture seeps through the wall, creating visible damp marks and a perfect breeding ground for mould spores.
Rising Damp
Rising damp is caused by groundwater moving upwards through brickwork and masonry due to a missing or failed damp-proof course (DPC).
It often affects older properties and usually appears as a tide mark on lower walls, sometimes accompanied by salt deposits or flaking paint.
Leaks
Leaks from pipes, appliance drains or supply pipes, roofs or even neighbouring properties can also lead to damp walls. Slow or hidden leaks are particularly tricky as the water may accumulate behind walls before any signs become visible.
You can check your pipes manually or get a plumber to do a pressure check to check that any and all pipes are free from leaks.
Whatever the source, trapped moisture creates ideal conditions for black mould, that often appears as dark, fuzzy patches on cold or damp areas.
Central Heating
If water appears to be running down from the ceiling onto the wall, your central heating system could be the cause. Heating pipes often run under floors and through ceilings, so a hidden leak is a string possibility.
Mains Water Supply
If you have wet walls in a cellar or any room below ground level, the cause could be a leak from your water main or even from a neighbour’s water supply.
Your water provider can test the moisture that’s present for free and from this test, confirm if it’s from the mains, sewage or whether it’s just natural groundwater.
You can find your local provider on the Water UK website.
Mould can be extremely dangerous nd not only damages surfaces but can also trigger allergies and respiratory issues, making early detection and treatment absolutely essential, not only to avoid property damage, but more importantly, avoid any potential serious health issues.
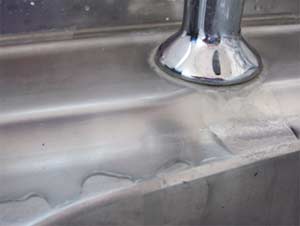
Check behind your appliances for any leaks that making your walls damp
Damp Patches Low on Walls, Possibly with Black Mould – Rising Damp
If you notice damp or mouldy patches near the bottom of your wall, just above the skirting board, there is a good chance that you could be dealing with rising damp.
Rising damp happens when moisture from the ground travels up through your bricks through capillary action. This usually shows up as a discoloured ‘tide line’, often yellow or brown and can encourage black mould growth in the affected area.
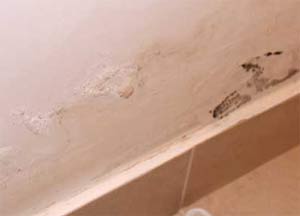
Rising damp often causes visible staining and wet patches just above the skirting board
Most homes are built with a Damp Proof Course (DPC), a waterproof barrier that sits around 6 inches above outside ground level, to stop this. however, if this is missing, damaged or even bridged (where an obstruction covers it) then moisture can bypass the DPC and make it’s way up your walls, often eventually reaching your internal finished surfaces creating damage and mould.
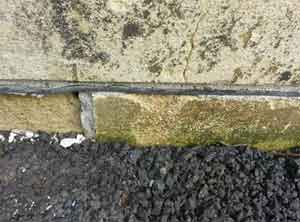
Damp Proof Courses are built into houses to stop damp rising up your walls
How to Fix Rising Damp
Start by checking if your home has a Damp Proof Course (DPC). Most houses built after the 1950s will have one, usually a thin waterproof layer about 150mm (6 inches) above ground level. If there’s no DPC or it’s been damaged or bypassed, moisture from the ground can rise up through the brickwork.
If your DPC exists, check that it hasn’t been bridged by debris in the cavity wall or by external ground levels. Internally, bridging can occur when rubble or mortar inside the cavity rises above the DPC line, allowing damp to bypass the barrier.
To check for internal bridging, carefully remove one or two bricks near the suspected DPC level, no more. Never remove more than two bricks without professional advice. Use a torch to inspect the cavity and remove any debris by hand (wearing heavy-duty gloves), using a crowbar or vacuum cleaner if needed.
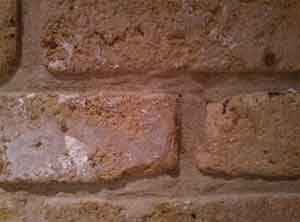
Remove a brick from your cavity wall to check for debris bridging your DPC
External bridging is easier to spot. Check that the garden soil, patio, or steps don’t sit above the DPC level. If they do, lower them or remove the contact points where possible.
If there’s no DPC or it’s broken or still ineffective after clearing bridges, you’ll need to install a new one. The most common modern solution is a chemical DPC injection. This involves drilling small holes in your wall and injecting a waterproof cream.
The cream is absorbed into the bricks and forms a continuous water-resistant barrier. Afterwards, the holes are filled with a waterproofed mortar mix. Installation methods may vary slightly depending on the product used.
Full step-by-step guidance is available in our project on how to install a chemical DPC.
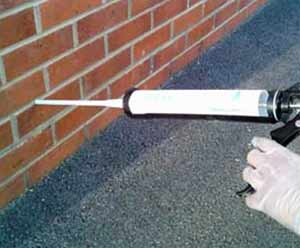
Insert a new DPC by injecting a chemical DPC cream into your walls
Damp or Cold Patches Across Walls, Often With Black Mould
If you’re noticing widespread damp or cold spots on your walls, especially with black mould, it’s likely due to penetrating damp. This happens when moisture seeps in from outside, usually through faults in the building’s structure.
Common causes include cracked pointing, damaged flashing, corroded wall ties, or bad cavity wall insulation. Homes in areas with heavy wind-driven rain or exposed walls are especially at risk.
Have patches near your chimney breast? See our guide to fixing chimney breast damp.
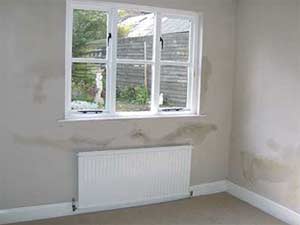
Damp patches all over your wall are typically caused by penetrating dampness
Faulty and Cracked Pointing, Rusty or Dirty Wall Ties and Poor Cavity Wall Insulation
Check the outside of your home where the internal damp patch appears. Look for cracks in the brickwork or pointing, these often allow rain or cold air to enter. Cracks can be caused by subsidence, house movement or rusty wall ties.
Wall ties connect the inner and outer walls. When they rust, they expand and crack the mortar, letting moisture in. Even small gaps can make indoor walls colder, this then leads to condensation and, worse still, black mould.
Sometimes, debris left on wall ties during construction or built up over time creates a bridge for damp to pass from outside to inside. This also causes cold or damp patches.
If cavity wall insulation was badly installed or has gaps, it can leave areas of the wall uninsulated. These cold spots draw in moisture and encourage mould growth.
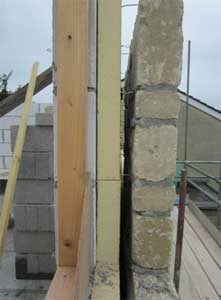
If debris gathers on your wall ties this can create damp and cold patches on your walls
How to Check and Fix Faulty Pointing, Wall Ties and Cavity Wall Insulation
If your wall has cracked pointing, ask a trusted builder to assess and repoint it. They can also inspect hidden wall ties and replace any that are rusty or damaged.
If the pointing looks sound, use a metal detector to locate wall ties behind any damp patches. To check the tie, carefully remove one or two bricks near the affected area (see earlier guidance).
Inspect for rust or mortar debris on the wall tie. If needed, replace the tie following this step-by-step guide.
You can also check for gaps in cavity wall insulation by removing bricks. If insulation is patchy or missing, consult at least two qualified installers. Re-insulating may require full removal of old material, so get expert advice first.
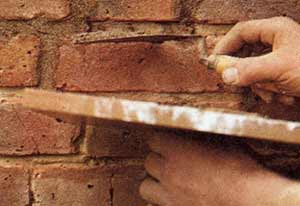
Get your pointing fixed to prevent water from entering your external walls
Faulty Flashing, Guttering or Roof Tiles
Damp walls may be caused by leaks from damaged guttering, broken roof tiles or faulty flashing around your roof or chimney.
Use binoculars or a drone with a camera to closely and safely inspect your roof from the ground. Look for cracks, missing tiles or loose flashing.
Even the slightest gap or bit of damage can let rainwater into your roof space and once it’s in it can travel down into your walls and even to the furthest reaches of your home causing damp patches or mould.
The fact that it can travel so far makes issues such as these really hard to trace as the issue may appear on one side of your home, but actually come from damage on completely the other side.
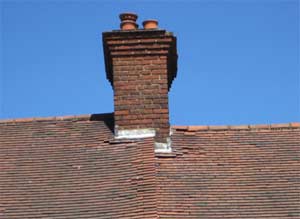
Broken roof tiles could be letting water into your house, creating wet patches on your walls
How to Fix Damaged Flashing, Guttering and Roof Tiles
If your roof flashing is damaged, you can either replace it for a long-term fix or apply flashing repair tape for a quicker, cheaper solution. Products like SylGlas offer reliable waterproofing in the short term.
Broken guttering should be replaced to prevent water overflow. See our Plastic Guttering Replacement Guide for step-by-step help.
Cracked roof tiles must also be swapped out. The replacement method depends on the type of tile, some are nailed and mortared, while slate tiles use metal clips.
Watch this helpful video guide to replacing roof tiles for a full walkthrough.
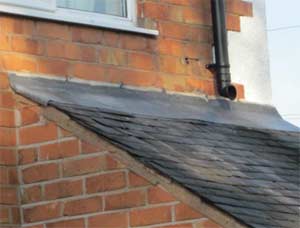
Repair your flashing either using lead sheeting or cheaper flashing tape to stop water getting into your roof and walls
Extreme Rainfall Exposure
Heavy and frequent rain can saturate even well-built external walls, allowing moisture to pass through to internal surfaces and cause damp.
If your walls stay wet during prolonged rain, applying a masonry waterproofer can help prevent water absorption. Learn how to do this in our External Wall Waterproofing Guide.
Repairing Damp Damage and Preventing Future Problems
Damp can damage walls both visually and structurally. Once you’ve fixed the cause, it’s vital to repair the damage before redecorating.
Start by checking your plaster. Tap the wall with your knuckles, if it sounds hollow or is crumbling then unfortunately it’s blown and will need replacing. White salts or crystals on the surface are also signs of salt damage and again, will need to be replaced.
If the plaster is solid, let it dry out fully (this may take months). Even then, replacing it is often the safest option to avoid future issues.
Ensure there is plenty of ventilation so leave windows and doors open. You can also use fans and dehumidifiers to aid in this.
Before redecoration, treat any mould or salt (white crunchy salts appearing on the surface) deposits fully. Use a good quality mould cleaner to remove black mould and a salt neutraliser to remove salts in any affected areas. Apply directly to the bare wall after removing any blown plaster.
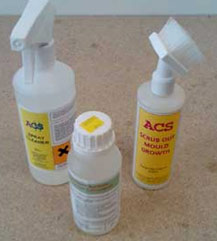
Use mould cleaner and salt neutraliser to treat wall surfaces before replastering
Replaster once treated and dry. Some plasters contain built-in salt neutraliser, or you can add it yourself. For severe salt issues, fit a mesh membrane before replastering to stop salts reaching the new surface.
Alternatively, apply a waterproof breathable render before plastering. Ensure your chosen product meets UK standards by checking with the British Board of Agrément.
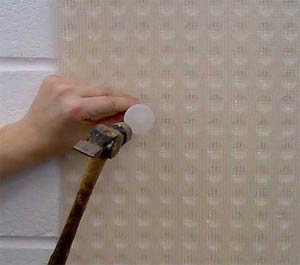
Fit a mesh membrane to your wall to prevent damp from washing salts into your plaster
Wet walls can a huge number of different causes, but it’s crucial to fix any issues as quickly as possible to prevent further damage to your home and ultimately more expense.

 DIY Doctor Ltd,
  0845 6342 179


