Porcelain Tiles And Ceramic Tiles
Bathroom and kitchen tiles are usually made to be an attractive, waterproof covering for walls and floors. There are realistically two types of tile used for this purpose. One type is commonly known as ceramic tiles and the other, porcelain tiles. The truth is however that the word ceramic means to be made from clay and hardened by heat and this of course applies to both types of tile!
We have come to accept that what are referred to as ceramic tiles are the (usually) highly glazed, slightly cheaper tiles which are fairly light and reasonably easy to cut. Porcelain tiles are made from clays which contain various minerals outlined below and because Porcelain and porcelain tiles are the result of pressing, compacting and then firing a very fine clay dust (usually collected from areas containing such minerals as iron and magnesium) at temperatures of up to 1400 degrees C they become very dense and heavy.
Porcelain tiles are generally thicker than what we call ceramic tiles and are tough and hard wearing. This makes them an ideal covering for areas with high foot traffic and exposure to water and moisture.
Ceramic tiles are also pressed into shape but the top surface is usually coloured, or sometimes pigments are mixed with the clay. The surface is then glazed before being baked. As the ceramic tile is not usually made of the very fine dust from which porcelain tiles are made, the pressing leaves them less dense and therefore, in an unglazed state, fairly porous. This can be seen by turning a ceramic tile over and dripping some water on the back of it. The water will soon be absorbed by the tile. Doing the same with a porcelain tile however, because of its dense construction shows nothing like the same absorbency. Porcelain tiles are therefore used a great deal in bathrooms and kitchens.
With this in mind you can imagine that you are going to need quite a tough specialist tile drill bit when drilling into tiles of this type – enter, the diamond tipped drill bit!
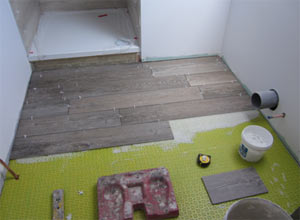
Porcelain tiles pressed to a wood grain effect being used on a bathroom floor
When pressed into thicker sheets however the this dust can be used to create porcelain tiles and due to the thickness becomes quite tough and hard wearing making it an ideal covering for areas with high foot traffic and exposure to water and moisture. With this in mind you can imagine that you are going to need quite a specialist tile drill bit when drilling into tiles of this type – enter, the diamond tipped drill bit!
Porcelain tiles are therefore used a great deal in bathrooms and kitchens as can be seen on the above.
Drilling Into Tiles
As porcelain tiles are much harder than other ceramic tiles they need special cutting and drilling equipment such as a diamond tip drill bit or a diamond core drill bit. A great example of these is the Porsadrill tile drill bit set from 365 drills.
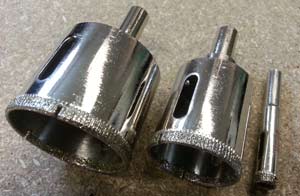
Diamond drill bits with no arbour or pilot drill for drilling through porcelain tiles and ceramic tiles
The Porsadrill diamond tip drill bit makes the job of drilling into tiles easy and completely does away with the ordinary system of a core drill bit and pilot drill bit held in an arbour which is quite tricky to master due to the fact that the pilot drill tends to slip and scratch the surface of the tile.

Old tile drills usually have a core drill bit and arbour to centre a hole through a ceramic tile
Using A Guide Plate Instead Of A Pilot Hole When Drilling Into Tiles
One of the problems with using core drill bits with a centre drill is that you cannot drill holes on, or sometimes even close to, the edge of a porcelain tile. Neither can you enlarge or extend an existing hole.
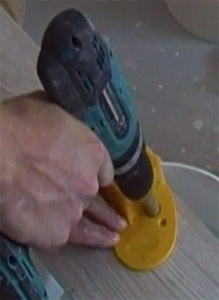
Using a guide plate to centre a hole through a porcelain tile
With this system however, you can. This is achieved by the unique idea of doing away with the guide drill in the centre of the core bit and using a guide plate to stop the drill bit slipping over the tile.
There is no centre guide drill so the drill holes can be overlapped and taken right up to the edge of tiles.
The guide plate has non-slip pads on the back so when it is placed on a tile and held down, the drill bit is simply placed in the appropriate hole and you can drill through the tile.
Tile Drill Bit Sizes For Porcelain And Other Bathroom Tiles
For the DIY or home improver bathroom tiler, when tiling a bathroom with porcelain tiles, it’s a good idea to have a selection of drills of different sizes for each of the holes you might need to drill e.g. holes for holding toilet cisterns on the wall, for towel rails, for service pipes such as cold water feeds, for waste pipes etc…In light of this you will need the following tile drill bit sizes:
- 6mm (x2) diamond drill bit for red wallplugs
- 8mm (x2) diamond drill bit for brown wallplugs
- 16mm – for 8mm to 15mm copper pipes
- 30mm – for 22mm copper pipes and tap connector pipework
- 40mm for plastic drainage and larger holes which can be made by overlapping the holes.
The tile drill bits listed above can all be purchased from your local DIY store as traditional tile drill bits and core bits but you can also purchase a complete bathroom set containing all the bit sizes you will need from 365 Drills (as show below) but with the added value of the all important non-slip guide plate.
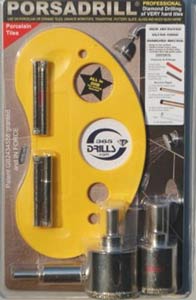
Porsadrill bathroom drilling kit
It is as well to remember that the Porsadrill diamond drilling kit can also be used, (with huge amounts of speed!) on ordinary ceramic tiles, natural stone tiles such as marble tiles, Travertine tiles, slate tiles, limestone tiles and granite tiles. Each drill bit can also be bought individually, in pairs or in a complete bathroom kit.
Cooling Down Diamond Drills When Drilling Porcelain Tiles
All diamond tipped drill bits generate heat when they are drilling, especially through very hard porcelain tiles. To cool the drill bit down a soaked sponge is used to drip water into the hole. See how this is achieved easily by watching the video below.
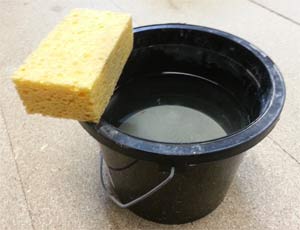
A dripping sponge cools down the diamond tipped drill to allow more effective grinding
How To Drill Tiles Using A Porsadrill Tile Drill Bit
- Select the correct size of drill bit you need. Don’t forget to allow some movement space if you are drilling for a pipe.
- Place the drilling guide on the spot where you want to drill
- Squeeze a little bit of water into the guide hole
- Start the drill on a slow speed and put into the guide hole
- Put steady pressure on the drill without trying to force through the hole
- Place the wet sponge against the side of the drill bit allowing, with a slight squeeze, the water to flow into the hole as it is being cut.
- Allow the drill bit to grind through the tile
- Wipe away the debris with the sponge.
The 365 diamond drill bits allow you to drill close to the edge of a porcelain tile without fear and gives you the neatest of holes which can be enlarged if you have not managed to get an exact fit. Professional tilers love it and we love it. It is better than affordable and gives DIY and Home Improvement enthusiasts a really good chance of producing a professional job at a low price and with the minimum of effort.
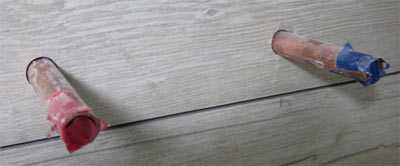
Holes drilled in tiles for hot and cold water service pipes in bathroom

