A room thermostat is an essential part of your home heating system. It ensures that the system knows what temperature it is in your home and then adjusts the heating system accordingly, turning it up when cold and down or off when warm.
In this guide we take a look at the room thermostat and all you need to know about these very handy objects.
What is a Room Thermostat and how Do They Work?
A room thermostat, whether mechanical or digital, allows you to set a desired temperature that will be maintained when your heating system is on.
Using a room thermostat to control your boiler lets you manage when and where heating is active, preventing unnecessary wastage and saving money by not heating empty rooms.
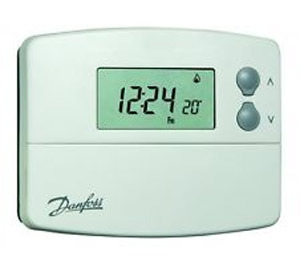
Programmable hard-wired room thermostat
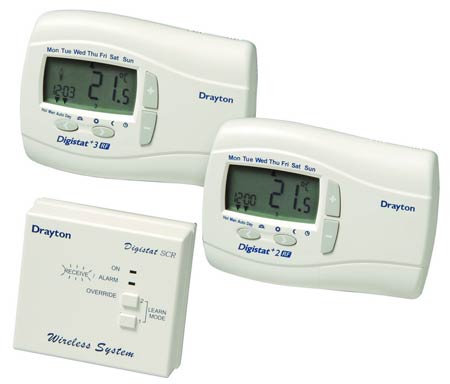
2RF wireless programmable room thermostat system – Image courtesy of Drayton
Using a thermostat can reduce your heating bills and lower your carbon footprint by decreasing energy consumption, as heating typically uses the most energy in homes.
Once your set temperature is reached, the thermostat turns off the boiler and heating, maintaining comfort in your home without any energy wastage.
Major heating manufacturers like Honeywell and Siemens offer various thermostat types that include wired, wireless, digital, and analogue.
Wired thermostats connect directly to the heating system, while wireless ones operate remotely.
Analogue thermostats, featuring simple dial controls, are generally more affordable and easier to use, making them ideal for elderly users.
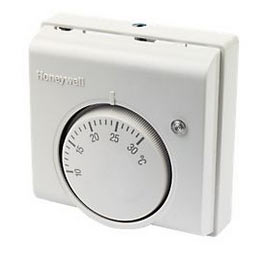
Honeywell analogue room thermostat – Image courtesy of Honeywell
Digital thermostats are often more visually appealing but may come at a higher cost. They offer advanced features like zone heating, depending on your heating system, though their interfaces can be more complex.
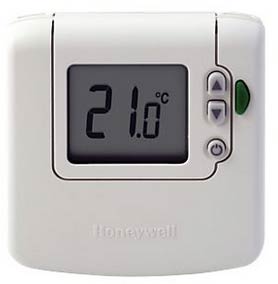
Honeywell digital room thermostat – Image courtesy of Honeywell
Why Upgrade to a Digital Room Thermostat?
Mechanical thermostats often maintain higher-than-needed temperatures due to their slight inaccuracy, potentially using up to 10% more energy. They are also slow to respond, letting room temperatures drop 3-5°C before the heating kicks back in, causing discomfort.
Digital thermostats offer precise temperature control with accuracy greater than 1°C. They prevent rooms from exceeding the set temperature, minimising energy use, and quickly activate heating to maintain a stable, comfortable environment.
Digital thermostats come in several types, including Digital Thermostats, Programmable Thermostats, and Programmable Thermostats for Heating & Hot Water.
Many modern thermostats can be controlled over the internet. These systems connect to the internet, allowing you to set your heating remotely via a web app on your smartphone or through the manufacturer’s website. While convenient, these setups can be expensive.
Why Should I Consider a Programmable Room Thermostat?
A programmable room thermostat combines time-clock functions with advanced features, offering greater control and energy savings.
The key benefit is the ability to set different temperatures at various times of the day, known as comfort levels. This flexibility allows you to match the heating schedule to your lifestyle, optimizing comfort and efficiency. Additionally, programmable thermostats can act as frost stats.
Current building regulations require homes with more than 150M² of usable floor space to have multiple heating circuits with separate time and temperature controls. A programmable thermostat is an ideal solution for meeting these requirements.
Depending on your lifestyle, you can choose between a 5/2 day or 7-day programmable thermostat. Many manufacturers now offer 5/2 day versions as standard due to their simpler programming needs.
Where Should a Room Thermostat be Placed?
Choosing the right location for your room thermostat is crucial for accurate temperature control and efficient energy use. The thermostat should be placed in a room that is regularly used, such as the living room or hallway, where it can effectively monitor the ambient temperature and maintain a comfortable overall heat.
Avoid placing the thermostat in areas that experience extreme temperature changes, such as near windows, doors, or direct sunlight. These locations can cause false readings, leading the heating system to turn on or off unnecessarily. Instead, position the thermostat on an interior wall, away from drafts, radiators, and other heat sources that could skew its readings.
Mount the thermostat at a height of about 1.5 meters (5 feet) above the floor. At this height, it ensures accurate air temperature measurement at a level that reflects the average living space conditions. Ensure the chosen spot has good air circulation around the thermostat to provide accurate temperature detection. Avoid placing it behind furniture, curtains, or other obstructions that can block airflow and affect its performance.
For homes with multiple heating zones, each zone should have its own thermostat placed strategically to ensure optimal control. In larger homes, this might mean placing thermostats in different rooms or levels to manage varying temperature needs effectively.
What is the Best Temperature for a Room Thermostat?
Setting the optimal temperature for your room thermostat is essential for maintaining comfort and energy efficiency. The best temperature can vary depending on the time of year, the specific needs of your household, and personal preferences. Generally, a comfortable room temperature is around 20°C (68°F) for most people. This temperature strikes a good balance between comfort and energy savings, ensuring your home feels cozy without excessive energy use.
During the colder months, you might need to adjust the thermostat slightly higher. A setting between 20°C and 22°C (68°F to 72°F) is typically recommended for living areas during the day. Bedrooms can be kept cooler, around 18°C (64°F), to promote better sleep. At night or when the house is unoccupied, lowering the thermostat by 3°C to 5°C can significantly reduce heating costs without sacrificing comfort.
In the warmer months, maintaining a thermostat setting around 24°C to 26°C (75°F to 78°F) can help keep your home comfortable while minimising cooling costs. Using ceiling fans and natural ventilation can also help maintain comfort without heavily relying on air conditioning.
Smart thermostats offer even more control, allowing you to set different temperatures for different times of the day, known as temperature scheduling. This feature helps to maintain comfort when you are home and save energy when you are not. For example, you can program the thermostat to lower the temperature at night and increase it shortly before you wake up, ensuring a warm home in the morning without running the heating all night.
Benefits of a Room Thermostat
If you haven’t already been sold on the idea of the importance of the room thermostat to the correct operation of your heating system, there here is a quick summary of the main benefits:
- Energy Efficiency: A room thermostat helps to optimise heating and cooling, reducing energy consumption by maintaining a consistent temperature and preventing unnecessary heating or cooling.
- Cost Savings: By regulating the temperature effectively, a room thermostat can lower your energy bills, offering significant savings over time.
- Comfort Control: You can set your preferred temperature, ensuring that your home is always at a comfortable level. This is especially beneficial for households with varying comfort needs.
- Convenience: Modern thermostats, especially programmable and smart models, allow you to schedule temperature changes based on your daily routine, providing comfort when you need it and saving energy when you don’t.
- Remote Access: Smart thermostats can be controlled remotely via smartphone apps, allowing you to adjust the temperature from anywhere. This feature is perfect for ensuring your home is comfortable upon your return.
- Environmentally Friendly: Using a room thermostat to manage your heating and cooling more efficiently can reduce your carbon footprint by lowering energy consumption.
- System Longevity: By reducing the workload on your heating system it will help it to last longer.
- Temperature Stability: Room thermostats help maintain a stable indoor temperature, preventing the frequent fluctuations that can be uncomfortable and inefficient.
- Customisation: Programmable and smart thermostats offer customisation options, allowing you to create specific heating and cooling schedules tailored to your lifestyle and preferences.
- Health Benefits: Maintaining an optimal indoor temperature can contribute to better health by ensuring a comfortable living environment and reducing the risk of conditions such as hypothermia or overheating.
- Integration with Smart Home Systems: Many modern thermostats can integrate with other smart home devices, allowing for seamless control and automation of your home environment.
- Ease of Use: Digital thermostats are user-friendly, often featuring intuitive interfaces and clear displays, making it easy to set and adjust temperatures even for those new to the technology.
Other Types of Thermostat and Controls to Consider
Aside form the traditional type of room thermostat found in many homes across the UK there are also other types of thermostat control used by various different systems you should also be aware of, the most common of these are as follows:
Zone Controls
Zone controls allow you to heat different rooms independently. For example, if you are spending the evening in the living room, there’s no need to heat the dining room. This can save money on your heating bills.
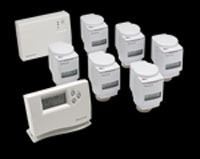
Wireless zone heating control system
Boiler Interlock
A boiler interlock turns off your boiler if neither a cylinder thermostat nor a room thermostat needs it. This helps conserve energy and improve efficiency.
Cylinder Thermostat
A cylinder thermostat, often found in airing cupboards, regulates the temperature of water in a hot water cylinder. It ensures the heating element stops heating the water once it reaches the desired temperature, typically set around 60°C to prevent bacterial growth.
Boiler Thermostat
Located on the front of your boiler, this dial controls the temperature of water sent to radiators and the hot water cylinder. It can work with boiler interlocks and room thermostats to maintain optimal heating levels.
TRVs – Thermostatic Radiator Valves
TRVs control the flow of hot water to radiators based on the room’s temperature. They monitor the air temperature around them, so make sure they are not obstructed for accurate readings.
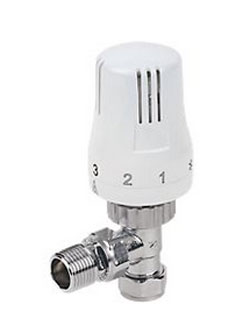
Thermostatic radiator valve
How to Replace an Existing Thermostat With a Wireless One
Now that you know all about what a room thermostat is, how it works and what all the main benefits are, it’s now time to take a look at how to swap an older existing, probably analogue room thermostat for a nice new modern wireless one.
- Step 1 – Turn Off Power: Before you begin, turn off the power to your heating system at your consumer unit or fuse board before going any further!
- Step 2 – Remove the Old Thermostat: Gently remove the cover of your old thermostat. Use a screwdriver to detach it from the wall plate and disconnect the wiring. Note the configuration of the wires and their labels. Either draw a diagram or take a picture with your smart phone.
- Step 3 – Label Wires: Use labels or masking tape to mark each wire according to the terminal it’s connected to. Between this and the diagram/picture above you will be sure to know exactly what wire goes where.
- Step 4 – Install the Wireless Receiver: If your new wireless thermostat comes with a receiver, fix it in place near to your boiler. Follow the manufacturer’s instructions to connect the receiver to your boiler using the labeled wires.
- Step 5 – Mount the New Thermostat: Secure the new thermostat’s wall plate to the wall using screws and wall plugs or plasterboard fixings. Ensure it is level before fully tightening.
- Step 6 – Connect the Wires: Attach the labeled wires to the corresponding terminals on the new thermostat’s wall plate. Double-check each connection to avoid any errors.
- Step 7 – Attach the Thermostat: Once the wiring is connected, attach the thermostat unit to the wall plate. Most wireless thermostats snap into place or require minimal screwing.
- Step 8 – Turn on and Test: Turn the power back on at your consumer unit/fuse boar. Your new thermostat should power on. Follow the setup instructions provided by the manufacturer to configure the wireless features. Once powered on, test the system fully ensuring it turns on and off when it should do.
- Step 9 – Connect to Wi-Fi: For smart wireless thermostats, connect the device to your home Wi-Fi network. This usually involves using a smartphone app provided by the thermostat manufacturer.
- Step 10 – Configure Settings: Use the app or the thermostat’s interface to configure all of your desired settings e.g. temperature, on and off times etc.
The room thermostat is an essential element in your heating system and to ensure the system operates at peak efficiency it is absolutely essential that your thermostat also operates correctly.

