If you have a damaged brick in the wall of your home or another structure then it is highly important that you get it removed and replaced with a new one before it causes and damp or structural issues.
Using this guide you will learn exactly how to replace a damaged brick in a wall, read on to find out how.
Why do you Need to Replace a Brick?
There can be a great many reasons for a single brick or multiple bricks failing in a wall.
Firstly, this can be down sub-standard workmanship in that the incorrect materials e.g. the wrong type of bricks are used or mortar mix is used, allowing water and moisture in to cause damage.
Other causes include simple wear and tear in that a brick or bricks are damaged and crumbling or cracking or the face may have blown off due to freeze-thaw action creating what’s known as spalling.
Other reasons can include the fact there may have been an overflow pipe or soil pipe running through it (or several bricks) that has now been removed leaving a hole that now needs filling in.
Additionally, if bricks become marked or stained over time due to lichen, bitumen or tar-like substances used for sealing roof structures or any number of other potential causes, you make them more visually appealing you may wish to get them replaced.
Also, if you need to get an air brick inserted into an existing wall, the steps to do so are pretty much exactly the same as removing and replacing a brick.
One final reason for replacing a brick may be due to the fact that you have had to remove it in order to inspect or clean a cavity area.
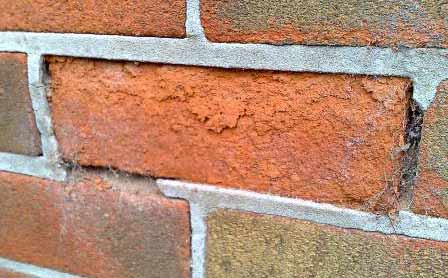
Brick face damaged by frost blowing the face of the brick off causing spalling – Image courtesy of Meyrick Builders
Why Replace a Broken Brick?
A broken or damaged brick in a wall (especially if it is cracked) can also lead to a whole heap of issues. Water and moisture can easily penetrate through cracks and holes into the interior of the cavity and create damp issues on interior walls.
In most cases, this will usually result in stains and black mould, which not only looks unsightly but can also cause numerous health issues.
As you can see from the above, although seemingly a small and possibly insignificant issue, a cracked or damaged brick in an exterior, weather facing wall can cause some serious issues for both you and your home so it needs replacing as soon as possible.
In the event that you have cracks across several bricks in a wall this may be a sign of something more sinister such as possible foundation movement. If this is the case then you should seek further advice from a professional builder or surveyor.
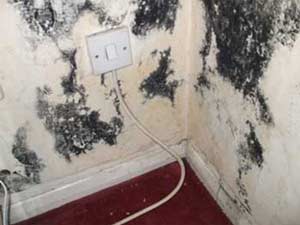
Damp damage to interior wall causing black mould due to broken and damaged bricks
Finding the Correct Size and Type of Replacement Brick
It’s important that your new replacement brick matches the rest of the wall, especially if it’s in a visible wall of your home. You may not be that concerned about it but if you sell the property on, it may become an issue.
When it comes to bricks, depending on their age, where they were manufactured, who manufactured them etc. will really depend on how easy a replacement is to get hold of. If the property is relatively new (last 10-15 years) then you should be able to obtain any replacements from a local builders merchant.
For older properties, this job can become much more difficult. Your best bet here is to try local reclamation yards or brick suppliers in the local area where they were originally manufactured. A list of manufacturers can be found on the Brick Development Association website here.
Other solutions include asking neighbours if they have any spares knocking about or keep your eye out for anyone having any building work done. You may be able to get hold of one or more bricks that are being removed.
One thing to bear in mind is that newer UK bricks are in metric and older bricks will be in imperial measurement, so could possibly be different sizes.
For unique bricks, you may have to research a little more. There are quite a few different companies out there now that specialise in identifying and supplying unique and rare bricks so it’s well worth contacting one of these for help.
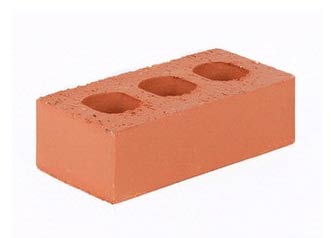
Class B clay engineering brick
How to Match Mortar Colours
When replacing bricks, not only must the actual brick match but the mortar should also. New or incorrect coloured mortar will stand out like a sore thumb and make the whole job look sub-standard.
When it comes to mortar, the colour of the sand and cement used will determine the overall colour of the mortar. Help on getting a good colour match can be found in our matching mortar project here.
In all honesty this is a tricky job and mainly involves trial and error, mixing different types and colours of sand and cement until you get the desired result!
It is extremely hard to get an exact colour match, especially when you take into account age and weathering, which can have a dramatic effect. With this in mind there are tints and dyes available to help solve this problem.
One that we have used quite a few times is the Bebbington Brick Weather Tint and Colour Match for bricks and mortar. This is a great product and one that we have had consistently great results with as a brick stain. To find out more, see our product review here.
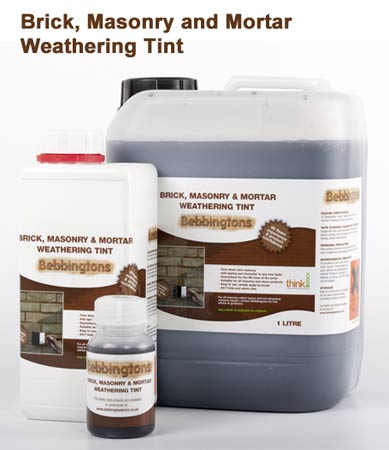
Bebbington Brick Weather Tint and Colour Match
Tips on Removing a Brick
Before simply getting stuck in with a drill or hammer and bolster and knocking a brick out of your house wall, it’s a good idea to be aware of any potential pitfalls.
The first and most important rule when removing bricks from a wall is to never remove more than 2 bricks at a time as this can seriously affect its structural integrity.
If you have quite a few to sort, replace 2 and leave them to cure correctly for at least a week before tackling any more. It’s slow progress but at least everything will remain structurally sound whilst doing so.
In terms of the new brick you are using, make 100% sure that any old mortar has been removed from it. If any remains it can cause new mortar to go off too quick and also make fitting the new brick even trickier.
One other thing to be aware of is if your mortar is lime based e.g. soft as when hammering you should proceed with great caution.
Lime mortar is softer than straight sand and cement mortar and the shocks and vibrations caused by using drills or hammering can easily crack and damage the surrounding mortar.
To these ends, take regular breaks and check all the surrounding joints for cracks and shock damage. If you do discover any then stop straight away.
The only choice you really have then is to continue removing your brick using an angle grinder to cut as much of the mortar or indeed the brick away as possible as this method is quite “low impact”.
One other technique is to use a masonry saw or hacksaw blade to cut along the mortar line, detaching it from the surrounding brickwork. This can be tricky and time consuming but does work well.
If you are not confident in doing this, then it’s best to contact a professional builder to complete the job for you.
Tools and Products Needed for Replacing a Brick
When removing and replacing a brick in a wall you will need to use the following tools and materials:
- SDS drill – preferably, but if you don’t have one a standard power drill will do the trick
- Selection of drill bits – roughly 6 – 9 or 10mm or so
- Bolster chisel
- New brick of the correct size and type
- Cold chisel
- Plugging chisel
- Brick laying trowel
- Pointing trowel
- Pointing tool or short length of hose
- Bucket or wheelbarrow to mix mortar in
- Bucket for preparing the brick
- Sand – ensure it’s the right colour
- Cement
- Mortar dye – if you can’t get the right coloured sand
- Ladder or better still work platform
- Safety helmet
- Gloves
- Eye protection
- Old clothes
How to Remove an old or Damaged Brick and Replace with a new one
Once you have all of your materials together such as the correct replacement brick and you have also formulated a matching mortar mix, it’s now time to get started with actually replacing your broken or damaged brick.
NOTE: If you are just replacing a brick because it is stained then it’s worth thinking about removing the brick in one piece and turning it around so that you can use the un-marked inner face. Removing it in one piece without damage is a tricky job, but it’s worth considering.
Step 1 – Preparing the Replacement Brick
The first task is to get yourself a bucket and fill halfway with water. Next, place the replacement brick in the bucket, ensuring that it is fully submerged.
This is so that once you have applied mortar to it and it’s in place in the wall, the surrounding bricks don’t suck all the moisture from the mortar too fast. If it does then it may not adhere to the brick very well and due to this not hold it in place, causing it to become loose.
This is mainly just a precautionary step. In most cases there will be enough moisture in the surrounding brickwork to prevent this but it is certainly good practice.
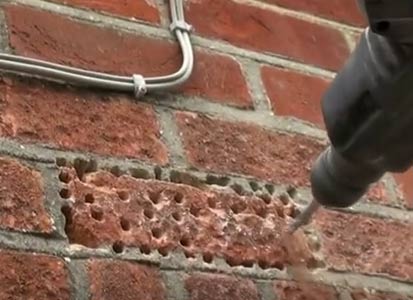
Step 2 – Drill out old Mortar
Before you start, get yourself a pair of safety goggles and put them on! This is a must! You will be wearing these for the duration of the job!
Drilling and chiselling bricks can cause shards to fly off in all directions and easily end up in your eye! Also, a pair of gloves and old clothes are a good idea.
For this you will need a decent drill (preferably SDS) that should be at least 800W. For this size and spec drill you should be fine to use an 8mm drill bit but for anything less you will need to use a smaller bit, around 6-7mm to prevent putting too much strain on the drills motor.
Start by drilling out the old mortar around the outside of the brick. Bunch the holes up as close as you can as this will save on hammering later on. Drill all the way around the outside until you have come full circle.
When drilling, be careful not to drill too close to the surrounding bricks as the bit can easily slip or skew off causing damage.
As we have mentioned, it’s also possible to use an angle grinder to cut away the mortar but unless you are used to using one of these devices, we recommend you stick with the drill. Although they are quite a time saver, they are tricky to use in that they can slip, damaging surrounding bricks and they can be very dangerous.
Also, it can be difficult to keep an eye on the cutting disc when making vertical cuts and where you are actually cutting. This can lead to you easily cutting into surround bricks, again, causing damage.
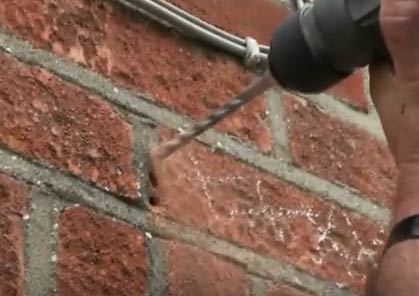
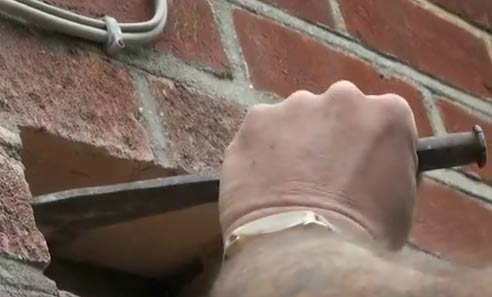
Drilling out old mortar to remove brick
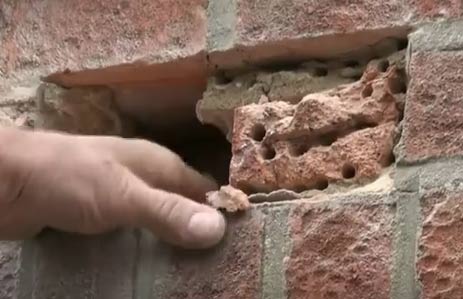
Step 3 – Removing the old Brick in one Piece
If you need the brick in one piece, take a hammer and bolster (2-3 inch should be sufficient or a cold chisel) and start knocking out the mortar surrounding it. Do the sides first, then the bottom and finally the top.
If things start to get a little tight for the bolster or you need to get into tighter areas, swap to a plugging chisel.
Once all the mortar has been removed the brick should be loose. Wiggle it around a bit to loosen it fully and then jiggle from side-to-side, pulling forwards as you do so until it comes out. You can use your bolster chisel also to lever it out.
If you are re-using it you will now need to clean all of the old mortar off. This is not the nicest of jobs and as you may have guessed, involves knocking it all off with a hammer and bolster. More information on this can be found in our cleaning bricks project here.
Old mortar drilled out ready for brick to be removed
Step 4 – Removing a Brick by Breaking it up
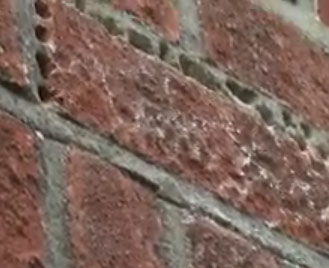
If the brick is not needed or past being of any use through damage, the best and easiest method is to drill it full of holes, break it up and then knock it out with a hammer and bolster.
As above, drill as many holes in the mortar as possible, but don’t start chopping it out just yet, you will need to drill the brick first.
Brick drilled full of holes ready for breaking up with bolster
Start at one side (your choice which side) and work your way across, keeping the holes as close together as possible as this will save on hammering time. Once you have drilled as many holes as you can, pop the drill down and get your hammer and bolster.
Hold the bolster at a rough 35-40° angle on the face of the brick and start hammering. Work your way across the brick, moving through it in layers initially until larger sections start to come away.
Whilst working, again, be careful of damaging surrounding mortar or brick faces.
It is quite hard work but don’t be tempted to rush as accidents can happen, take your time!
As parts of the brick break away, sweep them to the outside making sure that you avoid any falling into the cavity.
Brick in wall broken up with hammer and bolster
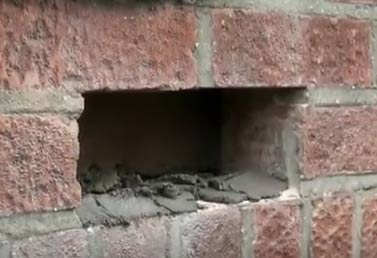
Once all the brick has been removed, use the hammer and bolster to chip of all of the remaining mortar from inside the hole and then use a small hand brush to thoroughly sweep away any remaining dust and debris.
Removing remaining mortar from inside hole
Step 5 – Lay Mortar Bed
Before you start laying any mortar you need to wet all of the brick faces on the inside of the hole. For this, you can use rose sprayer or a paintbrush dipped in water.
Get the edges nice and wet. As said, this is to prevent them from sucking moisture out of the mortar mix and causing it to dry out too quickly before it has set, causing it to become brittle and then crack.
Mix up a batch of mortar to a consistency of 1:5:2 (1 cement to 5 soft sand to 2 lime). If you are not using lime, go with just a 5:1 mix. For help with this, see our mixing mortar project here.
If you are using dye to colour the mix, add this also. As mentioned at the top of this project, it’s a good idea to work out the exact quantity of dye or tint before so that you know exactly how much to use.
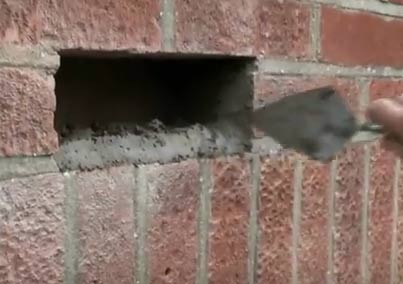
With your mix ready, lay a decent bed of the mortar on the base of the hole with a pointing trowel. Make sure that you cover the entire top of the brick at the base of the hole with a decent covering.
Mortar applied to base of hole
Once the base is prepared, move on to the sides. Again, using your trowel, add a decent covering to the insides of the bricks on either side.
Mortar applied to sides of hole
Step 6 – Apply Mortar to the Replacement Brick and Insert it
With the hole ready to go, take your brick and apply a decent covering to the top of it, making sure that you cover it fully.
Insert it into the hole, wiggling it from side to side to get it in place. Take your time and don’t force it in as this will dislodge mortar from the bed.
Once in place, position it so that it is level and flush at the front with the rest of the wall. You can use a piece of wood or a spirit level across the faces of the other bricks to check this.
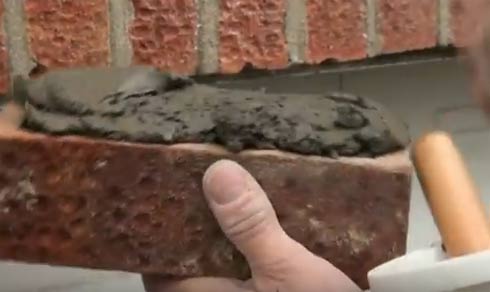
Mortar applied to top of replacement brick ready for inserting into hole
Step 7 – Fill all Gaps with Mortar
The final job now is to fill all the gaps around the sides with mortar. The main aim here is to force as much into the gaps as you possibly can to ensure that they are all full up, but not too much so that it starts falling down into the cavity.
Get some of the mix on your pointing trowel and using its pointed end and side, push the mortar into a gap. Continue this until you cannot force any more in. Work your way around until you’re done.
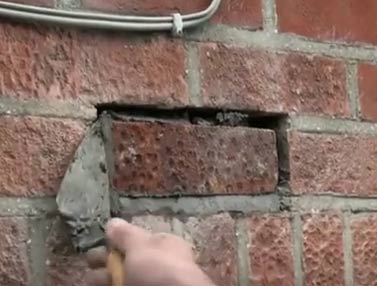
Forcing mortar into gaps around edge to fill holes using pointing trowel
With all the gaps filled nicely, tidy the joints up with the back of the trowel, your pointing tool or a short section of hose pipe until they are smooth and uniform with other joints and once you are happy with this, you’re done! Good work!
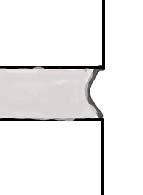
Bucket handle pointing is one of the most common forms of pointing and features a concave dip between bricks
As this process is basically the same as those used to repoint brickwork, if you need some further advice on this then check out our project page on how to repoint brickwork.
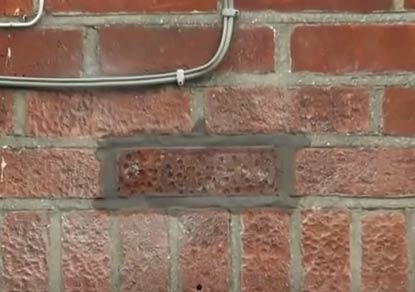
New brick in position in wall
Replacing a brick because it has become damaged, marked or stained causing a visible inconsistency with the rest of the of the wall is a pretty straight forward job and as long as you take your time, there is no reason why you cannot complete it to a high level.