Condensation on toilet cisterns, or toilet sweating as it’s also known and on cold water pipes in your bathroom can cause huge amounts of damage if left unresolved, in the form of rotting floors and more importantly joists.
In this project we take a look at the various methods of fixing toilet cistern condensation issues, read on to find out how.
Problems With Cisterns and Water Pipe Condensation in Modern Bathrooms
Condensation on and under toilet cisterns can cause huge unseen problems. The warm air in the bathroom hits the underside of the toilet cistern and cold water pipes and condenses causing condensation immediately.
This condensation then drips on to the floor and once the floorboards are wet and then eventually soaks down into the joists, over time the whole lot rots and then the floor collapses.
Once this has happened you then have no choice but to replace all the floor boards, joists, floor coverings and often the ceiling below at great hassle and expense.
One other issue that we have seen in recent years is that the modern trend of burying the toilet cistern out of site, often behind a stud wall to create a more minimalist look, but this can cause huge problems due to the issues outlined above.
While this makes the whole bathroom look much neater and tidier, but if the cistern or indeed any cold water pipes running to it are not insulated, then the same condensation issues can occur, only this time out of sight so you have no idea they’re actually happening until the floor collapses.
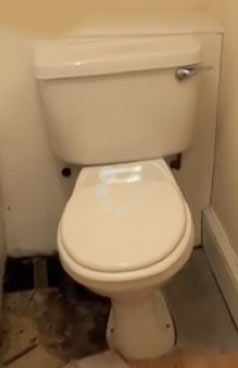
Rotten bathroom floor under dripping cistern condensation
What Causes Condensation on Toilet Cisterns?
Condensation is caused when the water and moisture that naturally exists in the air around us hits a colder surface it then condenses on that surface forming water droplets commonly known as condensation.
The warmer the air, the more moisture it can hold and as bathrooms tend to be quite warm and humid places, this can be quite a lot. Couple this with the fact that toilet cisterns are filled with cold water, this creates ideal conditions for condensation to form.
This is also the case for any cold water pipes as the water that flows through them is often at a much lower temperature than the surrounding air and thus this cools the pipes to the point where condensation quickly forms.
Tools and Products Needed for Insulating a Toilet Cistern
For the purposes of this guide we are going to be insulating our toilet cistern, so in order to successfully do so, you will need the following tools and products:
- Yoga mat
- Suitable sealant glue for sticking mat in place
- Tape measure
- Scissors
- Range of spanners
- pair of pliers (if cistern retaining nuts are tight)
- Sturdy bench to work on (if removing the cistern)
- Flat blade screwdriver (for turning off isolation valve)
- Old rags or sponge
How to Stop or Reduce Condensation on Toilet Cisterns and Water Pipes
If you suffer from condensation issues in your bathroom on or around your water pipes and toilet cistern, before any heavy and costly damage is caused it is essential that you put a fix in place to prevent any floors or joists rotting out.
Below we outline several different solutions for curing condensation on both toilet cisterns and water pipes.
Boxing in Pipes
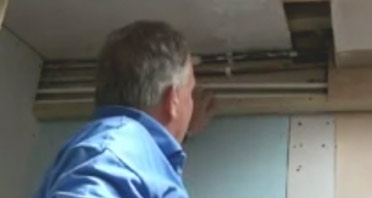
Use boxing and insulation to warm cold water pipes
If the condensation problem exists in your bathroom or toilet, boxing in the pipes where ever possible can help. This might warm the water going into the cistern slightly allowing less condensation to form.
Before any boxing in is done, make sure you lag the pipes and/or place insulation inside the boxing also to help keep as much warmth in as possible. You can find out more about pipe boxing in this project.
And if you want to know how to lag your pipes correctly, see our pipe lagging project here.
The hot humid air from the room condenses on the colder water pipes and underside of cistern so any insulation you can use will make things better.
Boxing on it’s own however can be dangerous as you can no longer see the condensation forming so as said, don’t forget to insulate as well as box in the pipes.
Adding Hot Water to Your Toilet Cistern
There are fittings available in the US called anti-sweat valves which can add a little hot water to your cistern when the cold water enters after you have flushed.
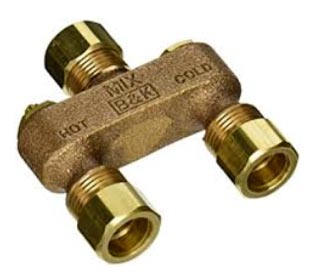
Anti-sweat valve for adding warm water to toilet cistern – Available form Amazon here
On the whole this isn’t a great solution, as I’m sure you can imagine, as it can be expensive and if it is a loo which is not used often, can be a complete waste.
Also, as the warm water cools very quickly when introduced to the cold water, condensation can then still form. With this in mind this option is best avoided, but for completeness, we have to mention it.
However if you do fancy trying this then the anti-sweat valve can be achieved by connecting your hot water basin or bath supply to the water feed as it enters the cistern.
The hot feed should be controlled by an in line service valve (such as that used on a washing machine hose) which will allow you to turn down the amount of hot water mixing with the cold as it enters the cistern.
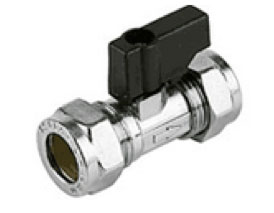
Add hot water to toilet cistern via a service valve
Remember, the cistern only needs to be at the same temperature as the air outside to avoid condensation.
Ventilate the Toilet or Bathroom
The universal answer to condensation in bathrooms, whether it is on the cistern, the pipes or the tiled walls is of course to ventilate the room to keep everything at a fairly equal temperature but the problem still exists in small bathrooms; therefore we need to make the surface of the cistern warmer and this can be done in a relatively simple way.
Extractor fans will not only remove foul smells from the bathroom but circulate the air at the same time. This draws the hot air up to the fan where it can escape without condensing.
It is important to ensure you have some fresh air entering the bathroom regularly, as with every other room in the house.
Regular air changes avoid condensation much more easily than any other method. Opening the windows at least once a day is effective insurance against condensation.
Also, it’s a good idea to keep a window open when showering or bathing as well as using an extractor fan. This will also allow some of the hot humid air to escape out the window along with being sucked out by the fan.
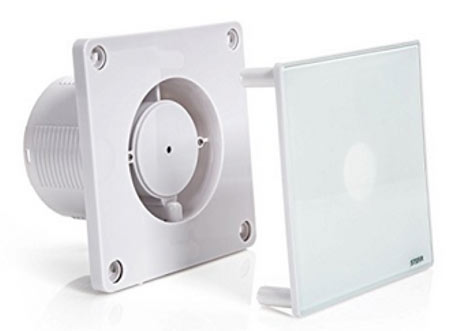
Condensation can be reduced by extracting the warm, humid air – Available here form Amazon
The DIY Doctor Method for Curing Condensation on Toilet Cisterns
As this is an issue that affects many homes around the country, here DIY Doctor we decided that we would sit down and come up with a proper solution and we feel that we have and this comes in the form of actually insulating the inside of your toilet cistern.
This isn’t just something we came up with over a lunch hour, this is something that we have trialled in our own houses and in some customers houses and have found it to be very effective.
Step 1 – Purchase a Yoga Mat
The very first job to do is to buy a yoga mat! They can often be bought at car boot sales and (after the onslaught of new year’s resolutions regarding losing weight, getting fitter etc.), most supermarkets and sports shops and websites like Ebay and Gumtree.
Go for the thin, very dense foam kind, they’re normally around 10 – 15mm in thickness.
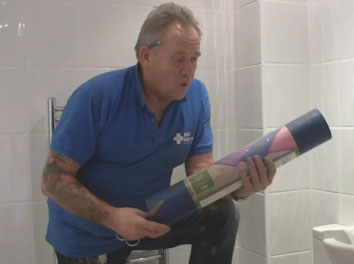
Toilet cistern condensation countered with a yoga mat
Step 2 – Turn off the Water
Next, and this is one of the most important points, turn off the cold water via the isolation valve if you have one. This should be on the pipe somewhere, normally where it enters the room or not far from the cistern itself.
If you don’t have an isolation valve, turn the water off at the mains stopcock. Once turned off, flush the toilet a few times to empty the cistern and clear the pipework.
While doing this, if you don’t have an isolation valve this is the ideal time to fit one to make any future work easier. There is an excellent project, complete with video, on fitting and isolation valve here.
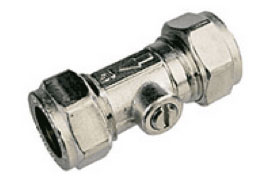
Use isolation valves to turn water off to toilet cistern
Step 3 – Clear out the Cistern
As we have said above but if you haven’t done it yet, flush the cistern to remove as much water as you can then, and using a sponge or rags etc., wipe out the cistern until it is completely dry. Then use a hairdryer to warm up the inside.
You can strip out the contents of your cistern, or simply work around them, but in all honest it is easier to remove everything, so you have some space to work in.
Remove any removable parts, such as the flush unit from the cistern. These can easily be refitted after your mat is in place.
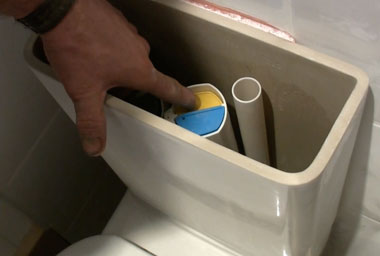
Get to the cistern parts by removing the flush unit
It’s also an easy job to remove the cistern from the toilet entirely. This will make it much easier to work on. Simply disconnect the incoming water supply pipe and then the two nuts that attach the cistern in place underneath either side of the back of the toilet bowl.
See the video on replacing a toilet in this project here to see how this can be done. Sponge out last of water and dry the inside of the cistern.
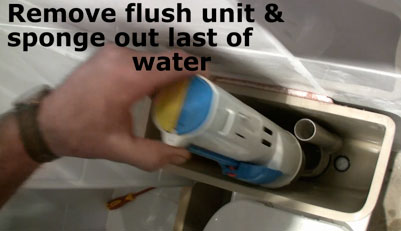
Flush pipes can be removed from toilet cisterns
Step 4 – Cut and Stick Mat in Place
Once the cistern has been gutted out you can now start cutting and sticking the mat in place.
Measure each section of the cistern, the front, back, both sides and the base. You may find it easier to make a template of each section, especially if your cistern is shaped.
Once all of the sections for each side of your cistern have been cut to size they can now be glued in place.
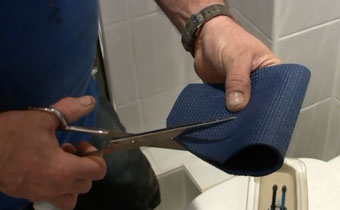
Cutting yoga mat to line toilet cistern
For things to stick correctly, the inside of the cistern needs to be completely dry for this to work properly.
Once stuck in place you need to make sure none of the mat fouls any of the moving parts of the cistern.
Stick them in place using a suitable waterproof glue or sealant. We advocate the use of a sealant called Forever White which is excellent for this purpose.

Excellent bathroom sealant Forever White, ideal for sticking mat in place
When your toilet cistern is lined it should look a little like this. Leave it for 8 to 10 hours for the sealant cure completely.
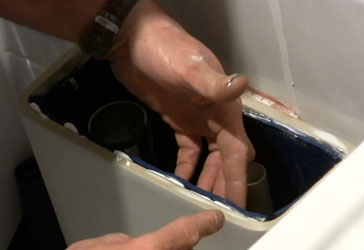
Sticking mat in place on inside of toilet using sealant
The yoga mat acts as insulation on the inside of the tank which gives the outside an opportunity to warm up. The cold water within the cistern will find its way between the walls of the cistern and the inside of the yoga mat. This thin film of water will warm up quickly and will keep the outside of the cistern warmer.
It is vital therefore, that you use a sealant which will definitely hold the yoga mat in place. There is just no point in using a cheap sealant at the yoga mat will come unstuck which will not only allow your cistern to start sweating condensation again, but it could foul the moving parts of the toilet.
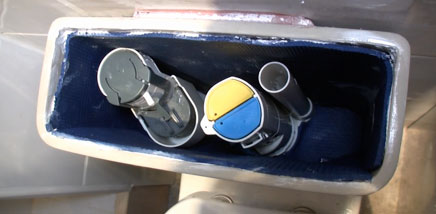
Inside of toilet cistern lined with yoga mat
Step 5 – Replace Valves and Reset Float Valve if Needed
Once the mat has fully dried in place you can then go ahead and reassemble the cistern.
When reassembling, make sure that any seals are fully in place and that everything is flat and level on surfaces as the slightest gap will leak.
When doing up any retaining nuts, ensure they are tight, but not too tight as over-tightening them can cause them to leak.
When you sit the cistern back on the bowl ensure that you have replaced the rubber doughnut that sits between the cistern base and the toilet bowl inlet.
Once You may need to reset your float valve if you have the older type of cistern (see our cisterns and tanks project) because the cistern will now hold a little less water.
Step 6 – Refil Cistern and Test
Once everything is reassembled and the water supply fully connected, turn the water back on and allow the cistern to fill up. Watch it as it fills to ensure the fill valve is set correctly and it doesn’t overflow.
As it’s filling, closely check the incoming water supply for any leaks. If there are any, gently tighten the coupling nut.
Once the cistern is full, again closely check the retaining bolts that hold the cistern to the bowl on either side for an leaks and tighten if needed.
Finally, periodically flush the toilet and allow it to refill and monitor. If all is well you should now be condensation free.
General Tips for Reducing Condensation Levels
As we have said, condensation is a problem for the whole bathroom and not just for the toilet cistern or water pipes so here follows some general tips to follow in order to help reduce overall condensation levels in the bathroom:
- Always shower or bathe with an extractor fan on
- Always shower or bathe with a window open
- Ventilate the room space well throughout the day
- During colder months, heat the room. Fitting a TRV to any radiators can help
- Keep trickle vents open if you have them fitted to your windows
- Lag any and all pipework and box it in
- Insulate and voids where possible
Avoiding Condensation on Cold Water Pipes
Cold water pipes are, obviously, colder than the warm, humid air in the bathroom and as such are prone to just as much condensation as the cistern itself. This problem can be effectively reduced in a couple of ways other than the boxing in method we spoke about at the top of the page and the tips above.
- Method 1 is to lag the pipes in the bathroom just as you would if they were in the loft. There is not always the room for this underneath a toilet cistern but if there is the lagging can be disguised by painting it the same colour as your bathroom walls or skirting
- Method 2 takes up a lot less room but is not quite so effective. It is however, considerably more attractive! The tubes in the image are called pipe snaps and they are pre-curled strips of plastic which can be cut to length easily as shown in the video. They simply clip over the pipe and make it just a touch warmer and less prone to condensation
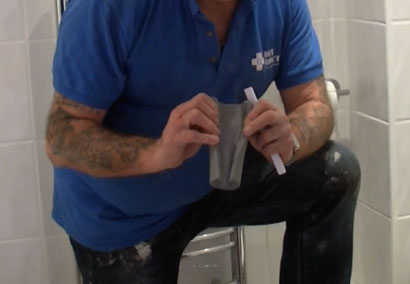
Lag the bathroom pipes with 15mm pipe lagging
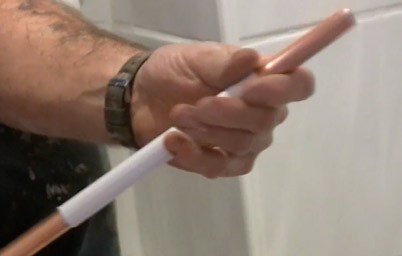
White pipe snaps to hide and warm copper pipe
Solving any condensation that forms on your toilet cistern is an important job as, despite the fact it cuts down on you having to constantly wipe off the cistern when condensation forms, it also prevents and potential rotten floors, joists, ceilings etc. and the associated hassle and cost that this brings.


