Mitre saws can be both hand operated and power operated. The power models of mitre saws use a high speed disc blade to cut material. Before using a power mitre saw you must first make sure your saw is firmly fixed to a work bench or located on a stable work stand, a high speed revolving cutting disc can be a dangerous device if not used correctly.
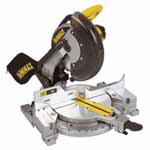
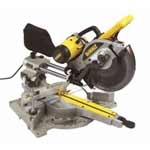
Tabletop mitre saw
You can find out more about all the tools shown in this project or purchase from our toolstore. You may also want to see:
- Our project on cutting worktop mitres
- Our project on angles used in carpentry
- Our project on cutting a mitred joint
- Our project on putting up coving
- Our project on using a worktop mitre jig
- Our project on fitting architrave to door frames
When using a power mitre saw the blade engages instantly when switched on so be prepared for this. Make sure the blade guard is down at all times.
If the item you are cutting is too long (or heavy) for you to handle safely, make sure you have a person to help or use roller support stands as shown below
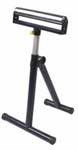
Roller stand for supporting long timbers
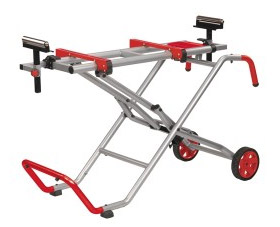
Collapsable mitre saw legstand with wheels
Most new model power mitre saws come with a blade guard that retracts when the cutting arm is lowered into the cutting position. The material you are cutting can be clamped in position or held firmly in position, if in doubt clamp the item that is to be cut. Your fingers are very precious!
Types of Power Mitre Saw
This kind of Miter Saw is usually called a chop saw and now is available in 4 different formats:
Standard Chopsaw
This saw will give you a straight cut through timber. The depth of the cut (I.E. The largest timber it will cut in one stroke) is equal to 20mm less than half of the blade diameter. For example a 215mm blade will cut a timber 90mm wide in one stroke.
Chop saw for straight cuts through timber
Compound Mitre Saw
This saw will be able to also do all the cuts a standard chop saw can do, but with the added feature of being able to lay the blade to one side to create another angle of cut for the mitre mainly for aid of producing skirting joins, boxing in, and MDF work (check our cutting a mitre joint project).
Compound mitre saw
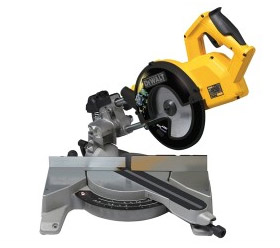
Sliding Compound Mitre Saw
This version can reproduce all of the other cuts of the Compound Saw but with the added feature of being able to extend the cutting width by sliding out on a fixed rail. This saw can be used for cutting wide timbers laid flat on the saw base.
Sliding compound mitre saw for long mitre cuts
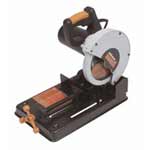
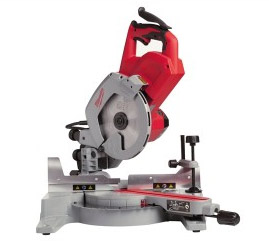
Dual Compound and Cross Cut Mitre saws
This version of the mitre saw can produce all the other cuts of the previous saws, but with the added extra of the cutting blade being able to flip to both sides making opposing mitre cuts able to match with great detail.
Cross cut miitre saw
The more operations a saw does, the more expensive it is to buy.
Setting up a Jig Block for Cutting Mitre Joints
Chop saws are ideal for cutting many timbers to the same length.
If you need to cut quite a few pieces of timber to the same length then it is well worth your time setting up a jig block
This can be achieved by fitting a jig block to your work bench at the required distance to the blade and simply butting your timber up to it every time you make a cut.
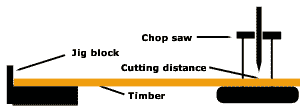
Jig block for cutting timber to the same length
Manual Cutting Mitre Saw
The manual mitre saw is basically the early pre-runner to the machine version, a plate for wood to be placed onto, 4 upright sliding rods which allow a saw blade to be guided while cutting through a material and a ratchet system which can be adjusted to cut at a pre set angle of degrees.
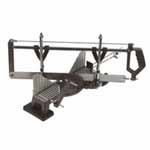
Hand mitre saw for manual cutting
This device would normally be fixed by screwing to a wooden horse or work bench prior to use. The blades are also exchangeable for cutting through different materials.
Using a Mitre block
A mitre block or box is made of plastic or wood, which guides a hand saw (through pre cut grooves) on the correct angle to cut repeat mitres.
The timber is placed in between two raised sides of the box and the saw cuts at preset angles of (usually) 45°, 66°and 90°. Cheap and cheerful but can help with simple tasks.
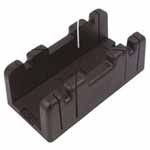
Mitre block for cutting mitre angles
When you have finished using a Mitre Saw it is always advisable to clean all dust and dirt from your machine, then oil it. Build up of debris in the moving parts of your Mitre Saw will give you incorrect cutting angles or sliding parts that will not work correctly when required.
As always DIY Doctor always recommends the use of safety goggles, gloves and dust masks when using any device which creates dust and debris and has sharp moving components.