Controlling air flow and ventilation in your home is critical to keeping moisture and condensation in check and also controlling and preventing rot in timbers and also potential dangerous black mould growth.
One of the main ways this is achieved is by using air bricks to ventilate cavity space so in this guide we look at all aspects of air bricks and how they are installed.
What Is an Air Brick?
An air brick is a specially designed brick with built-in holes that allow fresh air to flow into spaces beneath suspended timber floors. This airflow helps prevent damp, mould, and rot by stopping moisture from building up in enclosed areas.
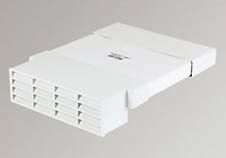
Cast iron style air vent
Homes with suspended floors have a small gap beneath the ground floor. Without ventilation, stale, damp air can collect here and damage the wooden floor structure above over time. Air bricks let this air escape and bring in fresh air, keeping the space dry and protected.
If airflow is blocked or missing, problems like timber decay and condensation can quickly develop, often going unnoticed until serious repairs are needed.
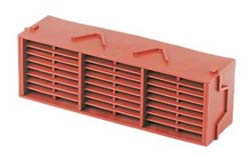
Older air bricks were made from clay, while modern versions are typically plastic. Plastic air bricks are stronger, easier to fit, and often allow better airflow than traditional clay designs.
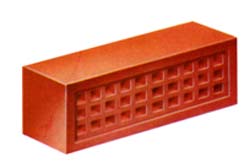
Clay air brick
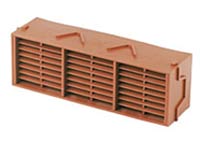
Plastic air brick
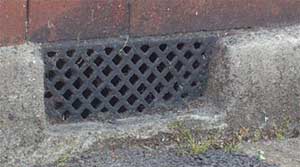
Some properties also use cast iron grilles instead of air bricks. These serve the same purpose, just with a different look and material. Air bricks are also sometimes called vent bricks.
What Are Air Bricks For?
Air bricks are essential for ventilating homes with suspended floors, such as timber or beam and block systems. These floors don’t sit directly on the ground and leave a hollow cavity space beneath, which needs proper airflow to stay dry and free from damp, rot and mould.
Without ventilation, the air under your floor can become warm and humid, especially during the day when your heating is on. When the temperature drops at night, moisture in this trapped air turns into condensation on cooler surfaces like floor joists and boards.
Over time, this condensation can soak into the wood, leading to rot, mould, and long-term structural damage, all the while hidden beneath your floor.
The best and only reliable way to stop this is ventilation. Air bricks allow fresh air to move through the floor void, helping to balance temperature and reduce moisture build-up.
Every home with a hollow floor should have working air bricks in the external walls. However, these vents can become blocked by dirt, debris, or home improvements. It’s important to check they’re clear and that there are enough to ensure a steady flow of air.
Want to learn more about preventing damp? Check out our full condensation guide here.
What Happens Without Ventilation?
With the absence of any ventilation, numerous issues can easily occur, all of which normally result in one or all of the following issues: damp, rot and mould.
Unfortunately where any of these issues are present, significant costs can be involved in putting them right.
As you are unable to physically see into the void below a suspended floor to inspect it, how do you actually know that any damage is occurring? In most situations you may notice one or some of the following issues:
Rot in Timber Floors
When air can’t flow freely beneath your floor, trapped moisture leads to condensation and over time, this can cause serious damage.
At best, you may see signs of damp or mould. But in worse cases, condensation triggers dry rot, a fungus that eats away at timber and often needs professional treatment.

Dry rot in a timber floor void. Image taken from a manor house in Warwick where dry rot caused a full floor collapse – Courtesy of Property Repair Systems
Rot often starts where joists rest on support walls which can be cool spots with little airflow. To check for damage, press a screwdriver into the timber. If it’s flaky or soft, the timber may be rotting. If the centre feels solid, you might have caught it early. Applying a combined fungicide and insecticide can help stop it from spreading.
If the timber is spongy or crumbles easily, the rot has gone deeper. In that case, the affected sections should be replaced with new wood.
You can either hire a professional, such pros can be found here at the Property Care Association, or tackle minor repairs yourself.
If most of the joist is sound, you can repair it using Joist End Repair Plates or by splicing in new timber with a Timber-Resin Splice system. Learn more about timber repairs here.
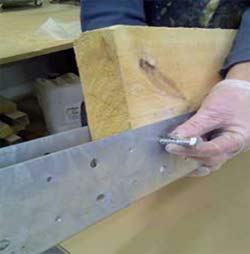
Joist end repair plates and spliced timber used to replace rotten sections – Courtesy of Property Repair Systems
In one Forest Hill, London home, we uncovered rotten joists beneath old Victorian floorboards. Although air bricks were installed, they were blocked by garden debris. Restoring airflow and replacing the damaged timber solved the issue. See the full project here.
Creaking Timber Ground Floor
A creaking timber floor can be more than just an annoyance, it may be a sure sign of problems with the joists, often caused by moisture, rot, or sinking supports, which is very often due to lack of ventilation in the floor void.
Timber floors are usually held up by joists, which rest on sleeper walls built into the subfloor. To keep air circulating and prevent damp, these walls are often constructed using a honeycomb brick pattern that allows airflow through the structure.
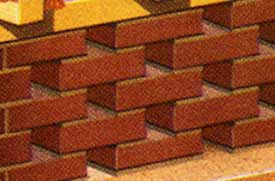
Honeycomb sleeper wall supports the joists while allowing air to move freely
On top of these walls, a timber wall plate is laid to secure the joists in place.
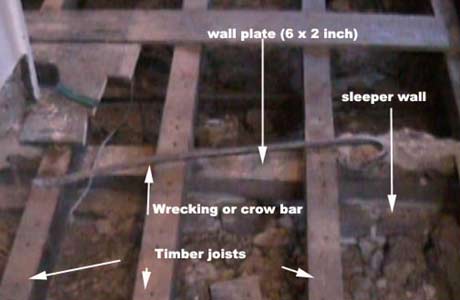
Timber joists fixed to a wall plate laid on the sleeper wall
Over time, poor ventilation, often due to blocked or missing air bricks, can lead to damp and rot. The wall plate may decay, or the mortar beneath it can crumble. When this happens, the plate may sink under the joists’ weight, causing the floor to flex or bounce like a trampoline.
If your floor creaks or feels springy, the wall plate may need replacing. This is a structural issue and should be addressed as soon as possible. See our guide on timber repairs here for step-by-step help.
Condensation, Damp and Mould
When there’s not enough ventilation beneath suspended timber floors, moisture can quickly build up, leading to serious long-term problems. Condensation in the floor void often goes unnoticed until visible damage appears. Recognising the early signs is key to preventing costly repairs.
Musty smells are often the first clue. Damp, stagnant air trapped under the floorboards creates a distinctive odour that seeps into rooms above.
Another warning sign is warped or uneven floorboards. Moisture causes timber to swell, twist, or lift at the edges. In some cases, floors may start to creak or feel soft and “springy” underfoot.
You might also notice black mould or mildew forming around skirting boards, lower walls, or in corners near exterior walls. These areas are closest to the damp floor void and tend to attract condensation.
In more advanced stages, dry rot or wet rot may develop in the timbers supporting your floor. This often starts in hidden areas where airflow is blocked, such as behind built-in furniture or in poorly ventilated corners. Joists can become soft and brittle, leading to structural issues that require urgent attention.
Do Air Bricks Help With Condensation and Mould?
Yes — air bricks play a vital role in reducing condensation and preventing mould growth, especially in homes with suspended timber floors. These small but essential ventilation bricks allow fresh air to flow through floor voids, stopping damp air from settling and causing damage.
Condensation forms when warm, moist air meets a cold surface, such as floor joists or the underside of floorboards. Without enough airflow, this moisture becomes trapped, creating the perfect environment for mould spores and timber rot to develop. Over time, this can lead to black mould on internal walls, musty smells, and even structural damage.
Air bricks improve ventilation by letting outside air circulate freely beneath your floors. This movement helps to regulate temperature and keep humidity levels down, making it much harder for condensation to form in the first place. In effect, they provide a natural, passive way to dry out enclosed spaces without the need for mechanical ventilation.
Benefits of Installing Air Bricks
As we have discussed, air bricks offer several benefits when it comes to ensuring the health of a suspended timber floor, however they also have numerous other benefits:
- Improves Underfloor Ventilation – The number one benefit of the air brick. It helps in reducing stale air build-up and helping prevent moisture-related damage.
- Reduces Condensation – By increasing airflow in enclosed spaces, air bricks help control humidity levels, reducing the chance of condensation forming on surfaces like floor joists and wall bases.
- Prevents Mould Growth – Proper ventilation disrupts the damp conditions mould needs to grow, including black mould.
- Protects Timber Structures – Moist air can cause timber to swell, warp or rot. Air bricks keep wooden joists and wall plates dry, helping to retain their structural strength.
- Eliminates Musty Smells – Trapped damp air often leads to unpleasant odours in older homes. Air bricks allow the space to breathe, keeping the air fresher indoors.
- Cost-Effective Solution – Compared to mechanical ventilation systems, air bricks are cheap, affordable, easy to install, and require little maintenance, making them fantastic value.
- Helps Meet UK Building Regulations – Many renovation and extension projects require adequate underfloor ventilation. Air bricks help homeowners stay compliant with UK standards.
- Reduces Risk of Dry Rot – Dry rot thrives in damp, unventilated conditions and air bricks help break the moisture cycle.
- Blocks Pests When Fitted with Grilles – When installed with mesh or purpose-built covers, air bricks can improve ventilation while preventing rodents or insects from entering underfloor spaces.
Common Concerns About Air Bricks
If air bricks are so effective, why not build entire homes with them? The answer lies in balance — while they’re great for ventilation, they can introduce unwanted draughts if not properly managed.
Many homeowners block or remove air bricks to stop cold air rising through floorboard gaps, often without realising this can trap moisture and cause extensive and costly damage. Blocking just one side of the house, or building over vents with extensions like conservatories, is a common mistake.
Airflow must pass through the underfloor space, just like opening a window and door creates better air movement than a window alone. To maintain this cross-ventilation, ensure air bricks are installed on all sides of your home and kept clear.
If your floor feels draughty, don’t block the vents. Instead, seal gaps between floorboards, see our blocking floorboard gaps guide here. You can also fit air brick cowls, which deflect wind while still allowing air to circulate.
Gaps between wooden floorboards can cause draughts – fill them instead of blocking air bricks
To stop pests like mice getting in, mesh covers are available for air bricks, but they must be kept clean as fine mesh can clog easily.
In flood-prone areas, air bricks can allow water to enter. Flood covers are available to prevent this, but they should only be used during a flood risk and removed afterwards to restore airflow.
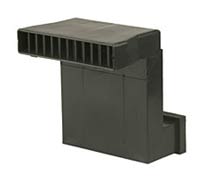
In damp conditions, ventilation is even more important. Telescopic air vents are a smart solution as they lift the air intake above ground level while still allowing air to flow under suspended timber floors.
Telescopic air vent raising the level of airflow for better underfloor ventilation
Can you Block up Air Bricks?
In pretty much every case, you should never block up air bricks. They are essential for allowing fresh air to flow underneath suspended timber floors, helping to prevent moisture build-up, damp, and timber rot. Blocking them, even partially, disrupts ventilation, which can lead to serious structural problems over time.
Air bricks are especially important in older UK homes with suspended timber ground floors. Without airflow, the space beneath the floor can become humid, encouraging mould, condensation and even dry rot. This can damage joists and floorboards, leading to expensive repairs.
If you’re unsure whether your air bricks are doing their job or contributing to a draught, consider fitting vent cowls or telescopic air vents, which manage airflow more effectively while keeping your home protected from the elements.
Common Air Brick Sizes
Choosing the right size air brick is key to proper underfloor ventilation. The most common air brick sizes in the UK are:
- 215mm x 65mm x 50mm (9″ x 3″)
- 215mm x 140mm x 50mm
- 215mm x 215mm x 50mm
For most homes with suspended timber floors, the 215mm x 65mm x 50mm size is usually enough, as long as you install enough of them, evenly spaced around the property. Correct spacing is vital for good airflow (see our ventilation spacing guide below).
Air bricks come in various designs including rectangular, square, or louvre openings. In older properties, especially Victorian homes, you may also find decorative cast iron versions that combine function with character.
What If Your Floor Is Low and the Air Brick Is Too High?
Air bricks should always be above ground level outside so that fresh, outside air is fully accessible, but must also ventilate beneath your internal floor to work properly.
In some homes, especially older ones, the ground outside may have been raised, putting the ideal air brick position below the current ground level. This presents a major problem!
To solve this, you can install a ‘Z-shaped’ periscope vent sleeve. This clever fitting channels fresh air from above ground down below the floor level where it’s needed, even if the vent sits higher than the internal void.
Z-shaped sleeve raises the air intake above ground while venting below your floor
To fit one, dig down to the correct height and cut into the wall at least 50mm below the floorboards or ideally just below the joists. The sleeve is built into the wall so the top is flush with the outer brickwork, and the lower section drops air into the floor void.
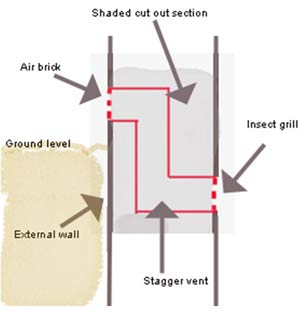
Wall cross-section showing how a Z-shaped sleeve directs airflow under the floor
If you’re building something like a conservatory or extension that blocks existing air bricks, you must extend the ventilation using 100mm (4 inch) plastic pipes laid side by side. These act as ducts, keeping airflow moving under the house.
Make sure the pipes slope slightly towards the outside to avoid water collecting and entering your floor void.

Use drain pipes to carry ventilation through new construction, keeping airflow under the original floor
Tools and Products Needed to Fit Air Bricks
In order to successfully fit air bricks, you will need the following tools and products:
- SDS drill (if dealing with solid wall)
- Selection of long drill bits (if dealing with solid wall)
- 10mm masonry drill bit
- Core drill of correct size (if dealing with solid wall)
- Masonry rake bit
- Chosen style and number of air bricks
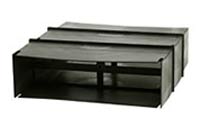
- Lengths of air brick duct or telescopic ducts
- Cavity tray (if needed)
- Periscope vent (if needed)
- Sand
- Cement
- Selection of trowels
- Bucket/barrow to mix in
- Hammer
- Bolster and selection of chisels
- Pointing tool
- Tape measure
- Marking pen/marker
- Vacuum (for cleaning hole out)
- Dustpan and brush (for cleaning hole out)
Air Brick Installation
There are several different ways that an air brick can be installed and which method is used will depend on on the type of wall it’s being installed in; either solid or one with a cavity.
In respect to this, here follows the correct method for each type of wall.
Installing Air Bricks in Solid Structures
Firstly, we will start with how to set an air brick in a property or home with a solid brick, block or stone wall e.g. one with no cavity.
Step 1: Work out Correct Spacing
The very first step to undertake is to work out exactly where your air bricks are going to go around your property and how they are going to be spaced. This will also tell you exactly how many you are going to need.
The recommended spacing for air bricks is 1800mm, which in other words means there should be an air brick every 1.8 meters or 6 foot on both sides of the house.
It’s important to note also that any air bricks should line up on opposite sides of the property as this will ensure decent air flow.
Another point to note is that it will depend if you live in a detached house or terraced one as to whether you will have bricks on opposing walls.
Step 2: Select the Correct Type of Air Brick
Once you know where your air bricks are going to go and how many you will need, you can then choose them and there’s quite a choice.
Today, modern air bricks are available in a great range of colours, styles and types including clay, cast iron, plastic etc.
In many ways the type of property that you have will dictate what type of air bricks you go for. Modern will likely be clay or plastic, period, probably cast iron.
Plastic air brick providing a little more strength than traditional air bricks
Step 3: Cut Hole in Wall
Before we start, it’s worth mentioning that because the hole you are making is very small in relation to the volume of total bricks in the wall you do not need to worry about compromising the stability of your wall while you are fitting this new air vent. No lintel is necessary over an air brick, air brick construction is such that they are as strong as normal bricks.
This is where the work starts to get serious; It’s time to start cutting some holes in the wall.
If you are dealing with bricks, this is easier and simply involves you chiselling or drilling out the mortar around a brick and then pulling it free.
The final step is to then use a chisel or rake to remove any remaining mortar, leaving you with a clean hole, ready for your new air brick.
However, if you have a solid block or stone wall this is a little trickier and more involved.
The easiest and most straightforward method is to use a substantial SDS drill and long drill bit or even a core drill bit and drill a series of holes through the wall the rough size of your air brick and mortar lines and then using smaller drill bits and/or a chisel to square the holes off.
This can be a fair amount of work and also quite tricky and tight work trying to get into the hole you’re making and get it square, especially if you have quite a few to do, however it just needs to be done.
As you cut your holes, ensure that they slope down towards the outside ever so slightly to prevent any water from running back in to the vent.
Step 4: Insert Ducting
Having cut a hole through the wall, instead of leaving just open space between the air bricks, where dirt and debris can easily collect and then find its way into your home, you need to insert a sleeve between the 2 vents.
This will also prevent the vents from becoming blocked on the inside!
The correct ducting or sleeve as it’s known can be purchased from most DIY stores or when you purchase your air bricks.
To insert the sleeves, simply measure the total width of the hole, from outside wall face to inside wall face and then the width of each air brick and then subtract this from the total width of hole and this is the size of sleeve needed.
Air bricks should be fitted with a sleeve to ensure good ventilation
Once fully cut to length, now simply push the sleeve through the hole you have made in your wall, leaving enough either side for both air bricks.
Step 5: Insert and Cement in Air Brick
The final step now is to insert and repoint in both of your air bricks, this is a fairly straightforward job that can be seen in full in our pointing and repointing brickwork project.
You may also find our replacing a brick project useful.
In essence it simply involves mixing up some cement to the correct consistence, laying a bed of it at the base of the hole and then adding some to the sides and top of the air brick, positioning the brick in the hole and then pointing up the mortar.
The ducting is then insert form the open side and the process above is repeated for the remaining air brick – Job done!
Fitting an Air Brick in a Cavity Wall
Now comes the method for installing an air brick in a cavity wall e.g. the inside and outside walls of a home that comprise of 2 separate walls; an inner skin and an outer skin with a gap in between.
The method for installing in an air brick in a cavity wall is very similar to that of a solid wall, but this time slightly easier as you don’t have to cut through a solid structure to form your hole.
Step 1: Work out Spacing and Number of Vents
As above, work out exactly where each air brick is going to go in the base of your wall. Air bricks should be spaced at every 1800mm or 1.8m (6 feet) just above ground level.
They should be positioned opposite each other on either side of your home for optimum air flow, all around your home where possible e.g. in a detached property.
This will also tell you exactly how many vents you will need and also what total length of ducting.
Step 2: Choose Vents
Once you know how many vents are needed, you then need to purchase them from your local DIY store.
The style you go for is up to you, however you should go for something that suits the style of your home and your tastes.
Step 3: Form Hole
This is where the work starts! To form your hole the best and most straight forward methods is to use a 10mm masonry drill or mortar rake to drill or rake out the mortar holding the brick in the wall where your vent is going to go.
Remove all of the mortar from all around the brick until it comes loose and then you can simply pull it free form the wall> clean away any remaining mortar from the hole until it is totally clear
Step 4: Insert Vents and Ducting
With your hole formed, measure and cut your ducting to length or if you are using a telescopic duct, pull it out to the correct length.
If you are concerned about air bricks and cavity wall insulation, if cavity insulation is present, then it is not a problem, the same type of ducting should be fitted straight through the insulating material.
Air brick with a duct to fit into a cavity wall
Mix up some new mortar to the correct consistency, see our replacing a brick and also our pointing and repointing brickwork guides for full help on the correct mix to use.
It’s also important to note that when fitting high placed airbricks above the DPC, for any room venting such as for wood burners etc. a cavity tray has to be fitted above the airbrick to prevent moisture ingress.
The cavity tray should be inserted over an air vent where the cavity is bridged as shown in the image below, but we cover this in more detail in our project about wall cavities, so please look there if you are in any doubt.
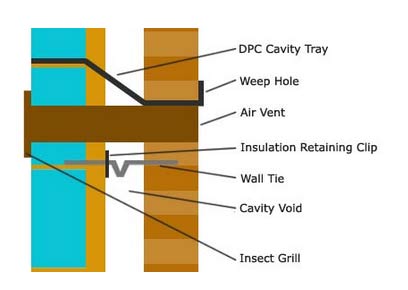
Using a cavity tray above an air brick
Lay a bed of mortar at the base of the hole and then spread some mortar on the sides of the vent and top and then insert it into the hole and then point it up with some further mix.
Insert the ducting from the other side and repeat the above for the other air brick. Once it’s nicely cemented into the wall you’re now done and can continue on for any remaining air bricks required.
How to Maintain Your Air Bricks and Vents
Air bricks are essential for keeping your floor void dry, so regular maintenance is an absolute must to keep them clear and functioning effectively. Check them often and remove any debris, soil, leaves, or rubbish blocking the airflow. A simple brush can help clear the holes and keep air moving freely.
Leaves and dirt blocking air bricks can trap moisture and lead to damp and timber rot
If the outside ground level has risen above your air bricks, you’ll need to either lower the soil or fit a telescopic vent to raise the air intake safely above ground while still venting under the floor.
In severe cases, soil may block the internal side of the vent. If so, lift some floorboards to inspect and clear the space inside the wall to fully restore airflow.
Keeping air bricks clear ensures proper ventilation under your timber floor, helping prevent condensation, damp, and expensive structural damage from rot.
If you are or suspect that you are suffering from damp, mould or rotting issues in and around your floor area, you may very well need to install new or additional air bricks to ensure the follow of air below your suspended timber floors is sufficient enough to prevent issues such as this from occurring.