When working on or around the electrics you are allowed to do yourself at home such as changing switch faceplates it’s essential that you know exactly what type of light switch does what so that, when changing them, you change like-for-like.
With this in mind, this DIY project looks at the different types of light switch and what each should be used for.
Rules and Regulations for Electrical Work
The rules on what you can and cannot do to the electrics in your home are extremely strict, however when it comes to changing light switch faceplates and a few others, you are allowed to do this without the assistance of a qualified electrician.
Don’t take any chances; if you don’t understand the job from start to finish then don’t attempt it, it’s that simple! If you are wanting to add new lights and light switches to an existing circuit or the similar then this is not possible, this will need to be done by a registered Part P electrician.
This is because he/she will have all of the necessary skills and knowledge to test the circuit and then issue a minor works certificate covering the work that’s been done. Failure to do this can invalidate your home insurance!
When working on or around electricity, make sure that the power is off and the circuit that you are working has been isolated. If you have any doubts at any time then you should consult a professional.
It is very important to be safe. Please have a look at our project on electrical safety before you begin any project.
What is a 1 or a 2 gang light switch?
When it comes to electrical sockets and switches, ‘Gang’ describes the number of switches on the plate. They are sometimes called rockers, throws or dimmers, depending on how they operate, but still they just refer to the number of light switches on the plate. It is possible to get more, but it is very uncommon to have more that three in a domestic setting – this would be called a 3-gang switch.
If you have a dimmer switch they are described in the same way; a 1 gang dimmer switch will have a single dimmer on the plate, and a 2 gang dimmer switch will have 2 dimmers and so on.
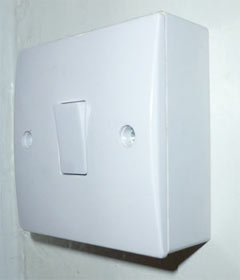
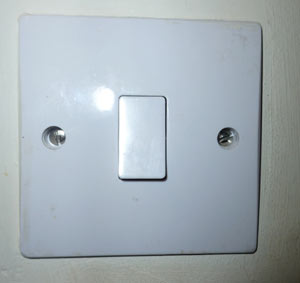
1 gang light switch
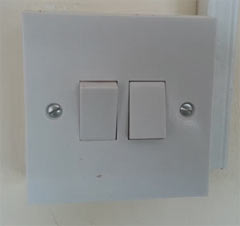
2 gang light switch
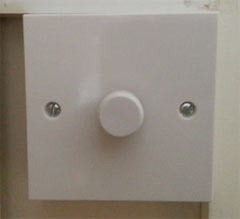
1 gang dimmer switch
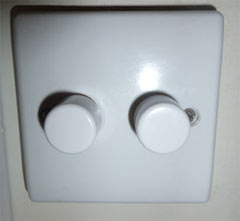
2 gang dimmer switch
A 1 gang switch will control a single lighting circuit, or turn 1 light on and off, with a 2 gang switch you can control two individual lighting circuits, and so on.
However, if you need two switches to control a single lighting circuit, in the same manner that you would have a switch at both the top and bottom of a staircase to control a landing/stairway light, you need to use what’s known as a 2 ‘way’ switch.
It is also possible to install or fit a variation on this theme by combining dimmer and "throw" switches on the same plate. You are then able to set the light to the required ambiance and turn it on and off. The ambiance setting is remembered by the switch but can be altered just like any other dimmer.
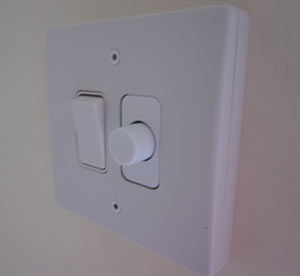
Combined dimmer and throw or rocker light switch
What does 1 way, 2 way and intermediate light switching mean?
There are 3 basic types of switches that are used for domestic purposes:
- 1 Way Switches: If a light switch is ‘1 way’ this means it is just an on/off switch. This is the simplest type of switch that you can get. The single switch controls a single light (or lighting circuit)
- 2 Way Switches: A ‘2 way’ switch means there is another switch controlling the same light. These are often used on a stair case, large room with switches by each door
- Intermediate Switches: If you need to control the lights from three places, say you have 3 entrances to a large room and need a light switch next to each one, you will need an intermediate switch. The light(s) can be switched on and off from anyone of 3 places
On the whole 2 or 3 gang switches will always be 2 way switches. If you are buying switches and don’t know exactly what you need then it is often a good idea to get a 2 way switch anyway.
This is because if you only need a 1 way switch you can still use it by only connecting one of the terminals (L1 or L2) and common terminal. If the switch doesn’t work the way you want it to, you can either turn the switch around or swap the L1 and L2 terminal.
Plate Switches and Ceiling Switches
In this project we have been talking about plate switches which are the most common types of light switch that are used in peoples homes.
A Plate Switch refers to a switch that has the switching mechanism (either a rocker or dimmer) mounted on a face plate. These switches can be flush mounted into a metal box which is sunken into the plaster of the wall. Plastic boxes are placed into plasterboard, or stud, walls. In either case these boxes are called pattress boxes. You can see more information about how to do this and how to cut chases here.
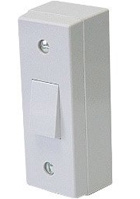
Some plate switches are mounted in plastic boxes on the surface of the wall. This might be because it is impossible to set the switch back or you don’t want to for styling reasons.
Surface mounted 1 gang light switch
In some cases there is not enough to have the traditional square or rectangular plate fitted and the switches need to be mounted above each other, rather than side by site. These are known as architrave switches. These can have rockers or dimmer switches, depending on what you prefer.
Architrave switch
When dealing with bathrooms or “special locations” as they are known, it is forbidden to wire a conventional switch within reach of a washbasin, bath or shower unit, so will need to use a ceiling switch in these circumstances, or put the plate switch outside the bathroom.
A ceiling switch is mounted to the roof and is switched on and off using a pull cord – see our project on how to fit a pull cord switch. This prevents any water or moisture coming anywhere near any electrical source.

Ceiling or pull cord switch
Knowing which switch to use if you are replacing your light switch faceplates is absolutely essential to ensure, once they’re swapped, that everything works as it should do. As the regulations state that you are allowed to replace switch face plates yourself, make sure you have the correct type of switch to avoid any issues.