This product review focuses on the Epoxy Repair Mortar for Tarmac and Asphalt from a company called Rizistal who are manufacturers and suppliers of top of the range, Industrial repair, paint and protect products in the UK.
Asphalt and Tarmac Epoxy Repair Mortar from Rizistal
The review will show that most tarmac paths and drives are not finished with Tarmac right up to the edges and weeds are allowed to grow through the surface where it has not been rolled properly and broken away. It shows that the Epoxy repair mortar will complete this job in a really cost effective and lasting manner.
The resin is much stronger than ordinary bitumen products such as tarmac and will last much longer. The fact that it has a very high strength formula allows it to be spread much thinner than other mortars also. In fact it can be applied in layers as thin as 10mmm and to depths of up to 100mm!
On Site Test of The Asphalt and Tarmac Epoxy Repair Mortar
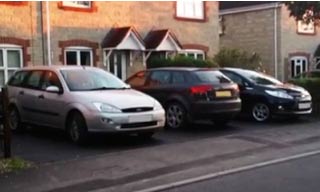
Our product review on the Rizistal Tarmac and Asphalt surface restorer will show that we applied one coat to the surface of a triple parking bay/driveway before we decided to repair the edges of the tarmac with the Epoxy repair mortar. Most tarmac areas are not completed up to the sides of edging stones and around drains as the tarmac equipment, such as rollers etc is simply to big to be used “delicately”. This makes an ideal testing ground for the Tarmac repair mortar and so we set to work.
Parking bays and driveway tarmac breaks away at the edges
Mixing Epoxy Repair Mortar for Tarmac
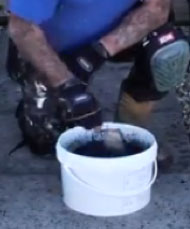
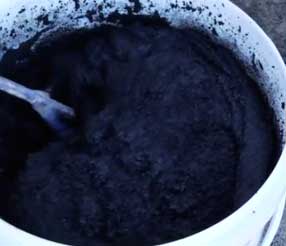
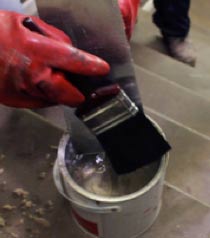
We mixed the epoxy with the hardener (Exact quantities are supplied in the tub) with a mixing paddle until a nice creamy consistency was obtained. We made sure we cleaned out all the cracks and gaps or dirt and weeds and applied the mortar with a pointing trowel. It went in really easily and was creamy enough to be spread very thin where required. The mixing took about 4 minutes in total.
Mixing Tarmac Epoxy Repair Mortar with a mixing Paddle
Is Priming Necessary for the Epoxy Repair Mortar?
When applying the Epoxy Repair Mortar to areas where a very thin application is required, Rizistal recommend that you apply a Tack Coat Primer first, but for repairs of 10mm thick upwards and the surface is relatively solid, no primer is necessary. If the area is a little damp, a tack coat primer can allow you to carry on with the job rather than wait for it to dry out.
For thin coat tarmac repairs use primer and epoxy repair mortar
The working time of Epoxy Repair Mortar for Tarmac and Asphalt
Once the resin is mixed with the hardener you have 20 to 40 minutes to apply depending on the temperature. Our repairs took about 35 minutes initially and there was still some life in the mortar on a fairly warm day. If the mortar is left too long it starts to lose it’s plasticity and becomes very hard to trowel out.
Coverage of Rizistal Epoxy Repair Mortar
You can expect to get a little under hald a square metre from a 20KG pack of the repair mortar when applied at 30mm thick. When you are doing tarmac edgings however, the average depth is about 20mm so a long long run can be achieved with a pack of this size.
Coverage of Rizistal Epoxy Repair Mortar is good
Surface preparation and installation
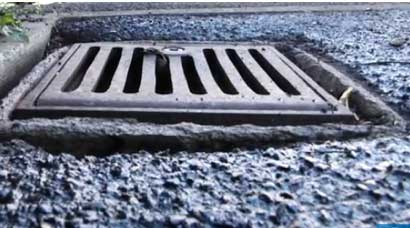
The image below shows just how weeds can penetrate the tarmac surface. We chopped out all the weeds and removed all loose edges with a hammer and chisel. Having done that we swept out all of the loose chippings and kep the crack at a fairly uniform depth of about 25mm.
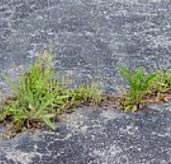
Chop out weeds from edge of tarmac drive – Image courtesy of lawnspot.blogspot.com
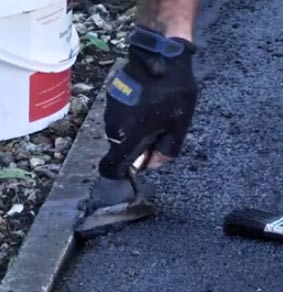
We then used a steel pointing trowel to push the repair mortar firmly into the cracks and trowelled the top smooth. Every now and again the trowel would start to stick so we wiped it off with some Rezistal Safer Solvent which did the trick brilliantly. This allowed for a very smooth finish where one was required.
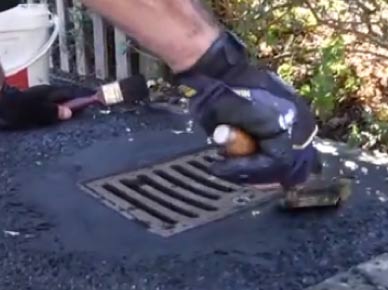
Because of the advanced nature of this product we were able to use an ordinary paint brush to brush out the edges and feather them in with the existing tarmac. While this joint is not exactly invisible, dabbing the brush onto the top of the repair mortar gives it a slightly dimpled effect which blends in really well with the newly painted tarmac surface.

A smooth finish with repair mortar round a car park surface gully
To download the full technical data sheet for Rezistal Tarmac Repair Mortar, click on the link after watching the video.
Curing and Drying Times of the Tarmac Repair Mortar
The repair mortar can be walked on after only 4 hours. Cars can be driven over it after only 8 hours but it is suggested that, wherever possible, the repair mortar is kept dry for 12 to 18 hours. That’s a big call in the English climate so you might want to think about getting some tarpaulins in! This product is well worth the wait.

Epoxy repair mortar can be walked after about 4 hours
DIY Doctors Opinion of the Tarmac and Asphalt Epoxy Repair Mortar from Rizistal
Fantasic. There is no doubt that finishing a driveway or path with the repair mortar really does give a finished job. The surface is waterproof, it will not break up and it blends in with the tarmac surface beautifully. An excellent product from Rezistal.
Tarmac surface fully restores with Rezistal products
We cleaned all of the tools and the roller with the Rizistal Safer Solvent when we had finished. This did the trick perfectly. The Safer Solvent is not as harsh as some White Spirits or Thinners and can be used with relative safety. We would still strongly suggest using all the correct safety gear though.
Rizistal Safer Solvent cleans tarmac restorer from tools
The Doctor’s Rating
Reviewed by: Mike Edwards

(5 out of 5 stars)
Get This Product Now