• Skip to primary navigation
  • Skip to main content
  • Skip to primary sidebar
  • Skip to footer
DIY Doctor

Main navigation

      • All Projects
      • Brick, Block, Masonry and Concrete
      • Damp, Condensation, Rot and Woodworm
      • Doors, Windows and Conservatories
      • Electrical
      • Fencing, Decking, Paving and Patios
      • Floors, Walls, Ceilings and Lofts
      • Garages, Sheds and Outbuildings
      • Gardening and Landscaping
      • General Building, Self Build and Renovation
      • General Repairs and Cleaning
      • Green Living and Eco DIY
      • Ground, Foundations and Drainage
      • Heating, Central Heating and Boilers
      • Joinery and Carpentry
      • Materials, Fixings and Fixing
      • Painting, Decorating and Finishing
      • Planning Regs, Project Management and Safety
      • Plastering, Plasterboard and Rendering
      • Plumbing
      • Roofing and Gutters
      • Tiling and Tiles
      • Tools, Appliances and Access
      • DIY Tips
      • Bathroom DIY Videos
      • Decorating Videos
      • Green and Eco Friendly Videos
      • Kitchen Videos
      • Building Foundation Videos
      • Electrical Videos
      • Hand and Power Tools Videos
      • Plumbing Videos
      • Building Videos
      • Fitting Blinds Videos
      • Heating and Central Heating Videos
      • Security Videos
      • Carpentry and Woodworking Videos
      • Flooring Videos
      • Kitchen Videos
      • Damp and Damp Proofing Videos
      • Gardening Videos
      • Plastering and Drylining Videos
      • Find a Tradesman
      • Contract Download
      • Working With Tradesmen - Ultimate Guide
      • Home Improver Protection
      • Price Doctor
      • Tool Store
      • Book Store
      • Tool Reviews and Product Reviews
      • Blog
      • DIY Competitions
      • About DIY Doctor
      • What we do
      • Trade Shows and Exhibitions
      • Master Classes
      • Contact Us

Home > DIY and Home Improvement Video Tool and Product Reviews > Building Tools Video Product Reviews and Tests > Product Review of the Chimney Sheep Draught Excluder

Product Review of the Chimney Sheep Draught Excluder

An open chimney is like leaving a window open all the time, so it is a good idea block this off when the fire is not being used. Otherwise you will lose a lot of heat out of the chimney. There are a number of solutions which you can use to exclude the draughts caused by an open chimney but few are as cheap and simple to use as the Chimney Sheep. Here we will show you how to use one and give you our verdict on how the Chimney Sheep performs when we put it through its paces.

TwitterFacebookPin ItBuffer

Many people seem to forget that a chimney is actually designed to “suck” warm air away from a room and the fire burning in the grate. This is the way that it is designed to work to ‘draw’ the smoke away with the hot air that rises above the fire, ensuring that it does not enter the room.

Cooler air replaces the air lost up the chimney and provides the oxygen required to keep the fire burning. The problems arises when the fire is not in use, as the hot air from the room will be drawn, unwanted, up the chimney. This is often referred to as the “Stack Effect”.

How heat is drawn up a chimney through an unused fire

The solution is to block the chimney temporally to stop this draw. Also by blocking the chimney you reduce other household draughts as cold air is pulled in to your homes to replace the warm air lost up the chimney.

What is required is a temporary draught excluder that will fit up your chimney. There is a range of options that you can choose to do the job, but the key thing is that it must stop the air flow and should ideally be easy to insert and remove without getting too sooty.

How Does the Chimney Sheep Work?

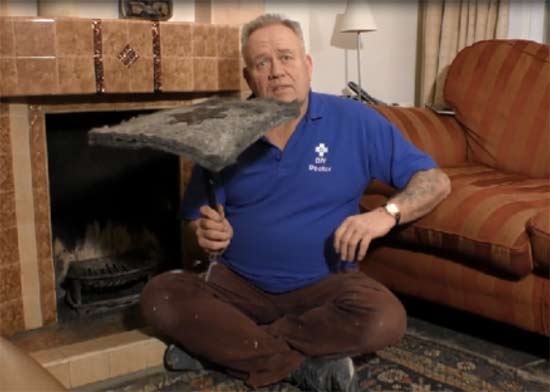
The Chimney Sheep is a section of wool which is held on the end of a sturdy plastic handle, which screws into the woollen head or “sheep” so that you can insert it. It is low-tech simplicity at its best. All you need to do is stuff it up your chimney and then give it a little tug back down to ensure it is securely inserted.

Chimney Sheep with handle attached
Screw the handle into the Sheep and then insert into the Chimney

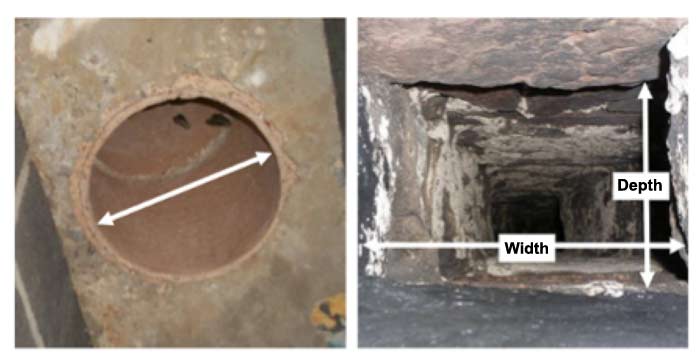
You do need to ensure that you get the right size Chimney Sheep for your flue; there are 9 different sizes. This is the only messy bit as you need to stick your in the (unlit!) fire and measure the size, which is very easy.

  • For a circular flue – measure the diameter
  • For a square or rectangular flue measure the width and length

Then take these measurements to the sizing chart on the Chimney Sheep website and you can very quickly work out the size you need.

Measure your chimney size
Measuring your flue or chimney for the right sizes Chimney Sheep

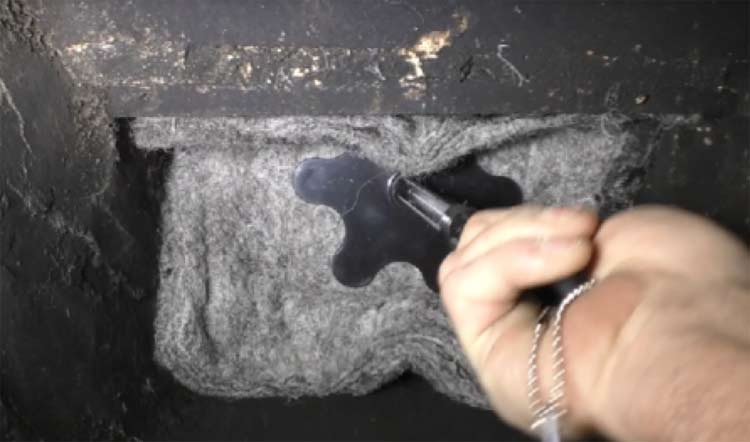
The fit should be snug one so that no draughts can get up the chimney and that the Sheep will be held in place by the sides of the flue. It should fit into the narrow part of the flue – you will feel it as you push it firmly into place. A gentle tug back will ensure a secure fit.

The handle and a useful tag will hang down into the fire place to remind you to remove it before your light the fire again.

Position the Chimney Sheep in place
Give the Chimney Sheep a little tug once in place to secure it firmly

Looking After Your Chimney Sheep

This is a fantastically easy bit of low tech kit to look after. When it is removed it will be a bit sooty and dirty. Put it in a sturdy plastic bag or leave it in the coal scuttle until needed next.

If you do feel it could do with a wash, you just remove the plastic parts and washing on a wool cycle, but don’t tumble dry it.

Some chimneys are rough, particularly stone and brick ones. This can fray the edges of the wool, but this can be tidied up with a pair of scissors. If the Sheep becomes misshapen it shouldn’t matter, just remove it from its clamp and turn it round so it is inserted the other way, so it fills the flue easily again.

DIY Doctor Opinion on the Chimney Sheep

There really is nothing not to like about this really simple solution to an age old problem. It’s not revolutionary, but then it doesn’t need to be. We love low-tech when it does the job and there is nothing to go wrong.

In short we think that this is a great, cost-effective solution for anyone with an open chimney or flue.

The Doctor’s Rating

Reviewed by: Mike Edwards

5 Stars

(5 out of 5 stars)

Get This Product Now

Buy Now Here

TwitterFacebookPin ItBuffer

Primary Sidebar

DIY Doctor deal of the week

Inspection Light:

Quality 300 lumen inspection light

RRP Price: £18.58

Special Price: £10.44

Get it here now

See our other deals now!

Master Basic DIY - By DIY Doctor

Our Book - Master Basic DIY

Grab your copy now for all the DIY help you need right at your finger tips!

Buy it Here!

Signup for our Newsletter

Keep up to date with our DIY projects, tips and latest deals

Sign Me Up!

Our Sponsors

Find out about advertising on DIY Doctor

Advertisments

Footer

DIY Doctor

Site Menu

  • About Us
  • Contact Us
  • Blog
  • Media/Press
  • Community Work
  • DIY Projects
  • DIY Videos
  • Superstore
  • DIY Tips
  • DIY Suppliers
  • UK DIY Forum
  • DIY Webinars

Other Stuff

  • Advertise
  • Competitions
  • T and Cs
  • Privacy Policy
  • Cookies
  • NHIC
  • Sitemap

DIY Doctor Social Channels

Follow us on Facebook
Follow us on Twitter
Follow us on YouTube
Follow us on Pinterest
Follow us on Tumblr

DIY Doctor are members of:

© DIY Doctor Ltd 2022 All Rights Reserved