On Site Test of the Loft Lid
We were charged with fitting new loft insulation into a 150 year old loft. Space was tight and a new bathroom had been installed underneath. There were 4 downlighters in the bathroom and obviously the cable that supplied them ran from one to the next and so on.
The loft lights we were fitting were laid in series, sometimes called a daisy chain, where the feed cable feeds the first downlighter from the mains or from a 12 Volt transformer and the cable then runs from the first light to feed the second and so on.
This method of wiring downlighters is very common and the Loft Lid accommodates this by providing a nicely shaped, smooth cut out which will allow 2 x 1.5mm cables in and out of the void created by Loft Lid.
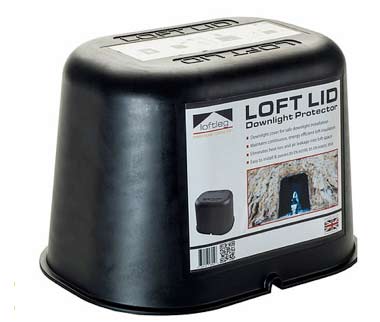
Protect cables and lights from overheating with Loft Lid
It has to be said in this review that we have suggested to Loft Leg that it would be a good idea to increase the size of this aperture to accommodate lighting cables even more easily and also to add another aperture for when cables cannot be clipped together.
They jumped on this feedback immediately. It will not be long before another version of Loft Lid is on the market making it possible to fit loft lid in even the most unruly of loft spaces! The original Loft Lid will work brilliantly in 99% of lofts and as soon as the new model is out we will let you all know.
Why do I Need a Loft Lid?
Electricity is energy. All energy creates heat. If the heat is not allowed to dissipate, or is not cooled down effectively, it can build up and create fires.
Electric cables get warm. Various sizes of cable are designed for different things such as lighting, power, heating, showers, cookers. Each cable has a safety rating for carrying current.
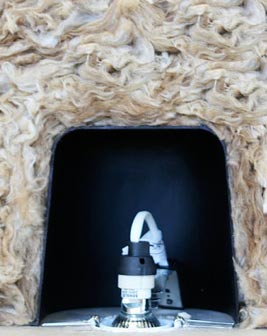
Keep insulation away from downlighters with Loft Lid
Lights are the same. They get hot and they should be cooled in some way. This happend naturally with lamps and ceiling lights, whose mechanisms are cooled by the air around them in a room and in ceiling voids.
In the loft however, with new building regulations specifying 270mm of loft insulation, there is not so much air about so a “container” is a great idea to isolate the downlight fitting from the insulation that surrounds it.
Preparing for Loft Lid installation
The Loft Lid is placed over the downlighter and stuck down to the plasterboard ceiling with, we suggest, silicone sealant. For this to be fully successful, and for it to stay in position when loft boards are being bashed against it and suitcases are knocking it, it needs to have a pretty solid fix. This can be achieved by getting all the dust from around the Downlighter by using a small vacuum or dustpan and brush.
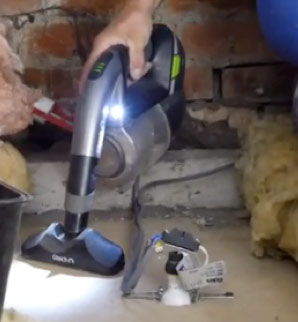
Fitting Loft Lid requires dust removal from round Downlighter
Fitting the Loft Lid Downlighter Protection
Having removed all dust move any wires to a position where they will be able to go into the Loft Lid aperture easily, grab a sealant gun and a tube of all purpose sealant or construction adhesive.
The sealant/adhesive recommended by Loft Lid is shown on their web site but most sealants or construction adhesives will do the job. If you buy a sealant which comes in a handy squash tube you
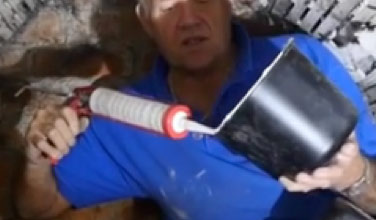
Loft Lid should be secured to loft floor with sealant
Apply the sealant to the underside of Loft Lid and place it carefully over the lighting cables (which will fit neatly into the aperture) until the Loft Lid is sitting flush on the floor. Twist slightly so that all the sealant is in contact with the floor and you have just fitted your first Loft Lid !!
Fitting Loft Lid Close to Joists
Because downlighters are usually evenly spaced across the ceiling, it is inevitable that one or more of them will be quite close to a ceiling joist. This presents no problem for Loft Lid which is designed to slide down the side of a joist easily.
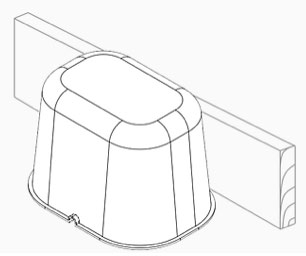
Loft Lid fitted close to a ceiling joist
Testing Loft Lid to British Standards
The Loft Lid is about as safe as it gets and has been tested and approved to all British Standards relating to fire hazard and flammability.
It is also tested by the IP code which is International Protection Marking to show it is dustproof, and can withstand high pressures….Basically it has been tested, with a 50W downlight, to within an inch of it’s life and will not let you down:
- Tested to BS EN 60695-2-11 – BS EN 60695 -11-5 and BS EN 60598-1 (Clause 12.4)
- Also tested to IP6X
The Loft Lid should be used for Downlights of 50 Watts or less.
Dimensions of the Loft Lid
The Loft Lid has been designed so it is large enough internally to allow any warm air to expand within the Loft Lid enclosure gently enough so that it will dissipate through the sides slowly and evenly keeping the temperature within at a perfectly safe level.
The walls of the Loft Lid are 2mm thick and the lip on the bottom, used for applying the sealant to, is about 5mm wide.
This gives external dimensions of 222mm long, 162mm wide and 152mm high.
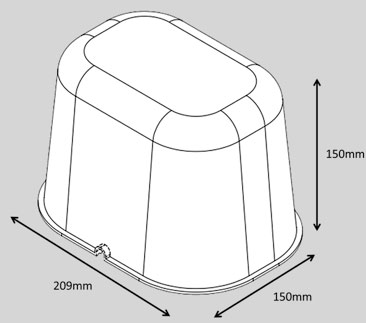
Loft Lid dimensions
Docs Opinion of the Loft Lid
We love the Loft Lid. It’s so easy to fit and is so obviously built to last. The dimensions are perfect for fitting a loft floor over increased insulation and it gives great peace of mind knowing the downlighters are well protected from overheating. Our advice – Buy them now!!
The Doctor’s Rating
Reviewed by: Mike Edwards

(5 out of 5 stars)
Get This Product Now

