Why do Concrete Holes and Cracks Need to be Repaired with Epoxy Repair Mortars?
Repairing holes and cracks in concrete paths and driveways is something we all assume can be done with normal cement and aggregate concrete, or even with just sand and cement.
The problem is that the aggregate in concrete paths and drives is quite large and when mixed the aggregate leaves big gaps in between. These gaps fill with sand and cement to make them solid but as the concrete dries it shrinks a little because the moisture content is reduced.
The filling therefore is solid, but has shrunk away from the sides of the repair and, as there is little room in a small hole or crack for the concrete repair to settle properly, the sand and cement also shrinks away from the larger aggregate pieces.
This leaves a tiny, almost invisible gaps, or fissures, between the repair and the hole itself and sometimes between the main aggregate and it’s surrounding mix of sand and cement.
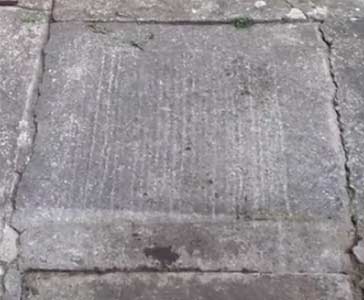
Concrete paths and drives crack and holes develop
In the rain, the water finds it’s way into this gap and because the repairs are normally a few inches deep, the water cannot evaporate out again very quickly. Consequently, when the winter ice, snow and frost comes, the water in the gap freezes. The image shows exactly what happens when a small crack in the concrete is allowed to get larger and larger. Image courtesy of interstatepm.com.
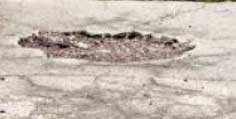
Freeze/Thaw action puts holes in paths and drives
When water freezes it expands to become ice. The pressure of this expansion forces itself on the sides of the hole. It then becomes almost the irresistible force meeting the immovable object. The side belonging to the main path or drive is much stronger as:
- It has been there much longer and probably reached it’s maximum strength in terms of compressive strength
- It is usually a much larger mass which the expanding ice finds much harder to break down
When the ice expands, some of the concrete (usually in the repair) breaks under the pressure. This obviously allows more water in which, in turn, turns to ice. The whole story repeats itself over and over until the repair is just dust in the hole it was supposed to repair. And surprisingly, this does not take long. A concrete repair 3 inches (75mm) x 4 inches (100mm) can be dust in only 1 year!
This cycle can be stopped by using an Epoxy Resin mortar mix and we chose to use a mix from Rizistal called High Performance Repair Mortar. We had previously filled some of the holes a little over half way with the Rizistal Deep Fill Epoxy Repair Mortar which is essentially the same stuff but with slightly different components to make the execution of larger holes much easier.

Epoxy Resin repair mortar for concrete in 20kg and 10kg tubs
The Epoxy Repair mortars from Rizistal are really very good and epoxy resins are used, in conjunction with very fine aggregates and additives to give a completely waterproof repair that will not be subject to freeze/thaw action. The resin sets so tight that absolutely no water can get in.
Onsite Test of the High Performance Epoxy Resin Repair Mortar
As mentioned above, the repairs to deep (over 50mm deep) holes in concrete paths and drives are more easily achieved by first using the Rizistal Deep Fill Epoxy Repair Mortar. This mortar has larger aggregates mixed with the resin which allows for the much greater strength required for large masses of any filling component.
When the hole has been filled with the deep fill mortar, the surface should be “scratched” to give a good key for the finer repair mortar which is to be placed on top.
The drawback to the Deep Fill repair mortar is that, if a nice smooth finish is required which needs to be “feathered in” to the top of the surrounding concrete on the existing path or drive, it cannot be done very neatly as the larger size of the aggregate makes smoothing it out very difficult. We then need to use the ordinary repair mortar which contains a much finer aggregate.
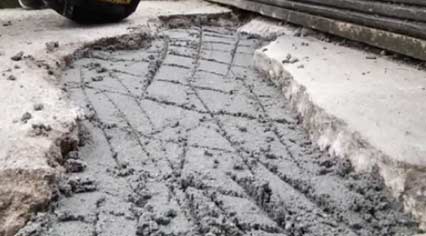
Filling holes with Deep Fill Epoxy repair mortar from Rizistal
What is Feathering Out or Feathering in?
Feathering is a term used in constriction when a surface needs to be flattened out by applying a covering which is thicker at one end than the other. It is used a lot in plastering and filling holes in walls with decorators filler. The thicker part is then trowelled out to blend into the surrounding surface so that the top of the surface becomes smooth overall. The process is named after the shape and density of a feather which goes from thick to thin in both ways.

Feathering out can be described best using the image of a feather
Preparation for Epoxy Resin Repair Mortar
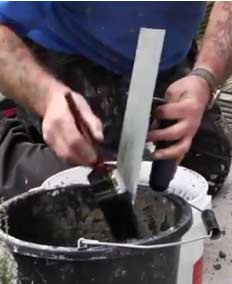
Having made sure our deep fill repair mortar is “scratched” on the top surface in order to provide a good key for adding the finer repair mortar, we brushed away any dust or loose mortar. The repair mortar was then mixed by adding the hardener to the resin. Both hardener and resin come in a container which is suitable for mixing so no buckets are required.
The mixing is done by using a mixer paddle in an electric drill. It takes a little while (6 – 7 minutes) for the resin to be thoroughly mixed with the hardener unto you have a really thick, but treacle-like mortar. At this stage it is totally obvious to see how this stuff can stay completely watertight as there is not one single air bubble or break in the mortar as it runs, a little like lava, round the container.

An electric drill and paddle mixer is used to mix epoxy repair mortar
Placement of Epoxy Repair Mortar
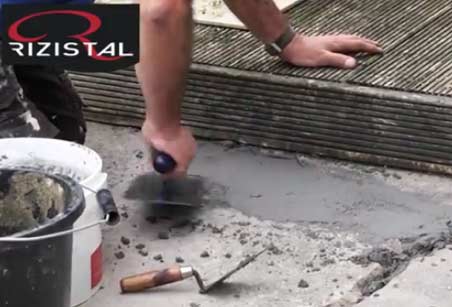
Use a small trowel, such as a gauging trowel or pointing trowel, to place the mortar in the hole. Allow it to settle and self-level. Keep adding mortar until you are a little over the top of the surround to the hole and let the mortar settle. It will form a very slight mound as it clings to the surrounding top of the existing concrete.
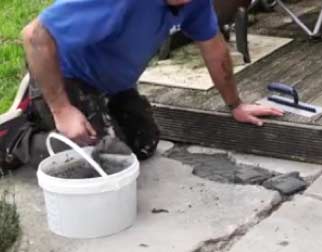
Filling a concrete repair with epoxy mortar and a pointing trowel
The mortar is not “thin” enough to flow into surrounding indentations and dents in the top edge of the hole so some help will need to be given to feather it out across the hole. This can be dome with the same trowel, or you can use a finishing trowel just as a plasterer would.
Because the mortar is resin based, you may find it will stick to your trowel a little. This can be overcome by wiping a little of Rizistal’s Safer Solvent onto the trowel as you can see being done in the video.
Safer Solvent being used to clean a finishing trowel
Getting epoxy repair mortar smooth can be done with a plasterers finishing trowel
Feathering out an Epoxy Resin Repair Mortar Repair
Having filled the hole completely and smoothed the top over with the finishing trowel, we then took a large 75mm (3-inch) paint brush and dipped the tip into some Safer Solvent. We then brush the mortar from the centre outwards until the tiny imperfections around the edge of the hole are full. This leaves a nice, flat level surface which is ready for painting when the epoxy mortar has cured.
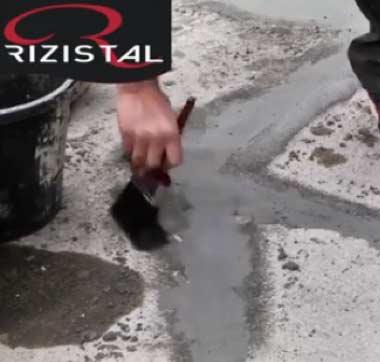
Using a brush to feather out an epoxy mortar repair to concrete
Is the Epoxy Repair Mortar all Grey or can I use it to Repair my Coloured Concrete Paving Slabs?
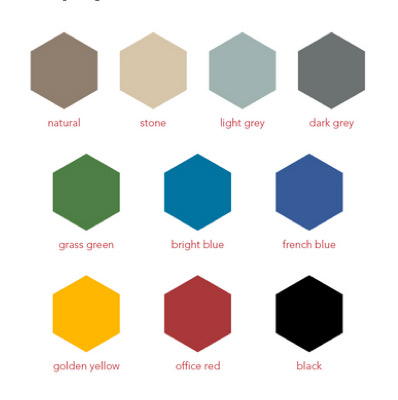
The epoxy mortar comes in 10 colours which can all be used to match paving slabs and repair blown patches on the tops of the slabs. We recommend that the repair should be a minimum of 5mm deep and if so it will hold fast becoming stronger than the rest of the slab!
Concrete and slabs of different coloured can be repaired with epoxy repair mortar
The colours are:
- Natural Epoxy Resin Repair Mortar
- Stone Epoxy Resin Repair Mortar
- Light Grey Epoxy Resin Repair Mortar
- Dark Grey Epoxy Resin Repair Mortar
- Grass Green Epoxy Resin Repair Mortar
- Bright Blue Epoxy Resin Repair Mortar
- French Blue Epoxy Resin Repair Mortar
- Golden Yellow Epoxy Resin Repair Mortar
- Office Red Epoxy Resin Repair Mortar
- Black Epoxy Resin Repair Mortar
How Much can I Repair with a 10kg and a 20kg Tub of Epoxy Repair Mortar?
You can expect to get about 1 square meter from a 10kg tub of Rizistal’s epoxy repair mortar when applied at 6mm thickness. Obviously this means you would get 2 square m from a 20kg tub.
Epoxy Resin Goes Hard Quickly, how Long do I get to Work With my Concrete Repairs?
Once mixed you have about 20 to 40 minutes to work with Rizistal High Performance Repair Mortar. The difference is due to the temperature at the time. The idea temperature for a 40 minute working time is 15 to 20 degrees centigrade.
When can I Walk on my Epoxy Mortar Concrete Repair?
Unbelievably you can walk on your repair after only 4 hours! You can even drive on it after 8 – 12 hours. It is as hard as nails but please do not use it at temperatures of less than 8°C as it will not cure properly.
DIY Doctors Opinion of the Epoxy Repair Mortar From Rizistal
Once again, Rizistal have come up trumps. This mortar is really strong at surprisingly thin coverings and can be feathered out really easily as seen in the video. This leads to fantastic repairs which, when painted can be pretty much invisible. We love it.
The Doctor’s Rating
Reviewed by: Mike Edwards

(5 out of 5 stars)
Get This Product Now