Topiary is a form of cutting and pruning plants and hedges and often involves creating intricate shapes and objects, however it can be quite tricky to master.
In our guide below, we take a look at the essential elements to get you started in your topiary journey.

An example of a Topiary Hedge
What is Topiary?
Topiary is the art of shaping plants into specific forms, such as balls, cones, or animals. Shaped hedges or specimens as they are known are considered topiary.
Topiary includes more than just shaped plants. It encompasses parterres — clipped box hedges in swirling or geometric patterns. Mazes and knot gardens, which feature different coloured box plants arranged to look like tied knots, also fall under topiary.
Stunning topiary examples can be seen at Levens Hall in Cumbria, Knightshayes in Devon, Hidcote Manor in Gloucestershire, and many other stately homes across the country.

An Example of Topiary
Understanding the Different Types of Topiary
Topiary isn’t just a single straight forward technique, there are in fact numerous different type, the most common are as follows:
Geometric Topiary
Geometric topiary focuses on shaping plants into precise, symmetrical forms like spheres, cones, and spirals. This type of topiary is ideal for beginners due to its relatively straightforward designs. Common plants used for geometric shapes include boxwood, yew, and privet, which have dense foliage that responds well to trimming.
Freeform Topiary
Freeform topiary allows for more creativity, enabling gardeners to craft abstract or asymmetrical shapes. This style is more challenging and requires a good eye for design and proportion. Freeform topiary can be a great way to express individuality in a garden, with popular choices being holly and laurel due to their flexible branches.
Animal Topiary
Animal topiary involves sculpting plants into lifelike animal shapes. This type requires skill and patience, making it suitable for more experienced gardeners. Wire frames are often used to guide the shaping process, gradually training the plant to fill the frame over time. Suitable plants for animal topiary include boxwood and myrtle, which can be finely trimmed to detail the animal’s features.
Figurative Topiary
Figurative topiary includes shaping plants into recognisable objects or characters, such as people, cars, or even fantastical creatures. This highly artistic form of topiary is complex and usually requires a pre-made frame to guide the growth. Plants like rosemary and privet are frequently used due to their ability to withstand frequent trimming and shaping.
Cloud Pruning
Cloud pruning, or “Niwaki” in Japanese, is a more naturalistic form of topiary where plants are pruned into soft, cloud-like shapes. This technique is inspired by the natural growth of plants and trees, emphasising harmony with the surrounding landscape. It is often used on conifers and Japanese maple trees, creating a serene and organic look.
Espalier
Espalier is a form of topiary that involves training trees and shrubs to grow flat against a wall or trellis. This method is both decorative and practical, as it saves space and can increase fruit production in fruit trees like apple and pear. Espalier requires regular pruning to maintain the flat shape and ensure the plant’s health.
Topiary adds structure and artistic flair to gardens, offering endless possibilities for creativity. Whether you’re a beginner starting with simple geometric shapes or an experienced gardener crafting intricate animal forms, there’s a type of topiary to suit every skill level and aesthetic preference.
The Advantages and Disadvantages of Topiary
Topiary, the art of shaping plants into decorative forms, adds a touch of elegance and structure to any garden. One of the primary advantages of topiary is its ability to transform a garden space, creating stunning focal points and adding visual interest. Whether you prefer simple geometric shapes or elaborate animal figures, topiary offers a versatile way to express creativity and enhance the aesthetic appeal of your outdoor space.
Another advantage of topiary is its evergreen nature. Plants commonly used for topiary, such as boxwood and yew, retain their leaves year-round, ensuring that your garden maintains its beauty even in the winter months. This year-round greenery can provide structure and form, adding to the overall design of your garden regardless of the season.
Topiary also offers practical benefits. Well-maintained topiary can serve as a natural privacy screen, windbreak, or even a barrier to keep animals out of certain areas. The dense foliage of topiary plants can reduce noise pollution and create a more serene garden environment. Additionally, topiary can increase property value by adding unique elements to your garden.
However, topiary does come with some disadvantages. One of the main drawbacks is the time and effort required for maintenance. Keeping topiary plants in shape involves regular pruning, which can be labor-intensive and requires some skill. Without consistent care, topiary can quickly lose its shape and become overgrown and become an eyesore.
Another disadvantage is the slow growth rate of many topiary plants. Establishing a mature, well-shaped topiary can take several years, which requires patience and long-term commitment. For those looking for immediate results, this can be a significant drawback.
Lastly, topiary can be susceptible to pests and diseases, which can damage the plants and ruin their appearance. Boxwood, a popular topiary plant, is particularly prone to boxwood blight, a fungal disease that can be challenging to manage. Regular monitoring and appropriate care are essential to keep topiary plants healthy and looking their best.
Pruning Mature Topiary Specimens
Topiary should be trimmed at least once a year to maintain its shape. For neat and precise cuts, use topiary shears, which resemble old-fashioned sheep shears.
The best time to prune topiary is in June. Start by trimming small amounts and frequently step back to check the shape. You can trim by eye or use a template, such as a wire hoop for balls or similar shaped guide depending on the item you’re working on.
For cones, trim from the centre out, working around the plant. Use three canes and garden wire to form a wigwam to guide you if needed.
Spirals and animal shapes are more challenging but manageable with practice. Trim gradually and step back often to assess your work. A second pair of eyes can be helpful for tricky shapes.
Creating Your Own Topiary
Want to add topiary to your garden? Start with plants like box, yew, privet, shrub honeysuckle (Lonicera nitida), or even golden leylandii. These are all easy to work with and are also a fast-growing option.
First, choose the shape you want. You can buy template frames in various shapes, from simple balls to animals. Matching the frame size to your plant will let you start trimming sooner.
Plant your young hedge in a pot or in the ground and secure the topiary frame over it with pegs. Feed the plant with an all-purpose fertiliser like Growmore and mulch the base to retain moisture.
If your frame has chicken wire, guide the branches through the mesh with a cane or pencil as they grow. Once the branches extend past the frame, begin trimming. Regular trimming will make the branches denser and improve the overall shape.
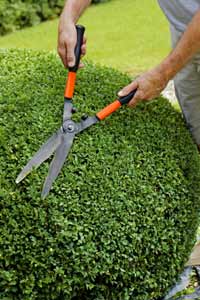
Trimming a Topiary Box Bush
Quick Fix Topiary
Impatient for a topiary hedge? Try creating a “false” topiary with ornamental ivy. Fill a wire frame with moss for instant shape, then plant a fast-growing, small-leaved ivy next to it. Train the ivy to grow over the frame, securing stems with wire as needed. Clip the ivy occasionally to maintain the shape.
Tips for Rejuvenating Overgrown Topiary
Rejuvenating overgrown topiary requires patience and careful technique, but with the right approach, you can restore its beauty and structure back to how it once was.
Assess and Plan
Begin by assessing the current state of your topiary. Determine the extent of overgrowth and what the original shape once was. Next, decide whether you need to cut back drastically or just trim the excess growth. Gather the necessary tools, such as sharp topiary shears, loppers, and a pair of secateurs for finer cuts.
Gradual Pruning
Start by removing the most overgrown and unruly areas. Cut back gradually to avoid shocking the plant. It’s often best to spread the rejuvenation process over several seasons, trimming a bit more each time rather than cutting everything back at once. This gradual approach allows the plant to recover and encourages healthier growth. Also, ensure you do any trimming at the correct time of year to avoid the risk of damage.
Restoring Shape
Once you’ve trimmed the bulk of the overgrowth, focus on restoring the shape. Use a template or guide, such as wire frames or string lines, to help you trim accurately. For simple shapes like balls or cones, trim evenly all around, working from the top down. For more intricate designs, take extra care to follow the original lines and contours.
Encouraging New Growth
After the initial pruning, provide your topiary with the care it needs to encourage new growth. This includes watering it thoroughly, especially during dry periods, and applying a balanced fertiliser to promote healthy development. Mulching around the base can help retain moisture and keep the roots cool.
Regular Maintenance
To prevent future overgrowth, establish a regular maintenance schedule. Trim your topiary at least twice a year, typically in late spring and early autumn. Regular maintenance keeps your topiary in shape and prevents the need for drastic rejuvenation in the future. Always use sharp, clean tools to make precise cuts and minimise plant stress.
Patience and Care
Reviving overgrown topiary is a process that takes time. Be patient and give your plants the care they need to recover. Monitor their progress and make small adjustments as needed. With consistent attention, your topiary will gradually return to its former glory, enhancing the beauty of your garden.
By following these steps, you can successfully rejuvenate overgrown topiary, restoring its elegant shape and ensuring it remains a stunning feature in your garden.
Although from the outside looking in, topiary may seem like an extremely tricky technique to master, using a frame to create and train the object you are trying to create can drastically simplify the process, so you should certainly adopt this approach.