
If you have just stumbled across this DIY project you may be thinking; why would I want to know how to clean a wheelbarrow. Isn’t it just a case of washing it out with some clean water? This is certainly a valid point and in essence, yes that’s exactly what you need to do, but for the uninitiated there are some further considerations.
If a wheelbarrow, especially one on a large building site, isn’t cleaned correctly from what may have been in it such as sand, gravel, debris and more often than not cement this can buildup over time, solidify and then ultimately make the barrow difficult if not impossible to use for some jobs.
When a barrow gets to this point on a large site and sometimes even on a domestic level in most cases it’s then discarded in a nearby skip, spelling its end – what a waste!
To this end, this project looks at how to correctly clean a wheelbarrow to keep it in tip-top condition and ensure it has a long and useful life.
How to Clean a Wheelbarrow After use
Cleaning a wheelbarrow is fairly straightforward job that in most cases just requires a little elbow grease and a brush. However if left to solidify or build up then this can be a lot more work and require a range of tools so it’s best just to do it as soon as you’re done.
Find a Suitable Cleaning Location
Before actually cleaning you barrow you will need to find a suitable location to clean it. Weather you’re cleaning soil, dust and debris out or whether it’s the remnants of mortar, cleaning your barrow on your driveway will ultimately mean that whatever’s currently in it, once cleaned, will then be all over your driveway meaning you’ll then have to clean that.
The best location to clean your wheelbarrow is on a gravel or shingle driveway or similar area as any waste water will then drain through the gravel leaving no stains or debris.
Alternatively if you don’t have any such areas another solution is to dig a hole and then drain any waste water into this before filling once you are done.
Note: Avoid washing your barrow down around any drains, especially if you are cleaning away mortar as this can solidify in drains and block them!
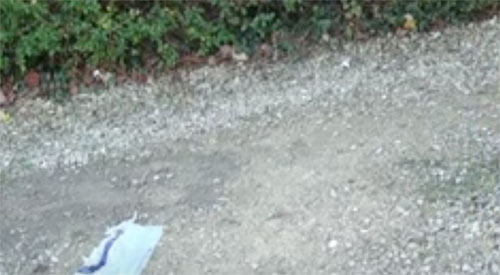
Gravel driveway or similar area is ideal for draining waste water from cleaning a wheelbarrow
Prop the Barrow up
The first job is to prop your barrow up at roughly a 45° angle so that the front of the barrow is lower than the handle end.
This can be done by propping it against the back of a van once the doors have been opened, against the rear of a tipper or against a wall.
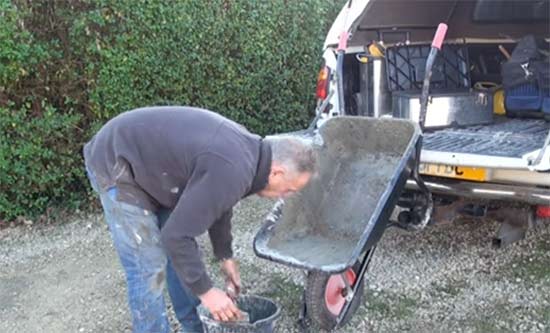
Prop your barrow at an angle for cleaning
Gather Cleaning Supplies
With your barrow propped up the next job is to get your cleaning supplies together. This includes a bucket full of clean, fresh water and an old masonry brush.
A masonry brush is pretty much the best tool for cleaning down objects such as wheelbarrows, buckets and the similar due to their thick and sturdy bristles.
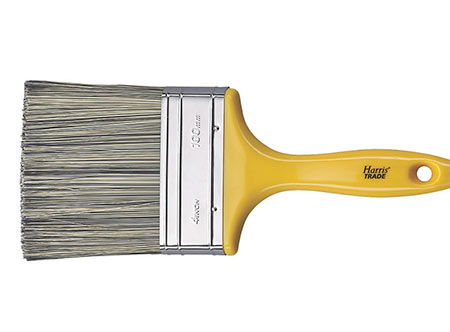
Sturdy masonry brush, ideal for cleaning wheelbarrows and similar objects
Clean Down Your Wheelbarrow
To clean your wheelbarrow thoroughly, dip your brush in your bucket of clean water and slop the water into the barrow, repeat this a few times, wetting down all areas of your barrow as you go.
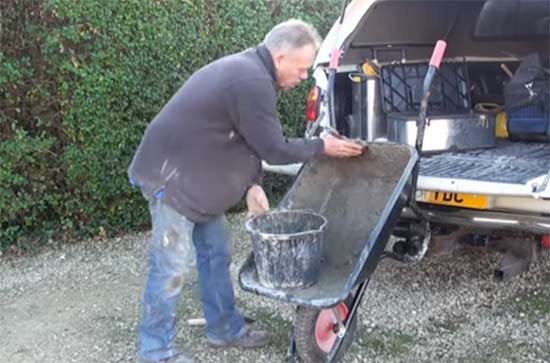
Use the masonry brush to wet down the inside of the wheelbarrow
Once everything is suitably wet start brushing down the inside of the barrow, working the bristles into all areas and corners as you go, loosening any debris that’s present.
Once you have gone over the whole barrow and removed some of the dirt, once again slop some clean water over the whole of the barrow and again get to work with the brush
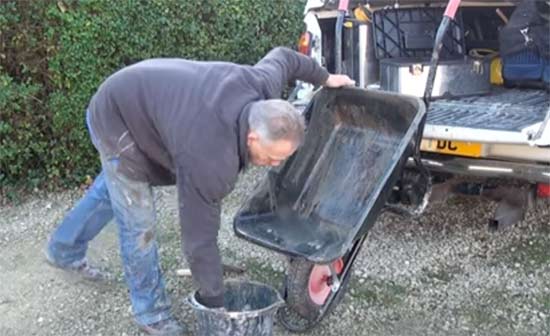
Debris being cleaned off of wheelbarrow using masonry brush
After a few passes using this technique the inner area of your barrow should now be pretty much clean and free from any dirt and debris. As a final clean throw some water from your bucket over the whole barrow.
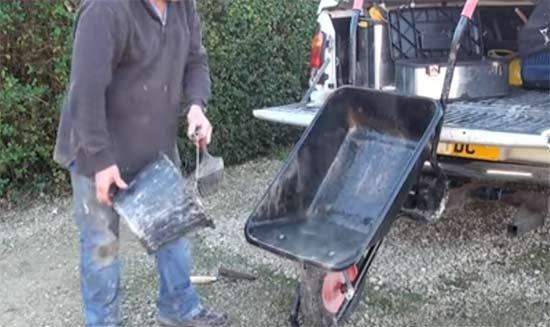
Slopping water from a bucket over a wheelbarrow to clean it
Clean Down Exterior of Wheelbarrow
Once the interior of the barrow is spotless and any traces of what was in it have been washed away, the final job is to give the exterior a good going over also.
As before use your masonry brush and some clean water and dowse the outside of the barrow in the clean water, using the brush to slop it on. Once it’s nice and wet work the bristles of the brush into all areas all over the outside of the wheelbarrow loosening and removing and dirt, grime or buildup.
Ensure that you go over all areas and don’t neglect anything. Also pay attention to the handles and around the wheel, ensure you remove any debris from here also.
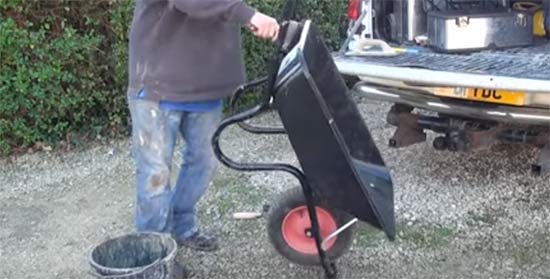
Thoroughly clean the exterior of the wheelbarrow
Cleaning Mortar From a Wheelbarrow
In many cases, especially for wheelbarrows used on building sites, they will inevitably get neglected and substances such as mortar and dirt buildup and solidify and before you know it the tray becomes half full of dried lumps of mortar and other similar stuff.
Fortunately with a little work pretty much any and all such debris can be easily removed.
Firstly, prop you barrow up as you did above, but this time as opposed to exposing the tray so that it faces outwards, this time turn it over so that the tray is facing downwards.
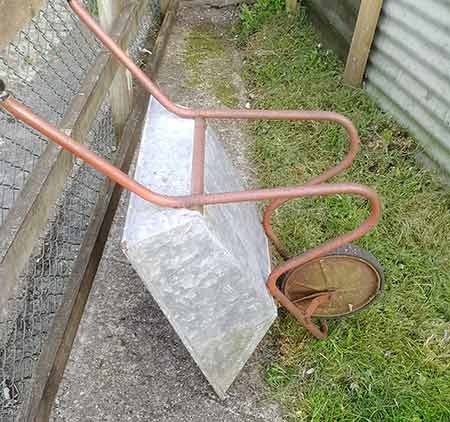
Turn barrow over so tray is facing downwards
With the barrow positioned correctly it’s time to start removing the debris. Using a standard sized hammer (normally around 30 – 40oz mark), gently start tapping over the entire tray area of the barrow.
Pretty much all wheelbarrow trays, unless they are made of timber, are made of thin steel which when spread over an area is fairly flexible. The gentle tapping will flex the metal and loosen the debris allowing it to fall away.
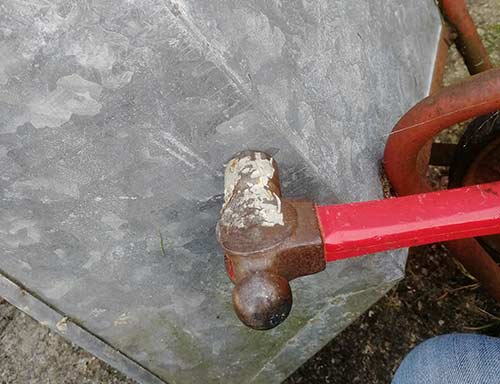
Tapping wheelbarrow tray with hammer to loosen dirt, debris and mortar
Take care not to tap too hard as you can easily bend the thin metal and cause impact damage. Instead of using a hammer you can also use a short length of timber as this is as effective as a hammer just a little less heavy and should cause less damage.
Take your time and work over the entire tray area, tapping away an removing as much debris and dried mortar as possible.
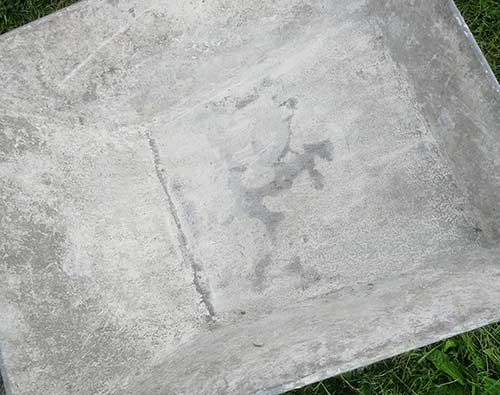
Wheelbarrow tray cleaned from all dirt, debris and mortar
What if the Mortar Wont Budge?
In some instances, especially around the internal corners that are reinforced and much stronger, mortar and similar materials can weld themselves in place and no matter now much banging from the outside you do they simply wont budge!
Despite this all is not totally lost as there are some solutions:
- Hammer and Chisel: Dont put the hammer away just yet! Using a small cold chisel (around 15 – 20mm) position the chisel tip at the base of the object you are trying to remove and give it a gentle hit. This should loosen it and allow it to fall away
- Knotted Wire Brush: If the chisel isn’t up to the job the next solution is to try and wear it away and one solution is to use an angle grinder (see our project here on using angle grinders for more help) and a knotted wire brush. As the brush is fairly course it hacks into object chipping away at it and eventually removing it
- Stone Disc / Flap Disc: On similar lines to the above, another pair of useful grinder attachments are the standard stone cutting disc and also the flap disc. The cutting disc can be used to cut into the object removing it a bit at a time and similarly to the knotted brush, the flap disc can be used to gradually grind away at the object
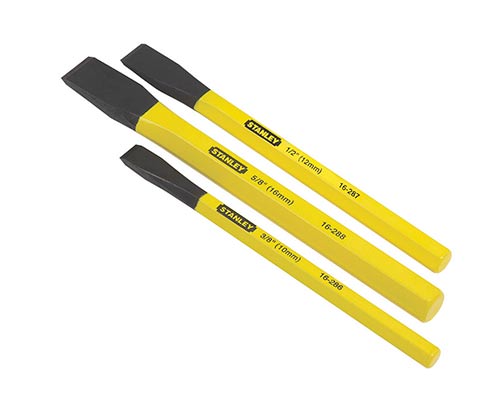
Stanley thin chisel set
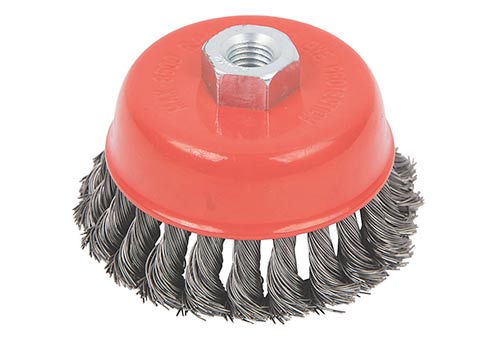
Wire brush wheel for an angle grinder
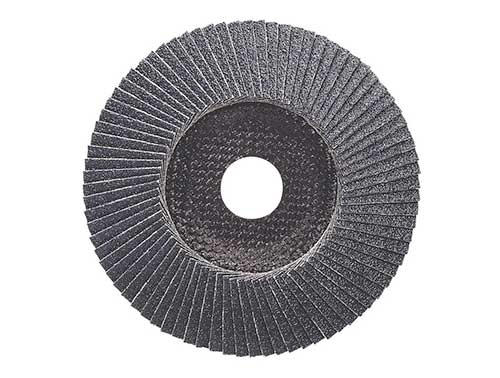
Flap disc for angle grinder
One thing to be aware of when using knotted wire brushes, stone discs and flap discs is that they will not only remove the debris you are working on but they will also scratch up the surface of the barrow tray if allowed to touch it, especially the cutting disc as this will also cut through the tray if it comes in contact with it, so ensure it doesn’t!
Additionally if your barrow is galvanised any abrasives that touch it will likely affect this protective layer so again minimise the risks of this happening.
In the even that you do cause any abrasive damage to galvanised or even basic steel surfaces it’s a good idea to coat them with a sealant such as paint to prevent any rust and further damage.
Maintaining a Wheelbarrow
To keep your wheelbarrow in top condition and ensure it has a long and useful life you will need to maintain it. As wheelbarrows are fairly basic objects this is fairly straightforward.
Maintain the Handles
The handles are your point of contact with your wheelbarrow. If there are any defects then after even a short length of time this is going to have an effect on your hands as they will be in direct contact with them!
Over time, handles can become knocked, scuffed, chipped etc. even metal ones. Split and sections of metal can be razor sharp and if you catch your hand on an area such as this it can cut you to ribbons!
If this is the case the first job is to file or grind down the damaged area and blunt it. As with any bare metal it’s important that it’s then painted to prevent future rust issues.
Once painted you should then fit a new set of grips as these will both protect the handles and also allow you to work in much more comfort.
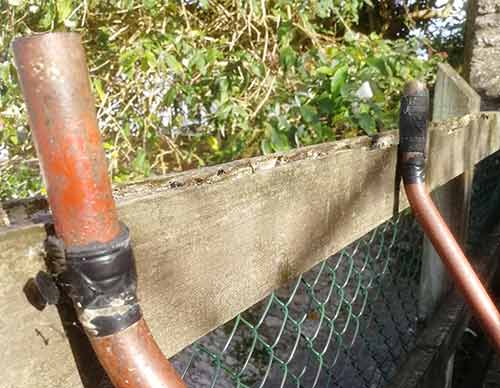
Damaged and unprotected wheelbarrow handles
Wheel(s) and Axle
Whereas the handles are your point of contact with your wheelbarrow, the wheel and axle is your barrows point of contact with the ground.
It is the wheel and axle that determines how easy your wheelbarrow is to use. If it’s well maintained and oiled and the tyre is kept fully inflated to the correct pressure if it’s pneumatic then the wheel will roll freely and easily allowing you to shift any load.
If however it isn’t then rust and debris can cause the wheel and axle to stiffen making moving even the lightest of loads an uphill task. Likewise if pneumatic tyres are not kept to the correct pressure and you try to use your barrow with a flat tyre then the additional surface friction can make your wheelbarrow feel like you’ve got 20 tons in it!
To these ends ensure you regularly oil around the wheel bearing area using a decent 3-in-1 oil and also check your tyre pressures regularly.
With some models the axle may feature a “grease nipple” somewhere on its exterior. The grease nipple will allow a grease gun to be attached and grease pumped inside the axle area. Once filled grease will then be readily available to the internals and ensure the wheel is fully lubricated at all times.
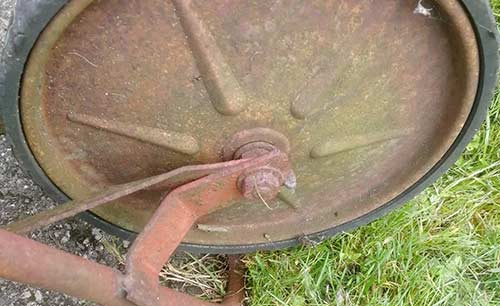
Oil wheels and axles regularly
Frame
The frame is the back bone of your wheelbarrow and if it’s weakened at any point then when wheeling your barrow with a heavy weight in it the frame could simply bend causing it to fail.
In the majority of cases, failure normally results form impact damage (bending or crushing the tubular frame) or rust.
In the case of impact damage it’s generally not possible to bend a tubular frame back into a perfect round circle again. The only choice here is to weld a section over or around the area to add the strength back to it.
When it comes to rust, again, this can easily cause a wheelbarrow frame to fold and fail. As with the above the only real solution you have here is to weld a patch over the affected area and reintroduce the strength back into it.
Ultimately it’s best to store your wheelbarrow in a covered and secure location so that damage and exposure to the elements is kept to a minimum and when in use you should also try to avoid situations or usage cases where damage can occur.
If any damage occurs it’s always best to sort it right away, especially small scrapes that can removed paint and protective surfaces as these are generally just a case of applying some paint to cover the area.
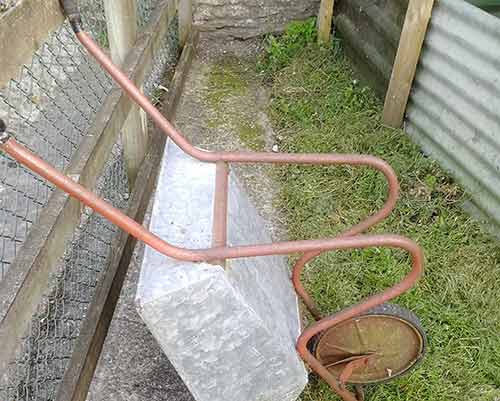
Keep your wheelbarrow frame in tip-top condition
Timber Wheelbarrows
Traditionally, wheelbarrows were made out of timber before they were made from todays steel and rubber. This was mainly for longevity and cost reasons, but if looked after and cared for there’s no reason why a timber wheel barrow can’t last as long as its metal counterparts.
If you have a timber wheelbarrow there are a few things that should be routinely done to ensure it’s kept in full operating order:
- As with the above, wheels and axles should be regularly oiled and greased to allow then to move freely and with ease
- Like steel, timber can become damaged but whereas steel cracks and can become crushed, timber generally cracks and splinters. Where timbers crack or split the best option is to replace them but if this isn’t possible then a section of timber can be screwed over the split to strengthen it, it’s not pretty but it will work. Where any splinters are present (especially on the handles) these should be sanded away using a suitable grade of sandpaper
- To ensure that your timber wheelbarrow stays in tip-top condition and remains resistant to the elements and also whatever gets placed in it it’s a great idea to periodically oil your barrow with a good quality Linseed Oil or the similar
- Even if you regularly treat your wooden wheelbarrow, if it gets stored outside and is exposed to the elements constantly then eventually it will succumb and rot and the similar (this is also the case for steel barrows that will rust). To prevent this from happening the best solution is to store your barrow under cover in a shed or similar
Cleaning down and fully maintaining your wheelbarrow and indeed any other similar tools is an absolute must in order to keep them in tip-tip condition and ensure they have a long and useful life and should be the first thing you do as soon as you complete your current task.

 DIY Doctor Ltd,
  0845 6342 179


