An angle grinder (side grinder or disc cutter as they are also sometimes known) is a hand-held power tool that can be used for a huge variety of different jobs including grinding, cutting, cleaning and polishing surfaces making it an essential tool to have in your arsenal.
Although pretty much every major manufacturer (DeWalt, Makita, Bosch etc….) make and sell their own brand of angle grinder, in essence, they are all pretty much the same and have similar main features, but the real differences come in the overall build quality of the tool and the power of the motor.
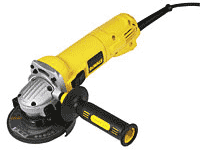
Angle grinder
It is possible to buy an angle grinder for less than £10 but as the saying goes, you get what you pay for. The build quality won’t be that great and the motor will probably be lacking in power, but if it’s only going to get used on the odd occasion for sharpening the mower blade, then a cheaper model will be more than good enough.
If, however, you foresee it getting used for longer lengths of time or on a daily basis, a more expensive, powerful and robust model is probably the way to go as you can be almost certain that it will not let you down halfway through a job.
What Different Types of Grinders are There?
The most important factor when choosing which angle grinder to purchase is the depth or size of material to cut or grind and the type of material you will be working with. This in turn will direct you to which size and kind of disc you will need.
In general, most manufacturers produce grinders and discs in the following sizes:
- 115mm – 4 1/2 inches
- 125mm – 5 inches
- 150mm – 6 inches
- 180mm – 7 inches
- 230mm – 9 inches
The most common size of disc used for DIY needs (and in general across most areas of use) are the 115mm discs (the 115mm being the size of the disc). Regardless of the type of disc you will be using e.g. cutting, smoothing, grinding discs etc… you will be able to obtain these in 115mm (4 1/2 inches) varieties.
Due to the fact that the smaller 115mm discs (regardless of type e.g. cutting, grinding, polishing etc….) are the most common and readily available they also tend to be the cheapest.
In terms of size, angle grinders are available in small, general and light purpose (up to 7 inches or 180mm) and large (9 inch or 230mm), with the smaller tools being suited to things such as sharpening blades, cutting reinforcing bars or cleaning rust.
When it comes to heavier work such as cutting large diameter steel pipes, steel I-beams or large paving slabs then the larger 230mm machines are more suited. Essentially, these are exactly the same but on a larger scale. They should also have the same features as their smaller counter-parts (these are discussed further down the page).
Due to their size and weight they are a fair bit trickier to handle and manage than the smaller ones and although they generally tend to operate at slower speeds, the torque they produce can be substantial.
Smaller angle grinders tend to operate at faster speeds, upwards and over 10,000rpm whereas larger grinders normally rotate at around 6000 – 6500rpm. Generally, with faster speeds comes more rapid wear on the discs, but due to the relatively cheap costs of 115mm discs, this isn’t much of a consideration when it comes to deciding the size of grinder you should purchase, this decision really comes down to the type of job you will be doing.
As we now know a little more about angle grinders, now is a good time to look at the various sources of power for our grinders, in general, this will be from one of the following:
- Electric: By far the most common type, power can be drawn from either mains (230 volt, general and domestic use), 110 volt via a step down transformer (mostly professional and building site use) or cordless through an on-board rechargeable battery (most commonly 18 volt Li-ion). Mains or transformer powered grinders normally range from 500 – 2,000 plus watts in power with the lower wattage items being at the cheaper end of the scale
- Petrol: More suited to site use, petrol cutters are really large scale angle grinders used for cutting steel, bricks and blocks, paving slabs etc…. and as such are not really suitable for grinding, just cutting. The tool features a small petrol engine that drives the cutting disc
- Pneumatic or Compressed Air: As with the above, this power source is mainly found in professional situations such as mechanics garages and workshops. The air to drive the tool is produced by a compressor and then channeled via pipes to the tool itself that then drives the cutting or grinding disc. These tools often operate at slower speeds than their electric cousins
As a summary, if you are looking to get an angle grinder for general DIY usage around the home, a cheaper 115mm corded model should be more than adequate for your needs but if you are looking to use it on a more regular, heavy duty and intense basis a more expensive model might suit you better or even a larger 230mm grinder might be the one to go for.
What can an Angle Grinder be Used for?
This power tool is designed mainly for either cutting through materials or grinding. In terms of cutting, their mainly only good for making straight cuts, but can be used for curves when one has more experience.
As mentioned, the real bonus of owning one of these tools is its versatility and ability to take a wide variety of discs and brushes that can be used for a multitude of different jobs. In essence, grinders can be used for:
- Cutting steel sheets, bars or rods, rusted bolts and screws
- Cutting bricks, blocks, tiles, slabs and even chopping out old mortar from joints
- Sharpening blades such as mover blades, shears, axes and other chopping tools
- Cleaning debris, paint and rust from metal surfaces e.g. gates and fences, car parts, trowels and spades, cement mixers, tidying up welds etc….
- They can also be used for making plunge-cuts in tiles if you need to chop a section out of the centre of a tile or slab
- With plenty of practice they can also be used for shaping objects and materials
As you can see, which ever trade you may work in or enjoy as a hobby at the weekends an angle grinder is a “must have” tool that you will certainly find regular use for.
After some practice with the tool you will begin to get used to its ways and the manner in which it operates and through this you will then probably find additional uses for it.
With some practice you can even cut curves and shapes in bricks, tiles or slabs. If you are particularly handy with it you may find that you can do this in one hit, but generally this is done in a few stages.
To cut a curve in a patio slab for example you would first start by marking out the curve you want to cut on the slab and then use a series of straight cuts with a cutting blade along the curve to remove the unwanted areas. Once done you should then have your rough shape that you can then continue to shape until you have a nice smooth curve.
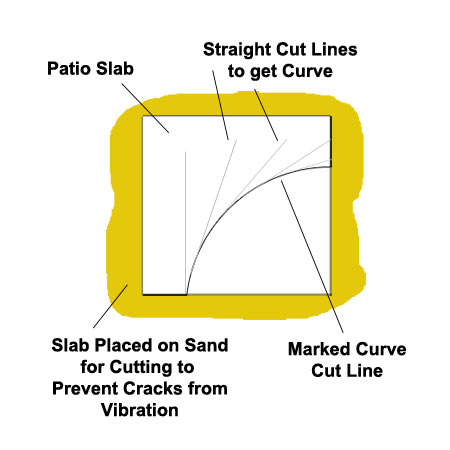
Cutting a nice smooth curve in a patio slab using an angle grinder
Types of Discs and Attachments for Angle Grinders
Discs are purpose made for the job they were created for, either cutting, grinding, polishing or sanding. Do not attempt to cut with a grinding disc or grind with a cutting disc.
Each disc should be labeled either "Stone" or "Metal". The material you work on should only be cut or ground with the disc labeled for that material.
Stone cutting discs will actually cut metal but they will tend to tear up and fall apart as they chop their way through and due to this the flying debris can cause a great deal of harm and damage to yourself, others around you and also to any nearby objects.
With the above in mind you should always grind and cut with the open section of the blade facing away from you.
On looking at an angle grinder, one thing that may catch your eye is the guard that covers about half of the disc when it is inserted. This guard is adjustable and by loosening it slightly you will be able to adjust it so that which ever position you are using the grinder in, the guard will be between you and the disc.
On this note, never ever be tempted to use your grinder without the guard attached, it’s there for a reason!
Now we have established that you should not use any disc or attachment to cut or grind the material that it is not intended for and that we should always use the guard it’s time to look at the variety of attachments available:
- Cut off Discs (metal and stone): These really do what they say on the tin. Metal cut off discs are used for cutting metal objects and stone cut off disc are for cutting stone or bricks
- Diamond Cutting Discs (tiles, mortar raking, slate, marble, granite, abrasive materials, asphalt): Again, these really describe themselves. This type of disc is normally diamond tipped on its edges so that it can cope with cutting the affore mentioned hard materials. When buying these types of disc you will need to check whether they are wet or dry cut (wet cut needs to be kept wet when cutting, dry can be used without water)
- Abrasive Discs/Pads and Sanding Discs/Pads: These normally come in the replacement form and are basically just pieces of sandpaper, but the difference is that they are normally Velcro backed or feature a method of attachment so that they can be fixed to a soft pad or base that is then attaahced to the grinder or sander. Available in a variety of “grit” grades (measurement of how course the paper is) from 40 grit right up to 400 grit. Once the paper has worn down it can be pulled off and replaced with a new sheet
- Grinding Discs (Metal and Stone): These come in both metal grinding and stone grinding types (make sure you get the right one) and are used for grinding down metal or stone to either shape it or take off lumps or peaks
- Wire Brush and Twist Knot Cups: These are basically wire brushes for your grinder. Groups of wires are twisted up and placed around the perimeter of the cup that then screws onto your grinder. When screwing up make sure you tighten them right up.
You will need to press the disc lock button in to lock any rotation and then use a spanner to tighten the nut on top of the cup.
The twisting action of the wire makes it very tough, enabling you to remove paint and rust with ease. This attachment will make mince meat of most surface coverings so only use it if you want to remove the covering completely
- Flap Sanding Discs: These are very handy to have knocking around if you have a grinder. Although primarily used for sanding and cleaning up surfaces (mostly metal) they do also grind a little so if you need to do some fine detailed grinding these are the best solution as they are not quite as harsh as a proper grinding disc. They are also available in a range of grit types so by combining rough down to smooth, you can get a great finish
- Polishing Pads: Like the above, these are screwed on to the threaded section of your grinder and tightened with a spanner. The polishing head or covering can then be fixed to the pad. Again, these are replaceable. The pads and coverings of this type are mainly used for polishing and finishing harder surfaces. Polishers, or mops as they are known are also available for polishing paintwork and other delicate surfaces. When working on delicate surfaces, sometimes it’s better to use a larger 230mm grinder as these operate at slower speeds
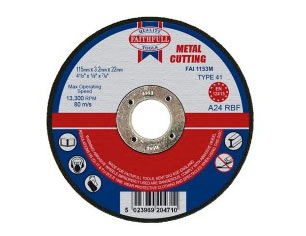
115mm metal cut off disc
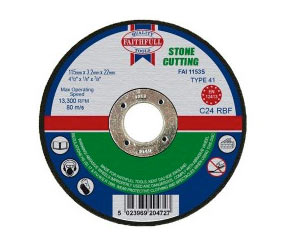
115mm stone cut off disc
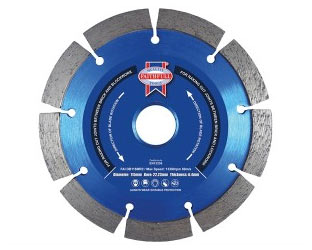
115mm diamond mortar raking disk
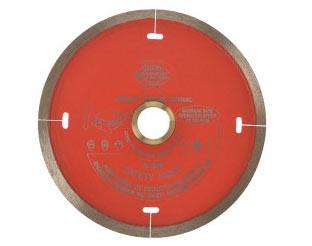
115mm diamond tile blade
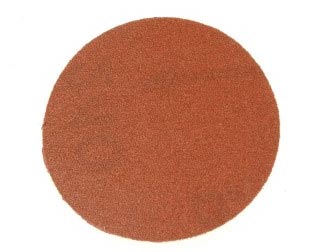
115mm circular abrasive pad
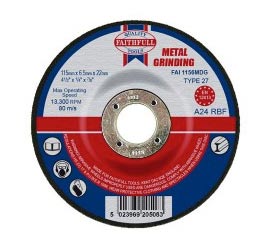
115mm metal grinding disc
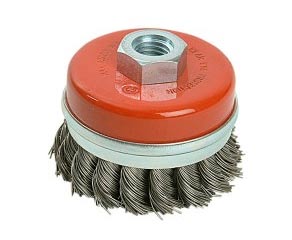
Wire brush cups and twist knot for an angle grinders
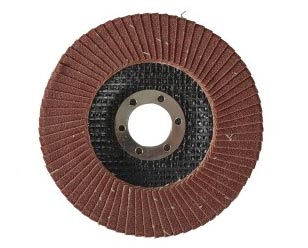
Flap sanding discs
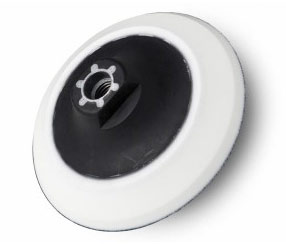
Angle grinder polishing pads
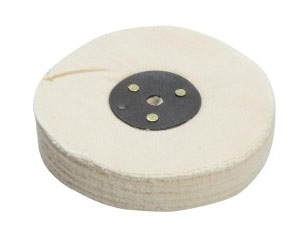
Angle grinder mopping pads
Discs and attachments vary considerably in quality and the best indicator is usually price. Cheaper discs (both grinding and cutting discs) will wear out considerably more quickly than expensive discs, but they are cheaper so depending on how regularly you will be using them, this may balance out.
Different Parts of an Angle Grinder
Regardless of the manufacturer, pretty much all angle grinders will have the same, basic features.
The majority of models sold come with a basic on/off push slide switch, so the disc will power up immediately. Respect should be given to this action and the power tool should be held with a firm grip when powered on.
In respect to the switch, most manufacturers will configure this so that you have to keep your finger pressed on to it for the tool to run. The second you release your finger the power to the tool is cut. This is mainly for safety reasons as if anything happens, then you will likely release your finger first.
As with all power tools, eye and hand protection should be worn at all times. There will be a lot of debris and sparks if working on metal from this power tool even with the guard in place.
All grinders come with a guard which protects the user from debris thrown out by the disc which is normally sent in a direction away from the user. This guard can be moved to allow use in awkward working positions.
The locking nut of a grinder will always tighten in the direction which will not allow it to come undone when the it’s in motion. As we have mentioned, grinders also have a disc locking button which allows you to lock the turning action of the wheel while you undo and tighten for new discs or attachments.
Most will also come with a detachable side handle. In most cases, this can be fixed for both left and right hand use and also sometimes on the top of the tool meaning that you can have full control regardless of what position you are using it in.
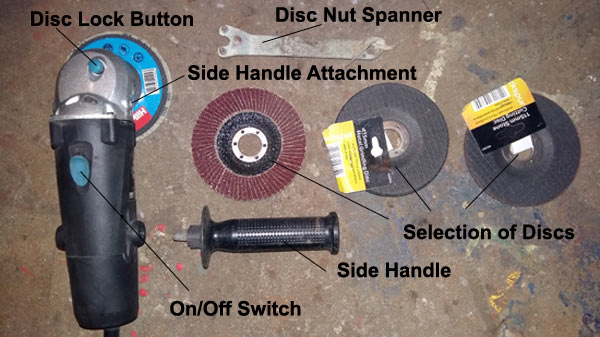
The main parts of an angle grinder and some of the attachments available for them – NOTE: The disc guard has been removed from this grinder for ease of viewing only! Never actually use it with the guard removed
One final point to mention in terms of the grinder itself are the motor brushes. The brushes are contained out side of the motor and allow it to work.
In essence, the motor coils need to be connected to complete an electrical circuit and to do this a copper or brass slip ring (or communicator as they are also known) is fixed to a sprung shaft with the springs pressing the brush that is attached to a section of copper wire on to the rings so that current is conducted and supplied.
The brushes themselves can wear down to such a point that the tool will stop working. At this point you will need to replace them.
As you can see in he image below, you will need to unscrew the two retaining screws on either side of the motor body, purchase some new brushes and screw them back in.
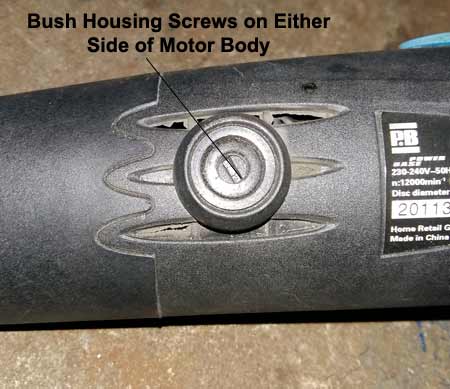
Old worn out bushes can be unscrewed and removed from the motor body and replaced with new ones
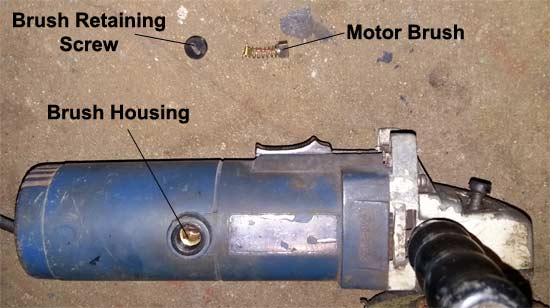
An old grinder with brush removed
How to Use an Angle Grinder
The manner in which you use a grinder will depend on what you need to do with it:
- Cutting or Grinding (general): This applies to both metal and stone – Make sure that the item you are working on is clamped firmly to a solid surface. To hold the item in place, ideally you would want to use a vice fixed to a workbench, a Workmate or by using suitable clamps to hold the item firmly to a bench or solid work surface.
- Cutting Paving Slabs: Due to the size and weight of most paving slabs, this is best done outside or in a garage or area with plenty of space. Before you start cutting and grinding, place the slab on a decent bed of sand. This will prevent the vibrations generated during cutting from cracking the slab
- Cutting Tiles: This quite a tricky job and only best done if you need to chop a section out of the centre of a tile. Place a decent, thick piece of cardboard under the tile to prevent vibrations from cracking it and using a clamp (make sure it has a pad of the clamping section), very lightly clamp the tile to the work surface. Too tight and it will crack, to loose and it may go shooting off on to the floor. It’s a very fine line between too much and too little pressure, so this may be something you want to experiment with
- Sharpening Blades: The best item to use for this is a vice or Workmate as this will allow you to hold the blade firmly in an upwards-facing direction, giving you a clear view of the angle that you need to hold the grinder on the surface to give you the correct cutting edge
- Cleaning and Sanding: This will depend on the item your working on. If it’s small enough, as above, make sure it’s held tightly in a vice or clamps but if you are working on a large item such as a gate or fence, ensure it’s laying down on the floor. If you need to you can use bricks or some sturdy sections of timber to prop it off of the floor
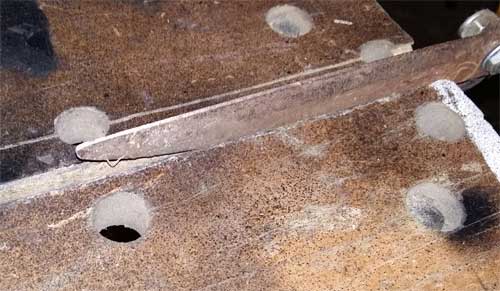
Shears gripped tightly in Workmate
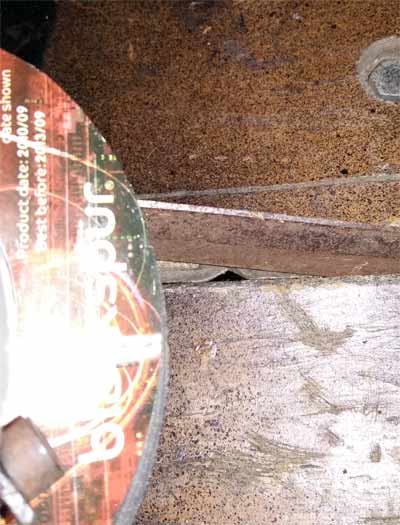
Holding grinder at correct angle to sharpen garden shear blades
The main point here is that the item you are working on is held while you are working on it.
It’s no good trying to hold the item with one hand and use the grinder with the other or even ask a friend or family member to hold it for you as angle grinders produce a fair amount of torque and can easily “bite” or “slip” and go shooting off causing untold damage to hands and other body parts, so stay safe and do it properly!
With your item properly secured so that it cannot move, fit the correct disc or attachment for the job and ensure it’s fixed tightly to the grinder itself.
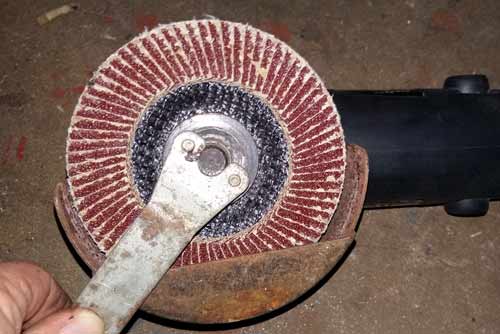
Using an angle grinder pin spanner to tighten retaining nut for disc
Before you start cutting, sanding or grinding (and with out the tool actually running) perform a few practice runs across your item so that you know exactly how you need to hold the grinder and in what position it needs to be in. Move the side handle if needs be to make the tool more manageable.
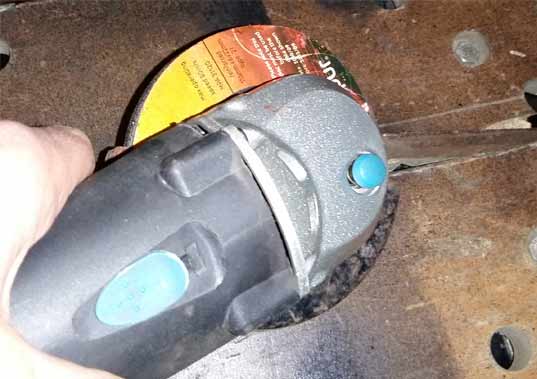
Practice holding the grinder in the correct positions for the job you are doing
Once practiced you can then actually make a start. Start the tool up and begin, moving it gently across your required surface or markings. Don’t be tempted to “go at it flat out”, stop every 10-20 seconds to make sure that you are working on the right area or keeping to your markings.
Let the tool do the work for you, you shouldn’t need to apply much pressure to it if any at all.
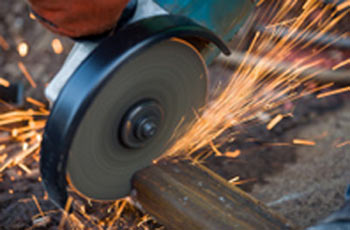
Cutting through a steel bar with an angle grinder
Once you are finished, turn the grinder off and allow the disc to run down until it stops. Don’t put it down with the disc still spinning as this can cause damage. Also, leave the item to cool down (especially if it’s metal). Grinding, sanding and cutting will cause the object you are working on to heat up, in most cases, until it’s red hot, so don’t burn yourself.
Check your work over to make sure all is well and that you are happy. If you need to do any more go ahead but check your progress regularly as once you’ve taken it off or cut it you can’t put it back on or joint it back together.
How to Stay Safe When Using an Angle Grinder
As we have emphasized numerous times in this project, as useful and versatile as these tools are, they are also very dangerous so treat them with respect. To ensure your safety and that your job is a success, make sure you follow the below points when using an angle grinder:
- Clothing: Wear old clothes as it can be a messy job and also make sure that you don’t have any tassels or loose items dangling down. As grinders run at great speed, loose items can easily become entangled and draw the tool into your body causing nasty injuries
- Safety Gear: Always wear eye protection, ear protection, sturdy gloves and decent foot wear such as a pair of heavy boots or even better, steel toecaps
- Secure Items You’re Working on: Make sure any item is fixed firmly to a decent work surface. If not, the torque generated by the grinder can send them shooting off into the distance
- Work in Space: Give yourself enough space to work in safely that allows you to move the tool around without it catching on anything and also ensures you don’t work yourself into a corner
- Practice: Get used to the feel and weight of the power tool when it’s both running and not. The gyroscopic force generated by the rotating disc or attachment can feel a bit strange so it’s worth getting used to the sensation
- Grind and Cut Away from Yourself: Always grind and cut away from your body and make sure that the guard directs any debris away from you
- Turn off at the Mains: When not using the tool, make sure it’s turned off at the mains. If you accidentally lean or stand on it, it can start up and cause damage
- Fix Attachments Securely: Make sure that any and all attachments are fix securely to the grinder so that they can’t come off while the tool is running
- Use the Right Attachment: Use only grinding discs for grinding and cutting discs for cutting – essentially, only use a given disc or attachment for its intended use
- Safety Guard: Never ever be tempted to use the tool without the safety guard in place

