Kitchen worktops are crucial for various tasks like food prep and cooking.
However, laminate worktops are vulnerable to heat and sharp objects, which can cause tarnishing, melting or scratching.
Interestingly, even some lower quality stone and granite worktops can be damaged by heat.
To prevent damage, use a pot rest or chopping board. These provide safe spots for hot items and prevent direct damage to your work surfaces.
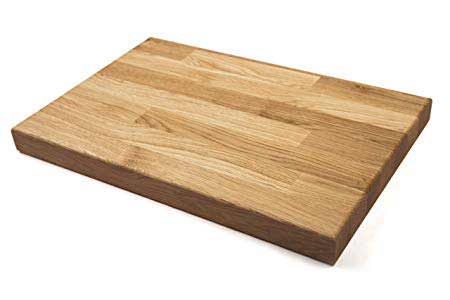
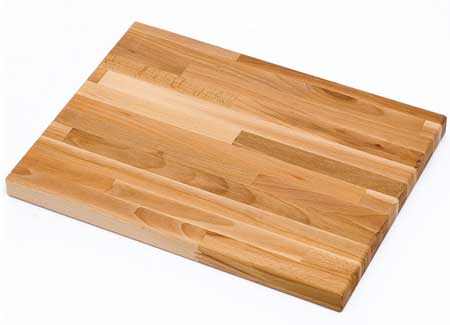
Solid hardwood chopping board
A sturdy timber or granite insert serves both purposes, offering a safe surface for chopping and a spot to place hot items, read on to find out more.
What is a Countertop Cutting Board Insert?
In most kitchens, a chopping board is a staple for food preparation, typically made of timber, glass, slate, stone, granite or plastic.
While versatile, movable chopping boards can lead to accidental damage if misplaced, especially when hot pans are involved.
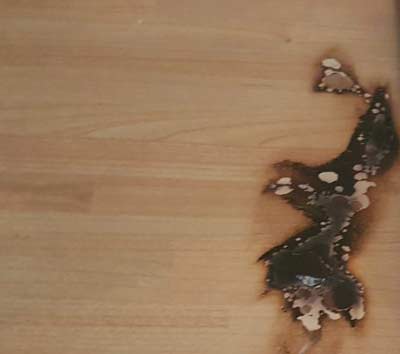
Heat damaged worktop
Enter the cutting board insert, a fixed chopping board permanently inserted or installed into a worktop, usually near the sink or cooker.
These inserts provide a dedicated space for food prep, minimising hassle when moving ingredients from the sink to the stove.
Opt for end-grain timber, commonly sourced from hornbeam, or other hardwoods for durability. Granite or marble inserts can double as pastry boards, provided they’re of good quality.
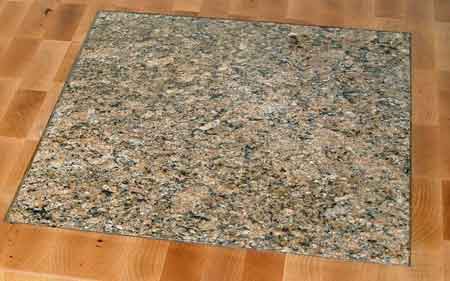
Granite chopping board insert cut into laminate worktop – Image courtesy of devoswoodworking.com
Benefits of a cutting board insert include stability during chopping and concealing existing damage, saving the expense of replacing entire worktops.
Alternative Cutting Board Options
Carving out a section of your worktop can be daunting for DIY novices, requiring precise tools and careful installation to avoid damaging the laminate surface and ensure a level finish.
With this in mind, before diving into this project, consider the following alternative chopping board options available:
Cooker Top Chopping Board
A cooker top chopping board is designed to sit directly on your cooker’s hobs or rings, providing extra workspace in your kitchen.
These boards are especially useful in small kitchens where space is limited, maximising your available area.
Available in various materials like marble, granite, toughened glass, and wood, they offer versatility to match your kitchen’s style.
Ensure the board is fire-resistant, particularly if you have electric hobs, to prevent accidental ignition if a knob is bumped and the hob turned on accidentally.

Cooktop chopping board – Image courtesy of chums.co.uk
Sink Top Chopping Board
Similar to the cooker top board, this board sits on top of your sink area.
Designed to fit over either the sink basin or draining board, these boards come in standard sizes for most setups or as custom extras for specialised configurations.
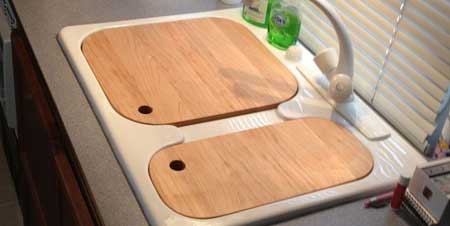
Sink top chopping board
Portable Butcher’s Block Island
If your kitchen space is limited, a fixed island might not be feasible. However, portable islands with chopping surfaces offer a versatile solution.
These islands often feature a durable butcher’s block on top, capable of withstanding extensive chopping and food prep.
When made with quality materials, butcher’s blocks can endure for many years.
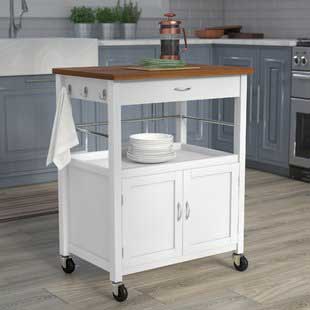
Movable island chopping board
Traditional Chopping Board
The classic chopping board remains a staple in every kitchen.
Available in various materials such as timber, plastic, glass, granite and the likes and many styles and colours, they complement any kitchen design.
Granite chopping board
What Type of Worktop do you Have?
Most likely, your current worktop is the standard laminated type, which is what we’ll assume for our purposes here.
Laminated worktops are typically between one and two inches thick and have a chipboard core beneath the laminated surface.
To confirm, run your fingers over the surface; it should feel slightly plastic-like. Tapping it should produce a dull thud sound. You can also look at the exposed section on its underside.
If you have a granite or marble work surface, it will feel much more solid to the touch or when tapped.
Note that cutting granite or marble worktops requires specialised tools and skills, so it’s best to hire professionals for this task.
Standard laminate worktop
Marble worktop
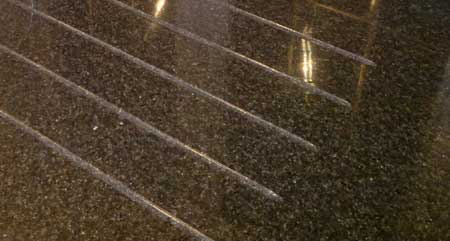
Granite worktop
Choosing the Right Chopping Board
Unless you’re opting for granite or marble, a timber “butchers block” is your best bet, as mentioned earlier.
It’s advisable to buy a high-quality chopping board and then tailor your worktop to fit it, rather than the other way around.
Off-the-shelf boards in standard sizes are usually sufficient, but for non-standard sizes or unique shapes, custom-made options may be necessary.
Solid hardwood butchers chopping block
Choosing the Location for Your Cutting Board Insert
Before cutting the worktop, inspect the underside to ensure there are no obstacles like unit side walls or braces that could be damaged.
If obstacles are present, reconsider the placement of your board to avoid complications.
For optimal results, cutting a worktop is best done when not fitted to base units so consider removing the worktop if it’s easily detachable before cutting.
Installing a Timber, Granite, or Marble Cutting Block
If you’ve chosen to install an insert chopping block after reading the information above, the next step is the actual installation.
There are various methods for installation, but for this project, we’ll cover cutting out a section of the worktop to drop the board in.
For the purposes of this example we are going to assume that you have already cut or purchased an insert of your chosen type ready for insertion into the work top.
Step 1: Mark out the Worktop Area to Cut
Once you have your cutting board to hand you can then measure it up to get the exact size hole you need to cut in the worktop for it to fit.
Once you have measured the length and width you will now need to transfer these measurements onto the worktop so that you have a clear template to cut around.
In terms of your cutting template, the main objective is to ensure that it is square. In order to do this you are going to have to measure off of a reference point.
We would always suggest that you use the front edge of the worktop for this and not the wall behind as they are rarely square.
You will also have to decide where your cutting surface is going to sit within the worktop. Is it going to be near the front, or in the middle, near the sink or near the cooker?
Once you’ve settled on this, it’s time to get marking. We are going to start with the front left corner.
Note: When drawing your cutting lines, make sure that they are exactly on your measurement marks, this is very important! We will explain why shortly.
To mark out your cuts, do the following:
- Using an engineers square, place it on the edge of the worktop so that the stock (the thicker side) is facing downwards and the outer edge of the blade is sitting on the work surface pointing upwards towards the ceiling. Make sure the stock is sat square to the front edge of the worktop also.
- This will give you a square edge to measure off as in most cases the front edge will be bull nosed so there won’t be an acute angle to work with.
- Move the square along the front edge until it is pretty much in position, marking the bottom left corner of where the chopping board is going to sit.
- Using a tape measure, pull the blade out 300mm or so and then lock it off with the thumb lock. Next, push the hook end up to the stock of the square and then measure and mark the location of front left corner of your board.
- Now, move the square to the right 80mm or so and repeat this. You should now have 2 horizontal marks.
- Using a straight edge, draw a line between these 2 points and you should now have a line that is totally square to the front of your worktop.
- Using a carpenters square (or steel square), place it down flat on the worktop so that the body is inline with your horizontal line and the tongue is flush with the front left corner mark.
- Next, using the measurement marks on the tongue of the square, mark the point of the rear left corner of your board and then run a pencil mark from the front left point to the rear. You have now marked out the left edge of your cut.
- Now, move the square so that the body edge is flush with the horizontal line you marked earlier and measure and mark the location of the bottom right corner. Extend the line out to this point.
- Take your square and flip it over so that the tongue edge is on the right and then position the heel point (or corner) just a little to the left (1/2mm or so) to compensate for the width of the pencil nib.
- Using the rule marks on the tongue, measure up the height of your board and mark and as before, joint the 2 points together with a pencil line.
- If all is totally square so far, the 2 rear left and right points that have not yet been jointed together should be the exact width apart as the width of your chopping board. If not you are going to need to re-measure and find out what’s out of square and then mark it out again. If all is well, use your square to joint the rear left and right marks. Once done, you should be left with a nice square that defines the exact size of your cutting board.
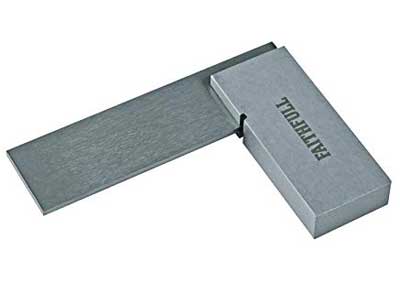
Engineers square
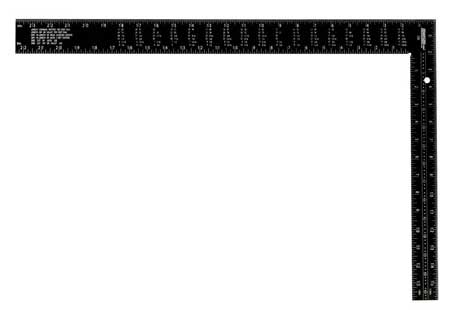
Carpenters square
Coming back to our above comment concerning getting your lines exactly on point with your corner marks – by doing so, you should now have marked the exact size of your chopping board out.
When you come to actually chop the area away, you will have to ensure that you cut the correct side of the line. What we mean by this is, when marking out, did you put your pencil mark directly on the mark on the tape measure, or to either side?
In any case, you will need to ensure you cut in the right place as this will have a huge bearing on the accuracy of your cut. Cut in the wrong place and the hole will either be too tight or too big, causing a massive headache!
Step 2: Cut out the Chopping Board Hole
With your markings done, it’s time to start cutting.
You have a few options for cutting when it comes to what tools you can use:
- Using a hand saw is possible but not recommended due to the difficulty in achieving a perfectly straight cut.
- Using a circular saw is, again, feasible but challenging, especially without removing the worktop and possessing experience in handling such power tools.
- For the best results, we recommend you use a jigsaw with a downward cutting blade to avoid chipping and breakout of the laminate surface.
Begin by drilling a 10mm hole in each corner of the marked area so that you can insert the jigsaw blade.
Ensure precise drilling by measuring 5mm in from both lines (or half the size of the drill bit width) at each corner and scoring a point for the drill point to sit in.
Next, score each cut line with a utility knife to reduce breakout and guide the blade.
If possible when doing this, use a straight edge or spirit level to score along to keep the line straight. Don’t slip while scoring as you will cause damage to the laminate.
Insert the saw blade into the drilled hole and align it with the cut line.
Start the saw and follow the cut line carefully, letting the blade do the work and keeping the sole plate flat on the worktop.
Once all lines are cut, gently tap the section out, being cautious not to chip the laminate.
Finally, tidy up any rough edges with a fine-grade file if necessary.
Step 3: Install and Seal the Chopping Board
With everything cleaned up, it’s time to fit your board.
If you’ve measured and cut accurately, the board should fit snugly in the cut out hole.
Before fixing it permanently, do a test fit with some help if needed, to hold the board from underneath to stop it dropping through.
Once the fit has been confirmed, remove the board temporarily.
Next, prepare your fixings to support the board.
Using Timber Battens:
Cut 3-4 battens to the height of the hole plus 100mm on each end (50mm for fixing either side). Fix them underneath the worktop to support the board, spaced evenly across the hole. Then, secure the board in place by screwing through the battens into the board.
Using Mending Plates:
Install 2 plates per side evenly spaced around the perimeter. Use appropriate size screws to avoid damaging the worktop or board surface.
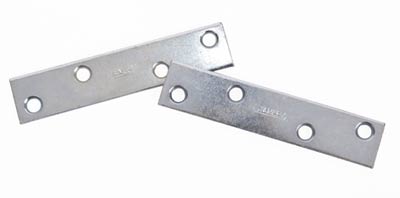
Flat mending plates
Finally, drop the cutting board in the hole and seal the gap between the board and the hole with a thin bead of silicone to prevent moisture from penetrating the core of the work surface.
Once in place and sealed, your installation is complete!
Cutting a chopping board insert into a worktop is not really a job for the faint hearted, if you get it wrong you can potentially ruin your work surface, but if you work carefully and take your time you can end up with a great looking and useful kitchen feature.
Advantages of Marble and Granite Worktops
Marble and granite worktops, along with other stone options, are highly sought-after kitchen features. While they offer numerous benefits, their cost can sometimes be a deterrent.
The polished finish of stone surfaces adds a contemporary touch to any kitchen. With a wide range available, they are durable and resistant to scratches.
These worktops excel in heat resistance, outperforming timber alternatives. They are low maintenance and ideal for pastry preparation, especially marble.
In summary, granite, marble, and stone worktops offer significant advantages, albeit at a potentially higher cost.
Granite Worktop Insert: A Success Story
Seeking innovation, we recently encountered a kitchen dilemma: a 3.2m worktop required, but the chosen worktop only available in a 3m standard length. To avoid unnecessary joints, waste and cost, we proposed a unique solution.
Instead of buying a full timber worktop, we suggested integrating a stone section. Though slightly pricier (£42.00 + VAT), the benefits outweighed the cost. The customer agreed and selected a stunning marble piece, which we seamlessly fitted.
Using a masons mitre for the join and a hardboard template for precision cutting, the marble mason expertly crafted the insert.
The result? A unique blend of the chosen Zebra worktop and a polished marble insert, offering both elegance and practicality. Combining timber and stone worktops? Why not embrace the best of both worlds!
Granite section inserted into timber worktop
whichever option you choose, it’s essential to ensure the worktop is sealed and cleaned regularly to keep it in top condition. Additionally, when making any cuts, these need to be 100% accurate to ensure the finished article is both visually stunning functions correctly.