When can I Turn my Fridge Back on After Moving?
It is always recommended that you avoid lying a fridge or freezer on its side but sometimes there may be no other option e.g. if you only have an estate car to move it in.
Some more modern units are a little better at coping with movement and especially being on their sides but unfortunately this cannot be guaranteed. If you have had no choice but to transport a fridge on its side it should be left upright for a minimum of 3 hours before it is plugged in and turned on.
If it was on its side for more than a day let it stand for 24 hours before plugging it in.
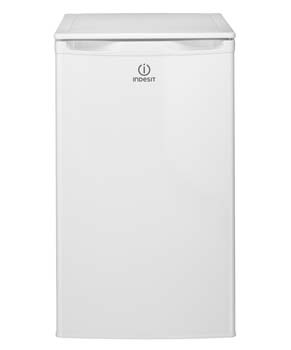
Under countertop fridge unit
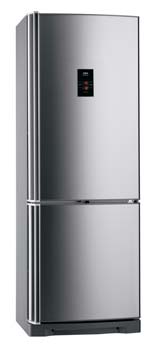
Electrolux advanced fridge freezer unit
Can you Lay Down a Fridge or Freezer to Move it?
You should always transport a fridge or freezer upright to avoid disturbing the refrigerant in the cooling system, if you have no choice you can lay a fridge or freezer down but before turning it on it should be sat correctly upright for 24 hours.
As mentioned above, It is always best to keep a fridge or freezer upright when moving, if possible, but if you do need to lie it down make sure you carry out the following 9 steps to protect your fridge or freezer when moving. Additionally, it you are moving the unit in an upright position you should also use the below steps:
- Turn off the appliance at least 2 hours before moving and preferably the night before to allow it to defrost, or if it is a compact frost free model to allow any fluid to drain*
- Unplug form the wall and secure the cable to avoid tripping or damaging the unit in transit
- Remove all food, shelves, boxes and trays. Remember to store any food contents in a family member or friends fridge or freezer for the duration of the move as you do not want any of your food spoiling or going off
- Give the fridge a good and thorough clean. Use a suitable spray cleaner or hot water with fairy liquid. Make sure you get into all of the corners and remove any food stuffs. Once cleaned give it a good wipe down to dry it. Also, give the outside a good clean and remove any dust, cobwebs etc…. from the rear
- If the door will be closed for more than 24 hours you may want to place a charcoal activated odour absorber inside to prevent it becoming stale
- Secure the door with low tack tape (make sure it is low tack as stronger tapes can damage the finish) or preferably a strap or bungee cord to make sure the door doesn’t swing open in transit. If your fridge or freezer unit has two doors e.g. a top unit and a bottom unit it is also a good idea to tie both the handles together also
- When moving your unit from its current position to the transport vehicle or new location make sure that you use the correct equipment e.g. some sack trucks (also strap the unit to the sack trucks). Fridges and freezers are bulky, awkward items and trying to carry them can result in damage and scrapes to walls and, worst case, even dropping the unit and damaging it or even splitting it which will then render it useless. In the event that you have to carry it due to space restrictions, make sure that you get some help, at least 2 people and always lift in the correct manner – look after your back!
- If you have to negotiate a flight of stairs during the move, again, make sure you have at least two people, one in front and one behind holding the sack truck. Due to their size and weight they can easily escape from you or topple over if you do not keep a tight grip on the sack trucks or keep the whole lot at a suitable angle. Also, always move down stairs, one step at a time
- Lie your fridge on its side and never on its back – lie it on the side opposite the hinges so the door is not straining to open. If you have a side by side fridge freezer lie it down on the freezer side (the side with the smaller door). Additionally, if possible, place a strong box or similar sturdy item under the top of the unit keeping it at an angle and minimizing the possibility of any damage.
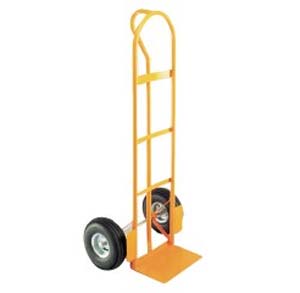
Box sack truck from Faithfull – Available in our store
*NB – Check with the manufacturer of your fridge as certain models do state that you must always transport them in an upright position. Check your instruction manual or the manufacturer’s website for more information.
How Should I Carry or Move my Fridge or Freezer?
As stated, you should not try to lift the fridge on your own; always lift it with at least one other person to avoid straining your back.
It is also a good idea to measure your fridge or freezer any doorways that you will have to go through to make sure it will fit.
If you do not have any of the affore mentioned sack trucks available to you they can be hired from your local hire shop. This may sound like an unnecessary expense but believe us, it’s more than worth it!
When placing the unit on the sack trucks, make sure it’s on its side. Do not be tempted to lay it on its back as this could damage or crush the cooling pipes or radiator.
If when the unit is on it’s side it is too wide to go through any doorways or openings, transport it to the opening and unload it from the trucks and then maneuver it through and load it back onto the trucks once through. Do not be tempted to ″wedge it on in there″ as this will damage the appliance and the opening.
How to Transport a Fridge Safely
Make sure you secure the fridge to avoid it moving in the van – use straps and take particular care if the fridge has rollers underneath, you may want to use chocks to make sure it won’t roll around.
Cover the refrigerator with a blanket to make sure the exterior surfaces are protected and do not get scratched.
Moving a Fridge Freezer or Freezer
Moving a freezer or a fridge freezer is the same process, and obviously you should make sure that the freezer is empty and defrosted before you attempt to move it.
You could have a leaving party and invite the neighbours round to eat up the contents of the fridge freezer and say goodbye in style!
Moving a Fridge, Freezer or Other Appliance into Position under a Countertop
If anyone has tried to do this before you will be well aware that it’s not an easy job. If the appliance, be it a fridge, freezer, washing machine, dishwasher etc…. does not have any casters then it will usually feature small rubber feet
These feet normally help prevent the unit moving around when it’s in action and also help protect your floor covering and due to the nature of rubber it tends to be quite resistant to sliding.
When forced these feet normally cause floor coverings such as lino, vinyl or carpet to ruck up and in some cases tear
To get around this issue, spray a small amount of furniture polish in the space under the counter top and rub it around using an old cloth or duster, making sure that you do not get any outside of the opening as this will make the floor very slippery.
With the polish now applied you should be able to slide your appliance easily into position.
Where is the Best Place to put a Fridge or Freezer?
This is one of those questions that you might never think to ask, however there are places that you should avoid placing a fridge or freezer.
It is generally recommended that you avoid placing either near a heat source such as a cooker, radiator, Rayburn or even a south facing window as this will lead to the unit having to work much harder to maintain a consistent temperature and through this it will also use much more electricity, costing more to run
* Note – Manufacturers of some models recommend they should be kept upright at all times to stop drain water from running back into the appliance because of the design of the drain (unless it is brand new and unused). Where you have to transport it on its side, turn it off a day in advance to let it drain fully.