Pull cord switches are very handy items as they can be used in a variety of situations such as bathrooms and the similar where a standard tumble-type switch cannot be used.
In this DIY guide we look at how to install a pull cord switch.
Regulations for Installing Pull Cord Switches
Back on the 1st of January 2005, Part P of the Building Regulations came into effect meaning that certain electrical jobs were no longer permitted on a DIY basis and could now only be carried out by a Part P registered electrician.
The remaining work that can be carried out by those without Part P registration mostly consists of:
- Replacement of existing fittings such as sockets, switches and light fittings
- Replacement of an existing cable for a single circuit where it has been damaged
- Adding additional lighting, light fittings and switches, to an existing circuit – As long as not in a kitchen or bathroom
- Adding additional sockets and fused spurs to an existing ring or radial main and installing additional earth bonding – As long as not in a kitchen or bathroom
All this is conditional upon the use of suitable cable and fittings for the application, that the circuit protective measures are unaffected and suitable for protecting the new circuit and that all work complies with all other appropriate regulations.
Any work other than this must be carried out by a professional electrician with the necessary knowledge to do the work to the regulation standards and also be able fully test it and then issue a minor works certificate once completed.
These rules absolutely do apply to DIY activities, so anyone carrying out notifiable work (anything other than the points listed) will have to submit a building notice to the local authority before starting the job and pay a fee to have the work inspected and tested, or simply avoid all the hassle and get a Part P electrician to do it.
If this is ignored then you may face problems when trying to sell your property as if its had notifiable electrical work carried out, but for which the appropriate certificate from a qualified electrician cannot be produced. Additionally, it will also propably invalidate your home insurance.
If you want to learn more about how to work safely around electrics, check out our electrical safety project here.
What is a Pull Cord Switch?
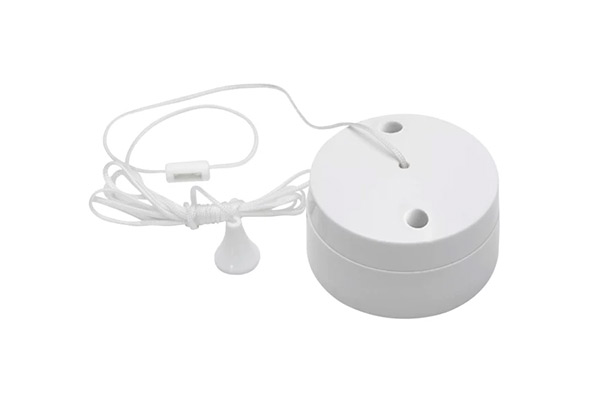
A pull cord switch is typically mounted to the ceiling, with the pull cord hanging down and is most often used in a bathroom or toilet where a standard tumble switch can’t be used. They are generally available in two types and ratings:
- A 6 amp version to control lights or extractor fans
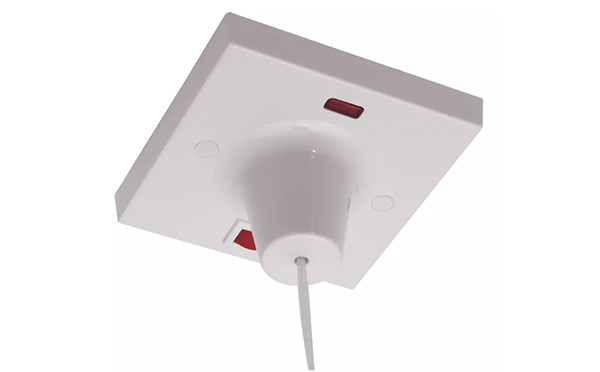
- A 45 amp version that’s used as an isolator for an electric shower
In most cases, the 45 amp version will have an integrated light and/or on/off indicator that states when the appliance is live and also turned on.
As stated, in the majority of cases they are used in areas subject to water and moisture as the fact that you have a pull cord to turn the light or appliance on and off you are no where near any electrical internals that could easily have water splashed onto them causing serious electrical injury.
After some use and time this type of switch can get a little tired where the switch appears not to function properly, normally due to an internal spring that jams up and gets stuck.
6 amp pull cord switches are normally only used on lighting circuits due to their lower operating amperage. They operate just like a normal switch, only they prevent water from coming in to contact with the main switch body, which can as commented lead to serious injury.

Standard 6amp pull cord switch
Tools and Materials Needed for Repairing and Replacing a Pull Cord Switch
To fit a pull cord switch or indeed just replace the cord, you will need the following tools and products.
- Small flat blade screwdriver
- Philips screwdriver
- Replacement pull cord switch – correct amperage, either 6 amp or 45 amp
- Replacement pull cord – if just replacing cord
- Scissors – to cut cord to length
- Ladder or steps to access switch
How to Replace a Pull Cord Switch
If you just want to replace your broken pull cord switch then work through the steps below. However, if you want to have a go at repairing your existing switch then scroll down to the sections we have on repair.
For the first part of this guide we will work through replacing a standard 6 amp pull cord light switch. From step 6 we will explain changing a 45 amp isolation switch.
Step 1 – Isolate the Switch and Circuit
The very first job to do before anything is to ensure the electricity is isolated for the circuit you will be working on.
To do this, turn off the MCB of the lighting circuit you’re working on or if a fuse board, pull out the fuse.
Belt and braces is to also stick a note over the MCB to state the circuit is being worked on that’s why it’s turned off.
Step 2 – Remove Switch and Access Wires
Once the circuit is isolated, setup your ladder under the switch, ensuring it’s flat and level and not wobbling and then unscrew the screws holding the switch to the back plate.
Pull the switch free and turn it over to access the wires. Take a picture of the wires (normally just 2), noting exactly which wire is in which terminal.
Depending on how old your property is will depend on what colours the wires are. If old then they may be red live, black neutral, if newer, brown live, blue neutral. More information can be found in our wire colours project here.
Step 3 – Loosen the Screws
Using a flat blade screwdriver, loosen each terminal for each wire and pull them free, ensuring terminals are loose enough to easily pull them out.
To save a little time and fatigue, loosen the terminal screws on the new switch also.
Step 4 – Connect New Switch
Next, connect each wire in turn to the correct terminal according to the photo you took earlier. This should normally be Live brown/red to COM and neutral blue to L1.
The neutral wire should also have a brown sheath or brown tape wrapped around it to indicate that it’s the switched live, but this will depend on the wiring setup. As long as you wire it up the same as the old switch, all will be well.
Tighten each terminal screw and then gently try to pull the wire from each side of the switch, to ensure you have connected it properly.
5. Refit Switch to Back Plate
Finally, gently push the switch back up to the back plate, ensuring you don’t kink any wires, turn it so the screw holes line up and then insert each retaining screw and screw them up tight.
Finally, turn the MCB back on and then pull the switch to make sure all is working as it should be.

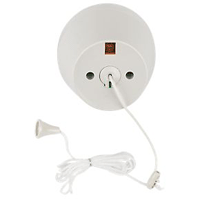
Pull cord switch
Step 6 – Replacing a 45amp Switch
Replacing a 45 amp isolator switch is exactly the same process as changing a 6 amp switch.
One thing to note however is that the switches do differ slightly. Whereas the 6 amp switch is single pole, the 45 amp switch will be double pole as it needs to be able to isolate both the live and neutral.
Again, before unscrewing anything, once the switch has been detached from the back plate/ceiling, ensure you take a picture of the wires and which terminals they are connected to.
A more substantial screwdriver is normally required due to the wiring thickness, that will usually be either 4mm2, 6mm2 or even 10mm2. This makes them a lot stiffer to move around, so be aware of this.
The different wiring thicknesses used will reflect the type and size of the shower it’s supplying. It is unlikely, but if the switch includes and earth connection, this must also be connected in the same way as the old switch.
Once all swapped over and screwed back in place, check the neon light when the power is back on. This should be constant and not flickering. Ensure the switch fixing screws are securely tightened, as this type of switch has to take a lot of strain.

Standard 45 amp pull cord switch
Repairing a Pull Cord Switch
If you want to try and save your broken switch, rather than throw it away and replace it with a new one, work through the steps below for your chosen type of switch.
Repairing a 6amp Pull Cord Light Switch
- Step 1 – Firstly isolate the power to the circuit you are working on in your consumer unit by turning off the MCB for that circuit or if a fuse box, pulling out the fuse. If you are unsure which is which, turn off all the power using the main isolator switch
- Step 2 – Undo the two screws securing the switch to the back plate and gently pull it down. There should be enough slack on the wires to allow you to do so
- Step 3 – Using some maintenance spray such as WD40, apply the lubricant to the inside of the switch, where the wires are connected, especially in around the pull cord section
- Step 4 – Supporting the switch with one hand, try to operate the pull cord with the other hand to see if the maintenance spray has freed up the spring and therefore the switch should work properly again
If this does not work, then the switch must be replaced (see Replacing the switch section above).
Repairing a 45 amp Pull Switch
With the heavier duty 45 amp shower switch, the spring is usually much stronger and an audible click will be apparent when operating this type of switch. If you cannot hear this then this is a good sign that the switch has failed.

Pull cord switch
- Step 1 – Before doing anything, turn off the circuit you are working on in the consumer unit or fuse box by turning off the MCB or pulling out the fuse. Most of these types of switch include a neon indicator, which will glow red or orange. If you have switched off the supply correctly the indicator will not be lit.
- Step 2 – Undo the two retaining screws holding the switch in place and carefully pull it down a little. There should be sufficient wiring to allow you to do this as with the lighter duty switch above
- Step 3 – Spray the switch area with the a little maintenance spray or WD40 and attempt to loosen the spring to make the switch work properly. Hold it with one hand and pull the cord with the other
Again, if this has does not work, the whole unit must be replaced.
Replacing the Cord From a Pull Cord Switch
On occasion, it’s not the switch that breaks but the actual pull cord that operates it. If the longer section breaks off the this can be replaced.
The cord itself is usually in two sections, with a plastic connector that separates them, so if the longer lower part breaks, a replacement can be added. The new cord may need to be adjusted for length.
Slide the cord from the finial and cut to length allowing for the knot.
Form a knot and then lower the finial to cover it. Other types of finial are available, such as timber or porcelain/ceramic, from hardware or DIY stores.
Replacing a pull cord switch is a fairly easy job if you have some basic DIY knowledge and one that you are allowed to do yourself. However if you are in the slightest bit unsure about what you are doing then always get the professionals in.

