Lead Paints contain lead, obviously! Lead has known to be toxin for over 100 years, although it was still available for use in the United Kingdom up until 1992. Between 1963 and 1992 the use of lead paint use was only allowed in historic buildings, so the prevalence of use diminished from the mid 1960’s onwards in most situations.
Lead was added to paint because it was very effective in a number of ways. It made the paint very hard wearing with the lead carbonate creating a spectacular bright white gloss finish. Lead also made the paint dry harder and quicker.
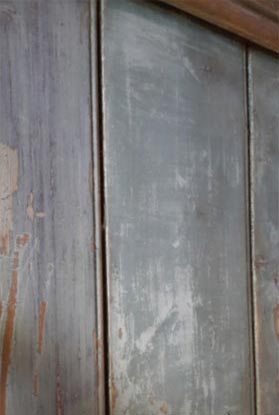
Lead Paint exposed after a top coat of modern lead free paint has been removed
The Risks and Effects of Lead Paint
Lead was used in paints as a pigment. Lead is a neurotoxin which builds up in the organs of the body and affects all of them, particularly the nervous systems. It enters the body either by particles being inhaled or ingested, and then will build up in the organs.
The effects are most serious in babies and children as their bodies are growing so have a much faster rate of absorption. Pregnant women can pass the toxins to their foetus where it will be adsorbed more quickly with more serious effects.
Children typically crawl on the floor and are more likely to put things in their mouths, so are again more likely to ingest or inhale contaminated substances. Should a child swallow a 10 milligram flake of paint this could equate to a 5 mg dose of lead; a very high dose!
Other than swallowing flaking paint, the other main risks are from inhaling or ingesting lead laden dust found in old buildings, particularly on the floors. High levels of lead can be absorbed from breathing in dust or fumes when lead paints are sanded or burnt off.
With the use of lead much reduced, there is much less risk of poisoning, however if you feel ill, suffer a loss of appetite, or start suffering from insomnia after excessive exposure to lead paint, you should seek medical advice. Don’t take any chances – prevention against exposure in the best course of action.
Despite the dangers of lead paints being known (Australia banned their use in 1906), their use continued and the proportion of lead actually increased to reach a peak of around 50% between 1930 and 1955. This means that while Victorian homes probably have the highest concentrations of lead in them, some post war homes will contain significant and dangerous levels of lead paint.
Paint Over Lead Paint or Strip it?
There is no formal guidance stipulating what you should do currently (such as there is with Asbestos). In the USA there is legislation in that forces landlords to disclose the potential presence of lead paint in properties to tenants; it is not here yet, but it is likely to happen at some point.
The jury is out about what you should do – The British Coatings Federation (who have produced an excellent and comprehensive booklet on dealing with lead Paint) advocate painting over lead paint wherever possible. However, others suggest that this is simply storing up the problem for the future, and if you have a dangerous neurotoxin in your home you should remove it, or worst case, paint over it and label it as having a toxin below the surface.
Without getting in to the argument, we feel that you should remove the lead paint is it is going to present a danger to yourself, or others in the future, especially if the paint is on a surface that is peeling or flaking, it could easily be chewed by children. If this is the case, painting over it is probably not a realistic solution, so you will have to consider removing any paint with toxic lead content.
How to Know if You are Stripping Lead Paint
It is important to know if you are working with lead paints. A lot of the times it is very obvious; they were commonly used on Doors and Skirting Boards, painted up until the 1960’s. If you are in a historic building this is a high chance that you will be stripping lead paints, even if it was painted in the early 1990’s.
When stripping paint you will find that the top layers of modern lead-free paint are removed fairly easily, but there is a layer of more stubborn paint that is a different texture underneath. If this is the case you should proceed with care, as this is likely to be lead based paint.
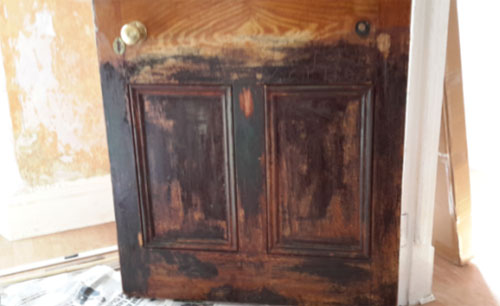
Lead Paint on a Door Being Stripped
If you are in any doubt you should use a lead testing kit to confirm the presence of lead.
A home that was built in the 1960’s or more recently should be lead free, however if you are working in a home older than this it is highly likely that there will be lead paint.
How to Strip Lead Paint
Because toxic lead can easily be absorbed by inhaling fumes you should not strip lead paint with a heat gun, and try to minimise sanding which creates fine particles that can also be inhaled.
Before you start you need to ensure that you have the right equipment:
- Mask for breathing protection
- Sugar Soap for cleaning and degreasing
- Wire Wool
- Stripping knives for removing paint
- Gloves for protecting your hands
If there are layers of paint over the lead paint that you need to remove, these will need to be removed, but take care as some of the lead paint will inevitably be removed also. For more information about removing normal paints see out project here.
Use a suitable stripper to remove the lead paint. This should ideally be a stripper that contains the lead particles stopping them from getting into the air where they could be inhaled and absorbed. The product that we use is HomeStrip from Eco Solutions because it is a gel that is applied and itself absorbs the paint particles when it is acting on it.
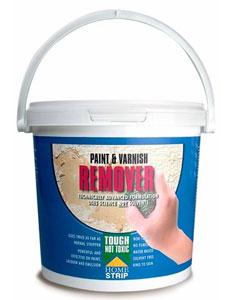
Home Strip from Eco Solutions. DIY Doctor paint stripper of choice for Lead Paint
Whichever stripper that you chose to use, you should follow the instructions in order to ensure that you get the best results. Often you will need to use a bit of effort and a tough abrasive, such as wire wool to help get the paint off, particularly if there are several layers.
At all times follow this sound advice from the British Coating Federation:
- Keep anyone not carrying out the work out of the area
- Keep dusts to a minimum – only use wet abrasive paper
- Do NOT use blow lamps or gas torches to strip paint
- Do NOT create lead fumes by over-heating lead containing paints
- Wear protective clothing and masks (if required)
- Clean up thoroughly after the removal of old lead paint
- Do NOT burn or incinerate lead-containing wastes.
Stripping Lead Paint from Doors (and Skirting Boards)
Stripping doors is a tough project, especially old Victorian and Georgian doors. From our many years of experience of stripping paints, stripping old doors are probably the worst paint removal jobs you will ever take on! We would not recommend using a hot air stripper which will release lead fumes into the atmosphere, and to wear gloves whilst removing these type of coatings.
An old door like this will have lead paint
A product like Home Strip Paint and Varnish Remover will remove some of the paint on an old door but there is often a deeper layer that it will not touch even after much scrubbing with steel wool. This is the green base coat which you can see in the picture below.
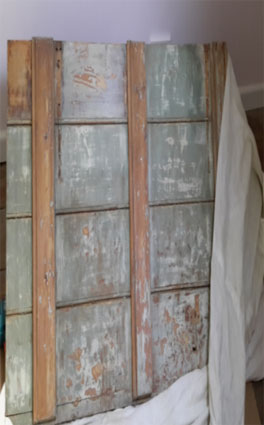
“Milk Paint” on an old door – this is a very hard lead paint
This hard to remove base coat is what is often called “Milk Paint” by the professionals. It is a very hard lead-based primer, which is very tough to remove.
We have found that hot soapy water seems to be the only way to break this type of milk paint down. Applying Home Strip, covering with plastic film and leaving for 24 hours will help a little to break down the surface, then with hot soapy water (washing up liquid) and scouring with the stainless steel scouring ball, or wire wool will start to shift it.
In some extreme circumstances we have seen some doors with a layer of this green “Milk Paint”, covered then by paint and then a top coat of thick varnish which has been grained. This too is almost impossible to remove with paint stripper combined with either steel wool or a scraper. The same removal technique should be applied to the grained varnish which is called “scumble glaze” and again the white base coat is the same as the green.
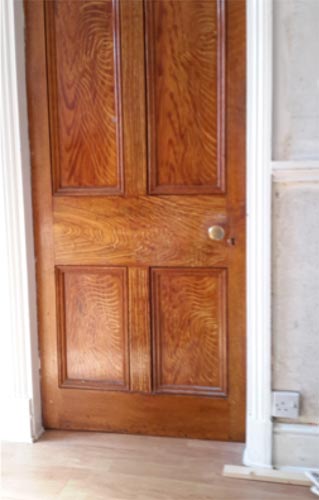
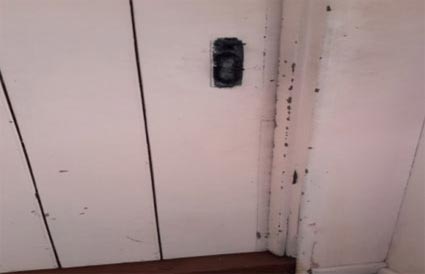
The finished Door – Lead Paint Removed Successfully
If it is not safe to cover it up or it is important to have the lead paint removed, then you should now be able to do it safely. As you can see from the picture above, the results can be spectacular and worth the care and effort.