If you’ve ever been tasked with paint removal, you know it’s not the most enjoyable job, it’s both messy and time consuming. Like many projects, the quality of the final result is directly influenced by the preparation work done on the surface. Neglecting this can lead to a rough appearance or quick deterioration. With this in mind, successful paint removal hinges on thorough preparation!
While the techniques discussed in this guide are generally effective on various surfaces such as wood and metal, it’s wise to consult the manufacturer’s specifications for specific paint stripping products to ensure they won’t cause any damage.
Understanding Safety Risks in Paint Stripping
While stripping paint is a relatively simple process, it comes with inherent risks associated with most of the methods discussed below.
Some paints incorporate harmful chemicals and solvents. Heat-based stripping methods can release these harmful fumes into the air, posing health risks if inhaled, so it’s essential to wear a mask.
Certain paint strippers are toxic and caustic, capable of causing burns if they come into contact with bare skin. Adhering to manufacturers’ guidelines and wearing gloves, masks, and eye protection is crucial.
Using sandpaper, particularly with a mechanical sander, generates a significant amount of dust. Inhaling this fine dust can have adverse effects on your health, again, wearing a mask is a must.
Mechanical sanders, such as belt sanders, random orbit sanders, and vibrating plate sanders, can be hazardous. Belt sanders, in particular, can bite, jump around, and strip skin if the rotating belt catches you.
Lead paint is a prevalent source of lead in older houses. Approximately two-thirds of homes built before 1940 and half of those constructed from 1940 to 1960 have been decorated with lead-based paint. Some homes from the 60s and early 70s may also contain lead.
For safety reasons, DIY Doctor does not recommend sanding down or burning off paint from internal or external surfaces unless you are certain the paint does not contain lead. If unsure, refer to our project on preparing timber for painting, where you’ll find comprehensive instructions on safe practices.
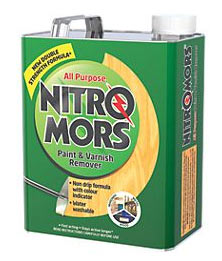
In the following paragraphs below you will see a product called Paint and Varnish Remover and this is the best product DIY Doctor has found in over 30 years of decorating, for stripping paint. It is safe and it is clean. If this project looks like product placement it’s because it is! This is the only way we strip paint and we know what we are doing. Danger of lead paint warning sign
Different Paint Stripping Methods
When it comes to removing paint, various methods are available, each suitable for different situations, environments, or surfaces. Your choice may depend on specific conditions or limitations, and sometimes you may have multiple options at your disposal.
NOTE: Regardless of the method you select, it’s wise to perform a test on a small, inconspicuous area first to ensure it won’t cause any permanent damage.
Consider the following paint stripping options:
- Liquid, gel, or paste strippers
- Mechanical strippers, such as sanders
- Hand stripping with sandpaper
- Heat guns
Each method has its own strengths and weaknesses, so understanding your specific needs will help you choose the most suitable approach.
Using Liquid, Gel, or Paste-Based Paint Strippers
Undoubtedly, this is probably the quickest and easiest way to strip paint, and in the majority of situations, it can be the most useful. It can be applied with a brush or putty knife, making it suitable for tight spaces where a scraper may not reach.
This method is excellent for use on decorative moulding and odd shapes where scraping would be time-consuming.
As you may know, there are quite a few products of this kind on the market. The most common forms include:
Gel Type Paint Stripper
Gel-based paint strippers offer a convenient method for removing paint. Using a paintbrush, apply the gel to the surface to be stripped, following the manufacturer’s guidelines regarding the recommended thickness (usually 1 – 2mm). Allow a few minutes for the gel to penetrate, visibly softening or lifting the paint. Afterward, use a scraper, steel wool or an old rag to remove the softened paint.
Depending on the number of paint layers, you may need to repeat the process several times to achieve complete paint removal.
Steps for Stripping Paint Using Gel Strippers
- Clean the surface to be stripped, removing any dust and loose debris
- Apply gel stripper: Use a paintbrush to generously cover the surface with the gel stripper
- Let it bubble: Allow the gel to sit on the paint surface for about 20 minutes or as instructed by the manufacturer until it starts to bubble
- Scrape paint off: Once bubbled up, use a metal paint scraper or putty knife to scrape away the softened paint
- Repeat if needed: Reapply the paint stripper to any areas with remaining paint, then repeat steps 2 and 3. Stubborn areas can be addressed with steel wool
- Clean the surface: After completion, wipe the entire surface with white spirit to remove any remaining stripper
Gel-based paint stripper
Paste Type Paint Stripper
Paste-type paint stripper offers two main options – a powder that requires mixing and a ready-to-use version. Like the gel variant mentioned above, you may apply the paste with a brush or, if it’s too stiff, use a scraper or putty knife.
Spread the paste over the designated surface, adhering to the guidelines on the packaging for the recommended amount (usually a thin layer of 1 – 2mm). Ensure thorough application, especially in corners, and let the paste sit for the duration specified by the manufacturer.
Unlike the gel type, where reactions are often visible, paste reactions may not be apparent. Wait for the full time specified by the manufacturer.
After reaching the designated time, test a small area to confirm the effectiveness. The paint should lift away with the paste.
If the process worked correctly, use a scraper to lift the paste and paint away from the surface.
Steps for Stripping Paint Using Paste Strippers
- Clean the surface: Brush and wipe the surface, removing any dust, debris, and loose paint
- Mix paint stripping paste: Follow the manufacturer’s instructions to mix the paste to the correct consistency
- Apply paste to the surface: Once mixed, spread the paste over the paint to be stripped using a brush or putty knife if it’s too thick
- Leave paste to work: It may not be obvious that it’s working (might not bubble as with the gel above), so leave it for the correct time stated by the manufacturer
- Scrape paste away: Once left for the correct amount of time, use a paint scraper or putty knife to scrape the paint away
- Repeat if needed: If any paint remains, then repeat steps 2 – 5 above to remove it. Use steel wool on any stubborn areas
- Clean surfaces: Once all stripped away, wipe everything over using white spirit to remove any remnants
Paste-based paint stripper
Regardless of the method you’ve chosen from the options above, after successfully removing all the paint, it’s advisable to clean the surface using fine wire wool or very fine sandpaper.
Exercise caution during this process, especially if the surface is wood or decorative. Being too heavy-handed or using a coarse abrasive can risk damaging it!
While the two options mentioned above are easy to apply, they come with some drawbacks. They are corrosive and can cause burns upon contact with bare skin. Additionally, they emit harmful and toxic fumes. Always refer to the packaging and manufacturer’s instructions, use them in a well-ventilated space, and wear gloves, eye protection, and, if possible, overalls and other protective clothing.
On certain surfaces, gels and pastes may cause damage, such as to some wood fillers. In such cases, you’ll need to repair or replace the damaged areas before proceeding with painting.
Be aware that once you’ve used chemicals on a surface, thorough cleaning is necessary before repainting to remove any chemical residue, which may affect the paint. Follow the manufacturer’s instructions and use the recommended substances to neutralise any residue. Typically, white spirit can be applied to a rag, and the entire surface should be wiped down.
Finally, never leave chemical-based strippers on a surface for an extended period, as they may dry into the surface, making it challenging to ensure complete removal.
Advantages of Liquid, Gel or Paste Based Paint Strippers
- Quick and easy to apply
- Can get into awkward areas
- Thorough and complete paint removal
Disadvantages Liquid, Gel or Paste Based Paint Strippers
- Corrosive to skin and can burn
- Produces toxic fumes
- Can damage some surfaces and fillers
- Needs cleaning properly before applying paint
A Revolutionary Paint Stripping Solution
Discover a game-changing product that’s making waves in the market and has been for some years – a user-friendly, solvent-free stripper guaranteed not to harm the surface you’re working on. Home Strip paint and varnish remover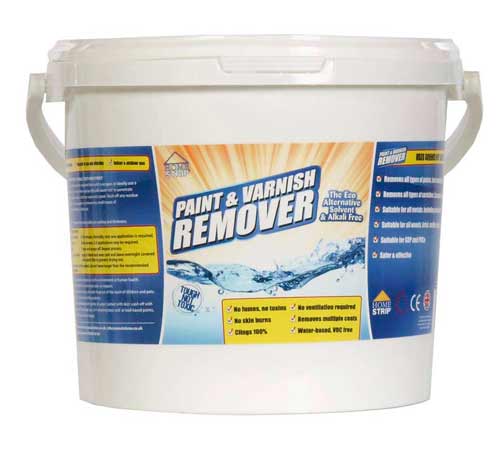
This innovative solution, known as Home Strip™, stands out in the market for its environmental friendliness and safety. To explore the range of products it can safely remove and the surfaces it’s suitable for, visit the Eco Solutions website. All Eco Solutions products are environmentally friendly and endorsed by Wayne de Wet, a multiple award-winning decorator and Grand Winner Dulux Select Decorator 2011.
Researched, developed, and manufactured in the UK, Home Strip™ is a revolutionary, patented water-based paint stripper. It relies on science, not solvents, making it safer for users and the environment compared to conventional hazardous solvents. Awarded Millennium Products Status for creativity and innovation, Home Strip® is ideal for both do-it-yourself enthusiasts and professionals. It’s economical, extends further than hazardous solvent-based strippers, and has minimal VOC content (0.000004%, certified by an independent laboratory detection test).
Unlike many DCM-free paint strippers that replace one hazardous solvent with another, Eco Solutions patented technology eliminates the hazardous solvent content and replaces it with water. It’s a safer alternative for you and your family.
Product Features and Advantages
- Water-based
- Tough non-toxic formulation
- Non-hazardous
- Non-caustic
- Non-flammable
- PH neutral
- No fumes
- No skin burns
- No ventilation required
- Suitable for use by people with respiratory problems, such as asthma sufferers
Eco Solutions provides stripping products for various surfaces and applications, including artex removal. Learn more about removing artex in our project guide. Additionally, we’ve reviewed the Home Strip range. If you want to know our thoughts after testing it, check out our review here.
Refer to the instructions above for stripping paint using gel when using Home Strip to strip off paint.
Paint Stripping with a Sander
A large variety of sanding tools are available today, each serving a unique sanding purpose and coming of shapes and sizes:
- Domestic Plate/Sheet Sanders: Some of the most common types of sander, you attach sandpaper to the plate vibrates, and when it vibrates it creates friction with the surface.
- Belt Sander Type: An oval belt revolves around rollers, rubbing sandpaper over the surface.
- Drill Attachment Type: Circular attachments that fit into standard drill chucks and revolve, powered by the drill.
- Random Orbit Type: Similar to plate/sheet sanders, a sanding disc/sheet is attached to a base plate that turns the disc backwards and forwards in a random manner.
- Detail/Corner Sanders: Come in various shapes and sizes, ideal for hard-to-reach corners.
- Drum Sanders: Feature a foam drum with an abrasive coating that revolves, creating friction with the surface.
Each tool has its pros and cons. While they cover large areas quickly, using the wrong grade of sandpaper can cause damage. It’s easy to go past the surface you’re stripping, and damage the material below. Dust is a significant concern, potentially damaging electrical equipment and requiring proper protection (goggles, dust mask, and covering furniture).
Stripping Paint with Sandpaper or a Sander
- Clean the area: Remove loose paint, dust, and debris from the work item.
- Protect surroundings: Cover nearby items with dust sheets as sanding creates a substantial amount of dust.
- Wear protective gear: Put on old clothes, gloves, eye protection, and at least an FFP3 dust mask.
- Attach a vacuum: If using a mechanical sander, connect a vacuum to help remove dust.
- Sand paint/finish: Begin sanding to remove the paint, avoiding dwelling in one area too long to prevent damage.
- Detail work: Use sandpaper on your finger for tight and detailed areas or consider gel, paste strippers, or a stripping knife/scraper.
- Smooth over: Once clean, use a finer grit sandpaper by hand or with a sanding block to smooth the entire surface.
- Clean up: Vacuum and wipe everything, removing any remaining traces of dust.
Advantages of Stripping Paint With a Sander
- Sand and strip large areas at a time
- Varied range of paper grades for different jobs
- Cost effective when it comes to purchasing sanding paper
Disadvantages of Stripping Paint With a Sander
- Using the wrong paper can damage a surface
- You can damage the surface beneath the paint
- Sanding intricate or odd shaped objects can be tricky
- Massive amount of dust created
- Have to be aware of the type of surface you are sanding e.g. you can damage timber if you do not run with the grain when sanding
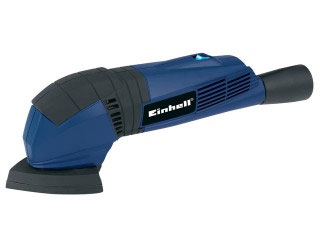
Corner and detail sander
Paint Stripping by Hand Using Sandpaper and Scrapers
As you can guess this involves a fair amount of elbow grease and due to this fact is only a realistic solution for small jobs where there is only a very thin layer of paint that needs to be removed.
There are several ways to do this:
Stripping Paint Using Standard Sandpaper
One simple method for paint removal is sandpaper. Begin with a coarse grade (60 or 80 grit) and move to a medium grade (180 or 240 grit) as you work through the layers of paint.
Once most of the paint is gone, go over the surface with a fine-grade paper (800 to 1200 grit) for a smooth finish. This step also ensures the removal of microscopic traces of paint. Be prepared for dust, so wear eye protection and a mask!
To strip paint using sandpaper, follow these steps (always wear eye goggles and a decent face mask):
- Clean the area: Remove dust, debris, and loose paint from the working area.
- Select sandpaper: Choose the correct grit paper for the job—coarse for old, thick paint, medium for newer, thinner coatings.
- Sand the area: Use a flat sanding block for flat areas; for detailed work, use sandpaper on the end of your finger or folded.
- Clear away dust: Periodically stop and clear away dust with a vacuum.
- Deal with detail: For detailed areas, use sandpaper on the end of your finger or folded; very fine areas may require gel or paste-based strippers.
- Clean up: Once complete, vacuum up all dust and wipe everything down with a damp cloth to remove remaining fine dust.

General purpose sandpaper set with fine, medium, and coarse grade papers
Stripping Paint with Wet and Dry Sandpaper
Another effective method for paint removal is using wet and dry sandpaper. Similar to conventional sandpaper, this type can be dipped in water before sanding the surface.
This technique minimises dust, and depending on the surface, it can result in an extremely smooth finish. However, if working on wooden surfaces, be cautious, as the use of water can lead to wood absorption and swelling. Allow sufficient time for drying before proceeding with repainting.
The process of using wet and dry paper is akin to using standard paper. Periodically, you’ll need to dip the paper in a tray of water to clean it and optimise its effectiveness. General-purpose wet and dry sandpaper set with fine, medium, and coarse-grade papers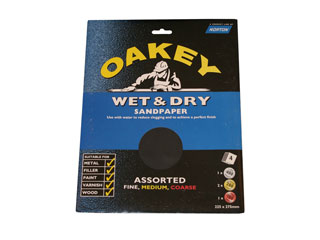
Keep in mind that if the surface is shaped or decorative, wet and dry sandpaper may not be the best solution. Despite careful efforts, there’s a risk of flattening edges and losing intricate details.
Efficiently Remove Paint with a Wood Scraper
One of the final paint stripping method in our list is using a wood scraper. While this method can produce favourable results, caution is needed to prevent inadvertent damage to the surface.
Follow these steps to use a wood scraper for paint removal:
- Tidy up. Clean the work area, ensuring it’s free from dust, debris, and loose paint.
- Select your scraper. Choose the appropriate scraper for your job, considering flat areas, angles, and details.
- Start scraping. Gently work the scraper over the paint to be removed, progressing through the layers. Be careful not to dig the scraper into the surface and avoid any damage.
- Go over the surface. Repeat the process, working through the layers and using different types of scrapers for detailed areas.
- Finish up. Once all the paint is removed, use a medium-grit sandpaper to smooth the surface.
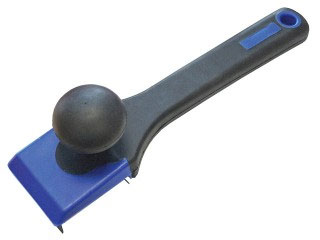
General-purpose wood scraper
Pros of Using Scrapers and Sandpaper
- Cheap and cost-effective for all types of projects
- Fairly easy to control the amount of paint removed
- Ideal for situations where only small amounts of paint need removing
Cons of Using Sandpaper and Scrapers
- Requires significant manual effort
- Can potentially damage intricate details
- Possibility of surface damage
Paint Stripping Using Heat
When it comes to paint stripping, heat proves to be a valuable ally, and there are two main tools at your disposal: the blow torch and the heat gun. Each has distinct characteristics:
- Blow Torches: These tools utilise a naked flame to heat a surface and strip paint. Most modern options come with adjustable knobs, allowing you to control temperature and intensity using specific nozzles.
- Heat Guns: Unlike blow torches, heat guns don’t rely on a naked flame. Similar to the domestic hair dryer but more intense, they operate by blowing hot air onto the surface (Do not attempt to use a heat gun as a hair dryer).
When using either tool, maintain a constant distance from the surface, typically 6 to 8 inches (adjust as needed based on flame/heat intensity).
Hold the tool at the correct distance and move it back and forth in a sweeping motion, heating the surface. Over time, you’ll observe paint lift, either bubbling or wrinkling.
Once the paint starts to lift, use a scraper to remove it. An old rag comes in handy to wipe off any residue.
Repeat until all paint is removed. Afterward, use sandpaper (usually a fine grade, 800 to 1200 grit) to smooth the surface, removing any final residue and providing a suitable surface for repainting.
Before using these tools, practice to understand flame/heat intensity and heating duration. In some cases, this method may cause timber resin to seep out, and any existing fillers can be damaged and require replacement before repainting or covering.
Always be cautious of potential issues such as seeping resin or damage to fillers, and practice with the tools before tackling the actual job.
Furthermore, pay attention to the surroundings, removing any flammable items like curtains, carpets, or plastics. Also, be wary of glass, as intense heat can cause it to crack. Wear eye protection, a mask, and heavy-duty gloves, as heating paint may release harmful fumes.
To strip paint using a heat gun, follow these steps:
- Clean the working area. Remove unnecessary and flammable items. Clean up any dust, debris, and loose paint.
- Heat the paint. Turn on the heat gun, holding it about 2 inches from the surface. Gently wave it over an area until the paint bubbles. Do not overheat to the point of smoking or catching fire. Always wear gloves and a suitable face mask.
- Scrape off paint. Once the paint is bubbling, use a suitable scraper to remove it. Repeat until all paint is removed.
- Finish up. After removing all paint, sand the surface with medium-grit paper to smooth it over. Wipe down with white spirit when the surface is cool.
Advantages of Using Heat for Paint Stripping
- Rapid paint removal
- Effective on multiple layers
- Relatively affordable tools
Disadvantages of Using Heat for Paint Stripping
- Can be hazardous
- May damage the surface, especially wood
- Might require several tools for different aspects of the job
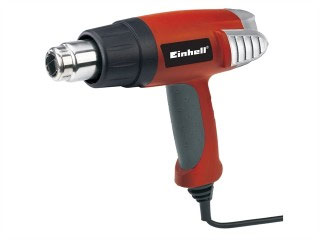
Hot air or heat gun with multiple heat settings
There are numerous different methods that can be used to strip paint from a given surface, some are better than others while some are easier and some are more effective, The methods that you choose to use is ultimately up to you, as long as the paint is removed that’s the main goal.