Cutting in paint is an essential job when decorating as it ensures that where different surfaces, such as walls, ceilings, windows, doors and moulding’s meet there, is a perfectly crisp and straight paint line.
Although any kind of preparation work is a drag, if you want a top notch finish it’s essential, so read on and find out how to cut in like the pros.
What is Cutting in and Why Should You do it?
Cutting in paint is the technique of painting a crisp straight boarder line of paint between two joining surfaces such as a wall and ceiling or around objects such as windows, door frames or moulding’s such as coving.
This has two advantages, the first is that you get a nice crisp and neat paint joint between your walls etc. and the second is that with the detail work done, you can quickly paint the rest of the wall using a more suitable tool such as a roller. Known as “Trimming In” in North America, the 2 techniques are exactly the same.
In terms of why you would want to cut in, the main reasons include
- When painting a wall you are likely to be using a roller or a paint pad. It is impossible to paint into the corners and joints between the wall and ceiling or similar using tools such as these, they are simply too big
- It is much quicker than masking up objects. It is the only practical way to make sure that the paint stays only on the wall you are painting, plus removing masking tape can tear existing paint off creating more work
- You will get a really crisp, clean line where the paint from the wall ends – if done right!
- As corners are tight and not easily accessible there should be minimal damage to any surfaces so you can start cutting in right away with minimal preparation work
Cutting in is a technique that will save time and make the job look much better
Tools and Products Needed for Cutting in
To successfully cut in when painting and get a great finish it’s essential to use the right tools and products, these are as follows:
- Suitable amount of your chosen paint
- Good quality angled sash brush
- Small 4 inch roller and paint tray (with sleeve of the same nap or fluffiness as large roller)
- Dust sheets
- Ladder or hop up
- Paint kettle
- Large roller (for painting rest of room)
- Painters George if needed (paint cutting in tool as they are also known)
Although we have included a Painters George in our tool list above you shouldn’t really need one. The point of cutting in is to avoid spending money on things such as this and once you have perfected your cutting in technique, you’ll get a much better result than you will ever do using tools like this.
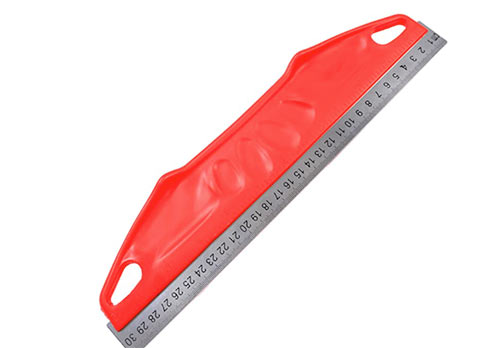
Paint edging tool or Painters George or paint cutting in tool for cutting in paint
What Paint Brush Should you use for Cutting in?
When cutting in you should always use a good quality 2 – 3 inch wide angled sash brush.
It is essential that you use a good quality angled sash brush for cutting in as the overall success of the job depends on getting a clean and crisp paint line and you absolutely cannot do this with a cheap brush. This is one area where saving a few quid isn’t an option.
Additionally by using a brush with good quality bristles they will spread the paint much smoother and you will get a flatter overall finish with less brush marks.
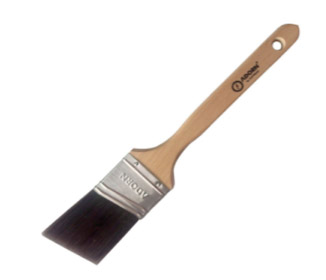
Many decorators prefer to cut in with a sash brush – get one on Amazon here
Tips and Pointers When Cutting in Paint
Over the years, professional decorators pick up a lot of tips and tricks, especially when it comes to painting, that allow them to work quickly and efficiently. Here follows some tips and tricks for cutting in that should help you:
- Always use good quality brushes and rollers. They reduce the amount of brush strokes and give a better finish
- When cutting in, always ensure the area is well lit by turning on any lights or even wearing a head torch. This will ensure you can clearly see your cutting in lines and where you are painting
- Always decant the paint into a smaller container such as paint kettle when cutting in, it’s easier to handle, less weight and there are less chances of any spillages
- When loading up your brush with paint, only dip the bristles in around an inch
- If you need to get into any tight corners or spaces, stipple the tip of the bristles into area to fully cover any surfaces
- If you get any paint where it shouldn’t be wrap a damp rag around a scraper (only 1 layer) and then run it over the area to wipe the paint away. The crisp, flat edge will ensure you don’t wipe paint away from surfaces you want it to remain on
- If you have to use masking tape, only use low-tack masking tape as it will reduce the risks of the tape pulling any paint off
- After cutting in, if you have to leave any further painting for a day or so, brush over any paint edges to feather them out to avoid any “hard lines” appearing when you paint the rest of the wall
How to Cut-In Paint
The concept or cutting in paint is very easy, but in practice is it much harder and it takes a great deal of concentration to do it neatly and get a clean finish, however with a little time this is more than achievable.
Step 1 – Get Prepared
Before doing any painting the first job to do is any preparation work. Here is a quick run down on the more important tasks that you probably need to get done before any cutting in commences:
- Move all the furniture and pictures that might get in the way and cover any that can’t be moved
- Laydown all the necessary dust sheets that you need over any exposed floor
- Clean, fill and sand any damage to walls so that they are flat and smooth and ready for paint. If you’re painting a kitchen or bathroom, wash down with sugar soap to remove any surface grease and grime
- You might need to consider a mist coat if there is any bare plaster. See our painting new plaster project for more information
- Cover and mask up any feature that you cannot afford to get paint on or move
- Remove anything from the wall that you can, including radiators, light fittings and switches. Make sure you isolate any circuits if you remove switches and faceplates at your consumer unit, this is essential!
For more help with preparing surfaces, see our project explaining what is needed to prepare a wall or ceiling for painting.

Wall to be prepared for cutting in
Step 2 – Mask Up?
Although the whole point of cutting in is to bypass the need to mask anything up, on the odd occasion you can’t avoid it. For example if you have ornate moulding’s, wainscoting, dado rails or wall paneling then to avoid any spillages or over painting it’s probably worth masking items like this up.
Use a low-tack masking tape so that it doesn’t stick to firmly to the surface and rip off any coverings when you pull it off. See our masking up project here for further help.

Low-tack masking tape
Step 3 – Add Paint to Paint Kettle
One of the trickiest aspects of cutting in is holding a brand new full paint tin, often on a ladder, and trying to concentrate on getting a nice, crisp line whilst not spilling any.
To avoid such issues, get yourself a paint kettle or similar small container, stir the paint fully for a minute or so and pour roughly an inch of paint into it from the tin.
You will now be able to concentrate fully on the job at hand while easily holding a nice light weight container of paint.
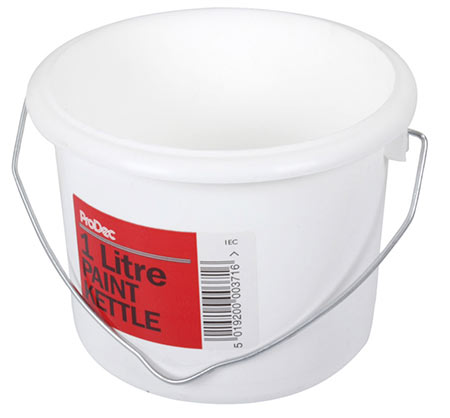
Paint kettle, ideal for use when cutting in
Step 4 – Ensure Area is Well Lit
So that you can see exactly what you are doing, as cutting in is detailed work, it is essential that your working area is well lit so remove the light shade and turn it on, use an additional lamp or set of site lights or even wear a head torch, as long as it lights everything fully, you can work effectively.

Site light used for extra lighting
Step 5 – Dip and Load Paint Brush
The next step is to load your paint brush with paint; this is why you need a good quality brush so that you do not over load it and it still holds it’s shape correctly.
You only need to use the bottom third of the brush, around 1 inch, so dip it into the paint. Try not to get paint all over it and do not over load it.
If you do get a little too much on it, dab it on the side of the paint kettle to remove some.
Step 6 – Start Cutting In
Before painting anything visible, it’s a good idea to start in a corner or somewhere is doesn’t matter too much if you don’t get a perfect line.
To keep full control of the brush you should hold it in a similar way as table tennis player holds his paddle. Use your index finger against the thin side of the bristles to give you even more control. This is all about precision. Make sure you’re confortable as you shouldn’t be straining. If you’ve got a lot of painting to do, you don’t want to be suffering any fatigue part way through.
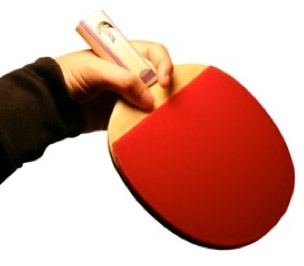
Hold your brush like a table tennis player
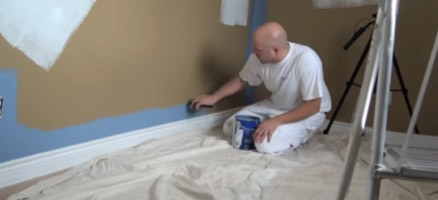
Starting a couple of centimeters from the corner or line you are cutting into, position the brush on the wall and, applying a little pressure, sweep the bristles along the wall up towards the line or joint you’re cutting into.
As the bristles fan out, draw the brush closer to the line or corner, moving towards it until you are painting a crisp line along it. Work slowly and carefully, taking your time.
Only tackle a short run at a time, around 600mm (2 feet or so) initially until you get the feel of it.
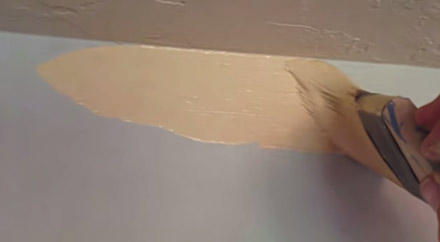
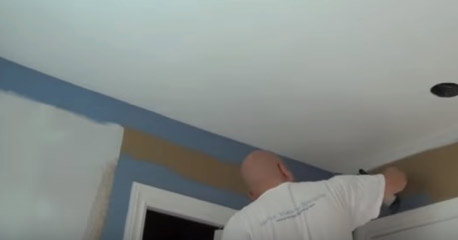
Cutting into joint between the top of the wall and the ceiling
Next, you will need to come back the other way, so don’t get too concerned if there are gaps or it’s not perfect. One clean, single movement is all that is required.
Recharge your brush if necessary and then come back on the opposite stroke. This should fill any gaps and finish with a nice clean line.
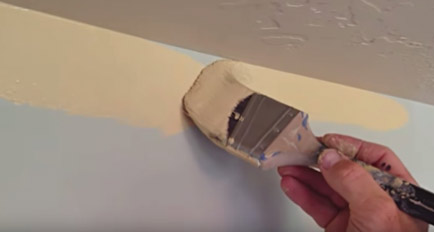
Cutting in requires two strokes, the second passing back over the first to fill any gaps
Using this technique, continue to work your way around the entire room until your first cutting in pass has been done and all lines and joints have a nice crisp coating of paint.
Step 7 – Apply Second Cutting In Coat
For the best possible results a second coat is needed. If there are any slight gaps or waves in what should be a perfectly crisp, straight line then a second coat will also sort these.
Using the same techniques outlined in the above step, lay on a second cutting in coat all around the room.
Once you have gone over the first coat, lay on a second coat, only this time, lay it on next to the first coat. Once finished, your cutting in paint should be around 4 inches wide, or roughly twice the width of your paint brush.
For the wider section you may find it quicker and easier to use a smaller 4 inch roller.
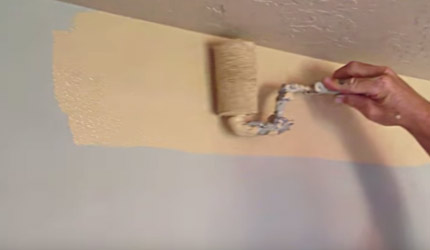
Use a small roller to ensure that your cutting in is seamless
Step 8 – Feather Paint Edges in (if paining the next day)
In an ideal world, once you have completed any cutting in you should then really paint the rest of the room straight away as this will avoid getting any hard lines between your cutting in and the rest of the paint.
Hard lines are caused when the edge of a paint line dries to form a ridge and when more paint is laid on up to and over it, the ridge is visible. The big problem with hard lines is that regardless of the amount of paint you lay on, they will always stand out.
If you have no choice but to leave the painting then a way to avoid any hard lines is to get as much paint out of your brush as possible and then run the dry brush over any and all edges to feather them out.
This will ensure they dry out flat to the surface and when any further coats are laid on, no hard edges are formed and both coatings blend seamlessly.
Once all the painting is completed clean your brush correctly so they can be used again.
Dealing With Corners
At some point along your cutting in journey you are going to have to deal with corners and possibly tight detailed areas that running your brush in a straight line as we’ve detailed above, just won’t get into correctly.
The best technique for cutting into corners and tight spaces is to position the brush on to the area to cover and then very steadily vibrate your hand and the brush very slightly so that the bristles “stipple” their way into the space, covering with paint as they go.
Removing any Mistakes or Over Paint Marks
If you’re new to this then the odd mistake and getting paint where it shouldn’t be is going to be inevitable, but fear not, this can be easily rectified, but to ensure no lasting damage any over paint mistakes should be wiped off immediately.
Using an old, slightly damp rag, wrap it around the edge of a paint scraper, only one layer, and then run it over the mistake. You can use the thin edge of the scraper to get right up close to the joint you’re painting, keeping everything nice and sharp.
Where to Cut in Paint
You will need to cut in all around the wall (or walls) that you are painting – every edge. You will also need to cut in along the corners where one wall meets another. This is because a roller will not get in there and give a complete covering of paint.
It is important to cut in to every edge because this will give you a crisp and sharp line, which a roller will not be able to achieve. This is the case even if you have masked up the skirting boards and the switches.
Cut in along every edge of the wall being painted
Cutting in Paint on Artex and Textured Ceilings
If you have an older property the chances are that at least one ceiling will have artex or some kind of textured coating on it and due to its roughness, keeping a brush straight and true to form a perfect, crisp cutting in line will be almost impossible.
The solution to this, as most trade professionals and sites on the web agree, is to use a this paint scraper, no wider than 2 inches, preferably 1 inch and then run it around the edge of the ceiling parallel with the wall to scrape off the high spots of the textured finish, back down to the flat plaster or finish beneath it.
By doing this you can then easily cut in as you have a flat area to run your brush against.
However one thing that no one mentions is that many textured finished contain asbestos and scratching and scraping at it will release the fibres into the air where they can then be easily breathed in. If you’re not aware, asbestos is seriously harmful to your health and has been linked with many conditions, including certain cancers.
So, before you go anywhere near an textured finishes you will need to get them tested first. For information on this see our project on asbestos safety here.
Although any preparation work is a bit of a pain, learning how to cut in paint is an essential skill to posses if you want to ensure any paint work is completed to a professional standard.