If you are an avid DIY’er or are involved in one of the many construction trades then at some point during a project or job you may find that you need to create a thread in a piece of metal for a bolt or that you need to cut a thread on a piece of steel for a nut.
This can be done fairly easily using what is known as a tap and die set and with little practice you’ll be cutting your own threads in all manner of objects in no time.
To learn about the different methods for cutting and tapping threads in steel and other metals read on below.
What is a Tap or a Die?
In order to cut a thread in or on a standard piece of steel you need a specific set of tools known as a tap and die set. In the set you will get a range of different sized taps and dies for cutting different sized threads.
Essentially a “tap” is used to “tap out” a thread in a given piece of metal after you have drilled the correct sized hole. This is known as an internal thread
With a hole drilled the correct sized tap is then screwed gently down through the hole and as the steel used to construct the tap is hardened (HSS or high speed steel for taps and dies for softer metals and generally cobalt for harder metals) and essentially much harder than the steel you’re cutting the thread in it cuts its way down through creating a nice smooth thread.
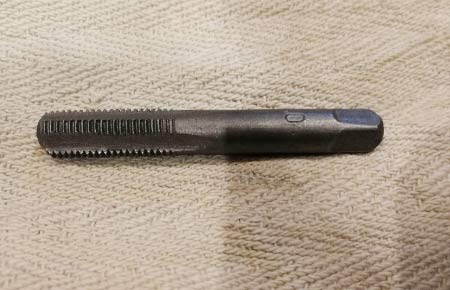
8mm tap used to create a 8mm thread in a piece of steel or other metal
A die is a similar object but where as a tap cuts a thread into a given piece of metal internally, the die cuts a thread around a piece of metal externally e.g. to create a bolt or a stud that a nut can be screwed down on to.
Again it works in a similar way in that the metal used to create it is hardened and due to this the cutting teeth are much tougher than standard steel so can easily cut into the item you are working on and create a thread.
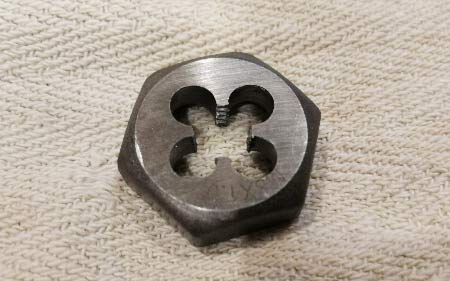
Die used to cut a thread on to a piece of steel or other metal
Another very useful feature of both taps and dies is that they can also be used to cut a thread back into an already threaded object if the original thread has become damaged.
On both taps and dies you may also notice 3 or 4 “flutes” channeled into the outside of your tap and also on the inside of your die.
These are hugely important as the waste that is removed from the item you are cutting into needs to be channeled out somewhere or it would simply bind and lock the tap or die up so during cutting the flutes allow the waste material to be removed allowing the cutting threads to stay free and do their job.
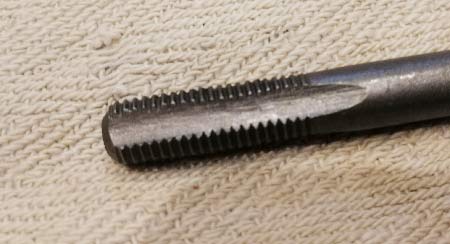
Flutes in side of tap to allow waste metal removal
One final point to mention is the affect that the hardening process has on cutting tools such as taps and dies. Essentially it makes them very brittle and quite fragile so dropping them or subjecting them to extremes of force can easily break them!
Types of Taps and Dies
Aside form the different sized taps and dies available for cutting different sized threads there are indeed several different types of each used for specific parts of cutting process and also in the case of dies for specific tools.
Types of Taps
There are 3 main different types of tap used for taping a thread in a piece of metal:
- Taper Taps: Also sometimes called a starter tap, the initial 8 or so threads are considerably blunter and flatter than the remaining threads and this allows you to start cutting much easier
- Plug Taps: Very similar to taper taps but only the first 4 or 5 threads are blunter meaning they are still fairly easy to start (although not as easy as taper taps) but can start cutting final threads much sooner, especially when cutting blind threads
- Bottoming Taps: The bottoming tap has not blunted threads at all and starts cutting from the off making them generally harder to start. They are generally used in conjunction with taper taps with the taper tap starting the cut and the bottoming tap used to go back over and cut the final thread
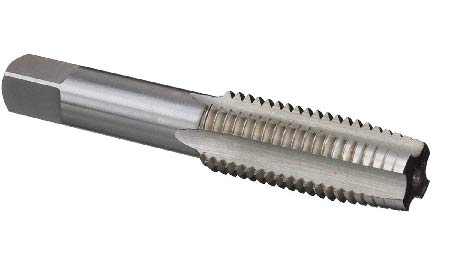
Taper tap used for starting a thread cut
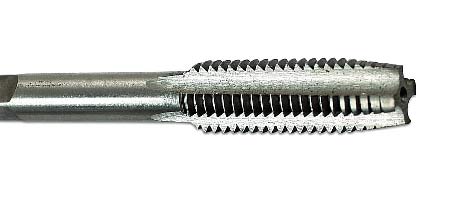
Plug tap used for starting and quickly cutting a thread
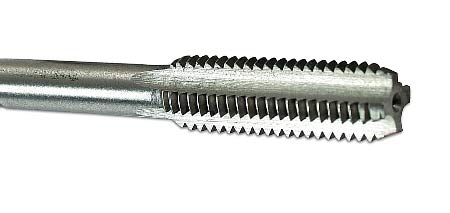
Bottoming tap used for cutting final threads
In the above we have mentioned blind thread, this refers to a thread the is cut into one side of a piece of metal e.g. doesn’t go all the way through.
On the opposing side of this is the through thread and as you may guess this is a thread that is cut all the way through a piece of metal from top to bottom.
Types of Dies
In the same way there are several different types of tap there are also several different types of die:
- Hex Dies: The hex die as you can see from it’s shape is hexagonal and due to this can be used with standard tools such as spanners, sockets and wrenches. As a range of tools can be used to operate them they are ideal for cutting threads in situ where the below round-type may be too awkward
- Round Dies: There dies are made to be used specifically with the T-handle stock tool that normally comes supplied with a tap and die set. The die is popped in the cradle and a screw is tightened to hold it firmly in place
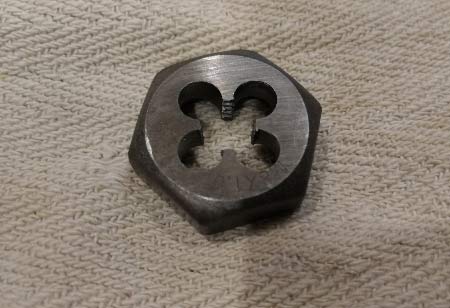
Hex die for use with spanners, sockets and wrenches
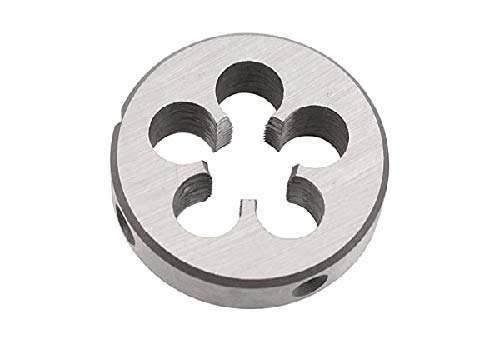
Round die for use with T-handle tool
Types of Threads
Not all threads are cut the same! By this we mean that there are numerous different types of thread and also coupled with this threads cut with different pitches, TPI (threads per inch), angles and crests (outer part of thread) and roots (inner part of thread).
This equates to a staggering range of different thread-types and although each one has to be cut and through tis a means of cutting then e.g. a tap and die set to do the job, there are today only a few different types commonly used – fine and course Metric (millimeters) threads and fine and course Unified Imperial (UNC/UNF) measured in inches.
The majority of tap and die sets available in the UK today will be metric kits as we now utilise the metric system but in days before metric became the standard imperial inch-based was all that was used.
In general pretty much all types of threads you will encounter will be metric but just be aware if the item you are working on is particularly old then there is a good chance it may be imperial.
The subject of threads and their variations is a fairly substantial subject and a little out of scope for this guide but a great run down on those available can be found in this article here.
Lubricate While Cutting Threads!
Typically lubrication is always used when cutting or drilling at high speeds to try and dissipate any heat generated. This both helps to reduce any heat damage and blunting to the cutting tool you are using and also aid with the forming of a smooth hole.
Although not much heat is generate through the act of manually cutting a thread you should certainly always use some form of lubrication. This will both help to move the chips and swarf.
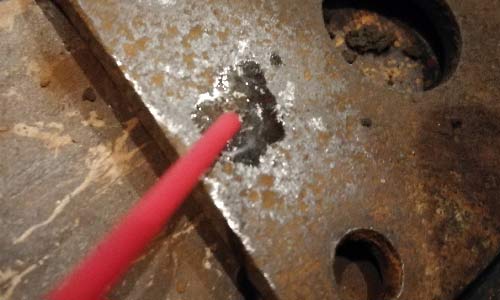
Lubricate while drilling holes and cutting threads
Use the Right Sized Drill Bit!
Creating the right sized hole for your thread is hugely important. As with most DIY jobs, the overall success is very much down to the initial preparation and forming threads is no different.
If your hole is too big then the threads root will be far too shallow and when a bolt is screwed up in most cases it will simply strip the thread out.
Likewise, if the hole is formed too small then the tap will simply bind up in the hole and you are cutting and more often than not simply break off.
To aid in selecting the right sized drill bit to cut the right sized hole there are numerous hole size charts that can be purchased and even found for free online. A decent metric and imperial chart can be found here.
How to Tap a Thread in a Piece of Metal (internal thread)
For the purposes of this example we are going to be cutting an 8mm or M8 x 1mm (distance between threads) through thread in a standard piece of steel.
Mark Thread Cutting Location
Bolt holes and other threaded recesses often need to be formed accurately so the item being bolted or fixed up fits perfectly so to ensure this is the case, first measure and mark the exact location that you need to form your thread with a pencil or marker.
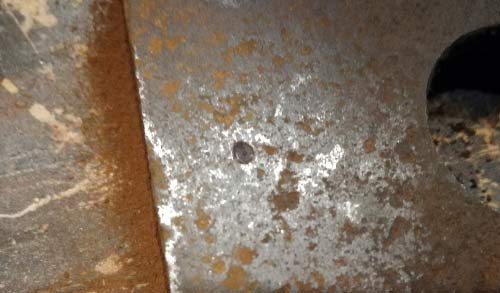
Hole for threading accurately marked
Once the hole location is marked use a centre punch to create a slight depression that will ensure the tip of the drill bit doesn’t slip whilst drilling out.
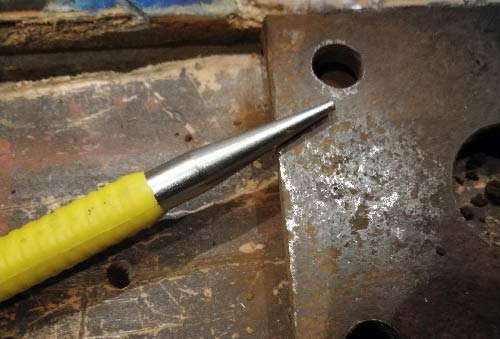
Centre punch used to ensure drill bit doesn’t slip
Drill out Hole
Once accurately marked the next job is to drill out the hole so that you can then thread it. As we have mentioned above forming the right sized hole is of the upmost importance.
As we will be cutting an M8 x 1mm thread, using our hole size chart we can see that we need to use a letter “T” or 7.01mm drill bit. As we are using standard mild steel we should be fine to use a 7mm HSS drill bit.
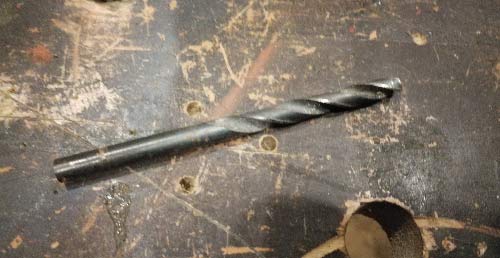
7mm HSS drill bit
Pop the drill bit in your drill and tighten the chuck fully. Position the point of the bit on the punch depression you created above and level the drill up ensuring that it is both horizontally and vertically level.
Add a little WD40 or cutting solution if you have it around the drill point and then slowly start the drill increasing speed steadily.
Ensure the drill is kept level while drilling and continue drilling down through, lubricating regularly if needed until you have drilled all the way through.
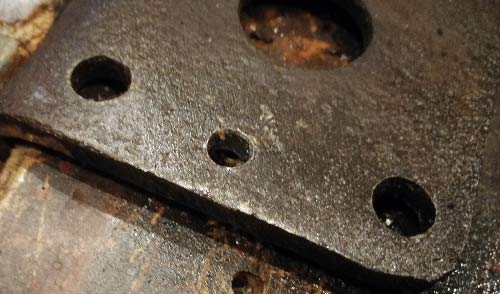
Hole for tapping drilled out
Cut Initial Thread
Once drilled out have a full clean up and remove any waste material and swarf and then select your M8 x 1 taper tap and pop it into the T-handle tap holding tool.
Position the point of the tap on top of the hole and turn it gradually feeling the threads start to bite and when they do continue on very carefully also making sure that you are holding the tap horizontally and vertically upright so that the threads you are forming are square and true.
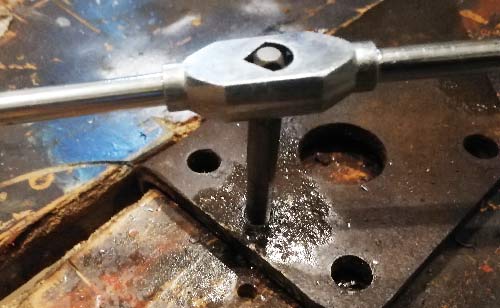
Starting thread cutting using a taper tap
Once the threads have started to cut in take your hand off the T-handle and then use a square to check across all 4 sides ensuring that the tap is totally square. Adjust if needed.
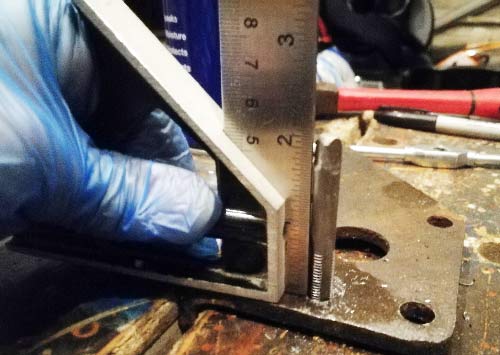
Checking tap is square using an engineers square
Once fully squared up continue winding the tap down through the hole taking your time. Stop every half turn or so and wind the tap backwards to help clear and swarf and break up and large ships so they can easily feed back up the flutes and also add a little lubricant if needed.
Repeat this all the way down through the hole until you reach the end and then gently wind the tap back out.
Final Pass Cut Using Bottoming Tap
With the initial cut and thread formed have a really good clean up and remove any waste and swarf and then swap the taper tap in the T-handle for the same size bottoming tap
Lubricate the hole a little to allow easy cutting and then run the bottoming tap down through to cut and form the final clean thread.
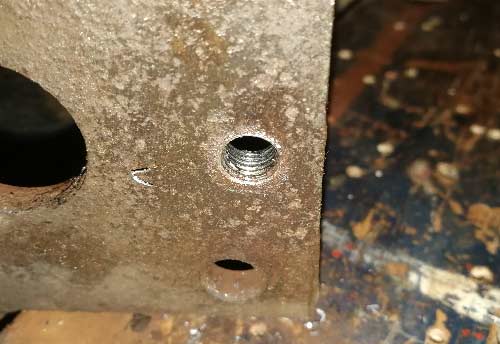
Final thread cut using bottoming tap
Test Fit a Bolt
With final thread now cut the last job is to have a test fit of our M8 bolt or M8 threaded piece of steel. As we haven’t actually cut it at this stage you can use a M8 bolt or simply wait until you’ve created your bolt. Add a little lubricant to the bolt and then screw it down into the thread. If all is well and then the bolt should slide nicely in and remain straight and true all the way down until it’s tight.
How to Cut a Thread on a Piece of Steel (external thread)
Cutting a thread using a die is a similar process to using a tap only this time we’ll be cutting the thread on the outside as opposed to the inside.
For this example we are going to cut an M8 x 1 thread in a piece of round rod so that we can then demonstrate it being screwed into the internal thread we created in the above steps.
Select the Correct Sized Die
Looking at your tap and die set, select the M8 x 1 die and pop it into the die stock T-handle tool and screw up the retaining screw to grip it in place.
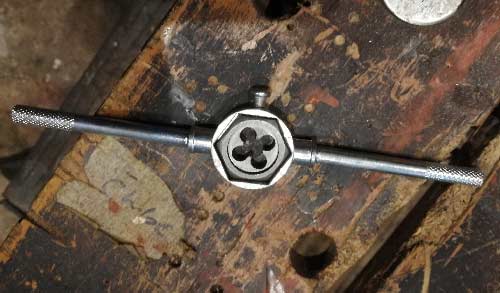
Correct sized die added to die stock T-handle
Cut Round Rod to Length and prepare
As this is an example we’re not too bothered how long our rod is so we are going to cut it to 50mm in length but if yours needs to be a specific length ensure you cut it accurately.
Once cut to length pop it into a vice and grip it up tight.
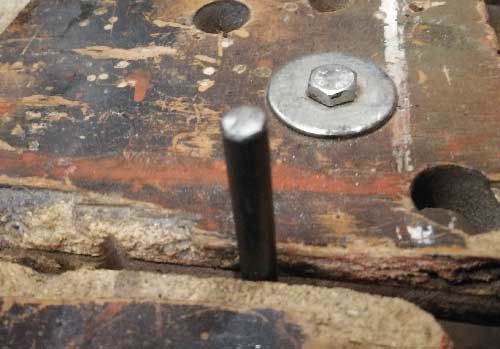
Round rod cut to length and gripped in vice
Using a file, file around the top edge of the rod, bevelling it to 45°. The act of bevelling the rod will help the die to start cutting much easier.
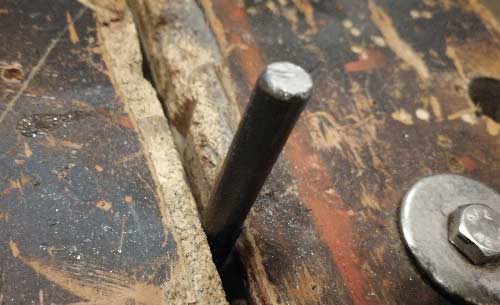
Top of round rod bevelled to allow die to cut easier
Cut Thread Using Die
Add a little lubricant to the top of the rod and then position the die down on top. Holding both stock handles gently turn the die down on to the rod, feeling the cutting threads cutting into the top of the rod.
As you cut, make sure that you are holding the die absolutely horizontally level so that in turn the thread will be straight and level.
Keep turning the die around taking you time and continually checking that you are straight and level and all is fully lubricated.
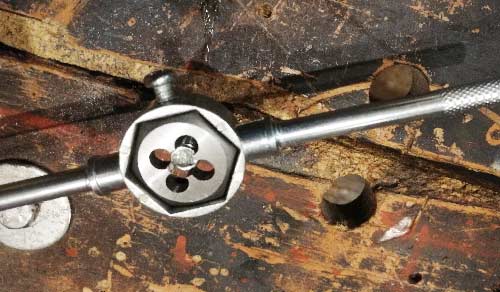
Cutting thread on top of round rod using a die
As with the tap, every few turns stop and wind the die backwards to clear out any waste and ensure it find the flutes ok.
Once you reach the point that you need to finish, stop and then gradually wind the die back up and off.
Once removed, clean everything up fully, removing any waste and swarf.
Test Fit Threaded Rod
With the thread successfully cut into the rod the final job is to test fit it and make sure out cut thread is a success.
Remove the rod from the vice and have a final clean up. Position the rod over the threaded hole we created above and carefully screw it down in making sure it remains straight and true.
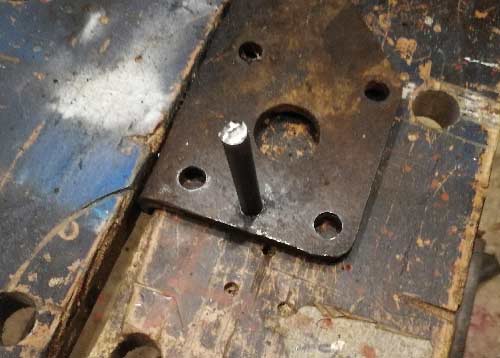
Successfully cut M8 thread in a piece of round rod and test fitted and screwed into piece of steel
How to Repair Threads Using Taps and Dies
Over time both internal and external threads can take quite a bashing if they are part of objects that see a rigorous daily workout.
When you also factor in forces, pressure and also environmental factors such as water and temperature this can have a severely detrimental affect on anything made of metal, so it’s easy to see how any type of thread, internal or external can become damaged and worse case even stripped.
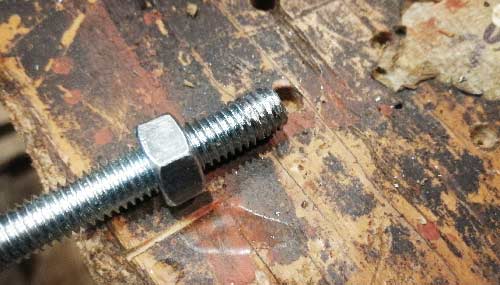
Damaged thread on coach bolt
Fortunately if a thread isn’t too badly damaged or completely striped bare then it can be repaired and recut by simply running the correct sized tap or die through it or over it.
Although it is possible to save a given thread this way the repaired result can in some cases be a little weaker than it would have been when originally cut.
However if it’s too badly damaged or has been complete stripped out in the case of an internal thread then there may be no choice left other than to drill it out and re-tap it with a brand new thread, which as you may guess will be slightly larger than the original.
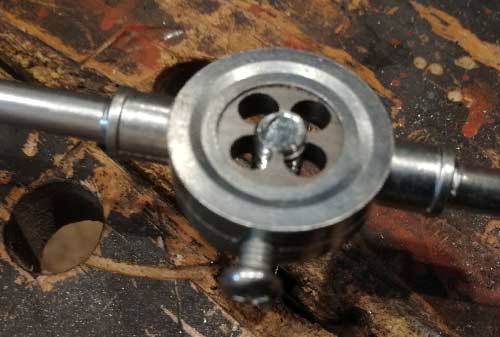
Re-cutting a damaged thread using a die
Cutting and tapping threads in steel and other types of metal is a very useful skill to have and one that you will find becomes more regularly used once you know how to do it.

