There are several ways to fix, anchor or support fence posts which include using a metal post holder (or Metpost or post spike as they are also known), digging a hole and using concrete to secure the post, or post ramming which is a bit like pile driving for fencing.
While the most common way to fix fence posts is to concrete them in and our project on fence posts shows how to do this, there are many occasions when concreting is not an option.
For example when the neighbours’ patio is right on the boundary, and you will have seen estate agents signs being put up using post holders.
For years Metpost or post spikes have been the biggest supplier of fence post holders, or post spikes, but now there is much more of a choice with other manufacturers producing similar products.
Fence Post Metal Spike
It might not even be a fence post you wish to secure, there are other areas where you would want to put up a post or timber upright, including posts for washing lines, garden arches or trellis, also other garden structures such as a gazebo or pergola need posts or indeed many decking installations require posts secured into the ground for the deck to sit on.
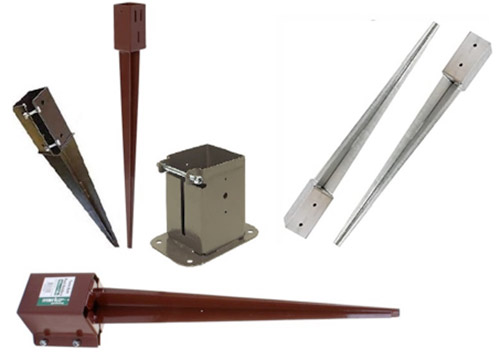
Selection of metal post holders
What Size Fence Spike do I Need?
This obviously depends on the size of your post and the height of your fence, or other structure.
The spiked fence post holders come in different sizes for different posts. You can see a selection of different models above, some with built in fixing bolts (which we prefer) and some which have holes for you to screw the post to the holder, which are usually cheaper.
If you use the ones that need screws then don’t forget to order enough rustproof screws! We would suggest using decking screws in this instance.
Fence post spikes can be bought for posts which are 50 x 50mm, 75 x 75mm or 100 x 100mm. They come in two lengths, 600mm and 750mm. The longer the spike the more secure the fixing will be for your post.
Do not use the shorter post holders for tall fences, they’re simply not up to teh job and as soon as they are subjected to any substantial wind they will likely fail.
50x50mm Post Holders
This size would be suitable for putting up posts for trellis structures so that climbing plants can scramble up them, this means there is space for the roots to grow and you are not taking up sections of your bed or border with blocks of concrete.
It is also ideal for fixing signposts – again this is the size used by estate agents for their signs. Use the longer length in light sandy soils or for taller posts – higher than 4 feet (1.2M).
75x75mm Post Holders
This size would be suitable for fences in most conditions – except in really exposed areas. It is also a good size for pergolas and washing lines. Again we would recommend that you use the longer 750 mm spikes in light sandy soils or for taller posts – higher than 4 feet (1.2M).
100x100mm Post Holders
This size would be best for fences in exposed areas, long expanse of fencing, gazebos which will be supporting a roof and pergolas if you want a more chunky-looking timber structure.
You can also use this size to install upright timber structures into your garden to create different zones, and to add height and interest by breaking up planting areas (see example below).
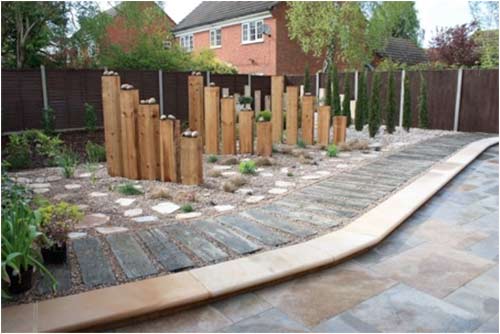
Using timber uprights to create structure in a garden – Image courtesy of Judi Samuel Garden Design
Using a Fence Post Holder Driving Block
Metal post holders and spikes solve the fence post problem in most ways. The metal spikes are simply driven into the ground with a sledge hammer or mallet but it is really advisable to put a driving block into the fence post spike first (shown in the image below).
You push the fence spike into the ground as far as you can by hand, then slot the driving block into the top of the fence spike and hit the top of the block with the hammer or mallet.
Note: Remember to ensure that you keep the post holder totally level as you drive it down into the ground – more on this below
Selection of metal post holder driving blocks
This allows you to hit the spike as firmly as you like without the risk of bending the sides of the post holder, which would prevent you slotting the post into the holder.
You could make your own driving block by cutting a short length of fence post and using that as a block.
We would suggest you drill a hole a couple of centimetres from the top of the block, all the way through, and thread through some sturdy rope to make a loop, or a piece of reinforcing bar (rebar) to act as a handle, like the one in the image below.

Home made fence post holder driving block
The act of hitting the block can cause it to get a bit stuck in the holder – which is why the proprietary block has metal handles.
You will probably need to replace your block from time to time depending on the size of your project – the composite blocks are solid and withstand the pounding quite well whereas a timber block will start to deteriorate as you use it.
If you are making your own block it is vital the block you make is cut square so you get the spike in level.
Bang the post holder into the ground making sure you check with a spirit level that it is going in vertically and not at an angle. If the post holder is leaning only 1/2 an inch (12mm) at ground level it means the post will be 12 inches out at the top (30cm).
This is especially important if you are lining up a row of posts for a fence!

Metal fence post driven into the ground
Aside from ensuring that any Met Posts are vertically levelled you will also have to ensure that as you bang them in they don’t twist. Again if any of them twist then they will be out of line so ensure each is square to any surrounding post holders so that all will finish square and level.
Once the spike is driven into the ground, the driving tool can be removed and the post pushed into the holder.
There is a bolt on the side of the holder that can be done up easily with a spanner to keep the post firm in the spike.
As you tighten the bolt check with a spirt level that the post is upright – not leaning backwards or forwards, or to the right or left.
Using Metal Spike Post Holders – tightening the bolts to the fence post
Although this type of spiked post holder is great for fence posts in normal ground we would not recommend it for any type of fencing which puts lateral stress onto the posts.
Chain link fencing for example, puts a lot of stress on the posts as it is tightened and the post holders would not be secured strongly enough in the ground for this (more on this can be found in our project on Chain Link Fencing).
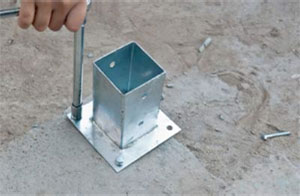
Bolt Down Fence Post Holder
If you want to put a fence post onto a patio for a summer house, gazebo or pergola there is a special bolt down post holder available for this too. It is shown below and as you can see it sits flat on the floor and is bolted or screwed down in all four corners. The post holder comes predrilled with holes for this purpose.
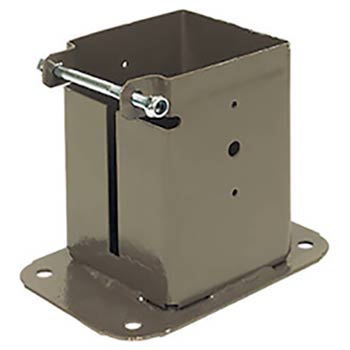
Bolt down fence post holder
This type of metal fence post holder can be secured to concrete, stone e.g. patios and terraces, timber (e.g. decks), or tarmac – such as a driveway where you might want to put up a car port or porch. It is the fixings you chose that will make the best and most secure job.
What Fixings do I use with a Bolt Down Fence Post Holder?
On a concrete surface we suggest you bolt it down using Rawl bolts (shown below) which are placed into holes drilled into the concrete and then tightened.
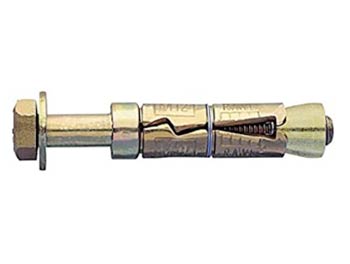
Rawl bolt used for securing bolt down fence post holders
Place your post holder in position and mark through the holes onto the surface below using a permanent marker or similar.
Drill the correct size holes for the bolts you’re using and then position the post holder back over the holes.
Drop your bolts into place and tighten using a socket wrench on the hex head of the anchor bolt. You can do this by hand or using an electric screwdriver.
For more information on the other types of fixings available, read our full guide to fixings here.
We also have a detailed guide covering the different types of nuts and bolts and how they should be used here.
With the rawl bolt, as the head of the bolt is tightened the bottom sheath expands, gripping the concrete.
You can also use a chemical fixing to hold the post holder down (see how here) with threaded bar studs that are set into the mounting surface.
This is probably the strongest method of fixing, especially in concrete which has been mixed by hand and may contain air bubbles.
Bolting fence post holder down onto concrete surface
Getting Post Holders Level
It is worth noting that these post holders also need to be level, so if you are fixing them to a base that has a slope or a dip then you can insert washers beneath the post holder holes to line up small disparities.
However if you need multiple washers to make the post holders line up then you could also mix up a small batch of mortar to sit underneath the post holder and support it more firmly.
For help and information on mixing mortar, see our how to mix mortar project here.
When using mortar, put enough washers in place beneath the post holder to get it level using a spirit level and then loosen up the bolts, add your bed of mortar and then tighten up the bolts to sit back down on the washers.
Check the level again, remove any excess mortar that will have squeezed out using a trowel and allow to go off before fitting your posts.
It is worth noting that there will also be a small amount of “play” in the posts before you tighten up the screw on the side of the holder so make sure your post is absolutely straight as you tighten, and check again once you have finished. You might find a post level is a good investment to help you with this.
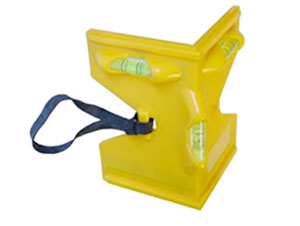
Fence post level used for keep posts level during installation
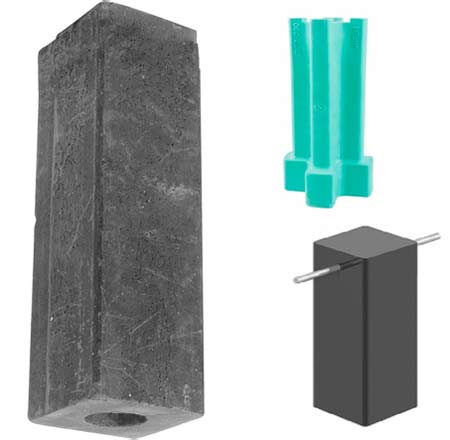
Concrete in Fence Post Holders
You can also buy post holders that are designed to be concreted in to the ground. They are made of steel and are extremely hard-wearing and resistant to corrosion due to the fact they are dual coated – firstly zinc plated then powder coated.
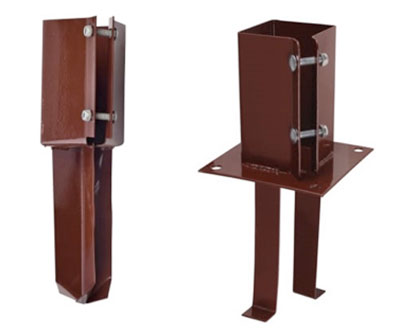
Concrete in metal fence post holders
This means that when you come to replace your fence, or other structure, in the future you will not need to dig out concrete footings or dig new holes.
More help can be found on replacing fencing in our replacing a fence panel project here.
Concrete-in fence post holders are designed for use where soil conditions are unsuitable for drive-in spikes.
The “shoe” should be set into a 450mm (18 inch) cube of concrete so that the base plate sits flush with the surface of the concrete.
Don’t forget to check it is level before allowing the concrete to go off!
The fence post should only be inserted once the concrete has cured.
The two-pronged style is suitable for small projects, or larger projects if you also bolt it to the concrete (see “bolt down fence post holder&dsquo; above) and the four-finned style is more suited to heavy-duty projects.
See also “What Size Fence Spike do I need?” above and treat the four-finned product as if it was the longer spike.
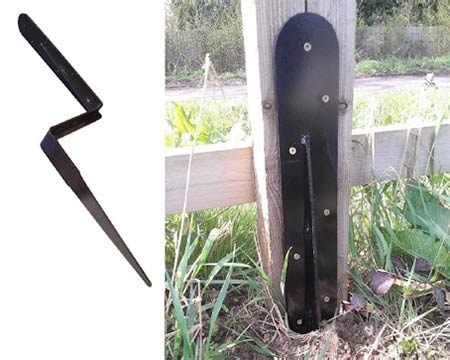
Fence Post Repair Spike
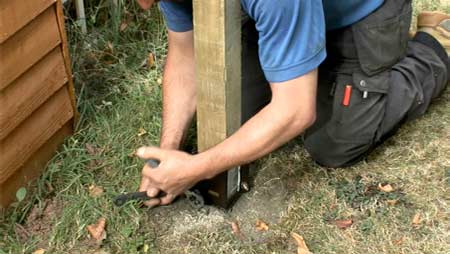
Most fences fail when the fence posts break due to rot or insect damage. If you have a broken fence post due to storm damage or rot, but most of the fencing is still intact you might want to just repair the post using a repair spike like the ones below.

Fence post repair spike
There is no need to remove the existing concrete or to add more concrete when you are using these spikes.
Saw off the broken or rotten fence post at ground level using a handsaw or reciprocating saw.
Hammer the repair spike into the earth in between the corner of the timber and the existing concrete – see how to do this in “Using a Fence Post Holder driving block” above.
The base of the post holder will sit on the old concrete and you can then slot the fence post into the holder and tighten the holding screws.
If your concrete block is too large to accommodate the spike above then you can get larger repair spikes (see below).
Drive the spike into the earth next to the concrete, so the upright section sits flush against the post and the horizontal section sits flush with the ground.
You can do this using a mallet, protecting the spike using a piece of offcut timber on the top of the spike.
Fix the spike in place using rust proof screws (such as decking screws) through the pre-drilled holes.
Large fence post repair spike