If you have undertaken any form of DIY before, in most cases, this is going to have involved some form of painting at some point, either painting walls or sprucing up tired woodwork or furniture.
As I’m sure you will be aware, the overall success of a job of this type very much depends on how well the surface or object you are working with has been prepared and this also goes for painting metal surfaces.
The way in which you prepare and paint your chosen metal object will in most instances be decided by what the object is. For example, if you are repairing and painting the wing of a car you are going to need to remove all traces of rust, undercoat the surface several times, smooth over your undercoat and then apply top coat.
On the other hand, if you are simply painting the metalwork of a garden bench then you may only need to clean off any surface rust and flakey old paint and apply the top coat.
If you are looking to paint a metal garage door, find out how to do this in our painting a metal garage door project here.
What Types of Metal Paint are There?
As with traditional paints, there are quite a few different types of metal paint available form many different manufacturers and in some cases, the paint itself is made from different ingredients.
The brand or manufacturer and cost of the paint also plays a part in the quality of the paint itself. The cheaper paints produced by budget manufacturers tend to be of a lesser quality than those produced by the more reputable ones, but that’s not to say that you can’t get a good finish with the budget paints.
As we have established, the key to getting a great finish is down to the preparation. Here follows some of the common types of paint. Some are a little more specialist but in terms of completeness, we though we would mention them:
General Purpose Spray Paint for Metal
These tend to be some of the most commonly used. They come in a huge range of colours and different types, such as:
- Primer – Normally either white, grey, red oxide or high build (thicker and used for filling and repairing small blemishes etc…) this is used to create a solid base for a top coat
- Matte and Gloss Finish – Normally only applies to top coat paints, these create either a dull matte finish of a shiny gloss finish respectively
- Metallic Finish – Used to produce a metallic effect finish. to produce this effect, slightly different pigments (the part that gives the paint its colour) are used and combined with aluminium flakes of varying sizes
- Textured Finish – Normally only used on a domestic level for decoration, this paint type produces a finish that has texture when touched. It’s normally made by mixing a base paint with adhesive and very fine particles, normally sand
- Heat Resistant Paint – This really does what it says on the tin. This is paint that is specially formulated to cope with very high temperatures, where normally paint would simply melt, loosing its bond with the heated object and becoming loose
- Acrylic and Latex – This is essentially a paint that is created using an acrylic or latex base. It produces a strong and hardwearing finished coat
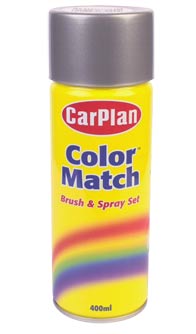
General purpose spray paint can
Cellulose Paint
One of the oldest types of paint finish around, cellulose-based paints (or Nitro Cellulose as they are also known) are typically mostly used in the automotive industry for painting and spraying cars.
The paint itself is made from a clear resin base and binder, pigment and predominantly, cellulose thinners. As the paint is sprayed on to a given surface, the cellulose evaporates and leaves the coloured resin base and pigment, creating the finish.
On the whole, this paint type is now rarely used and reserved for only industrial use and in classic car and vehicle restoration. Any use outside of this is against the law as is also using non-compliant solvent based paints due to the fact that they are toxic.
As this paint type is classed as an “aggressive paint” it is prone to react with other paint types and can caused bubbling and blistering. If this happens you have two choices:
- Strip off all old paint back to bare metal and start from scratch
- Use an isolator or sealer to seal the base surface
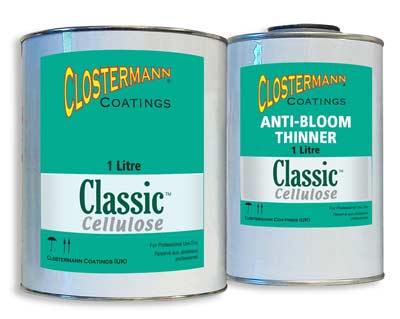
Classic car cellulose car paint and paint thinners – Image courtesy of clostermann.co.uk
Two-Pack or 2K Paints
This is in a way the modern replacement for cellulose paint. Although both achieve the same outcome, 2K paints work in a completely different way to their cellulose counterparts.
The paint itself is made up of acrylic and melamine resins and a second resin is added when ready to spray. This second resin causes a chemical reaction to take place which causes them to harden.
In terms of the final finish – where as cellulose, once dry, is then polished to achieve a high shine, 2K needs to be flattened down using a very fine grit sandpaper and to achieve the glossy shine, a lacquer is then applied.
Once dried or cured, the finish is extremely hardwearing, much more so than cellulose. It can resist things like oxidization (going dull and hazy over time), sunlight, petrol and acid rain.
It should also be noted that 2K or two-pack is strictly only a professional use product. The paint itself contains Isocyanate which is highly toxic and due to this by law, can only be sprayed in a controlled environment such as a spray booth.
Due to the substances used, anyone working with this paint has to wear a air-fed breathing apparatus. More about the rules of using this paint can be found here.
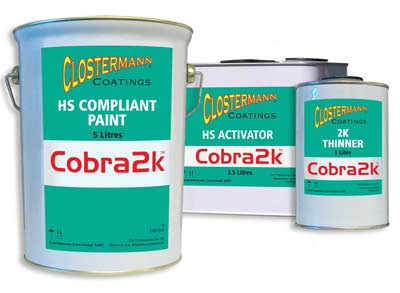
2K or Two-Pack paint with activator and 2K thinners – Image courtesy of clostermann.co.uk
Hammered Finish Paints and Hammerite
You may know this type of paint by the brand name most famous for producing it in the UK; Hammerite. Despite the brand name, pretty much all hammered finish paints are the same or very similar.
Their main use is to protect a given surface as they are great at repelling water and give it a nice, appealing finish so with this in mind they are ideal for painting metal fences and railings, garden benches and other outdoor furniture and also some plastic and timber items.
The great bonus of these paints is that they can be applied directly to rusty metal surfaces, although we would advise that you clean up and remove as much loose debris as possible, and also that they do not require surfaces to be primed first. You simply paint it on and let it dry!
In terms of applying, it can only really be applied by brush but it is now possible to buy as a spray in a can.
This is a good quality, easy to use, hardwearing paint and can be used on a huge range of items including furniture, radiators, bikes etc…. and can give a really unique finish with depth and texture.
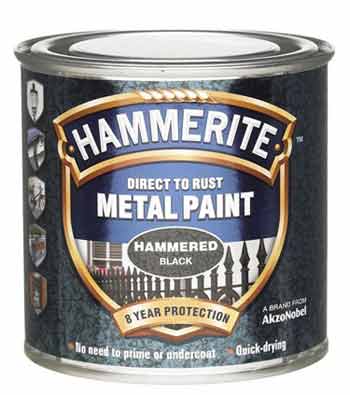
Hammered finish paint
Enamel Paint
Traditionally, the term enamel paint was used to describe a paint with a hard and glossy finish, but with the recent emergence of water based and latex paint, it now generally means a paint that cures to a hard surface.
With the finish in mind, it is ideal for use outdoors or in areas that are subject to heavy wear and tear and extremes in temperature, making them ideal for flooring, BBQ’s, car engines and braking systems.
Enamel or hard surface paints can also be used to treat timber surfaces, making them much more resistant to rot etc….
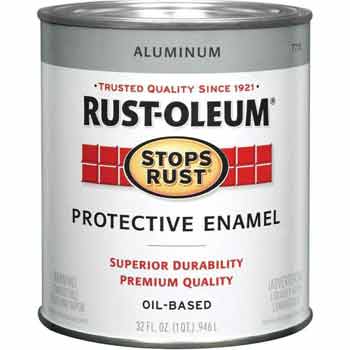
Oil-based enamel paint
Paint Reactions
We mentioned this briefly above, but it’s important to mention again in slightly more detail.
Although mostly isolated to the more professional level paints such as cellulose and two-pack, solvent reaction issues can arise when paints of different compositions are painted over each other. Issues can include:
- Blisters – Appears as raised bubbles on your freshly painted surface. Normally caused through a reaction with the original paint covering or something on the surface such as grease or dirt
- wrinkles – Looks very similar to wrinkled skin. Normally caused by laying paint on too thick or a hard edge underneath
- Crazing or Cracking – Looks very similar to dried and cracked mud in a field after hot weather, this is normally caused through a reaction between the original paint and your newly laid on paint
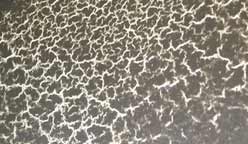
Cracking or crazing caused by a paint reaction
Although as stated, there can be other causes to the above issues, in most cases any issues that appear are down to a reaction between old and new paints or paints of a different compositional makeup.
When using standard domestic spray paint or hammered finish or enamel based paints, you should not experience any issues, but that’s not to say they can’t happen.
In the event that you do get a reaction of some kind, the only thing you can do is to wait for it to dry and then clean it off. It’s best to take it right back to the bare metal, but if this is not practical, rub off your fresh paint until it is totally smooth and back down to the original surface.
Before you lay on any new paint, you will need to seal the old paint to prevent any future reactions. For this you will need a sealer or isolator.
Coat the object in the sealer, using the manufacturers guidelines (normally at least two coats) and then once dried, flat it back if needed and then you are ready for priming or top coat.
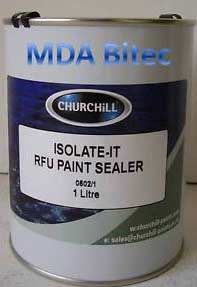
Paint sealer or isolator for cellulose paint
Preparing Metal Surfaces for Painting
As we have established, preparation is key! Depending on what you are painting will depend how it’s prepared:
Fences, Railings, Garden Furniture etc….
In most situations, you will just been looking to protect them and tidy up their appearance and will not necessarily be looking for a glossy finish that is totally flat and smooth, if you are, please skip to the next section.
Clean off as much rust and loose debris as possible using a wire brush or some course grit sandpaper. You can also use a power drill with wire brush attachment, this will speed up the process but please wear the appropriate safety gear (gloves, eye protection etc….)
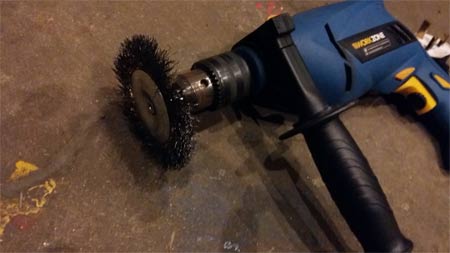
Power drill with wire brush attachment
Most direct to rust paints can be applied with out the need to do the above but we would always recommend that you clean the surface up as best you can.
With your surface totally clean, use a brush to brush over everything and remove any remaining dust and debris.
If you have it available, wipe the surface over with acetone or a plain mineral spirit to remove any traces of grease.
Once totally cleaned, you can move on to under coating if you are going down this route or move on to the top coat stage if you are using a direct to metal type paint.
Car Body Parts and Objects Needing a High Quality, Smooth Finish
Preparation for a nice glossy smooth finish is a bit more involved.
If any rust is present this will need to be removed completely. For this you can either use an angle grinder or some course grit sandpaper. Make sure you dig right in to it and remove it all right back to the bare metal.
If the area you are working on is large then you can also use the power drill and wire brush attachment mentioned above.
Depending on the rust and also if you are using an grinder, you may score the actual metal slightly so this will also need to be repaired. This can be done easily using some car body filler, once the entire area has been rubbed down.
Metal and car body filler and hardener
Rub the entire object down using either a 240 or 320 grit sandpaper. If the object you are working on is flat or slightly curved (such as a car wing), use the paper on a rubbing block. This will ensure that you do not create any dips or depressions and everything should remain flat.
If the object is thin or features lots of angles or details shapes, then use the paper in your hand as a block will not allow you to get in to tight areas.
Make sure that all the original paint or covering is rubbed down unil it is flat and smooth.
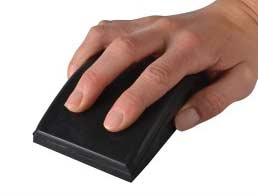
Rubber sanding block
When it comes to the rubbing down, especially when working on large, flat or curved objects, in areas where you go through to the bare metal, make sure you do not leave any “hard lines”.
A hard line is created by the various layers of existing paint that surround the patch of bare metal that then create a ridge of old paint around the patch.
If this ridge is not blended perfectly from the very top layer of old paint right down to the bare metal then, once your new paint is applied, it will collect around the ridge, leaving a depression in the finished coat.
To avoid this happening, use a fine grit wet and dry paper (400 grit) that’s suitably wet and on a flat rubbing block to rub over the entire area, checking regularly with your fingers to ensure that all is blending as it should.
To avoid taking off too much, use finer grit paper, 800 grit and then up to 1200 grit if needed.
With any blemishes, rust and hard lines taken care of, run over the entire object with some 1200 grit paper to finish. This will provide the required “key” for the under coat or top coat to bond to.
Your finished object should now be totally smooth and flat to the touch, with no ridges or depressions. Once you are at this stage you are then ready to get some under coat on.
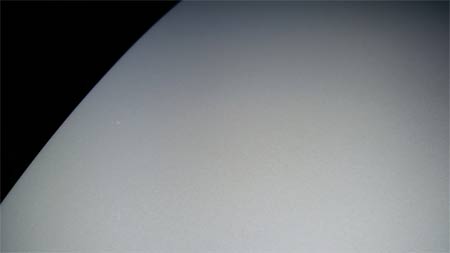
Car bonnet that has been undercoated and sanded down flat
In terms of the body filler mentioned above, for those not familiar with it, it’s basically like a soft clay-type substance that when mixed with a hardener (similar to two-pack paint) sets rock hard.
Once set it can then be easily sanded down and shaped. It’s ideal for filling holes, depressions, dents, and minor damage in a variety of metal objects.
It should ne noted that body filler should only be used for repairing non-structural damage. It is no where near as strong as metal and so should not be used to fix items where structural integrity is important.
Applying Undercoat
If you are working with a direct to rust or hammered finish paint then you probably won’t be laying on any under coat before your top finished coat. In some ways it’s always a good idea to get an under coat layer on as it provides a great base for the top coat so you may want to consider this.
Before you do, please read the manufacturers guidelines for the paint you are using. Some state that you must not apply their paints on top of an under coat layer (especially some of the direct to rust and hammered finish paints) as they use the rust to help bond to the object.
Before you start, mask up any areas that you do not want to get paint (or overspray) on using some masking tape and old newspaper if needed.
One important thing to avoid when masking up is masking too close to the area you’re spraying. By doing this you run the risk of creating hard lines as the paint builds up next to the tape.
If you are working on a large panel or similar, but only painting a small section, do not mask around the patch but instead mask any side areas etc…. that you do not want affected. When laying on the paint, try and direct it (if you are spray painting metal) to the area you want covered.
Any overspray can easily be dealt with one the paint has dried by polishing using T-Cut or a similar polish.
When it comes to your working area, ensure that there is plenty of ventilation, especially when spraying, as paint fumes can be toxic. Always wear the appropriate safety equipment such as a filter mask, goggles, gloves etc….
In pretty much all cases you will be doing this in one of two ways:
- Painting on with a brush
- Spray painting metal from a can or using a paint gun and compressor
Brushing on Under Coat
If using a brush, use the best quality brush you can get as this will help you to get a nice even coverage. Brush the under coat on, taking care not to put it on too thick. Once on, leave to dry for at least 12 hours (or manufacturer recommended time) and then apply another coat.
Once your second coat has dried, check the whole job over for any imperfections and if all is well, you are now ready for top coat.
If there are any specs of dust or debris (unfortunately this is often inevitable) you can rub these out with some fine sandpaper.
Spraying on Under Coat
For this you will either be using a spray can or spray gun powered by a compressor. Spraying is quite a tricky process and takes some practice to get absolutely right. Spraying too close and you will get too much paint in one spot as will spraying over a surface too slowly.
Too far away and you will only get a fine dust that won’t cover the surface properly.
The trick is to hold the can or gun about 25-30 centimeters away from the surface and sweep across the object from left to right. We could spend ages describing the process but only through actually doing it will you be able to judge the amount of paint that is expelled and at what speed you need to sweep over.
To these ends we strongly suggest that you practice first and once you have a good “feel” for all involved, then you can progress on.
We also need to mention that spraying from a can and a spray gun are really worlds apart. Although they both work on a compressed air basis, the pressure provided by a compressor is much stronger than you get in a can.
Also, the gun itself allows for a huge variety of adjustment in terms of the speed the paint is pushed out, it’s spread, the weight of the gun itself etc…. so using this equipment definitely requires some prior practice and experience.
When laying the paint on, as said, work from a distance of about 25-30 centimeters away from the surface and move over the object from side to side, ensuring that you are getting a decent covering, but not too much to create any runs. Once done, leave to dry for 12 hours of so.
If the end finish needs to be totally flat and smooth, before you lay on your second coat you will need to flat the first one down. Using fine grit wet and dry paper around the 400 grit mark, rub over the first layer until it is totally smooth.
Once done, dry it off and then use a cleaning solution to remove any traces of paint dust and then leave to totally dry for a few hours. Once dry, you can then lay on your second coat.
Once this has dried, flat this second coat down as you did for the first coat and then check over the whole piece. If a third coat is needed then follow the above steps again and then flat down your third coat.
Once you are happy that all is totally flat and free from blemishes or marks, you are now ready to add your top coat.
Applying the Top Coat or Finished Coat of Paint
Brushing on
When brushing the top coat on, this is pretty much the same process as with applying the under coat. Use the best quality bush you can get hold of as this will help in getting a smooth finish. Once the first top coat has been applied, allow it to dry before putting on the second coat.
The more time you allow it to dry, the harder it will be and this will also help it to last.
If you feel in warrants it, you can flat the first coat down before adding the second, but if you are not too worried about any brush stokes etc…. then you don’t need to worry.
If you are using a direct to rust of hammered finish paint, again, this will need to be applied in at least two coats, allowing the first to thoroughly dry before the second. You will also not have to worry about flatting down the first coat.
Once the second coat is on, give it a good 24 hours to really harded off before you move or place it in its final resting place and you’re done!
Spraying on
Spraying on your top coat is pretty much the exact same process as applying the under coat. You will need at least two decent layers and the first will need to be flattened down until it is perfectly smooth to get the best chance of a totally flat and smooth final finish and you will really want to leave each coat for at least 24 hours to really harden off.
Leaving the object in a warm space will certainly help this, but you will need to allow it to dry out naturally, don’t try and rush it.
Once both coats have been successfully put on it’s best to leave the final coat for a few days to really cure.
As this will be the final, visible finish take your time when spraying and don’t rush as you certainly want to avoid runs and ripples forming.
Once all dried, for an added shine, you can give the object a good polishing using T-Cut or a similar product.
In the event that you do get any dust or debris, runs or other imperfections appear, don’t worry too much. Most of the time these can be dealt with through a good polishing or by using some rubbing compound such as G3. This is very similar to T-Cut but slightly more abrasive and can be used to polish out minor imperfections.
Before using rubbing compounds it is a good idea to do some practice first. As this substance is quite abrasive it’s really easy to apply a little too much pressure in one area and rub through your new top coat, so be aware of this!
If you are considering spraying paint, as we have stated several times, it does take some practice to get it right.
One item that we need to look at in a little more detail is drying times. These will vary quite a lot depending on temperature and this applies to all paints. The warmer the temperature, the faster the paint will dry.
In the colder months, especially in the UK, the weather does tend to get quite damp. This can cause huge issues, especially when you are spraying. If there is a lot of moisture in the air, as the paint leaves the can or gun, it can mix with the moisture before it gets to the surface you painting.
This can cause it to “bloom”, where the surface goes a milky, hazy white colour. As you can imagine tis really only affects top coats and can totally ruin them so try and work in as dry an environment as possible.
Blooming can in some cases be polished out if it is not too bad, but it’s best to avoid it happening in the first place if you can.
Painting metal and metallic surfaces can be tricky but if you take your time and prepare everything as good as possible, there is no reason why you cannot get an amazing finish that you can be proud of, regardless of whether you are brushing on, spraying on or using a hammered look paint.