One of the final stages of many DIY and construction jobs is painting, whether it’s painting the walls and ceilings of a new extension or simply painting architrave around a newly replaced door frame.
As the cost of paint brushes have plummeted over recent years, many regard them as simply disposable, throwing them away once they’re done with, however this contributes to a huge amount of waste and is terrible for the environment so it’s essential that they are cleaned correctly and stored for the next time they’re needed.
In this project you will learn how to clean paint brushes and store them correctly so they last many years.
Types of Brush and Roller
Before looking at exactly how to clean a paint brush it’s important to know about the different types of paint brush and their characteristics as this will help to understand how to clean and maintain each correctly.
Essentially there are 3 different types of paint brush; synthetic paint brushes that are made using Nylon or Polyester bristles, natural paint brushes made using natural animal hair and combined brushes that use a mix of synthetic and natural bristles.
As you may imagine the bristles of a synthetic paint brush are rather stiff and uniform whereas natural hair brushes tend to be softer with more irregular bristles.
It’s these characteristics that mean that each brush type needs to be cleaned in a different way to ensure they’re kept in tip top condition.
You will often hear about good and poor quality brushes. On the whole the price generally indicates the quality of a paint brush but as a rule of thumb, synthetic brushes are generally cheaper less quality whereas natural brushes tend to be more expensive and higher quality.
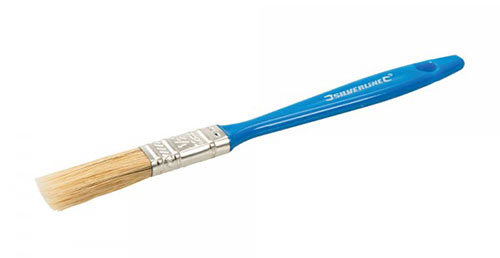
Cheap and low quality paint brush
Types of Paint
Along side the type of brush that’s being used, the type of paint is also very important as this really dictates how a paint brush is cleaned and what cleaning solutions are used.
In terms of the most common types of domestic paint used there are 3 main types; water-based paints, oil-based paints and shellac paints. However there are actually a few other different types of paint and coating other than the common paints used in the home. Each type should be cleaned using the following:
To clean each type of paint off of a paint brush, the following solutions should be used for each type:
- Water-Based Paint: Use warm soapy water to clean paint
- Oil-Based Paint: Use white spirit or a paint thinner cleaner
- Shellac Paint: Use acetone or denatured alcohol-based cleaners
- Cellulose Paints: Amyl acetate, bought from the chemist will act as well as the more expensive, off the shelf, acetone
- Varnish: Methylated spirits
- Rubber: Petrol
- Polyurethane: Paraffin or white spirit
- Washable Distemper: Weak solution of vinegar
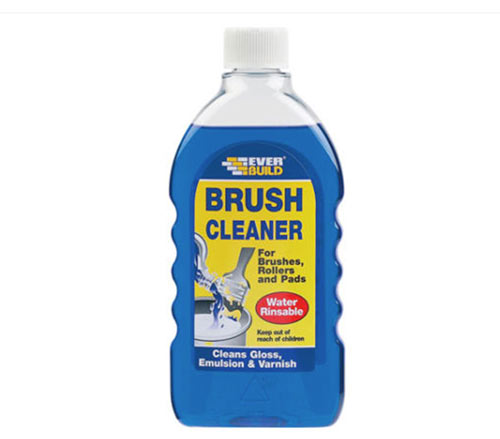
EverBuild brush cleaner
What Paint Brush for What Paint
Another very important fact to consider is what paint brush to use for what different type of paint.
You may think that it really doesn’t matter which brush to use but in actuality it really does. In light of this they should be used in the following way:
- Synthetic Paint Brushes: All water-based paints
- Natural Paint Brushes: Oil-based paints, varnishes, shellac
In relation to actually why it matters, well natural paint brushes shouldn’t be used with any water-based paints as the bristles will absorb the water, swell and produce less than satisfying finish and due to their stiffness, synthetic bristles don’t spread thicker oil based paints well at all.
Taking a Break Whilst Painting
If you are involved in a fairly large painting job, for example all 4 walls and ceiling in 2 or more rooms the chances are that this is going to spread over a couple of days, especially if you are starting form scratch and have to put on mist coats, undercoats and finishing top coats.
With this in mind you are going to want to stop at some point for a cuppa, to eat and also to sleep.
Cleaning a paint brush thoroughly can take a little while and simply leaving your brush or roller while you you eat your tea or even go to bed will ultimately mean the paint will dry and the brush then needs more work to clean it.
The solution here is to wrap each brush, roller, paint tray etc. in cling film or pack each in a plastic bag.
Ensure there are no holes anywhere (tape them up if there are) and that you get as much air out as possible. Once you have, tape up the neck of the bag or any open edges if you’ve used cling film and then you can safely leave everything for up to 48 hours without the fear that it’s all going to dry up.
You can also use snap-shut freezer bags if you have them, but you probably won’t be able to use them again afterwards unless you clean them very well.
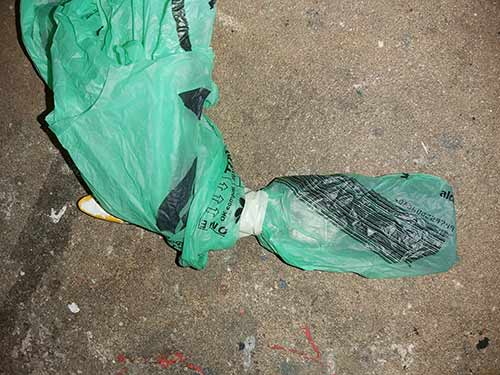
Paint brush wrapped in plastic bag and taped up
How to Clean Water-Based or Latex Paint From a Paint Brush
Paint brushes are best cleaned as soon as you have actually finished using them. It may be tempting to want to sit down and have a rest or kick-back for the evening but get them cleaned now as when the paint is still wet it will take much less time than if it partly or fully dries.
To clean water-based paint from a paint brush:
- Scrape the brush against the rim of the paint can to remove as much paint as possible and then flip it over and do the same. Keep going until you’ve removed as much as you can
- Put some fairly warm water in a smallish container (a paint kettle sized container is ideal) and fill it around a third of the way up
- Dip the bristles in the warm water and use your fingers to work through them using your thumb and fore-finger, getting as much paint out as possible
- Once you have removed as much as you can, squirt some washing up liquid on the bristles and work this in as much as you can, ensuring you get it as deep into the brush as possible to remove any trapped paint.
- Repeat the above once again, this time using clean water to remove any remaining paint and keep repeating until no more paint is visible
- Once as clean as possible, shake out as much water as you can from the bristles or better still use a brush spinner. This device allows you to rapidly spin a brush in a bucket to remove water trapped in the bristles. It’s very effective but messy so ensure you work over an old blanket or newspaper and wear old clothes
- Once as dry as possible, lay the brush down on a flat surface and allow it to air-dry for at least 3 days
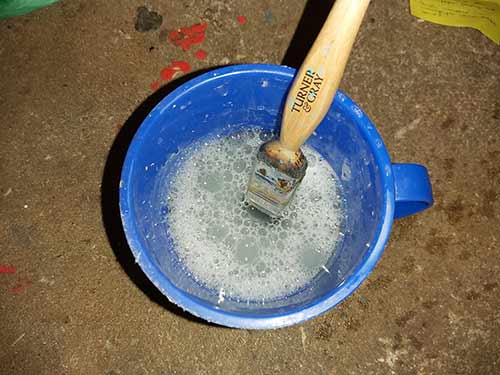
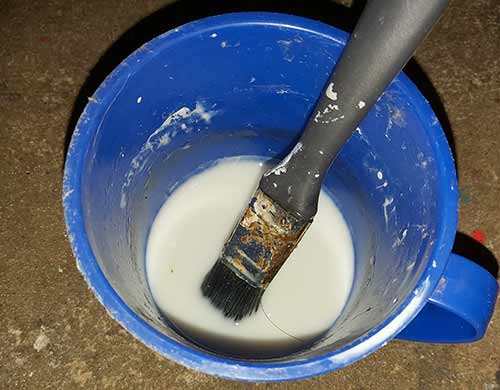
Paint brush dipped in hot soapy water
How to Clean Oil-Based or Shellac Paint From a Paint Brush
Oil-based paints are a little trickier to clean out of your paint brushes than water-based paints. As oil and water do not mix you can’t use water to clean the brush out, instead you will need to use a suitable chemical cleaner.
- Scrape the brush off on the side of the paint tin to remove as much paint as possible then flip it over and do the same to the other side and the 2 sides also
- Put on some household rubber gloves to protect your hands and tip some white spirit into a small container such as an old plastic cup and fill it about half full. If cleaning shellac paint use acetone or denatured alcohol instead
- Put the brush in and work the white spirit (or acetone/denatured alcohol) into the bristles well. Dip the brush in and out a few times and use your thumb and forefinger to work the white spirit in remove as much paint as possible
- Repeat the same process again in a new container using clean white spirit (or acetone/denatured alcohol) until it remains fairly clear and all the paint is out of the brush
- When you are sure the brush is clean, swap the white spirit for hot, soapy water and work the bristles thoroughly and finally rinse out under a warm tap
- Shake as much of the water out as possible and then leave the brush flat on a piece of newspaper for 3 or 4 days to air dry
Once your brush is clean you will now have 2 containers with waste white spirit in. You are not allowed to simply tip them down the drain as white spirit will contaminate the water supply.
Instead, cover the top of each container with some cling film and leave it for a few days. Over time the paint residue in the solution will sink to the bottom leaving the white spirit sitting on top.
Gently pour off the white spirit solution back into its original container to use another time.
Leave the paint until it dries in each container and once it is knock it out and dispose of it in a bin.
Brush in white spirit cleaner for cleaning oil-based paint
How to Clean a Paint Roller
Cleaning a paint roller id done in a similar way to cleaning a paint brush.
As in pretty much all cases you will only be using a roller to paint large flat surface such as walls and ceilings and therefore will only be using a water-based paint, so we will focus on this scenario in terms of cleaning.
- Firstly, pull the roller sleeve off of the roller frame. It will be covered in paint so have a bucket or water or old cloth handy to clean your hands
- Using your hand as a squeegee, hold the roller sleeve over the paint can and use the part of your hand between the your thumb and index finger to run down the sleeve and squeeze the excess paint back into the paint can
- Using a bucket, fill it a third of the way up with warm water
- Dip the roller sleeve in the bucket and use your fingers to run through the roller pile, working the water in and the paint out
- Discard the existing water and replace it with some fresh, clean warm water and repeat but this time squirt some washing up liquid on the sleeve and work this in
- Repeat this process until no more paint is present in the pile
- Shake the roller sleeve out as much as you can and then sit it upright on a piece of newspaper and leave for a good few days to thoroughly air dry
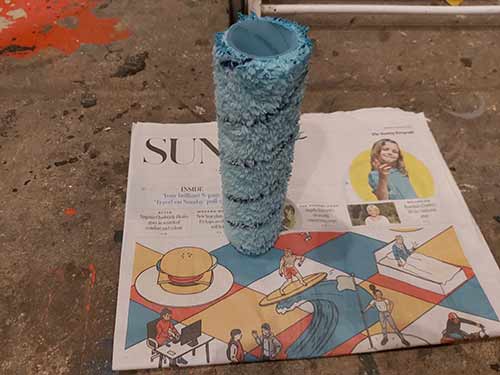
Paint roller standing up to dry on newspaper
How to Store paint Brushes
lay flat with an elastic band keeping the bristles in place. Do not stand your brushes on their bristles even if in water for re-use on the next painting session.
Once you have cleaned your paint brushes you will then need to store them correctly until they are needed once more.
In terms of storage, the big “no no“ is storing your brushes so they are standing on their bristles. By doing this you will bend the bristles out of shape so that when they are used again you’ll be painting all over the place!
This is especially true for natural brushes as the bristles are much softer and will damage much more easily.
When it comes to storing paint brushes they should either be hung up on some sort of racking or peg board or they should be stored flat neatly in a drawer or case free from anything that will crush or put weight on them.
If you are storing them flat then it’s also a good to keep them in their original plastic sheath if you still have it, if not then gently wrap them in a few sheets of newspaper and pop some elastic bands around the ferrule and bristles as this will hold the bristles nice and square, retaining their shape.
You can also do this if you are hanging them to store them, but it’s not really necessary as gravity will ensure the bristles remain straight and don’t spread.
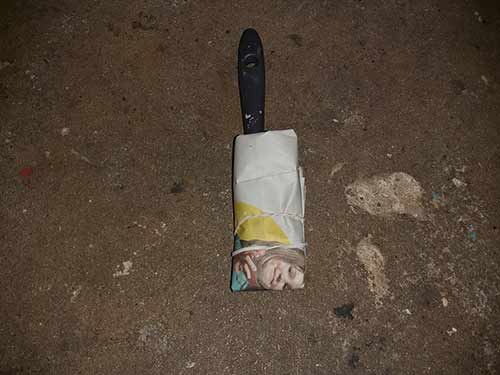
Paint brush wrapped in newspaper and held with elastic band to store
How to maintain Good Quality Brushes Once Cleaned
As we have mentioned, cleaning and maintaining your paint brushes for future use is absolutely essential these days to ensure that no unnecessary waste is created and that we put more emphasis on caring for the environment.
Here are some further tips and tricks that can be used to keep your brushes in the best condition possible:
- As we have mentioned in the section above, to ensure your paint brushes remain in tip top condition you should store them hanging or flat to ensure the bristles keep their shape
- If you have a natural bristle paint brush then to help keep the bristles in order it’s a great idea to comb them with a brush comb before each use. Again, tis will help keep the bristles in order and remove any dried paint around the ferrule
- If a natural hair brush has been left for a long time then it should be soaked in brush restorer (See directions on the restorer packaging for direction on use) until soft. Again this will ensure the best finish possible
- If you have to leave your brushes in any cleaning solution for a period of time, as mentioned, don’t stand them on their bristles. Instead drill a small hole through the handle and pass some string through and then hang them in the solution as opposed to resting them upright
- If you have left your brushes too long and the paint has dried solid they can still be saved. Dangle them in either white spirit or warm soapy water depending on the paint used over night and then use the cleaning tips above to give them a final clean. Once clean use some brush re-conditioner to restore the bristles
- If a natural hair or synthetic brush has had a particularly hard life and the bristles are all bent and out of shape badly it can still be saved. For natural hair brushes gently dip in boiling water a few times and then you can reshape them. For synthetic brushes boil a kettle and hold it over the steam and then you can again reshape them
- If a natural hair brush has been used with water based paint and the bristles are damaged and have gone hard as their natural oils have been washed away, thoroughly clean it with warm water and get all the paint out and dry it totally. Put some raw linseed oil between your thumb and index finger and massage it into the bristles. Repeat this until they are nice and soft and then comb them through
Today, cleaning and reusing paint brushes is an absolute must. Not only will it certainly save you money in the long run, but by buying, cleaning and reusing good quality paint brushes you will get a much better finish and also help the environment by reducing needless waste.