Fitting a barrel or sliding bolt is a great way further reinforcing the security of doors and gates in and around your home. As it is one of the more straight forward DIY projects, it can be done by pretty much anyone.
To fit a door bolt to a door or gate simply follow through the instructions below.
What is a Door Bolt?
A door bolt is an additional security object that can be added to pretty much any door or gate that allows the occupant to simply slide a bolt that’s fixed to the door or gate across to engage with a keep fixed to the frame that prevents it opening.
As long as both the bolt housing and the keep (the object fixed to the frame) are securely screwed in place using the correct sized screws and the frame itself is solid then even a smaller door bolt will resist quite a bit of force.
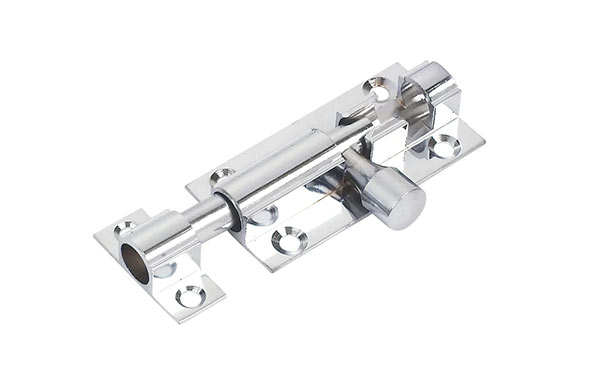
Standard small door bolt
Where Should Door Bolts be Fitted?
The door bolt should be fitted to the strongest part of the door so that it resists the most impact when forced and where it can be reached by any and all users. For a standard solid or panel door, this is either at the top, in the middle or at the bottom.
With a panel door, each of these areas features a rail, a solid section that holds the panels in place. As this is the thickest part of the door it provides the most solid fixing.
As for solid doors, as by their nature they are solid, a decent fixing can be obtained anywhere.
The final consideration in terms of fixing location is ease of operation. The bolt itself needs to be accessible for all that need to open it and if it’s too high or too low then this isn’t possible, so it needs to be placed where it can be reached at all times.
Different Types of Door Bolt
There are numerous different types, sizes and styles of barrel bolt and due to this each is suited to a particular application.
The smaller brass and chrome plated models are generally used on internal doors such as toilet and bathroom doors, the more substantial are used for entrance doors such as front and back doors and galvanised or zinc plated are more suited to garden gates.
Before anything is fixed in place, you will need to decide on what type of sliding bolt or barrel bolt you are going to use. Most of these types of door bolt can be surface mounted on the door or window making them easy to fit. Some examples can be seen below:

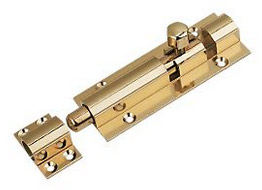
Brass door bolt suitable for more ornate applications e.g. furniture items and the similar
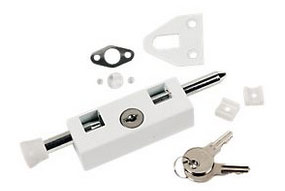
Pin type door bolt suitable for UPVC window
Straight sliding bolt suitable for bathroom door
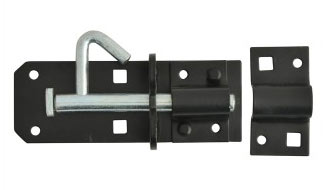
Door bolt with padlock latch
Tools and Products Needed for Fitting a Barrel Bolt
In order to successfully install a door bolt or barrel bolt you will need the following tools and products:
- Chosen door bolt kit
- Pencil or pen
- Small spirit level or boat float
- Medium grade sandpaper
- Hammer
- 1/2 inch chisel
- Flat edge screwdriver
- Philips screwdriver
- Cordless drill/driver
- Selection of small drill bits 2 – 4mm if possible or a bradawl
How to Fit a Sliding Bolt or Barrel Bolt to a Door
Once you have chosen your barrel bolt and ensured it’s correct for where it’s being installed, the next job is to actually install it in place. Read on to find out how.
Step 1 – Decide on Height of Door Bolt
The first task is to decide at what height on the door you want your bolt to be at. There are no rules for this and now is the time to decide if you actually want two bolts, one at the top of the door and one at the bottom.
Two bolts will obviously provide a bit more security than just the one and considering the cost it’s well worth adding two.
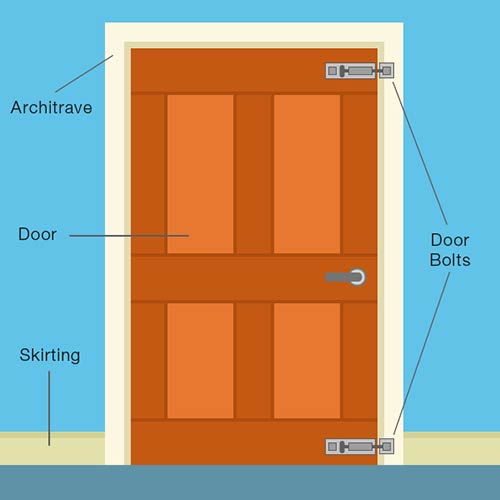
Door with door bolts fixed top and bottom
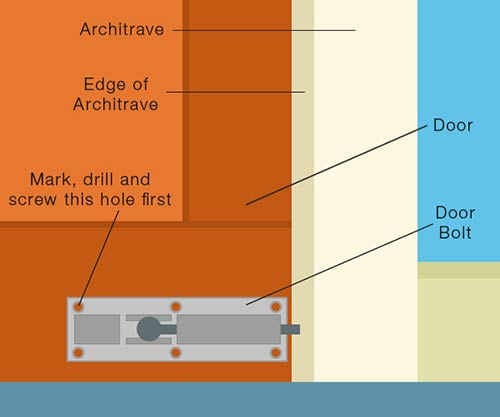
With your position chosen, hold only the bolt on the door. Make sure that the end of the bolt is not overhanging the door itself and touching on the frame.
Position it right on the edge of the door so that you have the maximum length available from the bolt.
Step 2 – Mark First Screw Hole and Drill Pilot Hole
Using a pencil, make a mark inside the screw hole on the bolt furthest from the edge of the door.
To ensure that the bolt is fitted straight and level we are going to insert one screw and level it up from there.
With your hole marked, remove the bolt from the door.
Next, we are going to create a pilot hole for the screw. Due to the small size of the screws normally used to fix a door bolt you will need to use a very small drill bit, 2 – 3mm should be fine (depending on the size of screw you are using – manufacturer’s instructions on the packaging should state the size of hole). If you have a bradawl, then this will be ideal. Drill in about 5mm.
Position the door bolt and mark the first screw. Drill your pilot hole and then screw up, but not too tight
Step 3 – Screw on Door Bolt in First Screw Hole
Now, position the bolt back on the door ensuring that fixing hole is over your pilot hole.
Using a screwdriver or cordless drill/driver insert the screw into the hole but do not tighten it all the way just yet, just go to pinch tight so you allow a little movement.
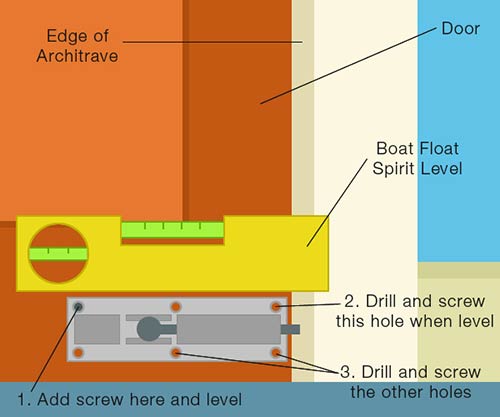
Step 4 – Level Door Bolt and Mark Second Screw Hole
Now, swing the hanging bolt up until it’s level by eye. Using your boat float, position it along the flat top edge of the bolt and adjust until it’s absolutely level and mark the top left hand screw hole with your pencil.
Remove the level and allow the bolt to swing back down out of the way and drill another pilot hole for your second screw.
Swing the bolt back up and insert your screw and tighten it all the way up and also now tighten up the top right hand screw.
Step 5 – Insert Remaining Screws
Depending on the type and size of lock you have you may have four or six screw holes. You can now work your way around them, inserting screws and screwing them up.
Level up the door bolt and then mark, drill and screw the top screw hole nearest the door
Step 6 – Mark Fixings for Door Keep
With the door bolt now fixed firmly to the door the final job is to fix the bolt keep onto the door frame.
Extend the bolt out slightly and drop the bolt keep over it. Close the door up until the keep touches the door frame. This will now mark the position on the frame where the keep will need to be fixed.
Step 7 – Chisel out Architrave if Needed
At this point you may now need to chisel a little out of the architrave to allow the keep to be fixed at the same level as the bolt itself.
If this is the case, use your pencil to mark around the area that needs removing and open the door up.
Take a suitable size chisel (should be around 1/2 inch) and carefully chisel the architrave back until you reach the door frame.
Please make sure you are gentle. Remove only small pieces at a time and don’t just whack it as you may end up splitting the architrave or frame.
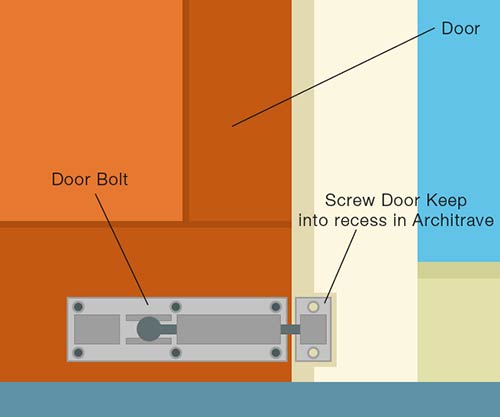
Fix door keep to door frame within recess in architrave
Step 8 – Tidy up the Recess
Once you have removed the bulk, tidy up the edges using the chisel and then a medium grade piece of sand paper.
As this will probably be quite a tight area to get into you can wrap the sand paper over the end of the chisel or a screwdriver and use it as a sanding block to really get into those corners and give yourself a nice sharp, tidy finish.
Step 9 – Fix the Door Keep
Now, put the bolt keep back onto the end of the bolt and close the door back up. With the keep flush on the door frame use your pencil to mark the screw holes on the frame.
Ensure there is a little movement around the bolt in the keep so that once all fixed, it is not too stiff to close. Remove the keep and open up the door again.
Drill your pilot holes using the same method described above and then screw your bolt keep firmly to the frame
Step 10 – Don’t Forget any Painting or Repair!
Just before you fix the keep to the frame, if you have had to chisel out a section of architrave now is a good time to paint the bare wood that now remains.
Paint it up and leave it until dry and then screw up the keep to the frame and you’re finished! Another job well done!
Fixing a barrel bolt or door bolt to a door in an excellent way to improve its security or simply just ensure a bit of personal privacy.