Measuring stairs can be tricky for beginners, but it’s crucial for buying the right amount of carpet and minimising waste. Understanding how to measure different types and shapes of stairs is essential. Keep reading to learn how to measure stairs for carpet.
Why Measuring Stairs is Tricky
Measuring a room is straightforward — width multiplied by length gives you the area. But for odd-shaped rooms, like L-shapes, you need to break them into rectangles and add up all the different areas together.
With stairs, it’s more complex. You have to measure various areas: the hallway, landing, and the entire staircase. Adding them together determines the amount of carpet needed. For straight stairs, measuring one tread and riser suffices, but for half landings or curved stairs, each element requires individual measurement.
Curved stairs, combined with landing and hallway, pose a significant measuring challenge.
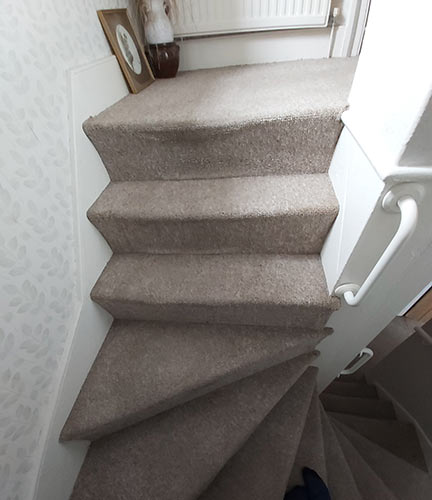
Curved staircase and landing to be carpeted
Considerations for Measuring Stairs
When measuring stairs for carpet, several factors ensure accuracy and minimise waste:
- Draw a plan of all areas to be measured and label each measurement.
- Measure each part of curved stairs and half landings separately at their widest points.
- Take at least three measurements along the length or width of hallways and landings to accommodate slight deviations.
- Measure the width and depth of doors and alcoves, noting them on your plan.
- Measure the staircase from top to bottom.
- If stair treads have a nose, add 25mm to each tread measurement to ensure sufficient carpet coverage.
Pile Direction Tips for Carpet Installation
Ensure consistent pile direction throughout your carpeted areas for a uniform look and to prevent uneven wear. This may not seem important but is absolutely essential.
If you have carpet laid with pile running in different directions, visually it’s immediately obvious and looks quite odd.
Pile direction should always align with traffic flow to prolong carpet life and reduce wear.
Consider room dimensions to minimise waste and ensure uniform pile direction. Although off-cuts can be used for other rooms, if it means the way they’ve been cut makes the pile run in opposite directions once laid, this isn’t ideal.
Although it may mean additional cost and wastage, for optimal results, purchase separate sections of carpet for areas with different pile directions.
Unused carpet sections may find use in smaller spaces where pile direction is less critical, or can even be sold on one of the various market places online.
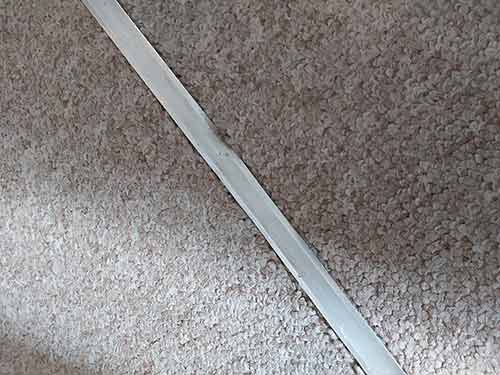
Carpet running between 2 rooms with pile running the same way
Measuring Carpet for Stairs, Hallways, and Landings
Now that you know all about the different considerations to take into account for measuring carpet for various room spaces, lets now take a look at how to measure carpet for different types of stairs and room spaces.
How to Measure a Landing for Carpet
To measure your landing for carpet, follow these steps:
- Sketch a plan of the landing area, noting alcoves, doorways, where any stairs descend and any other features.
- Measure the width of the landing, taking three measurements across and accounting for doorways.
- Measure the length of the landing, considering any uneven walls.
- Include the first step, nose, and first riser in your measurement, as landing carpets typically extend to the initial step of the staircase.
Rough plan of landing area
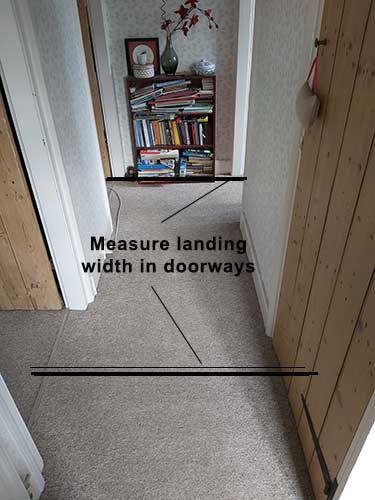
Measure width of landing including any doorways
Measuring the length of the landing area
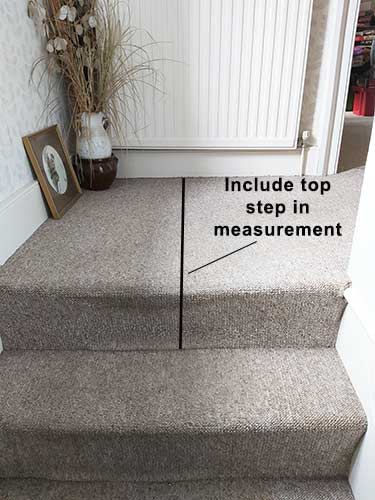
Include the first step and riser in the measurement of your landing carpet
For an odd-shaped landing, like an L-shape, there are two potential ways to measure accurately:
- Method 1 – Measure the width at the widest point, such as to the L, and measure the length to determine the overall area including the cutout. The cutout is discarded as waste or repurposed elsewhere.
- Method 2 – Divide the area into two parts — a large rectangle and a smaller one. Measure the width and length of each part, then add them together to calculate the total size. This method minimises waste but may result in carpet piles running in different directions.
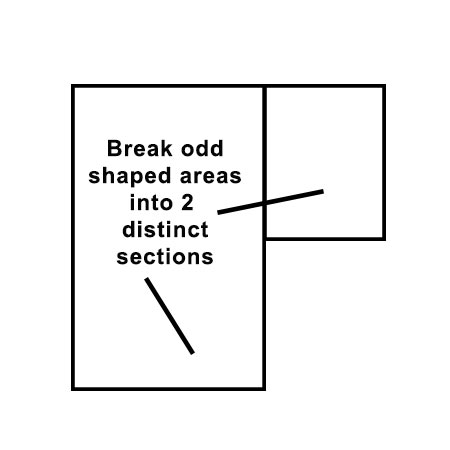
L-shaped landing area broken into 2 separate areas for measuring area for carpet
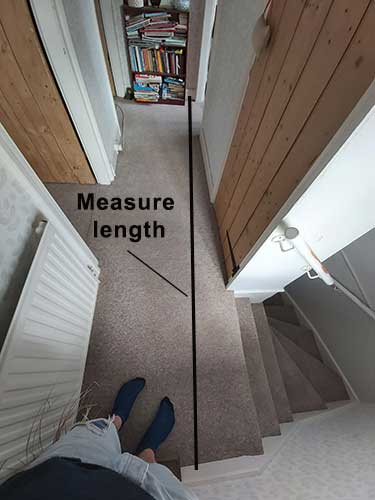
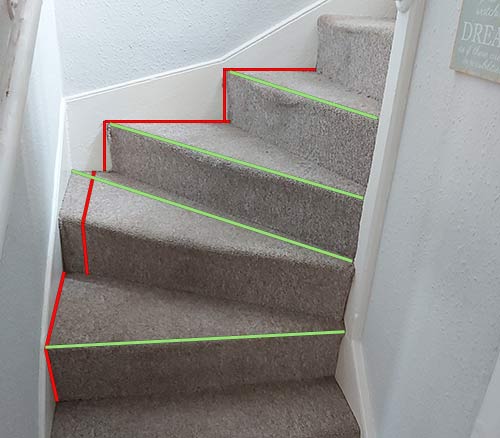
Measuring a Straight Staircase for Carpet
Measuring a straight staircase for carpet is the easiest and most straightforward of areas. Follow these steps:
- Sketch a plan of your staircase, noting the number of steps.
- Starting at the top, measure from the back of the first tread to the front, including around the the nose (if there is one), and record this measurement on the plan. Measure the width of each tread. Repeat for all treads.
- Add all the tread and riser measurements to calculate total carpet length needed. Use the widest width measurement for carpet width. You will now have total length and width of carpet required.
- To find total carpet area, multiply each step’s tread/riser measurement by its width and sum the results.
Staircase plan of straight staircase to measure for carpet
Measuring from the back of the tread down the riser of the first step
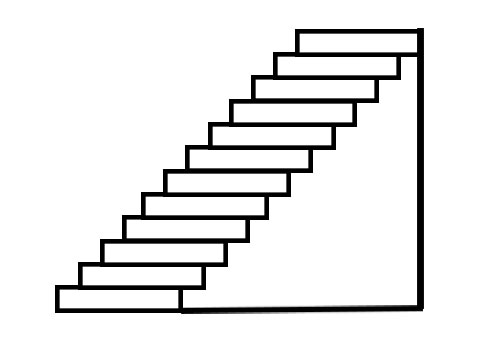
Measuring a Curved or Winding Staircase for Carpet
Measuring a curved staircase for carpet requires a different approach compared to a straight one, mainly due to the curved or winding sections.
- Start by sketching a rough plan of your staircase, noting the number of straight and winding steps.
- Begin at the top and measure each straight step from back to front, including the nose. Record these measurements on your plan. Repeat for all straight steps but not for winding ones.
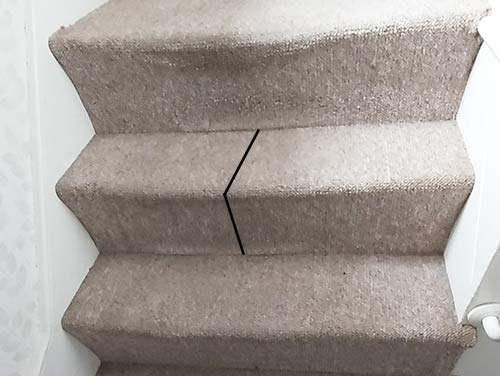
- Divide the winding section into three parts and measure each individually. Measure from the deepest corner to the front for length, and from the inner corner to the widest point for width.
- For each winding step, record measurements for depth and width (measuring from the rear of the deepest section to the front), adding 25mm for nosing if present. Record on the plan. For width, measure from the 2 points furthest apart across the tread
- Calculate the total length of carpet needed by summing all tread and riser measurements, and use the widest width measurement.
- To find the carpet area in square meters, multiply width by depth for each winding and straight step separately, then add up all the results.
- Add all measurements to determine the total carpet area required.
How to measure the winding steps in a winding staircase
Measuring a Half Landing or Mid-Landing for Carpet
A half-landing resembles a winding section but consists of only one large step as opposed to the 3 or more it may take to form the bend.
To measure a staircase with a half landing for carpet, follow the same steps as for straight stairs, measuring each tread individually, working down from the top.
Record the depth and width of each step, excluding the half landing, on your plan.
For the half landing, measure depth (including nosing if there is one) and width separately and note on plan.
Add all tread and riser measurements, including the half landing, for total carpet length. Use the widest width measurement.
To find total area, multiply width by depth for each step and the half landing, then add the results.
Measuring a half landing section of a staircase for carpet
How to Measure a Hallway for Carpet
Measuring a hallway for carpet mirrors the process for measuring a landing, with a few distinctions:
- Begin by sketching a plan of the hallway, noting doorways, alcoves, stair entry points and any other features.
- Measure the hallway width at three spots, ensuring to measure the widest point. Include 50mm for each doorway to accommodate joints.
- Repeat for hallway length, considering uneven walls and measuring into doorways if present.
- Select the widest and longest measurements for length and width of carpet required.
- To find area, multiply width by length.
For odd-shaped hallways, like an L-shape, calculate total area by either using the widest and longest measurements or dividing into two rectangles and summing their areas.

Measuring a hallway including doorway for carpet
Measuring Bullnose Steps
Bullnose steps, often found at the bottom of staircases, offer extra space for entry and come in various shapes and sizes. More often than not, commonly found in period homes.
Measuring them follows a similar process to regular steps: measure from back to front, including the nosing and riser.
However, the width measurement differs. Measure the curve of the riser around the front of the step, from the edge closest to the wall to the end of the step.
Once you have all the measurements, you can purchase the right amount of carpet and proceed with installation. Learn how to fit carpet on stairs here.
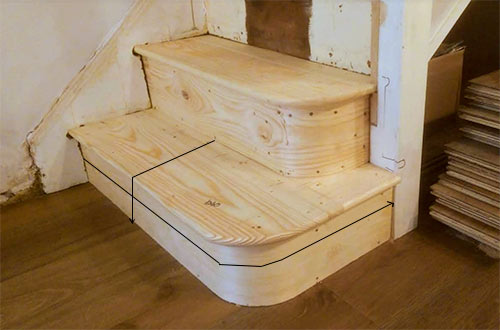
Measuring a bullnose step
Measuring a staircase, hallway, or landing for carpet is straightforward once you know which parts to measure. Ensuring you buy the right amount of carpet — enough but not too much — is the absolute crucial part of the job.