When laying carpets, a decent, good quality and durable carpet underlay is almost as important as the quality and durability of the carpets themselves and in terms of the overall quality of finish an absolute must have. To these ends we are going to run you through the process of laying carpet underlay correctly
Ultimately, the underlay you use with your carpets will go a very long way in determining how comfortable under foot your carpet feels, how good it looks and also how it wears. In tems of the latter, in some cases it can increase the life of a carpet by up to 50%!
A decent carpet underlay will also have other benefits in terms of reducing noise and helping to soundproof upstairs rooms and it will also have thermal and insulating properties and help to retain the heat and in some cases, reduce energy costs.
How do I Know if my Carpet Underlay is Still any Good?
If you are just in the throws of replacing your carpets and are considering using your existing underlay it’s a good idea to test it first, as in many cases it’s going to have to last for at least 10-15 further years.
If it’s relatively new (say, within two years) then it should still be fine to use, as long as it hasn’t been subjected to huge levels of traffic in that time.
If not, then you will need to check the following things:
- Does it feel hard to the touch, with no spring or life in it
- If you bend it and flex it, does it split or crumble
- Are your existing carpets wearing badly in places e.g. high traffic areas such as walkways etc….
- Are your existing carpets wrinked or rucking up in places
- In your existing carpets, are any of the fibres starting to break apart
If the answer to any of the above is yes, then the chances are that your underlay has has its day and it’s time for it to be replaced.
As we have already mentioned above, your underlay will in most cases have a direct bearing on the longevity of your carpets, so you may think you are saving a few quid by not replacing your underlay but in the longrun you could be loosing money through the decreased life of your carpet.
What Different Types of Carpet Underlay are There?
As you might imagine, there is a huge range of different types of carpet underlay to cover the vast array of different locations and environments that carpets can be fitted into.
Here follows a list of the most common types and where each should be used:
Sponge Rubber Underlay
Sponge rubber is one of the most commonly-used types of underlay. Synthetic rubber is made into a waffle-like texture with air pockets to form a flexible and durable material.
There are numerous different grades or thicknesses of this type of underlay available, from thinner lightweight to thicker luxury, so you can choose whichever is most suitable for your room and budget.
The waffle patterned nature of this underlay-type also has another benetif in that the built-in air pockets allow much more air circulation and when it comes to vacuuming, this means that any dirt that resides deep in the carpet is sucked up much more easily due to the improved air flow.
This type of underlay is also available as a flat pattern as opposed to waffle pattern.
When it comes to noise reduction and heat retention, this underlay is great across the board – in essence, this is a great all round solution for any area in your home.
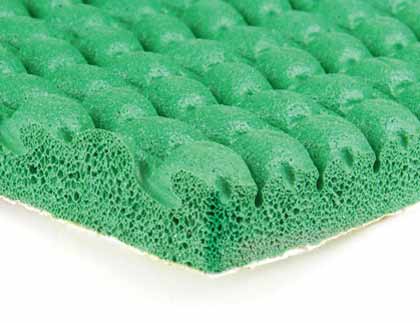
Sponge rubber underlay
Crumb Rubber Underlay
Crumb rubber underlay is very hard-wearing, and great for the environment as it is made from (up to 85%) recycled car tyres and other reclaimed rubber-based waste.
It’s not as comfortable to walk on as sponge rubber, but it’s perfect for areas with high levels of foot-traffic such as hallways, stairs (particularly over stair nosings) and landings.
It’s also good for areas where heavy furniture is used, as it recovers completely from indentations caused through the prolonged weight from heavy items.
Crumb underlay is also great to use with woven-type carpets as it helps to prevent the carpet from rucking.
In terms of sound deadening it’s excellent choice. Using a top quality branded underlay, it’s not unreasonable to expect somewhere in the region of up to 40db in sound reduction, making it a great choice when it comes to flats.
As for its heat retention abilities, it’s not quite as good as some PU foam underlays, but’s it’s still well up there!
Overall, best suited to high traffic areas, but still a very good all round choice.
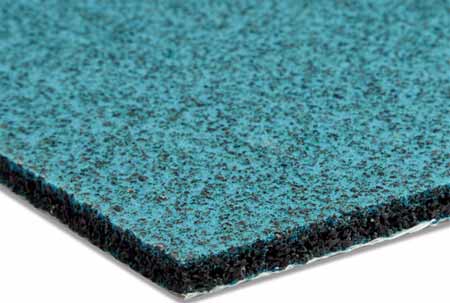
Crumb rubber underlay
PU Foam Underlay
Made from recycled furniture foam and other reclaimed foams, this underlay is another good environmental choice.
At present, this underlay type is the most commonly used underlay in the UK and is recommended by most carpet suppliers and fitters due to its great all round performance in terms of heat retention and sound deadening
PU Foam is also much lighter than its heavy and bulky rubber counterpart meaning it is much easier to handle from an installation point of view.
PU underlay also acts as a great insulator for cold floors and is is also generally a great heat retainer meaning you should also benefit financially when it comes to the saving in your energy costs.
Along side its great heat retaining qualities, it also offers great sound insulation, so is good for use in upstairs rooms and flats.
Being the most popular choice on the market at present, as you may expect, a huge range of thicknesses, weights and quality-types are available to suit different rooms, foot traffic levels and budgets.
As you might expect and in almost all situations, PU foam is now pretty much your first port of call when it comes to carpet underlay and unless you need to use specific underlay other than PU, this is the one to go for.
One final point to remember is that as this is the most popular underlay type there is a huge range of manufacturers making it and in turn a vast range of levels of quality. Just make sure you do your research and choose a reputable brand with a proven track record.
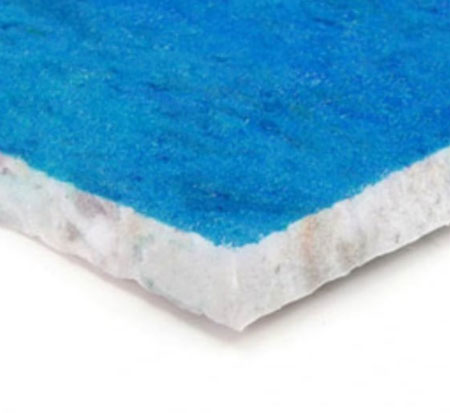
PU foam underlay
Wool Felt Underlay
Wool felt is a top underlay choice, and is often used in commercial buildings.
Made completely from recycled fibres including animal hair and jute making it very environmentally friendly, felt has brilliant thermal and acoustic insulation qualities, and is so durable that it often outlives the carpet!
If you take up an old carpet and find a wool underlay, don’t get rid of it until you’re sure it can’t be reused.
This underlay type is often one of the top choices for commercial installations due to it’s tough, hardwearing nature.
One downside to this type is that due to its density it can feel a little hard underfoot and this may be a little bit offputting for those looking for a more luxury.
As mentioned, wool felt underlay is ideal for high traffic areas that require an underlay to be tough and hardwearing and it’s also great for woven stretch fit carpets.
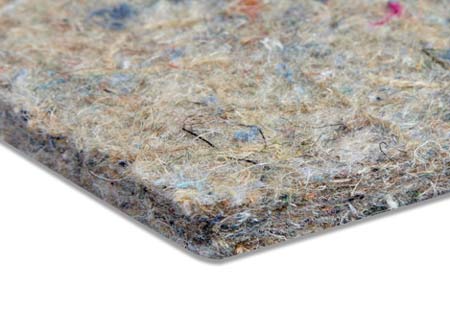
Wool felt underlay
Combination Underlay
Combination underlays, as the name suggests, usually consist of a layer of crumb rubber and a layer of wool felt.
A combination underlay combines the good properties of both materials to create an underlay that is very harwearing, has great thermal and noise insulating properties and is comfortable underfoot.
Again, most manufacturers offer a range of different grades/thicknesses from 9mm – 11mm depending on your budget and requirements.
In terms of where this underlay is most suited, again, it’s ideal for high traffic areas and will provide a good, longlasting solution, but it can also be used pretty much everywhere else.
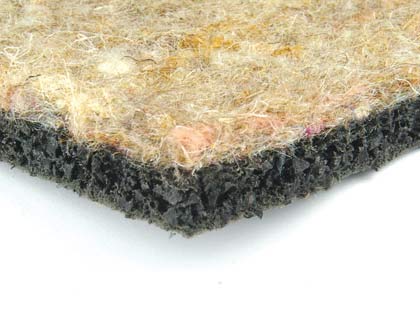
Combination underlay
Underfloor Heating
If you have underfloor heating or are considering installing it, you will need to use a special underlay with it.
Most manufacturers of underfloor heating products will recommend certain underlays as they have been tested and proven to work with their products, but if you are sourcing your own, then there are a few things that you need to consider.
You will need to make sure that your chosen underlay is a little more specialist and has a low tog rating (more about tog ratings below) e.g. certainly no more than 1.0.
Additionally, you will also need to go for a carpet with a low tog rating. Your combined carpet and underlay should not exceed 2.5 tog.
These specialist low tog products allow air to circulate so that the heat can penetrate through both and in to the room above. With higher tog rated products, the carpet and underlay when laid over your underfloor heating will act as an insulator and prevent any heat from rising up.
As you might expect, this underlay is only really suitable for laying over areas with underfloor heating.
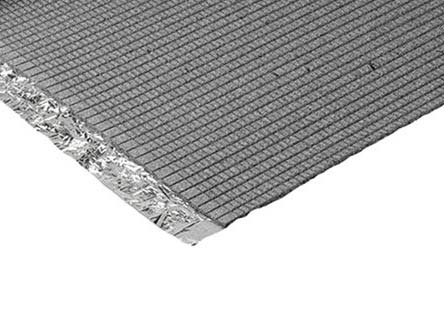
Underfloor heating underlay
Laminate Underlay
As with the underfloor heating underlay, it’s fairly self explanatory what this underlay type is for – laying under laminate flooring and engineered hardwood flooring.
As with underlays for carpet, you do get what you pay for in terms of quality and where carpet is slightly more forgiving, laminate and hardwood flooring tends not to be so it’s really essential that you go with a good quality type.
With a poor quality laminate underlay you will find that it will loose its rigidity much faster than a higher quality varient, causing your laminate boards to sag and seperate.
Not only will a poor quality version cause the flooring to fail over time but acoustic performance will be lacking making flooring noisy and any minor imperfections in the sub-floor will be mirrored on to the laminate floor once completed.
Higher quality underlays will have very good acoustic performance (very important if laying laminate in upstairs rooms) and also iron out any minor sub-floor peaks or dips, although it’s always a good idea to level the floor with a self levelling compound regardless, so that you know you are starting with a totally level base.
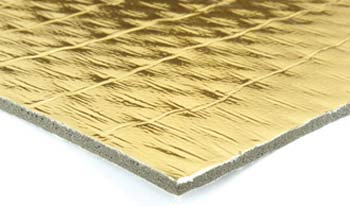
Laminate flooring underlay
What is Tog Rating and Why is it Important?
When it comes to the term “tog rating”, you may only be familiar using this to describe the thermal values of a quilt or for those of you that like a bit of hiking and camping, how warm a coat or sleeping bag may be, but this measurement of “thermal resistance” is also used for carpet underlay (more information can be found here).
Without going in to it too much, the tog unit is a measurement of how well a given material. object etc… insulates and holds heat, so with this in mind you can now see why it’s relevant when it comes to carpet underlay.
When choosing a suitable underlay, as we have mentioned above, the type of heating you have in your home may affect what type of underlay you should go for. This is where tog ratings come in to play
If you have a conventional heating system e.g. radiators, storage heaters etc…. mounted on the wall then you will want to go with a higher rated solution, at least 2.0 tog, so that it helps to hold the heat in the room and prevent it from escaping into the floor.
If you have underfloor heating and you are replacing the carpets/underlay that covers this then you are going to need an underlay with a low tog rating, e.g. certainly no more than 1.0 tog. This is so that the heat generated by the underfloor heating pipework is allowed to travel up through the underlay and carpet and in to the room in order to heat it.
A high tog rated solution here would prevent the heat from rising up in to the room, rendering it ineffective.
In either case, you should always check so that you know what you are getting for your money.
Preparing the Floor for Laying Carpet Underlay
Before you start laying any new underlay, it’s essential that you totally clear the room you will be laying in. This includes all furniture, current floor coverings etc…. so that you have a nice clean and clutter free space to work in.
Trying to get your underlay flat and inline across the room whilst you move furniture from one side to another is only going to end in a poor job so get it all out of the way before you start.
Next, make sure the floor is completely clean before you start! First, give it a good sweep over to remove any bulky dust and deris and then give it a good vacuuming to remove any smaller dust and objects.
Next, give the floor space a good close inspection to check for any raised nails (if laying on a timber floor). If you find any, knock them down with a hammer and punch.

Set of standard punches
Also check for any staples that may have been used to hold your old carpet or underlay down. If you find any, use a pair of pliers to pull them out. If you find any stray screws, again, remove these
With any nails, staples or screws taken care of, give the floor one final hoover just to be sure. This may seem a little “OCD” but even the smallest stone can feel like a boulder once you have underlayed and carpeted over it.
The final task before you actually start laying carpet underlay is to fit your carpet grippers. In brief, these should be fixed around the perimeter of the room, leaving around a 7mm gap between the gripper and the skirting/wall. This gap allows the carpet to be pushed down in to and give a professional visual finish.
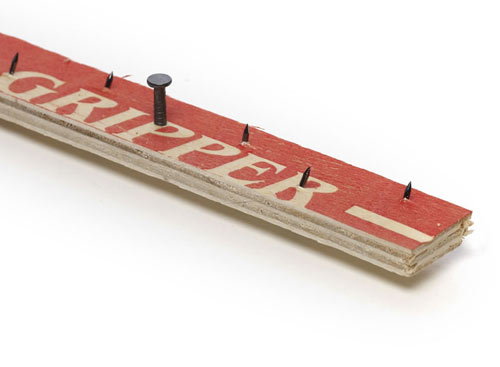
traditional carpets grip used to keep a carpet in place and stop it moving and rucking up
Our project on Laying Carpet has more information about preparation and fitting carpet grippers.
If you are laying underlay on wooden floorboards, a layer called an interliner should be used between the underlay and the floor. This is to stop up-draft problems, which include not only drafts but also dirt and staining.
Paper interliner for laying on to wooden floorboards under carpet underlay
One final point on preparation is that, if possible, remove any and all doors in the room you are working in. Although you can tuck the under under the door etc… trying to get a smooth cut when cutting around the door frame can be a real pain, so it’s best to make it easy as you possible can.
How to Lay Carpet Underlay
As with many jobs in the construction industry, the overall outcome and success of a job really depends on the preparation that is put in to begin with, so if haven’t already, please read through the steps above before you start.
If you have then you should have several rolls of your desired underlay and interliner lying on the floor of a completely clear, dust free room.
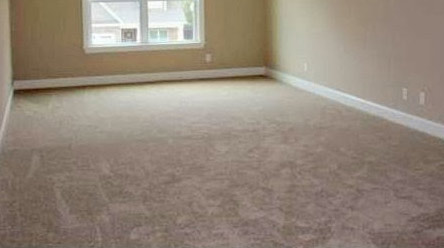
Clean and clear dust free room
Before we start anything, if you are laying on top of timber floorboards, take note of which way the boards are running as we will be laying our underlay in the opposite direction to the way in which these run. This is to avoid any “joint-on-joint” occurances.
Step 1 – Lay Your Interliner
Firstly, start by laying your interliner paper in rows across your floor area, overlapping each row by an inch or so. Once laid, tape up any joints using duck tape or similar to prevent it moving or sliding out of place.
With the interliner taken care of, the next job is to start laying your underlay.
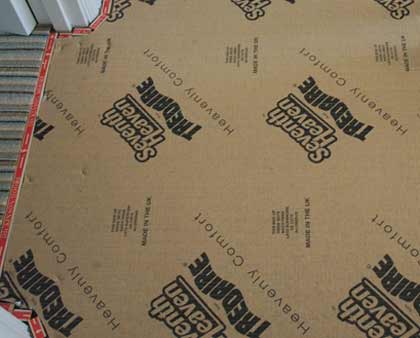
Important Tip: Depending on the type of underlay you are using will depend on which way up it’s laid.
If you are using rubber underlay, it should be face-down so the rubber is against the floor and the backing faces up. Foam underlay should also be face-down, with the coloured film on the floor and the backing face up.
Make sure you put your underlay down with the right face facing upwards
Step 2 – Start Laying Your Underlay
Take a roll and position it in one corner of your room and roll it out until you reach the opposite side of the room. Lay it out so that each row overlaps the carpet grippers along any edges and ends of the room.
Once the end of the room is reach, pop a few staples through the underlay into the subfloor (if working on top of a timber floor, if not, use some spray glue or double sided tape) on the room side of the carpet gripper to hold it in place.
With one end fixed in place, pull the underlay tight to pull any ridges out and then use a bolster to force the underlay down to the crease between the floor and wall. Now, chop it off at this point and move the rest of the roll to one side.
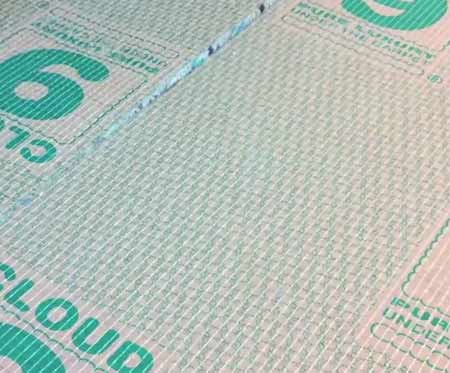
First row of carpet underlay laid within a room
Again, use a staple gun or some spray glue to hold your underlay in place. You’ve now completed your first row.
For any subsequest rows, please repeat the above steps, making sure that each row butts right up to the next with no gaps or rucks.
As with the first row, use the staple gun to staple the underlay in a few places along the edges inside the gripper and at the end of each row.
Make sure each strip of underlay is straight as you go, with no gaps between subsequent strips.
Step 3 – Cutting Around Doorways
Cut the underlay into doorways and any other recesses keeping any cuts as close to the skirting/doorliner as possible.
If need be you can simply cut a piece of underlay specifically for each given recess, taping it into place as needed, but it you can, it’s always best to cut out shapes rather than adding on as there is always the chance that they could move at some point in the future.
Carpet underlay cut in around door recess
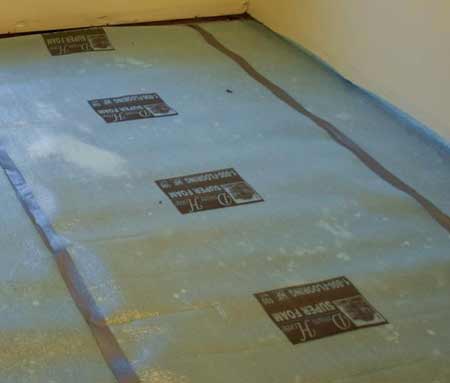
Once you have covered the entire floor area in underlay, use duct tape or similar to tape all the way along the joints between each row.
This will stop any defined lines in the carpet from showing where joints occur and also help to prevent the underlay from moving under the carpet, keeping it in place and also preventing any rucking up as the carpet is laid.
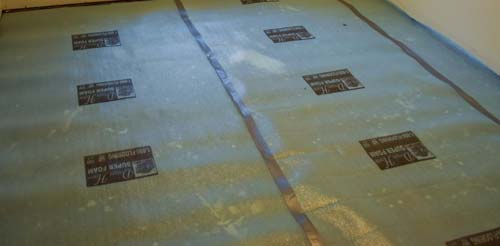
Carpet underlay laid in room and joints taped ready for carpeting
Next, use a sharp utility knife to trim off the edges of the underlay just inside the carpet gripper. Take your time and keep your cuts as crisp as possible to avoid any gaps.
The final job before you can progress with any carpet laying is to have a good clean up, removing any offcuts etc…. once done, you have completed laying your carpet underlay, pat yourself on the back for a job well done!