If you have a pet cat, installing a cat flap in your door is a simple way to give them the freedom to enter and leave the house whenever they need.
Although it may seem like a difficult DIY task at first, fitting a cat flap is fairly straightforward when you follow a clear guide and the instructions provided with your cat flap kit. With careful measuring and a little patience, you can achieve a neat, secure installation. Read on to find out how.
What is a Cat Flap?
A cat flap is a small door installed in an external door or wall that allows your cat to enter and leave your home without needing you to open the door. It gives your pet the freedom to move between indoors and outdoors whenever it needs.
For many cat owners, a cat flap is an essential addition. If you work long hours or are away during the day, it prevents your cat from being stuck inside or left outdoors for long periods.
With a cat flap installed, your cat can follow its natural routine, going outside to explore, exercise or use the toilet and returning indoors when it wants comfort, food or shelter.
This added freedom often supports a healthier lifestyle as cats with outdoor access tend to be more active and less likely to become overweight.
A cat flap also provides a quick way for your cat to get back inside during bad weather or if it feels unsafe outside.
Another practical benefit for owners is convenience. Your cat can come and go independently, which means no more being woken up during the night to open the door.
Basic cat flat in wooden door
Different Types of Cat Flap
Cat flaps come in several designs to suit different doors, homes and cat behaviours. Choosing the right type depends on where it will be installed and how much control you want over which animals can enter your home.
Below are the main types of cat flap available and how they work.
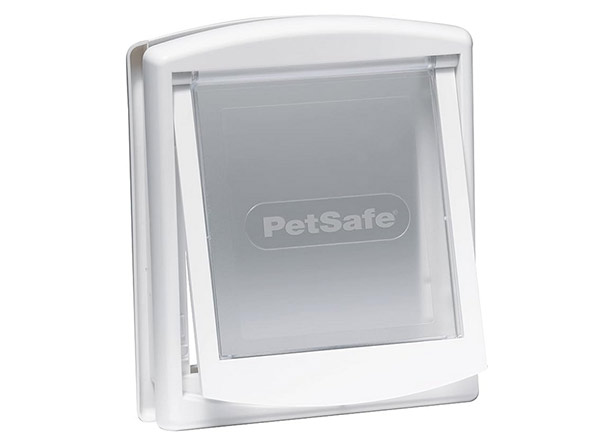
Standard Cat Flap
A standard cat flap is the simplest and most affordable option. It fits directly into a door and uses a lightweight swinging panel that your cat can push open to enter or leave the house.
Most models are made from durable plastic or aluminium and open easily in both directions, allowing your cat to move freely indoors and outdoors as it pleases.
The main drawback is that these flaps do not control exactly who can access. Any nearby cats or small animals may also be able to enter your home through the opening.
If you choose this type, look for a well-sealed design to help prevent draughts and keep your home as warm as possible and reduce any heat loss which increase energy costs.
Basic cheap cat flap
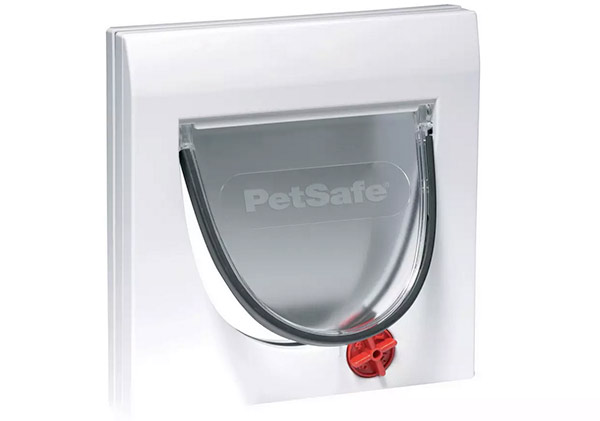
Locking Cat Flap
A locking cat flap works much like a standard cat flap but includes a built-in lock that lets you control when the flap can be used.
Most models offer several locking options, such as fully locked, entry only, exit only or completely open. This allows you to manage when your cat can go outside or come back in.
For example, if your cat is still outside when you go to bed, you can set the flap to entry-only so they can return home but cannot go back out.
Once your cat is safely inside, you can lock the flap completely to prevent other cats or small animals from entering your home overnight.
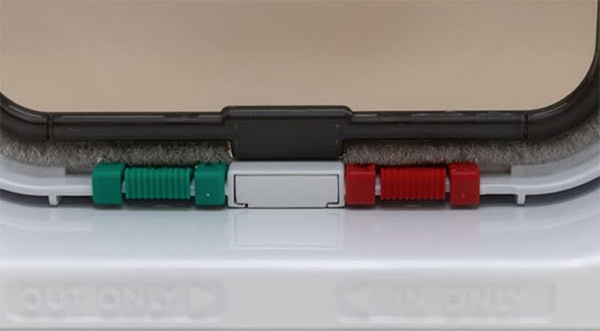
Locks on a locking cat flap
Magnetic Cat Flap
A magnetic cat flap is a more secure version of a locking cat flap. It stays locked using a built-in magnet and only opens when your cat approaches.
Your cat wears a small magnetic tag on its collar. When it comes close to the flap, the magnet releases the lock so the flap can open and your cat can enter the house.
After your cat passes through and moves away, the flap automatically locks again.
This system allows your cat to move freely while helping prevent other cats or animals from getting into your home.
Magnetic cat flap
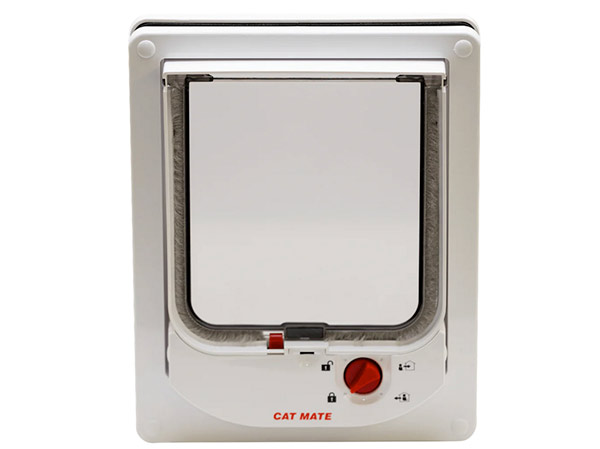
Infrared or Microchip Cat Flap
An infrared or microchip cat flap offers a higher level of security by only opening for your cat. The flap reads a small infrared tag on your cat’s collar or the unique microchip already implanted in your pet.
When your cat approaches, the flap recognises the signal and unlocks so they can enter. Once they move away, it automatically locks again to help keep out other animals.
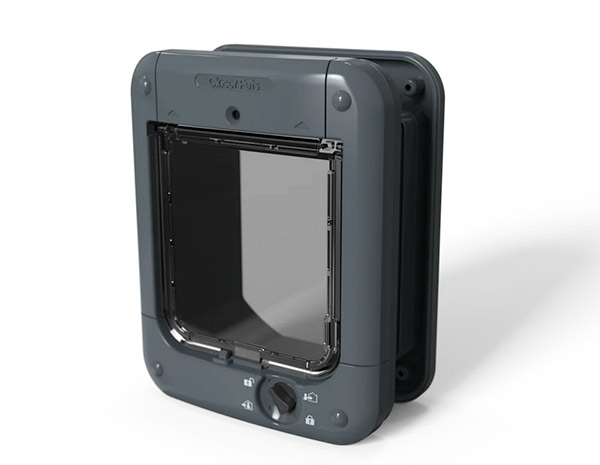
Microchip cat flap
Whichever type of cat flap you choose, make sure it fits tightly and seals well to prevent cold draughts and heat loss.
If you are replacing an older cat flap, be aware that many older models were circular, while most modern designs are square or rectangular. In some cases you may need to slightly reshape or enlarge the opening so the new flap can fit neatly and cover the existing hole.
Can you Install a Cat Flap in a UPVC or Glass Door?
Yes, a cat flap can be installed in UPVC, composite and glass doors. However, these materials are more complex to work with than timber doors, so extra care is needed.
Unlike wooden doors, which usually have a consistent thickness, UPVC and composite doors can vary widely. Some panels are solid and thick, while others may be only a few millimetres thick or hollow. This affects how the opening is cut and how securely the cat flap can be fixed in place.
In certain doors, especially composite models, the internal structure may include materials such as MDF, plywood or OSB and sometimes metal reinforcement like steel or aluminium sheets. These layers can make cutting the opening more difficult and time-consuming.
Installing a cat flap in glass is even more specialised. Glass panels normally need to be professionally cut or replaced with a pre-cut pane designed for a cat flap.
If you have a glass door or are unsure about the door structure, it is usually best to hire a professional installer to avoid damaging the panel.
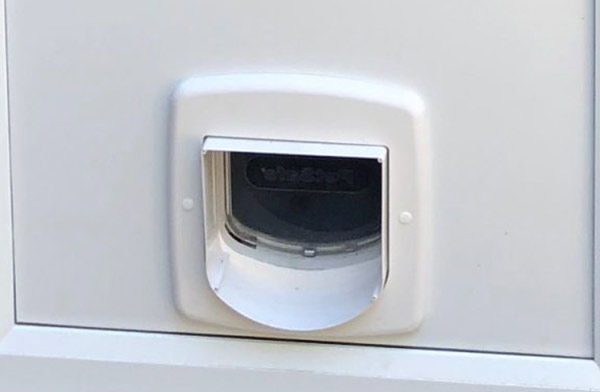
Cat flap installed in UPVC door
Measuring for a Cat Flap
Before buying or installing a cat flap, take a few simple measurements to ensure it will fit both your door and your cat comfortably. The right size flap allows your cat to move in and out easily without squeezing or struggling.
Measure the following areas of your cat:
- Torso: From the top of the shoulders to the bottom of the chest or stomach.
- Width: The widest part of your cat, usually across the chest or hips.
- Height: From the floor to the underside of your cat’s stomach.
Take these measurements gently while your cat is relaxed. Avoid forcing them into position, as this can make the process more difficult.
Once you have the measurements, check the flat section at the bottom of your door to make sure there is enough space for the flap and choose a model large enough for your cat to pass through comfortably.
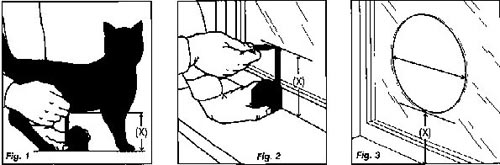
Measuring for a cat flap
Tools Needed to Install a Cat Flap
Before starting your cat flap installation, make sure you have the correct tools ready. Using the right equipment will help you cut the opening accurately and install the flap securely.
- Cordless drill or drill/driver
- Drill bits (5–6mm wood bit and 10–12mm flat bit)
- Jigsaw with a blade suitable for the door material
- Multi-tool (optional alternative to a jigsaw)
- Ruler or straight edge
- Pencil for marking
- Tape measure
- Cat flap kit with installation template
- Spirit level
- Screwdriver
- Spanner for tightening nuts or bolts
- Sandpaper
- File or rasp for smoothing edges
- Silicone sealant or decorator’s caulk with applicator gun
- Paint and brush (for sealing exposed timber if fitting into a wooden door)
How to Install a Cat Flap
The step-by-step guide below runs through the process of how to install a cat flap in a solid timber door, one of the most common and straightforward installation types.
If you are fitting a cat flap in a UPVC or composite door and have confirmed that the panel is suitable for cutting, the overall installation process is pretty similar to the method we have outlined below.
With this in mind, the below steps should cover most types of cat flap.
Step 1 – Measure Up
Start by measuring your cat using the method explained earlier and write down the results. These measurements help you choose a cat flap that is wide and tall enough for your pet to pass through comfortably.
If you have not yet bought a cat flap, select one that matches your cat’s size and suits your door type.
Next, measure from the floor to the underside of your cat’s stomach. Transfer this height onto the centre of the door where the flap will be installed. Use a spirit level to draw a straight horizontal line across the door. This line marks the correct position for the bottom of the cat flap.
Step 2 – Mark the Centre of the Door
Next, find and mark the centre point of the door along the horizontal line you created in the previous step.
Measure the full width of the door and divide the measurement by two to locate the exact middle. Mark this point clearly with an “X”, as it will be the centre position for the cat flap.
Take your time and double-check all measurements before moving on. Accurate marking helps ensure the flap is correctly positioned and avoids mistakes once the door is cut.
Step 3 – Mark the Cat Flap Outline
Find the cutting template included with your cat flap kit instructions. This template shows the exact size and shape of the opening needed for installation.
Place the template on the door so that the bottom of the opening aligns with the horizontal line you marked earlier and the centre of the template sits over the centre mark on the door. Secure it in place with tape.
If your kit does not include a template, remove the cat flap frame and trace the required opening onto paper to create your own.
Make sure the outline is accurate before transferring it to the door. To ensure it’s square (if it’s a square flap), check that the corners are even by measuring the diagonals. If it is circular, ensure the shape is properly round rather than slightly oval.
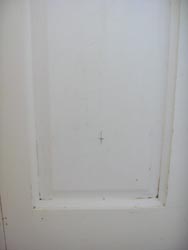
Centre point of cat flap
Step 4 – Drill Corner Holes for the Jigsaw Blade
With the template fixed in place, drill guide holes to allow your jigsaw blade to enter the cutting area through the door.
Use a drill bit slightly wider than your jigsaw blade (around 10mm is ideal). Drill the holes so their edges sit just inside the outline of the shape marked on the door.
If the opening is square, drill one hole in each corner. For a circular opening, you can often start with a single hole at the top, but drilling additional holes at the top, bottom and sides can make cutting easier.
After drilling, remove the template and use a straight edge to clearly redraw the cutting lines between the holes. These lines show the exact section of the door that will be cut out.
Step 5 – Cut Out the Cat Flap Opening
With the guide holes drilled and the cutting lines marked, you can now cut out the opening for the cat flap.
If possible, remove the door and place it on a stable, flat surface before cutting. If the door cannot be removed, the opening can still be cut carefully while the door remains in place.
Fit your jigsaw with a suitable blade. A fine-cut blade is usually best for a clean, smooth finish, although thicker doors may require a standard timber blade.
Insert the jigsaw blade into one of the drilled holes, keep the base plate flat against the door surface, and slowly follow the marked line. Cut steadily and carefully to achieve the most accurate result.
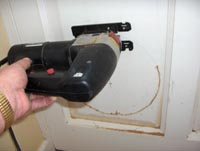
Cutting circle
If your door has panels, avoid cutting through the structural sections such as the vertical rails or mullions. Instead, position the cat flap in the centre of a single panel where there is enough clear space.
When using a jigsaw, do not force the tool to cut faster. Allow the blade and motor to do the work while you carefully guide the saw along the marked line to create a smooth square or circular opening.
Important safety tip: Always check both sides of the door before drilling or cutting. Cats sometimes sit close to the door when waiting to come inside.
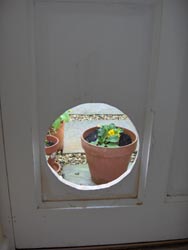
Hole in Door
If you have a multi-tool available, it can often be easier to control than a jigsaw. These tools are usually lighter, easier to manoeuvre and often cordless, which makes cutting the opening while the door is in place much simpler.
Step 6 – Tidy and Smooth the Opening
After cutting the opening, smooth the edges using sandpaper. A fine grit, such as 240 grit, is ideal for removing rough edges and creating a clean finish.
If you are cutting into a UPVC door, make sure your jigsaw is fitted with the correct blade. A fine-cut blade designed for UPVC or metal will produce a neater result and reduce the risk of damaging the panel.
If you are unsure which blade to use, check the packaging or ask for advice at your local DIY or hardware store.
Step 7 – Check the Flap Swings Smoothly
Place the cat flap into the cut opening and gently push it open and closed to ensure it swings freely without sticking or snagging.
If the flap binds anywhere, mark the spot and carefully trim the edges with a file, rasp or coarse sandpaper. Remove a little material at a time, testing frequently to avoid making the hole too large and creating gaps.
Step 8 – Positioning the Cat Flap Sections
Most cat flaps are designed to fit together in only one way, making installation straightforward. Refer to your manufacturer’s instructions to confirm which part goes on the inside and which on the outside of the door.
Typically, the section with the flap should be mounted on the outside. This protects the interior of the door from wind, rain and potential damage, especially for timber doors.
Once the correct orientation is confirmed, mark and drill the fixing holes as instructed to secure the flap in place.
Step 9 – Drill Fixing Holes
Position the flap section over the cut opening so it sits evenly and square. Use a pencil to mark each fixing hole through the flap.
Remove the flap and drill the holes using the size of drill bit recommended in the manufacturer’s instructions.
Apply a small amount of sealant around the external joints to make them water-tight. If the jig-saw vibrations have slightly stretched the joint between panels or mullions, fill any gaps with decorator’s caulk.
For timber doors, paint any exposed wood inside the cut opening to protect against moisture and prevent rot.
Step 10 – Assemble and Secure the Flap
Place the outer flap section on the door and insert the fixing bolts through the pre-drilled holes. Apply sealant to the rear of the flap and around the holes to ensure a watertight fit.
Having an extra pair of hands can make this step easier, as holding one section while aligning and securing the other from the opposite side can be tricky.
Fit the inner flap section over the bolts, then attach and tighten the nuts to secure the flap firmly in place.
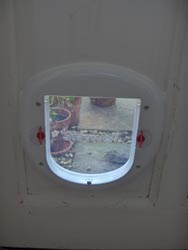
Cat flap fitted
Step 11 – Test the Cat Flap
Once your cat flap is fully installed, carry out a quick test to make sure everything works properly.
Start by gently pushing the flap open and closed by hand. It should swing smoothly in both directions without sticking or catching.
Next, test it with your cat. Place some food or a favourite treat on the other side of the flap and encourage them to walk through. Most cats will quickly figure it out when there is a tasty reward waiting.
If your cat seems unsure, don’t force them through. This can make them anxious about using it in the future. Instead, leave the treat nearby and allow them to explore it at their own pace.
If you have installed a magnetic, infrared or microchip cat flap, make sure the correct tag or microchip collar key is securely attached to your cat’s collar so the flap can unlock when they approach.
Installing a cat flap in a door may sound difficult if you’ve never done it before, but it’s actually a simple DIY job when you follow a clear step-by-step approach. Check your door type, choose the right cat flap, measure carefully and take your time during installation. With the right preparation, you can achieve a clean, secure fit as good as any professional can do.