Choosing the right drill can be overwhelming with so many options available. From drills and drill/drivers to impact drivers, the variety of power outputs, chuck types, and power sources (cordless or corded) can be confusing.
So, how do you pick the right drill for your needs?
This DIY guide simplifies the process by breaking down the main types of drills, including drill/drivers and combi drills. We’ll explain what each tool is best used for, helping you tackle any drilling job around the home with confidence.
What’s the Difference Between Corded and Cordless Drills?
Before diving into the various types of drills, it’s important to understand the two main power sources: corded and cordless.
Here’s a quick overview:
- Corded – These drills are plugged into a power outlet via a cable, typically 1.5 to 2 meters long. Note: On building sites, 110V tools are usually required, powered by a 110V transformer, instead of the standard 240V.
- Cordless – Powered by a battery typically clipped to the base of the handle, cordless drills offer mobility. Common voltages range from 10.8V to 54V.
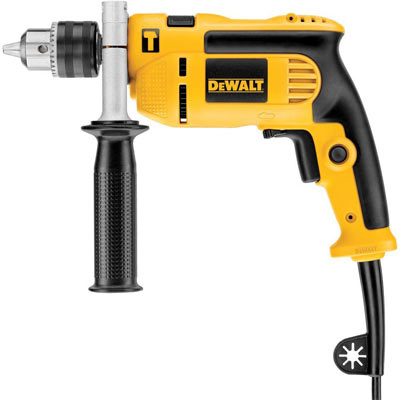
A standard mains-powered corded hammer drill

An 18V cordless drill/driver with a large 5AH battery clipped to the base
Both types have their pros and cons. The choice depends on your specific needs. For extensive on-site work without reliable access to power, an 18V cordless drill/driver is ideal. For occasional home projects like hanging shelves, a corded drill is a great choice.
Understanding Drill Batteries
When choosing a drill, you might notice batteries labeled with “Ah” or “amp hour”, such as 2Ah. This rating indicates how long the battery can last. For example, a 1Ah battery should provide a continuous 1-amp current for 1 hour. However, battery life can vary depending on the power demands of your task.
Batteries come in two main types: NiCad (Nickel-Cadmium) and Li-ion (Lithium-Ion).
Li-ion batteries are generally preferred because they don’t suffer from the “memory effect” that affects NiCad batteries. They’re also lighter and require less maintenance, though they can be more expensive.
Both types offer similar performance and lifespan if properly maintained.
Pro Tip: When buying a drill/driver, opt for a set that includes at least two batteries. This saves you from the hassle of waiting for a single battery to recharge during extensive tasks.
High-quality drills, especially those designed for professionals, often come with two 2Ah batteries. While these sets might cost more, the convenience of having a backup battery can be invaluable when you’re racing to complete a project.
Keyless Chuck vs. Keyed Chuck: What’s the Difference?
The difference is simple: a keyed chuck requires a key, while a keyless chuck doesn’t.
To securely hold a drill bit or accessory, the chuck’s jaws must tighten around it. In a keyed chuck, this is done using a key to turn a gear, tightening or loosening the jaws.
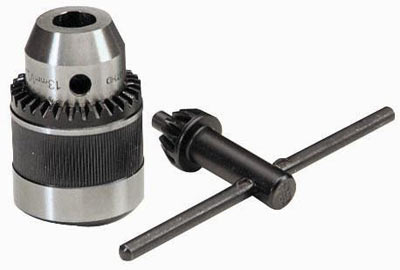
A traditional keyed chuck and chuck key
In contrast, a keyless chuck allows you to tighten or loosen the jaws by hand, making it quicker and easier to use. This convenience is why most modern drills and drivers come with keyless chucks.
Keyed chucks are typically all-metal, ensuring durability. Keyless chucks can be all-metal or a combination of metal and plastic. All-metal keyless chucks are generally more reliable and long-lasting.
Chucks come in standard sizes:
- 1/4 inch (6mm)
- 3/8 inch (10mm)
- 1/2 inch (13mm)
Smaller chucks are suited for lighter tasks, while larger ones handle more demanding jobs.
Overall, keyless chucks are the preferred choice today for their speed and ease of use. However, they are more complex and slightly more expensive than traditional keyed chucks, with some trade-offs in reliability.
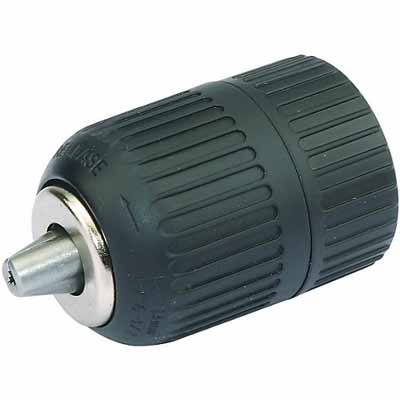
A modern keyless chuck
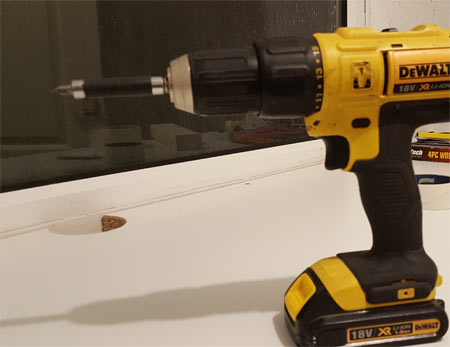
Brushed vs. Brushless Motor: What’s the Difference?
The difference lies in the type of motor your drill uses, but both operate similarly.
In a brushed motor, brushes supply current to the motor windings through communicator contacts.
A brushless motor, on the other hand, uses an amplifier controlled by a communicator, like an optical encoder, to switch the current on and off.
What does this mean for you? Brushless motors are generally more powerful, efficient, smaller, and lighter than brushed motors, making them easier to handle during extended use.
From the outside, you might not notice a difference between brushed and brushless drills, but the word “brushless” is usually marked on the drill itself.
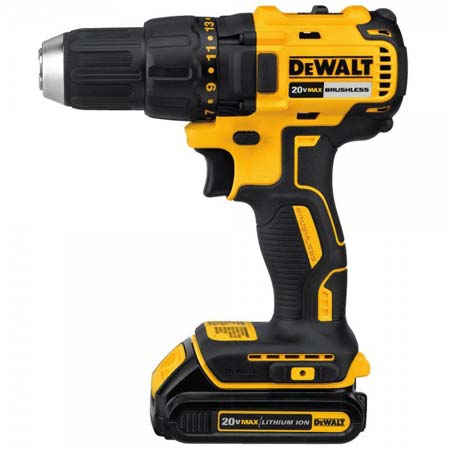
DeWalt brushless drill driver
Now that you understand these key motor features, let’s explore specific drills and what they offer.
The Standard Drill/Driver
The standard drill/driver is the basic option among drill/drivers, ideal for light DIY tasks.
It’s best suited for drilling into wood and softer metals like mild steel, and for driving screws, making it a good choice for woodworking projects and general home use.
While it can drill into masonry, this puts significant strain on the tool, so it’s not recommended for heavy-duty tasks like those better handled by a combi or hammer drill.
Standard drill/drivers typically have fewer features than combi drills, usually offering 1-3 speed settings instead of a range of torque settings.
They are also less robust, making them more suitable for home projects rather than the demanding environment of a job site.
In terms of power, standard drill/drivers generally operate between 10.8V and 14.4V, compared to the 18V typically found in combi drills.
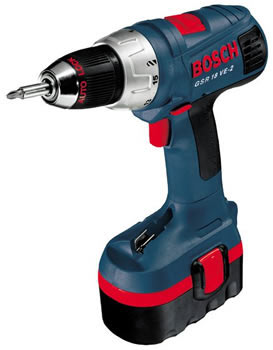
Standard 14.4v drill/driver
The Combi Drill/Driver
The combi drill/driver is an upgraded version of the standard drill/driver, offering more features and greater durability.
Often called a hammer drill/driver, it includes a hammer action setting for drilling into tougher materials. This makes it the preferred choice for professional tradesmen who need a robust tool that can withstand the demands of daily use on a job site.
Combi drills typically offer more versatility compared to standard drill/drivers. They usually feature a 2-speed gearbox, allowing for high-speed drilling and low-speed, high-torque screwing.
When choosing a combi drill, opt for models with an all-metal gearbox, as plastic gears are prone to wear and won’t last as long.
Another key feature is adjustable torque settings, usually controlled by a selector switch between the chuck and the drill body. Properly setting the torque prevents overdriving screws, helping you achieve a clean, flush finish.
Understanding the difference between speed and torque is crucial:
- Speed: The rotation speed of the chuck, determining how fast it spins.
- Torque: The power delivered by the motor to the chuck, affecting how forcefully the drill bit or screw turns.
A high-quality combi drill should offer at least 15 torque settings, along with specific settings for drilling and hammer action.
Additional useful features include forward and reverse settings, allowing you to change the rotation direction of the drill bit or screwdriver bit.
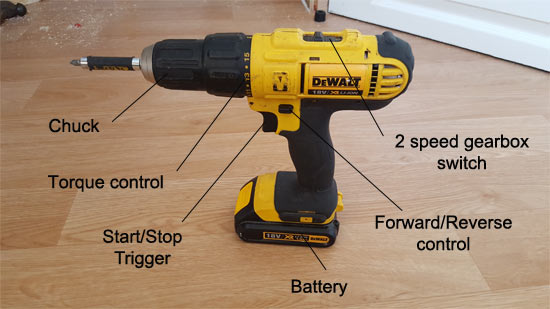
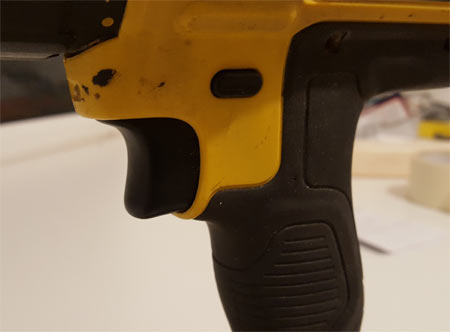
DeWalt 18v combi drill showing all the different features and what they control
The Impact Driver
The impact driver, also known as a percussion driver, is a relatively new tool, gaining popularity over the past decade.
Designed primarily for driving screws and handling heavy-duty tasks, the impact driver can also function as a drill in certain situations. Its compact design allows it to fit into tight spaces where larger drills can’t reach.
This tool excels in delivering high rotation speeds, coupled with powerful torque and impact force.
When driving large screws or working with tough materials, the impact driver is a game-changer. Unlike a standard drill or combi drill, which relies solely on rotation, the impact driver adds a hammering action with each half turn. This action drives screws more effectively, making it easy to insert large screws into dense timbers.
In our tests, we effortlessly drove a 6-inch, 10mm screw through a 9-inch timber without any strain!
Another advantage of the hammer action is that it keeps the screwdriver bit firmly engaged in the screw head, reducing the risk of stripping the screw.
One noticeable difference is the chuck design. Instead of a traditional chuck, the impact driver uses a hex socket, allowing quick and easy bit changes without the need to tighten or loosen jaws.
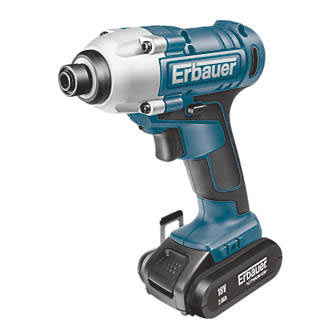
A modern Erbauer impact driver
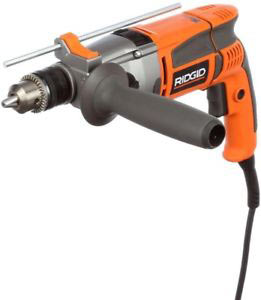
The Standard Impact Drill/Hammer Drill
The standard impact drill, also known as a hammer drill, has been a go-to tool for making holes for many years.
Older models were straightforward, often featuring a basic 2-speed gearbox or speed control via the on/off trigger. The harder you pressed the trigger, the faster the drill would spin.
Modern hammer drills come with a switchable hammer action. This feature allows you to drill through wood and metal using the standard drilling mode, but when switched to hammer mode, it’s ideal for tackling masonry or stone.
The hammer action works by not only rotating the drill bit but also adding a powerful up-and-down hammering motion. This makes drilling into hard surfaces like concrete much easier. However, avoid using the hammer mode on wood or metal as it can damage your drill bits.
Most modern drills also offer variable speed control, either through a gearbox or trigger mechanism. The power of these drills is measured in watts, with entry-level models around 550W and more robust options reaching 750-800W.
Higher wattage typically means more power, but for most household tasks, a 550W drill is sufficient. More powerful drills are generally intended for professional use.
Lower-powered drills usually have a standard keyed chuck, while more advanced models might feature an SDS chuck for quicker bit changes and better performance.
Given the power requirements, most of these drills are mains-powered (240V or 110V). Cordless versions are available but are generally more expensive and designed for professional use.
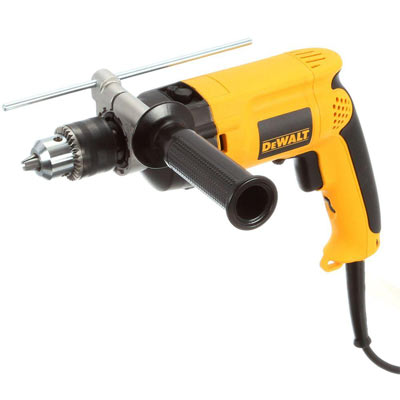
A standard DeWalt hammer drill or power drill
SDS Rotary Hammer Drills
SDS rotary hammer drills are the heavy-duty workhorses of the drill world, often referred to as kango hammers or pneumatic drills.
While standard drills can handle holes up to about 10mm, SDS drills are designed for serious tasks like drilling large holes in masonry or concrete. If you need to make a 4-inch hole for a soil pipe, this is the tool for the job.
These drills use a pneumatic hammer action driven by a piston, which delivers powerful blows to the bit. This action is measured in Joules and BPM (blows per minute). Higher Joules and BPM mean faster drilling through tough materials.
Unlike standard drills, SDS drills may have 2 or 3 modes: standard drilling, hammer drilling, and chiseling. The chisel mode allows you to use the hammer action without rotation, making it ideal for demolition work.
SDS drills operate at slower speeds than regular drills due to their immense power, ranging from 600W for smaller models to 1500W for more robust options. These drills are typically mains-powered (240V or 110V) due to their high power needs, though battery-operated versions with at least 36V are available but pricey.
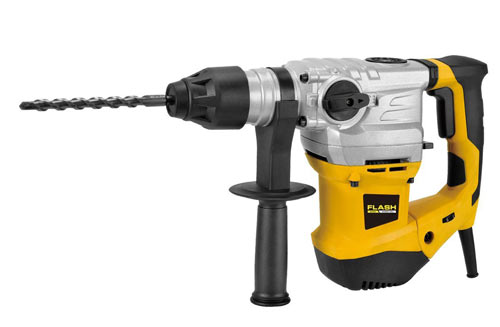
A large DeWalt SDS rotaty hammer drill
SDS drills require minimal maintenance, like adding grease to the transmission via an access point. They also feature an SDS chuck, which securely holds bits without slipping. SDS stands for “Steck-Dreh-Sitz”, a German term meaning “insert, twist, stay”.
For safety, larger SDS drills often include a clutch or torque limiter to prevent injury if the bit jams.
While SDS rotary hammers are mainly used by professionals, they’re indispensable for tasks like drilling large holes in masonry or breaking up concrete.
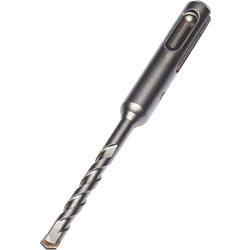
An SDS drill bit
Other Features to be Aware of
While most drills and drivers share common features like torque control, speed settings, and forward/reverse functions, some models offer extra features that can enhance your drilling experience. Here are a few advanced options to consider when buying a hammer drill, combi drill, or driver.
These features can make your drilling tasks easier and more efficient, so consider them when selecting the right tool for your needs.
Depth Gauge
A depth gauge is a useful feature on drills, extending from the front with a measurement ruler. It helps you control how deep you drill. For example, if you set the gauge to 40mm, it will stop drilling once it reaches that depth, preventing further penetration.
Note that cheaper drills often have plastic depth gauges, which can bend easily. Opt for drills with metal depth gauges for better durability.
Many drills allow you to remove the depth gauge when not in use, so it won’t obstruct your work.
Depth gauge mounted to front of drill
Adjustable Handles
Most drills have a pistol-grip handle with the trigger, allowing you to use one hand for the grip and the other for support. While this works for many tasks, an additional adjustable handle can make drilling easier.
Many drills, even budget models, come with a detachable handle that can be mounted on either side or adjusted to your preferred position.
If your drill doesn’t include an adjustable handle, you can buy one separately to enhance comfort and control.

Drill with a moveable side handle
Automatic Braking
Automatic braking is a specialised feature not found on all drills. It stops the drill instantly when you release the power trigger, preventing it from coasting to a stop.
Built-in LED Light
Many mid to high-end combi drills include a built-in LED light, though it’s less common in basic drill/drivers. This small light, located just below the chuck, turns on when you press the trigger and stays lit for about 10 seconds after release.
An LED light is incredibly useful for illuminating dark or tight spaces, eliminating the need to juggle a flashlight while working. For ease and efficiency, always consider a drill with this feature!
How to Use a Drill for Drilling and Screwing
Using a drill seems simple, but knowing the right techniques can make a big difference. Before you start, here are key tips to ensure you use your drill effectively.
In this guide, we’ll walk through the steps for screwing a screw into wood.
Step 1 – Choose the Right Bit for Your Task
Start by selecting the correct bit for your task. For drilling, use a drill bit of the appropriate size. For screwing, choose the right screwdriver bit, such as flathead or pozi-drive.
Tip: If you’re screwing, first drill a pilot hole. This is usually between 2mm and 4mm in diameter. Learn more about pilot holes here.
Mark where the screw will go, drill the pilot hole, then pick the right driver bit. For a pozi-drive screw, use a pozi-drive bit. Insert the bit into the bit holder, then into the drill’s chuck.
To secure the bit holder, open the chuck by turning it clockwise and close it by turning it counter-clockwise until it’s tightly held.
Pozi-drive screwdriver bit inserted into drill and ready for use
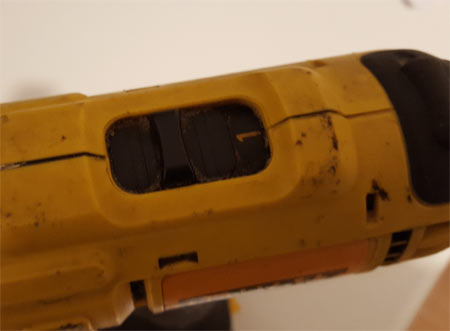
Step 2 – Verify the Rotation Direction
Before you start, check the drill’s rotation direction:
- Clockwise (Forward): Use this for drilling or screwing in, like inserting a screw or creating a hole.
- Counterclockwise (Reverse): Use this for removing screws or pulling out the drill.
It might seem obvious, but it’s important to confirm the direction, especially when the drill is running at high speed!
Make sure drill rotation direction settings are correct
Step 3 – Adjust the Speed Settings
Ensure your drill’s speed setting is appropriate for the task:
- Drilling: Use higher speeds for efficient drilling.
- Screwing: Opt for slower speeds to drive screws accurately.
While you can use any speed for both tasks, using the right speed makes the job easier and more effective.
Check the gearbox speed settings are correct
Step 4 – Set Torque and Drill/Hammer Modes
Adjust the torque and mode settings based on your task:
- Torque: For a small 1 1/2 inch screw in softwood pine, use a lower to mid-range torque (around 6-7). This prevents over-driving the screw.
- Mode: Select the correct mode—drilling or hammering—based on the material and task.
Proper settings ensure optimal performance and prevent damage to your materials and tools.
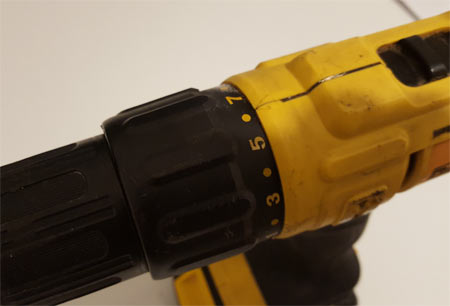
Check the torque settings are for your drill are set correctly for your job
Step 5 – Position and Drive the Screw
With your settings checked, it’s time to screw in:
- Position the Screw: Place the screw tip into the pilot hole and press lightly to hold it in place.
- Grip Carefully: Use your free hand to hold the screw below the head, touching the timber. Be cautious—wear gloves to avoid injury.
- Align the Drill: Insert the bit into the screw head, ensuring a secure fit.
- Check Alignment: Ensure the drill is square and level to prevent misalignment.
- Screw Slowly: Start with a slow trigger pull to build momentum. Avoid full speed initially.
- Monitor Torque: With the correct torque setting, the drill’s clutch should slip as the screw head reaches the timber surface. If not, slow the rotation by releasing the trigger.
Remove the drill and admire your work!
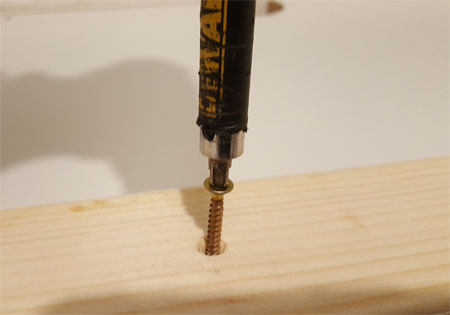
Bit positioned in screw head
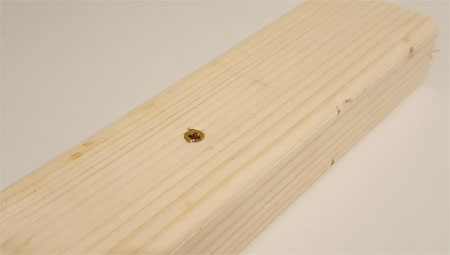
Screw successfully installed
Always wear appropriate safety gear, such as gloves, protective clothing, eye protection, and ear protection if needed.
With so many types of drills available—hammer drills, drill/drivers, combi drills, and more — Importantly, before purchase, consider your needs which will dictate exactly what type of drill/driver you should go for.