An angled drill is one of those tools, that in most cases, is rarely used or needed, but when it is, it’s a real life saver when you have to work in tight and confined spaces.
On a domestic level, it’s a tool that in many cases, would rarely be used and with this in mind, you might be thinking; why should I spend upwards of £100 on a tool I might use once in a blue moon? This would certainly be a valid question and one that we hope will be answered by the end of this project.
What is an Angled or Right Angle Drill?
An angled or right angled drill is very much like a traditional drill or drill/driver, except that instead of the chuck running in line with the body it’s set at a 90° right angle to the body.
The addition of this angle allows you to get the chuck and any drill or screwdriver bits down into tight spaces such as between floor or ceiling joists, behind cupboards etc. where using a traditional drill or driver would mean trying to drill or screw at an angle, which often leads to disaster and much wasted time.
In most cases, this tool is mainly reserved for those in the trades as they are the ones that find most use for them, but in reality they are a worthy addition to any tool collection.
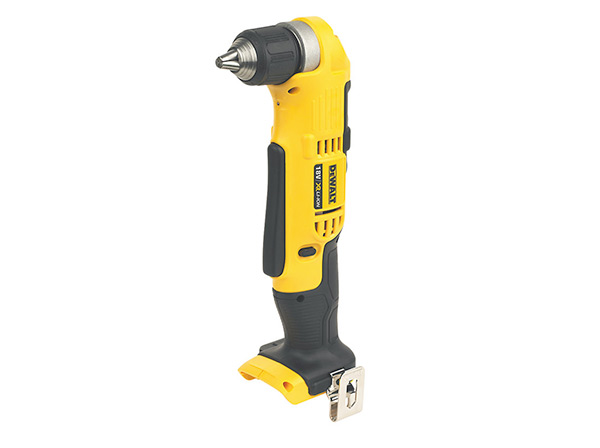
DeWalt cordless angled screwdriver
When Should you use a Right Angled Drill?
The ideal time to use an angled drill is when you need to drill a hole or screw in a screw in an area with limited space or access, such as the example above, when working between joists, where getting a traditional drill or drill/driver in to do the job just isn’t an option due to the fact that you simply cannot drill or screw in a straight line.
Okay, in some situations, screwing in a screw at an angle is acceptable e.g. if you are fixing two pieces of timber together in an area where it won’t be seen.
As long as the screw is inserted fully and the timber is firmly fixed, the fact that the screw is at an angle doesn’t really matter too much. The firm fix is what matters!
As we have established, the angled drill is not common in most tool boxes and when working in tight spaces, especially when screwing in screws, the go-to tool is normally the stubby screwdriver.
The stubby is small driver with a very short shaft that allows you to access and work in a confined space. This is fine for screwing a 1-inch screw into a piece of softwood, but imagine trying to screw a 4 inch screw into a piece of 6 by 3 inch timber. It would be virtually impossible!
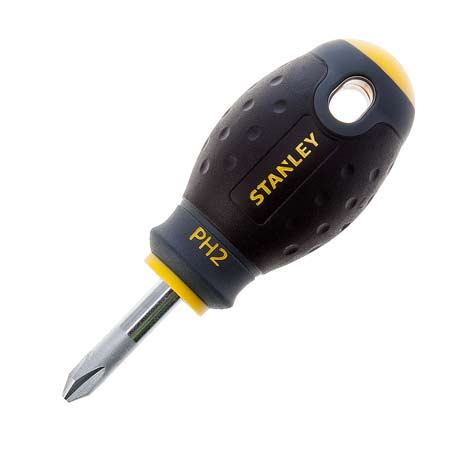
Stanley tools stubby screwdriver
One very important point to note is, as you will most probably be working in a confined space, the use of protective gear is a must! Working so close to flying debris is dangerous so protective goggles and gloves should be worn at all times.
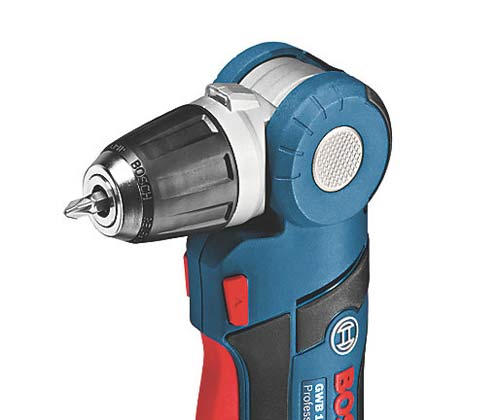
Parts of a Right-Angled Drill
Before explaining exactly how to use an angled drill, it’s important to run through all of the different parts of an angled drill so that you know exactly which item we are referring to in our instructions. The main parts are as follows:
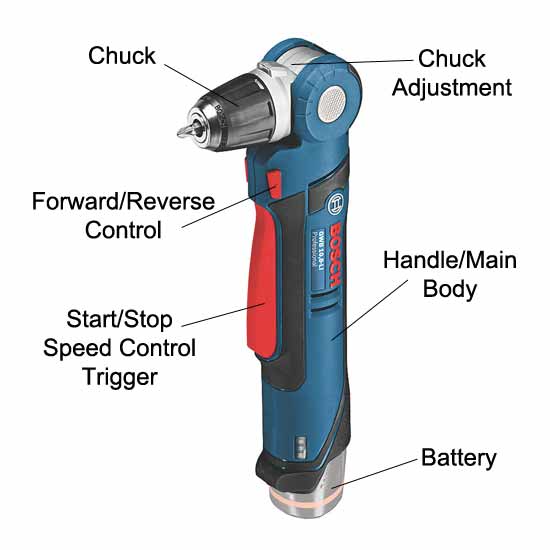
An angled drill showing all the different parts of the drill
- Chuck: Featured on all drills, this is the part that holds the drill bit or screwdriver bit. They comes in 2 types, keyed requiring a chuck key to tighten and hold the bit in place and keyless, meaning it can be tightened and loosened by hand
- Chuck Adjustment: Only featured on some, generally more expensive models, this allows you to adjust the angle of the chuck through most of the time, at least 90°, sometimes 180°. This makes it much easier to set the perfect angle for the hole or screw you’re working on
- Direction Control: This sets the direction that the chuck rotates in, either forwards or backwards
- Start/Stop, Speed Trigger: Allows you to start and stop the drill by depressing the trigger. With many models it also allows you to adjust the rotation speed of the chuck depending on how much it’s squeezed
- Main Body/Handle: The body of the drill that contains the motor and the electrics. Also acts as the handle
- Battery: The power source of the drill that provides the electricity that powers it. Available in a range of different types and power outputs. With corded models that plug into the mains, you won’t have a battery
What to Look for When Buying a Right-Angled Drill
If you know you have a fair amount of work to do in and around tight spaces then it may well be worth investing in an angled drill to make your life much easier.
If you are thinking of purchasing one of these handy tools then there are a few features that you should look for to ensure that you get the right one for you:
Torque/Speed Control
Torque, this is the power that the drill exerts on to the item you are working on. You need to make sure that it outputs enough power to cope with the jobs you will be throwing at it e.g. drilling holes and screwing in to large timbers and you also need to make sure that you can control that power.
As you will know if you have a drill/driver combi-drill, most feature an adjustable torque setting and/or a speed adjustment for the motor.
This allows you to use higher speeds when drilling and then turn it down to a lower speed for screwing.
Trying to screw a large screw into a thick timber at high speed will in almost all cases end up in you rounding the head of the screw off, so the ability to adjust power and speed is essential, maybe even more so with this tool as working in a confined space will usually require more accuracy.
Another benefit of power and speed control is the load that is put on the motor over time. Being able to use the drill at lower speeds will also make it last longer and not burn it out due to over-heavy use.
2 speed variable speed trigger for an angled drill
Adjustable Drive Head and Chuck
As we have mentioned, some angled drills allow you to adjust the position of the chuck so that you can use it at 90°, 45°, as a conventional drill and any other angles in that range.
This makes an already useful tool into an even more versatile item as, with adjustment to the chuck position, there shouldn’t be any place you can’t get to now.
As you may imagine, this feature does come with extra cost, so it’s generally only the more expensive models that feature it, but if you do have the additional funds then it’s well worth spending that little more.
Adjustable drive head on a Bosch angled drill
Comfortable Handle
This may sound unnecessary but when working in confined and difficult to reach spaces, having another grip point for the tool can make all the difference and save a lot of struggle.
If have to bend and contort your hand and wrist to get a decent grip on the handle and even reach the power switch this can be a nightmare and get tiring very quickly and if the drill snaps suddenly can also lead to injury!
This is even more important if you are a tradesman and will be using your angled drill quite a bit. Some manufacturers also offer an adjustable power switch so that you can move this also for even more ease of use.
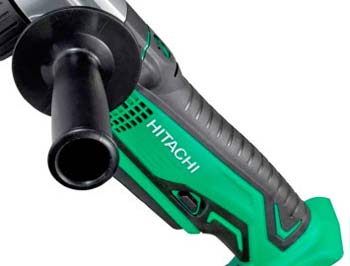
Comfortable and shaped handle on a Hitachi angled drill
Batteries
With the technological advances in Lithium-ion batteries, these have now pretty much replaced the older NiCad (Nickel Cadmium) batteries as, primarily, they tend to be a lot lighter than their Nickel counter-parts which, as we have established above, is very important.
Li-Ion batteries also require a lot less maintenance and do not suffer from the “memory effect” issues associated with NiCad batteries, so always go for Li-Ion!
If you are looking at purchasing an angled drill you should also look for one that comes with at least two batteries and a charger. There’s nothing worse than having to stop working due to a flat battery and with 2, you can use one while the other is charging.
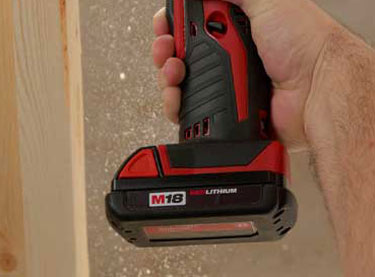
18V Li-Ion battery for a Milwaukee angled drill – Image courtesy of milwaukeetool.com
Power Supply
In terms of power supply, they are generally available in two options – corded and cordless.
The corded variety, in much the same way as traditional corded drills are either 240V mains and also 110V (requires a transformer) options also available for site use.
When it comes to the cordless versions, again, there are a few different options. Most aimed towards the DIY, casual use market will tend to be around 10.8V which, with today’s technological advances in battery technology (the Li-Ion batteries mostly) provide more than enough power for pretty much any situation.
If you are looking to use this tool more often then, especially if you are a tradesman specializing in roofs, lofts, plumbing or electrics etc…. then something with a little more oomph is needed is needed such as the 18V version.
Chuck Type
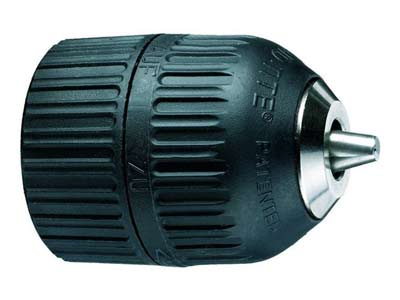
The type of chuck that the drill has also needs thinking about and these come in 2 diferent types; keyed and keyless.
With keyed chucks, a special chuck key (this looks like a cog on the end of a handle) fits in to normally one of three holes at the end of the chuck and is used to turn a gear, also at the end, that in turn opens and closes the jaws of the chuck and clamps down on the item inserted in to it.
This is fine and works well when the drill is new, but over time these do wear, requiring much more force and effort to tighten the jaws and if you lose the key, then you’re stuck!
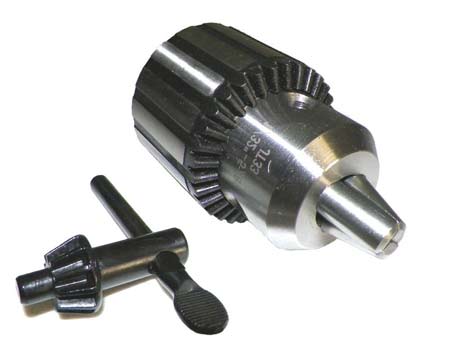
Chuck with key
The second option is the keyless chuck and instead of having a key to tighten the jaws, you use your hand to turn the exterior of the chuck that then tightens or loosens the jaws.
This has several advantages in that you don’t have a key to worry about, most models of drill allow you to get enough pressure by hand to easily tighten when working in a confined space and thus much easier to use.
Keyless chuck for a DeWalt drill
Types of Angled Drills
There are 2 different types of angled drill or drill/driver available today, the actual specific dedicated angled drill that we have looked at above and also an attachment that can be inserted into the chuck of a standard drill to turn it into an angled drill.
Obviously, if you are going to be working in and around tight spaces a lot then you should definitely go for the specific tool for the job – the angled drill.
However, if you only need such a tool for 1 or a few jobs, it may well be worth considering the attachment tool as they are significantly cheaper.
The angled drill attachment looks like a traditional angled drill with the actual body of the drill chopped off, leaving just the chuck.
Protruding from the opposite end of the chuck is a hexagonal shaft that simply slots into the chuck and jaws of a standard drill.
When the drill is powered on, this then drives the angled attachment, and through a series of gears, turns it 90° to the chuck of the attachment where a drill bit or screw bit is attached.
You may be thinking – brilliant, this sounds like I can get one of these and not have to worry about getting an actual angled drill!
This is not always the case though, the real bonus of having one of these tools is that it is small, compact and designed specifically for operation in tight spaces.
With the attachment, you still have a full drill at the other end, plus the additional length of the attachment so in reality you only have the ability to drill or screw at 90° which may be fine for your needs, but not necessarily suitable for confined spaces.
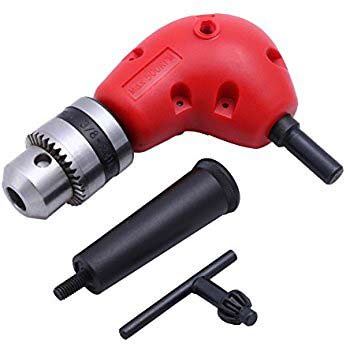
Angled drill attachment with keyed chuck
Tools and Products Needed for Using an Angled Drill
In order to drill holes or screw in screws when using an angled drill, you will need the following tools and products.
- Your chosen angled drill – either angled drill tool or angled drill attachment
- Pen/pencil
- Tape measure
- Selection of drill bits for the job you are doing
- Screwdriver bits
- Selection of correct screws if screwing in
- Correct PPE equipment – gloves, old clothes, goggles, mask etc.
- Items to kneel, rest on so you are comfortable working
How to Drill a Hole Using an Angled Drill
Now that we have run through all the features and key points of an angled drill, it’s now time to take a look at exactly how to use one.
For the purposes of this demo we will be using an dedicated angled drill.
Step 1 – Familiarise Yourself
The very first job, if you have never used such a tool before, is to familiarise yourself with it fully and how it operates.
Work out where all of the controls are e.g. forward/reverse switch, on/off trigger, how the battery attaches, if the chuck allows for adjustment etc.
When doing this, pay particular attention to the start/stop and speed control. Get used to using it and carefully controlling the speed and power output so that you have full speed control of any drilling and screwing you may be doing.
Step 2 – Plug in Full Battery
Before starting, make sure that you have at at least one fully charged battery to work with. As sated, there is nothing worse than having to stop half way through a job and wait for a battery to charge up!
If you are lucky enough to have 2 batteries for your drill, put the other on charge while you work so that you can simply swap them out when the other is drained.
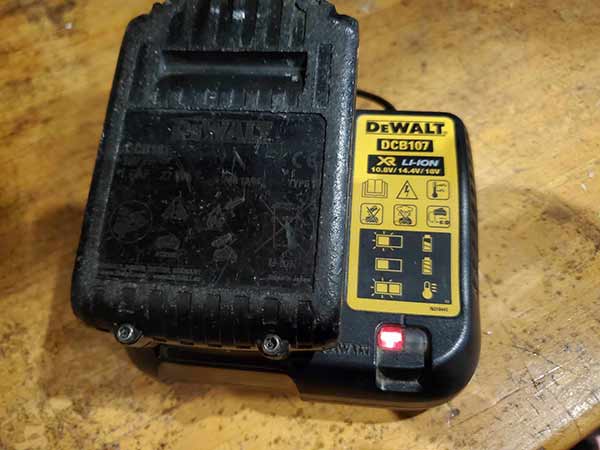
Charging up angled drill battery
Step 3 – Select and Insert Bit and Mark Hole
Next you will need to select the right type of bit for the job you are doing.
If you are screwing in screws then you will need the correct screwdriver bit for the type of screws you’re using. In most cases this will be a pozi 2 bit.
If you need to make a hole then a drill bit of the correct size will be needed.
If you are looking to make a large diameter hole for heating pipes or cables then you may need to start off small, using a small drill bit and work your way up. This will make the job much easier and put less strain on the drill.
Despite this, if you are using a flat drill bit then ensure you have a firm grip on the tool and that you take your time to minimise any unnecessary strain.
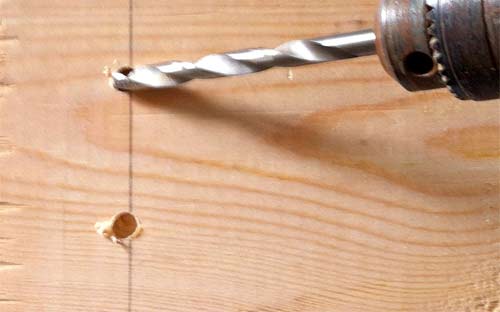
Once you have selected the right drill bit, the next task is to measure and mark the position for your hole in the correct location.

Drill hole marked on piece of timber – Image courtesy of diynetwork.com
Step 4 – Select Speed and Gearing and Direction
As we have stated several times above, using the correct speed setting for the job you’re doing is absolutely essential.
If you are screwing in screws, then a slow and steady speed setting should be used so that you have full control over what you’re doing.
However, if you are drilling holes then this should be done at higher speeds so that the drill bit can cut its way through the item you’re working on.
As mentioned, the type of speed control you have will depend on the drill you have, it may be set by how hard the start/stop trigger is squeezed or it may have a separate switch.
One point to note is that when drilling through timber with larger wood bits the drill will sometimes jump or catch when starting, this is where a variable speed control trigger comes in to its own as just starting and stopping in limited spaces can be awkward and dangerous.
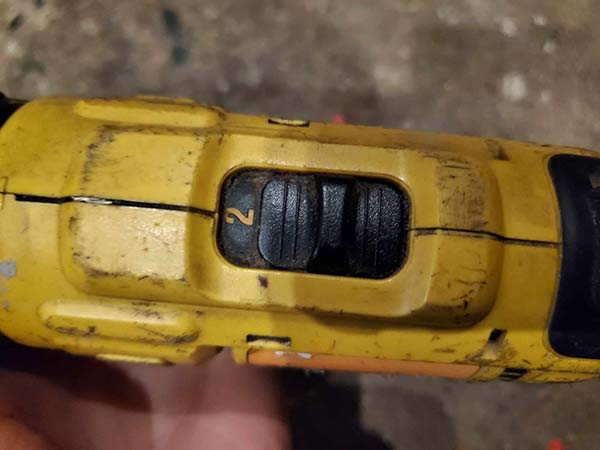
Speed control switch on drill
Step 5 – Position Drill and Drill Bit
Before you start drilling, get yourself in a comfortable position. Trying to hold the drill steady whilst balancing on your knee on a ceiling joist will get very uncomfortable very quickly and this is when mistakes and accidents can happen.
Essentially, if you’re not comfortable then you won’t have full control over what you’re doing!
Once you have gotten yourself comfortable, take the drill and position it within the working area where it needs to be.
Ensure that you can easily reach the on/off trigger and if screwing, easily hold the screw whilst it’s screwed in.
Additionally, if your tool features a detachable handle, make sure it’s screwed into the right hole to allow you fully control over the tool.
Drill bit next to mark on timber ready for drilling
Step 6 – Drill Hole/Screw in Screw
Finally, now it’s time to actually do the work.
Using the angled drill is very much like using a standard drill. The only difference is that you hold it slightly differently.
With a traditional drill, one hand holds the grip with the trigger switch and the other supports the underside of the drill, ensuring that it’s in the right position.
With the angled drill, most are designed so that you use both hands on the handle, one to operate the on/off trigger and the other positioned beneath to help hold it steady and in position.
If you are able to, sometimes you may also need to position your hand directly above the chuck so that you can apply a little pressure to either hold the screw in place while it’s screwed in or help the drill bit to bite into the medium you’re working on.
Take your time when drilling or screwing and don’t be tempted to rush. Once you are done, move the drill out of the way and inspect your work to make sure all is as it should be.

Large hole drilled through
Note: If you are drilling large diameter holes through joists for pipes or cables, there are rules on the size that these holes can be compared to the size of joist. For full information on this see our notching joists project here.
When using a Angled Drill (as with any power tool) always make sure you are using new or drill bits of good quality. This makes the work load on your Angled Drill much less and stops you trying to push the power tool which also cuts out possible accidents and wear on the motor of your drill.