
Installing a garage door may seem challenging due to its size and weight, especially for a DIY beginner, but it’s definitely achievable.
To help, we’ve created this step-by-step guide covering everything you need to know about fitting a garage door. Read on for more details.
Why Replace a Garage Door?
The main reasons to replace or install a garage door are either it’s a new build, requiring a door, or the existing door is too damaged to repair.
For new builds, the garage will be designed for a specific door size, making installation straightforward since the opening matches the door dimensions.
In the case of replacements, damage is often the cause. Timber doors can rot and sag over time, becoming insecure and allowing moisture inside, requiring replacement with low-maintenance metal doors.
Metal doors typically need replacing due to damage, such as break-ins or accidents. Since they don’t rot, it’s usually due to wear or impact.
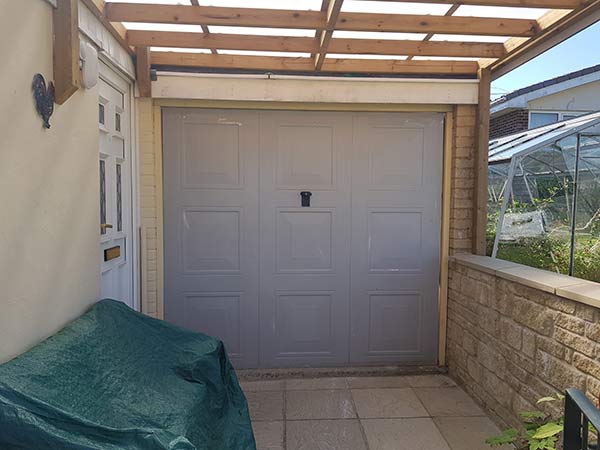
Newly replaced metal garage door
Types of Garage Doors
Garage doors come in various styles, mainly distinguished by how they open. The most common types include:
- Side-opening (traditional) garage door
- Up-and-over (canopy or retractable) garage door
- Roller garage door
Side-Opening/Traditional Garage Door
Traditional garage doors were typically made of timber and featured two hinged panels, opening from the centre. They were mounted on heavy-duty hinges to support the door’s weight.
However, over time, the weight could cause sagging, leading to damage as the door scraped the ground. Without proper maintenance, moisture could lead to rot, shortening their lifespan significantly.
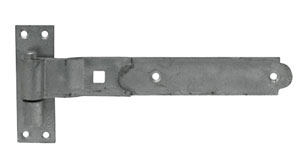
Band and hook hinge
Up-and-Over/Canopy/Retractable Garage Door
Modern garage doors are typically up-and-over designs made from lightweight, durable materials like aluminium or galvanised steel. These doors are low-maintenance, requiring only occasional painting and lubrication of moving parts.
Often called “canopy”, when opened, part of the door extends outward, creating a canopy effect. In contrast, retractable doors fully retract into the garage, leaving no part of the door outside the opening.

Typical up and over style garage door
Roller Garage Door
The roller garage door is a modern design, inspired by large industrial roller shutters. It features multiple hinged sections that roll up onto a spindle housed above the garage opening.
Typically custom-made to fit your specific garage frame, roller doors offer a precise fit and save space inside the garage when open. They are operated either by a pull chain or an electric motor controlled by a button or remote.
These doors are ideal when vertical obstructions, like brick piers or utility meters, block the full entry of traditional doors.

Roller Garage Doors – Image courtesy of Cheshire Garage Doors
Sectional Garage Door
Sectional garage doors consist of larger panels compared to roller doors. These panels move along vertical rails and slide into horizontal tracks at the top of the garage, keeping the door within the garage and avoiding external protrusion.
Known for their strength and space-saving design, sectional doors are durable but can be more expensive.
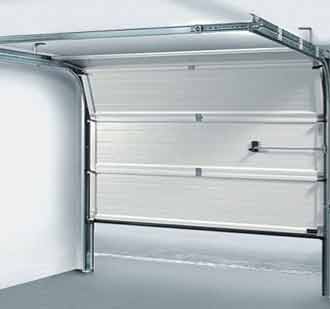
Sectional Garage Doors – Image courtesy of Garage Doors Online
The above is a brief run down on the types of garage door, if you would like to learn more, see our how to choose a garage door project here.
Materials for Garage Doors
Garage doors are commonly made from four materials: timber, galvanised steel, aluminium, and fibreglass (GRP – Glass Reinforced Plastic).
Aluminium and steel doors are lightweight, durable, and low-maintenance. Fibreglass/GRP doors are more expensive but offer a range of styles, excellent strength, and require minimal upkeep, focusing only on the opening mechanisms.
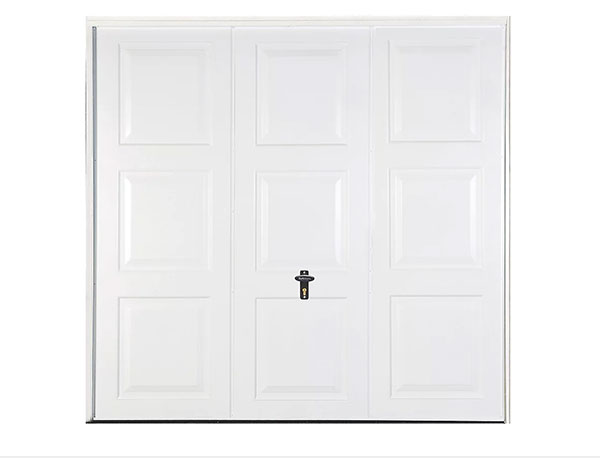
GRP garage door
Can You DIY Install a Garage Door?
Yes, you can install a garage door yourself, but if you’re new to DIY, it might be challenging.
Garage doors come with detailed instructions for installation. By following these carefully, you should be able to complete the job successfully.
Given the size of the door, it’s best to have two people for the installation. While experienced DIYers might manage alone, it’s advisable to work with a partner for safety and ease.
Costs of Installing a Garage Door
Garage door installation costs vary based on the door type. Basic steel or aluminium doors start around £400, while premium models can exceed £5,000.
These prices are for the door alone. If you prefer professional installation, expect to pay an additional £150 to £250 per tradesperson. Costs can vary depending on the door quality, tradesmen’s experience, and your location.
Regulations for Installing and Replacing Garage Doors
Typically, no building regulations apply if you’re replacing a garage door with a like-for-like model or installing one in a new build garage as per the approved plans.
Planning permission is required only if you alter the garage opening’s size or if you live in a conservation area, where changes must match the area’s aesthetic standards.
What to Consider When Fitting a Garage Door
Before replacing a garage door, consider the following factors to ensure a successful installation:
1. Door Size: If you’re replacing a standard-sized door, the new one should fit without issues. For non-standard openings, you may need to adjust the opening to fit the new door.
2. Frame Position: Installing the frame between the brick reveals and the lintel will slightly reduce the garage’s internal length, while fitting it behind the reveals will increase the available opening width.
3. Door Type: Ensure the new door’s frame, hinges, and other components are compatible with your existing setup. For different door types, you may need to modify these elements accordingly.
Tools Needed for Installing a Garage Door
For a successful garage door installation, gather the following tools and materials:
- Garage door kit
- Drill/driver
- Assorted screwdrivers
- Mitre saw
- Reciprocating saw
- Drill and screwdriver bits
- Appropriate screws and wall plugs
- Pliers
- Mole grips
- Tape measure
- Pen/pencil
- Circular saw
- Pressure-treated timber (if needed)
- Spirit level
- Clamps
- PPE gear: goggles, gloves, and old clothes
- Oil, grease, or lubricant (as needed)
- At least 4 chocks
While not all items may be necessary, having them to hand will generally be beneficial to the job as a whole.
How to Install a Garage Door
This guide covers the installation of a standard up-and-over canopy garage door.
Installing a garage door typically requires two people. You’ll need help for lifting, manoeuvring the door, and positioning the opening mechanism accurately.
Before you begin, carefully read the instructions that come with your door. These will provide clear, step-by-step guidance to ensure a smooth installation process.
Step 1 – Remove the Old Door
First, remove the old garage door, including the frame and any fittings. The method depends on the type of door you have.
For side-hinged doors, simply lift each door off the hinges. You might need to remove a split pin or nut from the hinge hook.
For up-and-over doors, you’ll need to handle the weight or spring mechanism. These components are heavy and under tension, so proceed with caution. Always release tension in the closed position and have a helper assist you.
If you must open the door to remove it, be cautious: once the tension is released, the door could fall quickly!
Step 2 – Check the Existing Frame
After removing the old door, inspect the frame to ensure it’s square and level for proper installation of the new door. Check that the frame is upright and in its original position.
Use a spirit level to verify vertical alignment and measure horizontal distances between vertical frame members in multiple spots to ensure consistency. Also, check the diagonal measurements from opposite corners; they should be equal.
If measurements vary significantly, the frame may be misaligned and could need replacement. For timber frames, inspect for damage or rot. Any damaged sections should be replaced before installing the new door.
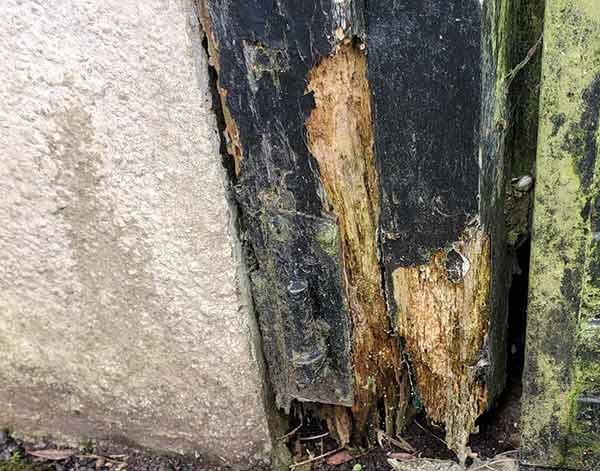
Rot in garage door frame
Step 3 – Check All Fixings
Before starting assembly, review the instructions and list of items included in your garage door kit. Unpack and organise all fixings on the floor.
Cross-check each item against the list to ensure you have everything needed. This prevents delays caused by missing components midway through the installation.
Step 4 – Assemble Door Fixings
Start by gathering all fixtures and fittings for the door and follow the assembly instructions carefully.
With assistance holding the door upright, attach the inner and outer handles and connect the rods to the locking mechanisms.
Test the handles to ensure that turning them properly releases the catches and allows the door to open. Adjust the connecting rods if necessary to ensure a full release.
Assemble any additional components as required, such as spring mounts, counterweights, or gap-filling covers. If the door uses brackets instead of a frame, secure the springs, weights, and any supporting arms.
Check for a sliding pivot or other mechanisms that help keep the door vertical when open, and ensure these are properly installed. Refer to the instructions for specific details.
Step 5 – Fix Frame in Position
If your door includes a frame, it will be installed either inside or behind the garage opening, allowing the door to pivot on it.
The frame may come in pre-assembled sections or in parts that need to be assembled. Follow the assembly instructions to put the frame together.
Lay the door face down on the garage floor and position the frame around it. Attach the brackets or fixings to connect the door to the frame. If your door has pivots or sliders that fit inside the frame, ensure these are engaged before attaching the frame.
Once assembled, move the door and frame (or just the door if there is no frame) to the garage opening. Adjust the position so it fits either inside the reveal or behind it.
Use chocks and a spirit level to ensure the door and frame are perfectly square. Measure the gap around the door and frame to ensure it’s consistent all the way around. Make adjustments as needed before securing everything in place.
Fix the frame to the garage using the supplied brackets and screws. Refer to the instructions for the correct drill hole size, which will vary depending on whether you’re using wall plugs or concrete screws. Secure each fixing one by one, double-checking for squareness.
If there’s no frame, the door is typically secured with large brackets that also hold the springs or weights. Follow a similar process: chock and level the door before fixing it in place.
Step 6 – Adjust Weights or Springs
With the door secured, open it to test its movement. If it’s too loose or stiff, adjust the spring or counterweight to balance it and ensure smooth operation. Your instructions will provide detailed guidelines for this adjustment.
Once properly adjusted, the door should lift and lower easily with one hand. Lubricate all moving parts with high-quality 3-in-1 oil. For sliding areas, apply lithium grease or a similar product.
After these final steps, clean up and enjoy your newly installed door!
How to Maintain a Garage Door
Regular maintenance keeps your garage door in top shape. For steel, aluminium, and GRP doors, oil moving parts and grease sliding components to ensure smooth operation. Adjust springs and weights as needed for optimal performance.
Metal doors may need repainting every 10 years due to paint deterioration. For guidance, check out our painting metal garage doors project.
Timber doors require more frequent maintenance, typically every 2 years, to prevent rot and maintain appearance. See our painting guide for wooden doors.
Band and hook side hinges may wear out with use and should be replaced as necessary.
Installing a garage door might seem challenging if you’re new to it, but with patience and by carefully following the manufacturer’s instructions, it’s definitely a manageable DIY project.
For part two of the below video visit the DIY Doctor YouTube channel

 DIY Doctor Ltd,
  0845 6342 179


