
A door frame, also known as a door liner, is essential for fitting a door properly. It supports the door, keeps it aligned, and ensures smooth opening and closing.
This simple how-to guide explains what a door frame does and why it matters and how to fit one, helping beginners understand the basics quickly.
What is a Door Frame?
A door frame (or door liner) is the fixed structure that supports a door, keeping it aligned so it opens and closes smoothly.
Most internal door frames are made from timber and are typically 100mm (4 inch) or 125mm (5 inch) wide. The size you need depends on the wall opening.
In stud walls, usually built from 3×2 or 4×2 timber, the frame must match the wall thickness:
- For 3×2 studwork, use a 4×1 door frame
- For 4×2 studwork, use a 5×1 door frame
This ensures the frame sits centrally, allowing for plasterboard and skim so the finished wall surface is flush with the frame.
External door frames are normally made from the same material as the door. For example, timber doors use timber frames, while uPVC or composite doors use matching frames, often reinforced with aluminium.
Door frame kits are widely available from DIY stores and are easy to assemble. Many include adjustable head sections to suit standard door widths, making installation quicker and more flexible.
For a lower-cost option, you can build your own frame using suitable timber, more on this below.
Important: Always fit the frame first, then trim the door to suit. Never alter the frame to fit the door.
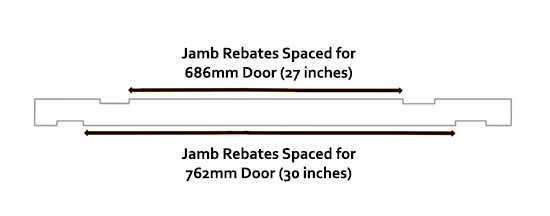
Door frame head piece showing 2 sets of rebates for 686mm and 762mm wide doors
Parts of a Door Frame
A standard door frame is made up of a few key components that work together to support the door and control how it opens and closes.

Head and side jambs of a door frame
Here’s a simple breakdown of each part:
- Head: The top horizontal section of the frame. It connects the side jambs and keeps the structure square and secure.
- Jambs: The two vertical sides of the frame. Hinges are fixed to one side, while the latch or lock sits on the other.
- Door Stop: Thin strips fixed inside the frame. They stop the door in the correct position and help it close flush without swinging too far.
- Threshold (Sill): The bottom section, usually found on external doors. It supports the frame and helps keep out water and drafts.
Architrave is often mentioned alongside the frame, but it’s simply a trim used to cover gaps between the frame and the wall to create a neat finish.
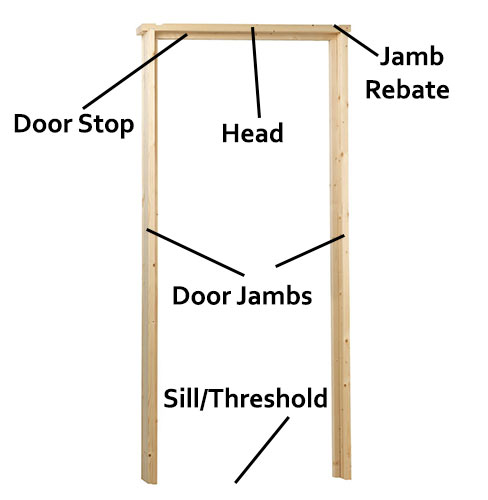
The parts that make up a door frame or door liner
How to Assemble a Door Frame Kit
Door frame kits are designed for quick and simple assembly, making them ideal for DIY beginners.
Start by clearing a flat workspace. Lay out the head (top piece) and position the two jambs on either side. Check the head is the correct way round for your door size. There will be recesses cut width-ways to signify both sizes.
Stand the head on its edge, insert the first jamb into the correct slot, and secure it with 75mm wood screws. Repeat for the second jamb. Make sure all is tight and there are no gaps.
Measure the width between the jambs at the top. Cut a piece of timber slightly longer, then fix it across the bottom (externally) to hold the frame at the same width, using a tape measure to maintain the correct width while fixing. This keeps the frame stable during fitting.
For accuracy, check the frame is square using a carpenter’s square. Add a temporary diagonal brace across the front to lock it in position.
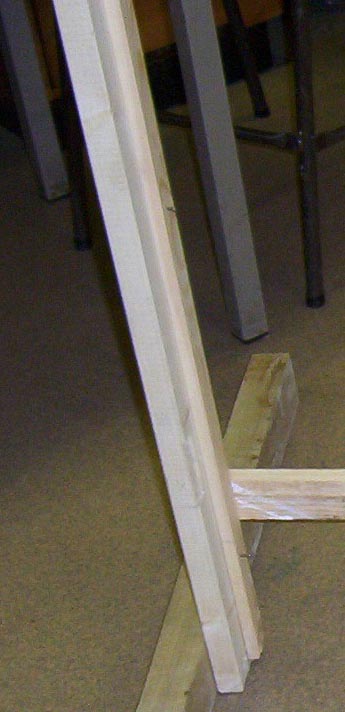
Temporary timber keeps the frame aligned and square
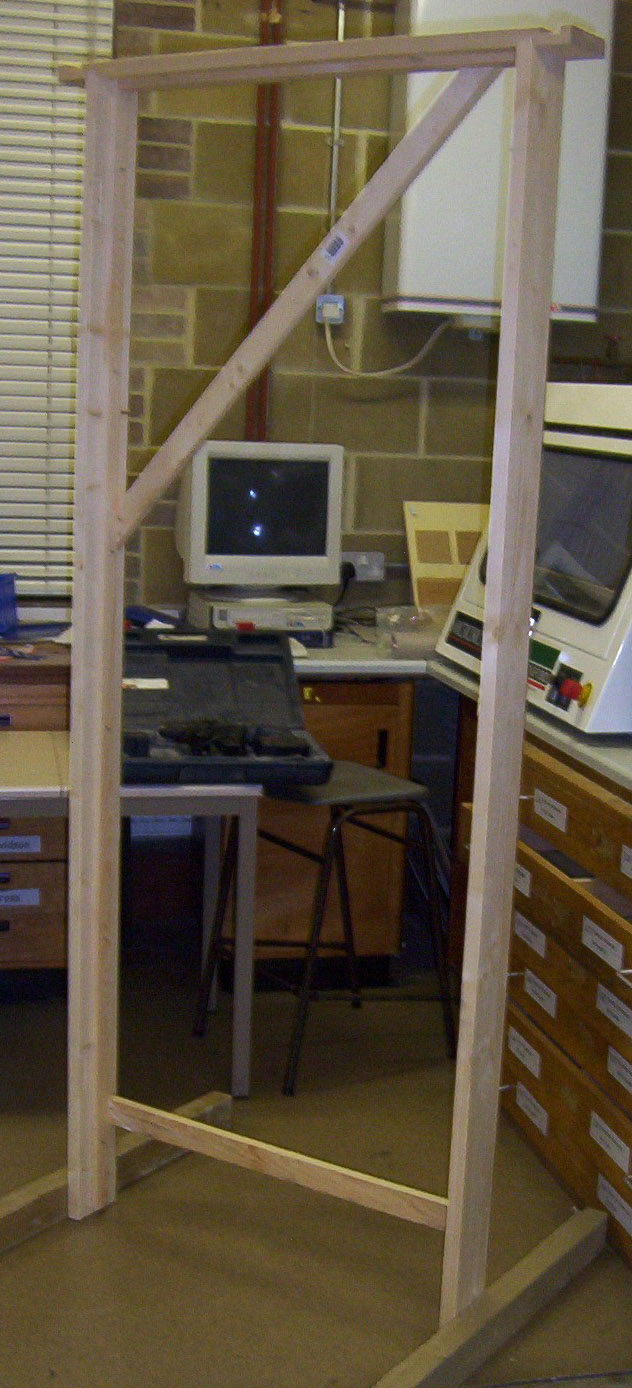
Use bracing to maintain a square frame during installation
Once square, trim any excess from the head so it sits flush with the outer edges of the jambs. Your frame is now ready to install.
How to Make Your Own Door Frame
You can save money by building your own door frame instead of buying a kit. It’s straightforward with accurate measuring and careful cutting.
Start by measuring your door. Add 6mm (1/4 inch) to the width and 12mm (1/2 inch) to the height to allow for clearance. This gap prevents sticking and ensures smooth operation.
Choose timber to match your wall thickness. Use 4×1 inch timber for 3×2 stud walls, 5×1 inch for 4×2 stud walls, or match the depth of masonry openings. If needed, trim timber down to size.
Cut the head (top piece) to the door width plus clearance and the thickness of both jambs. For example, a 762mm door typically needs a head around 818mm wide.
Create rebates (cut-outs) at each end of the head so the jambs slot in securely. Mark and cut these carefully to ensure a tight, accurate fit.
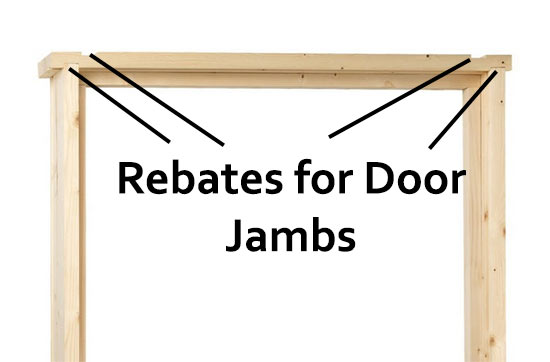
Cut rebates to house the side jambs securely
Cut the jambs to length using the door height plus clearance and allowance for the head rebates.
Drill pilot and countersunk holes in the head, then fix each jamb in place with 75mm wood screws.
To keep the frame square, fix a temporary timber brace across the bottom and add a diagonal brace across the front. This holds the correct width and alignment during installation.

Door frame made from scratch
How to Fit a Door Frame or Door Liner
Once your door frame is assembled, whether from a kit or built from scratch, it’s ready to install into the wall opening.
This step-by-step guide shows you how to position, level and secure the frame correctly for a strong, accurate fit.
Fixing a Door Frame to a Studwork Opening
Follow these simple steps to securely fix a door frame into a timber stud wall, ensuring it stays straight, stable and operates as it should do.
Step 1: Mark Fixing Points
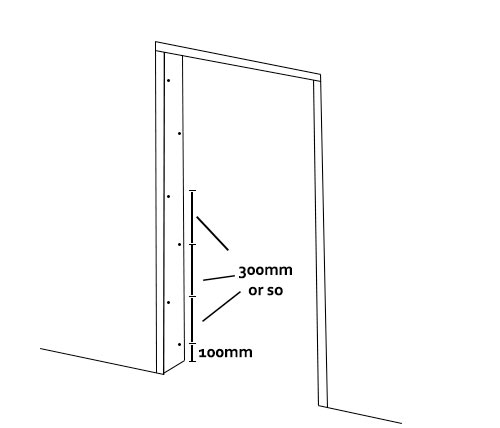
Mark screw positions on both jambs, around 25mm in from each edge. Start 100mm up from the base, then space fixings roughly every 300mm up the frame.
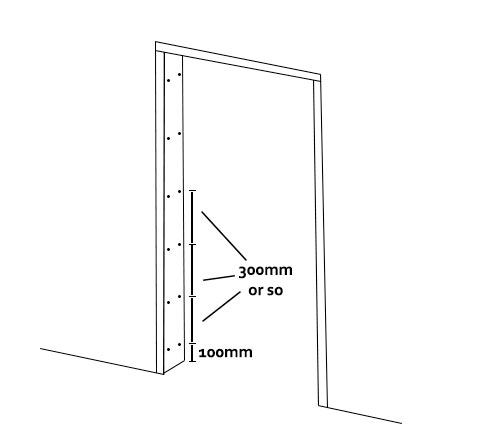
Typical fixing points for securing a door frame to studwork
Step 2: Drill Pilot Holes
Drill and countersink all fixing holes in the frame before placing it into the opening. This makes installation quicker and more accurate.
Step 3: Position the Frame
Lift the frame into the opening. Check for gaps between the frame and studwork.
Step 4: Pack out Gaps
Insert plastic packers wherever gaps appear. This prevents the frame from bending or twisting when being screwed in as this will effect how the door opens and closes into it.
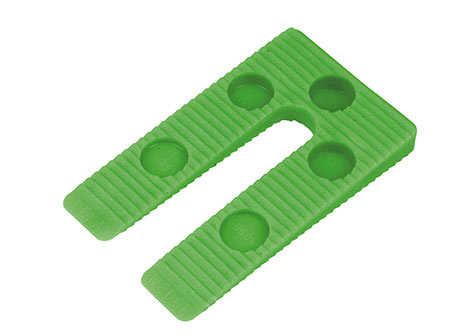
Use packers to keep the frame straight and secure
Step 5: Start Fixing the Frame
Insert screws into each hole and lightly tighten until they grip. Do not fully tighten yet.
Step 6: Check Levels
Place a long spirit level on each jamb and a shorter level across the head. Make sure the frame is perfectly vertically and horizontally square.
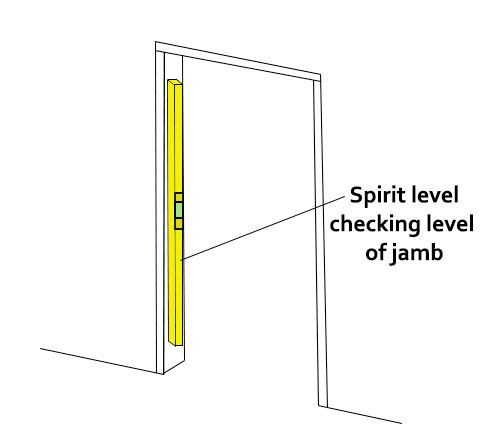
Check alignment regularly with a spirit level
Step 7: Tighten Gradually
Tighten screws slowly, working evenly around the frame. Keep checking with the level to ensure nothing moves out of line.
Step 8: Adjust if Needed
If the frame starts to shift or bow, loosen the screws slightly, adjust the packers, and recheck until straight.
Step 9: Secure the Head
Repeat the same process for the head, using a level and packers where needed to keep it flat and aligned.
Taking time to level and pack correctly ensures the door will hang properly, open smoothly, and won’t stick or bind.
Fixing a Door Frame into a Brick or Block Opening
Installing a door frame in a masonry opening (brick or block) follows a similar process to stud walls, but uses different fixings. The key goal as before is to keep the frame square, level and fully supported.
Step 1: Mark Fixing Points
Mark staggered fixing points along each jamb and the head. Space them 250–300mm apart and position each hole around one-third in from the edge. Staggering helps prevent bricks or blocks from cracking.
Stagger fixing points to reduce the risk of masonry cracking
Step 2: Drill Pilot Holes
Drill and countersink pilot holes in the frame before fitting. This ensures accurate and clean fixing and minimises any adjustments.
Step 3: Position and Mark the Wall
Place the frame into the opening and check it is level. Drill lightly through the fixing holes to mark the wall behind.
Step 4: Drill Masonry Holes
Remove the frame, then drill the marked holes using a 6mm masonry bit. Insert suitable wall plugs into each hole.
Step 5: Fix the Frame
Reposition the frame and insert screws into the plugs. Tighten gradually so the frame stays aligned.
Step 6: Check Alignment
Use a spirit level on both jambs and across the head. Adjust as needed. If the frame starts to twist, loosen screws and correct before retightening.
Step 7: Fit Door Stops
Mark a line around the inside of the frame equal to the door thickness plus 1mm. Cut and fix door stop strips to the jambs, then add the head section to complete the stop.
Step 8: Final Check
Ensure the frame is solid, square and ready for the door. The final step is to hang the door and test operation.
Fitting a door frame or liner may seem like quite an undertaking if you have never attempted such a job before, however if you take your time and work methodically, it’s certainly something that you can do!

 DIY Doctor Ltd,
  0845 6342 179


