Whether you’re fixing a shelf, fitting a curtain rail or hanging a picture, the same principles are involved in that you have to drill a hole and possibly insert a wall plug of some kind and then a screw, so even if you’ve never actually hung a picture, you may have without knowing it.
In this guide we go through the steps involved in how to hang pictures correctly. If you are looking to hang a heavy picture or mirror, please also see our project about how to hang a mirror.
What is the Correct Height to Hang Pictures?
The correct height to hang a picture on a wall is ultimately totally up to you, it’s your own preference, however as a general rule of thumb, the standard height of hanging pictures is somewhere between 57 and 60 inches from floor level so that it is at eye level.
However as said this is totally up to you and will obviously depend on factors such as your own height, the ceiling height of the room and a few other factors.
What to Think About Before Hanging Pictures
Before you actually start hanging any pictures on your walls there are a few things that you should think about first, these are as follows:
- Choose the Right Location: The first step is to decide where your picture will have the most visual impact. Think about the height and placement on the wall and what’s going to surround it e.g. other pictures, furniture etc. You don’t want it to be cramped or too isolated. Also if it’s a room with seating, think about eyeliner once seated.
- Wall Type: Not all walls are the same, and different types require different hanging methods e.g. plasterboard will need picture hooks or wall anchors and for brick or concrete walls, you will need screws with appropriate anchors. If you’re hanging something heavy, on plasterboard, it’s essential to locate and fix into the stud for added stability.
- Select the Right Hardware: Using the correct hardware is essential. For lighter pictures, a simple nail may do, but for heavier items, picture hooks or wall anchors designed for heavy items is best. Consider adhesive hooks or strips if you want to avoid making holes in the wall, especially for rental properties. Always check the weight limit of the hardware you choose to ensure it can safely support your artwork.
- Plan Your Layout Before making any marks or holes in the wall, plan your layout. You can use masking tape to outline where you want the picture to go or even create a mock-up with paper templates to visualise the arrangement. This is especially helpful if you’re planning a gallery wall with multiple pieces. Arranging on the floor first allows you to experiment with different layouts.
- Check for Hidden Wires and Pipes: Safety is paramount when hanging pictures. Before any drilling or hammering, make sure you know what’s behind the wall by using a stud finder that can also detect live wires and pipes to avoid any damage, injury or expense!
- Think About Lighting: Lighting can make a big difference in how your pictures are viewed. Hang pictures in well-lit areas where natural light or existing fixtures can highlight them. For dimmer areas, consider installing picture lights or spotlights to draw attention to your artwork. However, avoid placing pictures where they will be exposed to direct sunlight, as this can cause fading over time, especially with photographs and artwork.
What if You Can’t Use Traditional Hanging Techniques?
In some instances you won’t be able to use the traditional picture hanging methods of putting a screw or hanger in the wall to hang the picture off of.
This may be due to many reasons, but in most cases, this will be because it’s a rental property and with rental properties it’s often written in the contract that you are not allowed to make any holes in walls, doors etc. Other reasons can include expensive or protected wallpaper that cannot be damaged, undesirable fixing surface and many others.
Issues such as this have long meant that many rental property occupants have not been able to personalise their homes by hanging pictures, posters and the likes.
However, today, many products have come on to the market that help to minimise or reduce any holes or even allow hanging without creating any holes in the first place!
One such product can be seen below. These are called Command hooks and strips and they use a very clever and innovative type of adhesive that holds firmly, supporting up to 5KG in weight, but can be removed cleanly without trace when no longer needed.
Another great product, although it does require a few holes but only at ceiling height, are the picture hanging rails used in museums. These involve a rail that is hung at ceiling height and then hanging wires run down from this to hang the pictures. For a selection of these, see the picture-rail.co.uk website here.
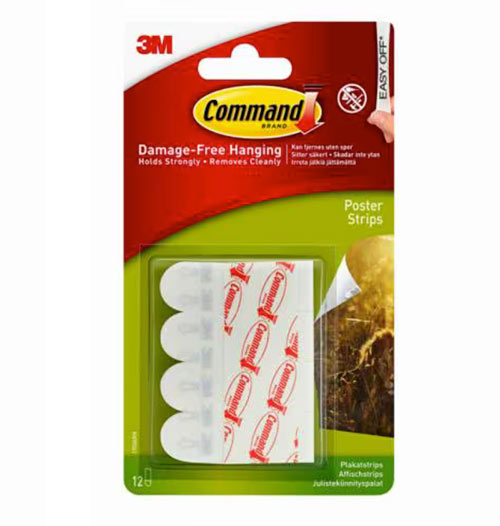
Command picture hanging strips
Hanging Options on the Rear of Pictures
The method in which you hang a picture on your chosen wall mount (Command strip, screw, hook etc.) will also depend as in most cases these come already included on the item you are hanging.
In terms of what these are, the most common types ar as follows:
- D-ring Hangers: These are commonplace on many pictures and feature a small D-shaped or triangular-shaped hanger screwed to the frame/rear that swivels that is then used to hang on a hook, screw or the similar. These are strong hangers, capable of supporting 15KG plus on the right hanging surface
- Hanging Wire: As you may image, this is wire that is fixed to the rear of a picture that is then hung on a hook, screw or the likes on the wall. This is usually fixed in place on the picture using tiny eyehooks or the above D-rings
- Sawtooth Hangers: Sawtooth picture hangers as essentially a strip of metal with some sawtooth shaped notches cut cut out of the base section that is hung on the hanger, screw etc. in the surface you’re hanging on. This is a strong fixing that allows for fine adjustment in terms of positioning and levelling the picture once in place
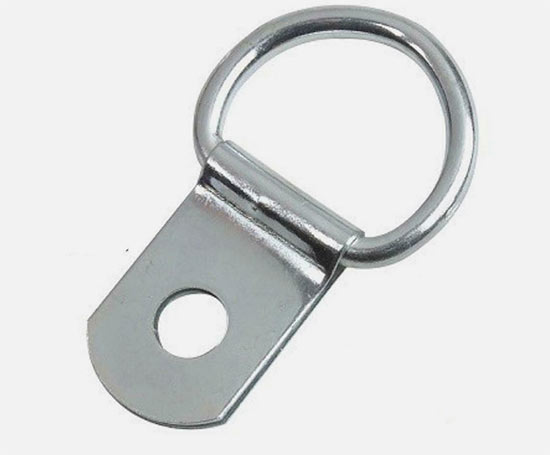
D-hanging ring
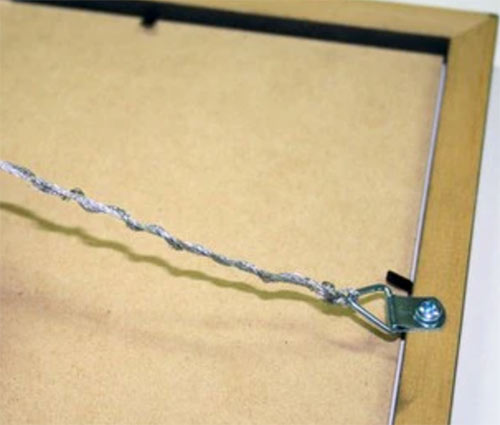
Picture hanging wire – Image courtesy of profileproducts.com.au
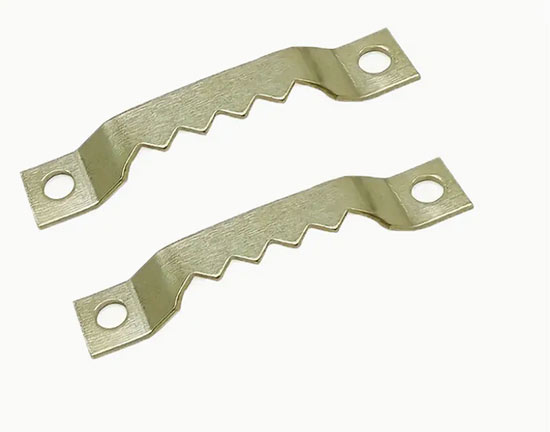
Sawtooth picture hangers
Wall Surface and Construction
The type of surface you’re hanging your picture, mirror or similar on is also an important factor as this will in many ways dictate what fixings you can use and what type/weight of item you can hang.
The main types of wall that you will face are as follows:
- Timber stud and plasterboard
- Brick/concrete block
- Dot and dab plasterboard
In order to know what you’re working with and what fixings you will need, you will have to find out and the best way to do this is, in an inconspicuous place, use the butt of your clenched fist to gently tap on the wall. If it’s solid, you’re most likely dealing with brick/block, if hollow then it’s dot and dab or plasterboard/timber stud.
If it’s brick or block then you will need to use a masonry bit to drill and hole and then add a wall plug and screw a screw in to hang from
However, if you are dealing with dot and dab or plasterboard/stud a different approach will be needed as the plasterboard isn’t strong enough to support much weight and any screws or the likes will simply rip out.
There are a great deal of different types of plasterboard fixings available today and depending on what you’re fixing, will depend which one you use. See our Plasterboard Fixings project for more information on what to use.
Equipment Needed for Hanging a Picture
In order to successfully hang a picture on a wall you will need the following tools and products:
- Tape measure
- Desired picture hangers
- Drill/driver
- Selection of drills (sizes, HSS, masonry etc.)
- Pen/pencil
- Tape measure
- Spirit level
- Wall plugs
- Screws
- Hammer
- Vacuum
- Pipe, stud and cable detector
It’s also worthy to note that picture hanging kits are available from most DIY stores, these kits usually include a variety of hanging hooks, wire, and screw eyes. They offer everything you need to securely hang most types of pictures on your wall.
How to Hang a Picture on a Wall
If you are new to DIY and hanging pictures, this may seem like a daunting task, however if you work slowly and methodically it’s certainly something that anyone can do. Work carefully through the steps below.
Step 1: Choose the Right Spot
Start by deciding where you want to hang your picture. As we have said above, a common rule of thumb is to place the centre of the picture at eye level, typically between 57 to 60 inches from floor level. This height works well for most spaces and creates a balanced look.
If you’re creating a gallery wall or hanging multiple pictures, make sure you plan the layout out fully first so that you know exactly where each picture will be placed.
You can use masking tape, pencil marks, chalk or another similar cleanable material to mark the spots on the wall, helping you visualize the final result before making any holes. They can then be removed afterwards
Once you have selected your desired spot or spots on the wall, the next and one of the most essential jobs is to check it over and ensure there are no pipes or cables buried there that you are likely to drill into. Check it thoroughly and note any areas that are a positive.
If you are lucky enough to find any studs (timber stud/plasterboard wall) this is a onus and means that you don’t need any fixings, simply drill and screw straight into it.
If you are unsure what a stud, pipe or cable detector is then see our using a stud detector project for further information.

Pipe, stud and cable detector
Step 2: Install the Hanging Hardware
Once you’ve chosen the perfect spot, it’s time to install the hanging hardware.
In pretty much all cases, the item you’re hanging should include a method of hanging it already installed on the rear, however if it doesn’t you may want to skip to the base of this guide and find out how to install one.
IN basic terms, for frames with wire, attach the screw eyes or D-rings to the sides of the frame and thread the wire securely. For frames without wire, use sawtooth hangers or picture hooks.
Once you have a hanging method sorted, mark the spot on the wall where the hook or screw will go, making sure it’s aligned with your planned height. To find this out accurately, see the section below entitled “How to Work out the Precise Hanging Position”.
Once you have your precise position, drill the desired sized hole for the fixing you’re using, around 5-6mm for wall plugs in solid wall, around 8-10mm for Redidrive, wall anchor etc. for plasterboard (manufacturer will state hole size on packaging).
With the desired hole or holes drilled, insert a wall plug or the fixing and then screw in a screw or other item to hang the item from.
Whatever fixing you are using, make 100% sure that it is capable of holding the weight of the item you’re hanging!

Step 3: Hang and Adjust the Picture
Finally you can now carefully hang your picture or item on the installed hanger.
Once in place, use a spirit level to ensure it’s straight and level. If the picture tilts, adjust the wire or hardware until it’s balanced.
For added stability, especially on uneven walls, you can use adhesive strips or putty on the bottom corners of the frame to prevent it from shifting.
Step back to check the alignment and make any final adjustments. A well-placed picture can transform the look of your room, adding a personal touch and drawing attention to your decor.
Hanging a Picture With no Pre-Defined Hanging Method
Pretty much all pictures, artwork, frames etc. will come bundled with a method of hanging them already in place on the rear, however in the unlikely event this is not the case then you will need to install one.
Where’s it Going on the Wall?
To hang a picture at eye level or higher, aim to have the bottom edge touching the wall, this looks best aesthetically.
Secure the hook and line assembly about 15% down from the top of the frame. This slight tilt ensures the picture hangs correctly and looks balanced.
For a typical wooden frame with no existing fittings (e.g., 500mm high and 400mm wide), start by measuring 100mm down from the top on each side and mark with a pencil. Choose a spot along the frame’s cross section that is deep enough to securely hold a screw eye.
Using an awl or bradawl, make a small hole at each marked spot. Insert the screw eyes by turning them clockwise. The coarse threading will help the screw grip the wood securely. If it’s hard to tighten, use pliers, but be gentle to avoid splitting the frame or breaking the screw eye.
For a snug fit, you can slightly bend the screw eye inward, allowing the picture to sit closer to the wall.
Choose Hanging Medium
Next, choose a strong material to hang your picture, such as twine, polypropylene string, or multi-strand picture hanging wire.
Attach the chosen line between the two screw eyes using a double loop for a secure hold. The line should have some slack, so it doesn’t need to be too tightly stretched.
If you’re concerned about strength, you can double up the line for added support. For wire, use pliers to tightly wrap it around the screw eyes to prevent it from slipping. For twine or string, use a double knot.
Test the setup by lifting the picture from the centre of the line, mimicking how it will hang on a hook.
How to Work out the Precise Hanging Position
Depending on what hanging method you are using will depend how and where the item actually hangs on the wall so it you are looking to be absolutely precise then you will need to work this out
Step 1: Noting Precise Hanging Position
Start by measuring the full width of your picture, including the frame. For example, if the picture is 400mm wide, use a pencil to mark the midpoint near the top edge on the back. Repeat this step near the line of string or wire to mark a second midpoint.
Next, place the tape measure’s return lip at the marked midpoint on the string or wire. Gently lift it upwards, mimicking how the picture will hang on a hook.
Note the distance between this point and the top of the frame. This measurement helps you position the hook correctly on the wall.
Step 2: Marking Hanging Position on Wall
To hang the picture, first hold it up on the wall to decide its exact placement. Lightly mark the top edge with a pencil where it won’t be visible once the picture is hung. This mark can be erased later if needed.
Next, measure down from this mark using the earlier noted distance when you tested the line tension at the back of the picture. Mark this spot with a pencil—this is where the bottom of the picture hook should be positioned for secure hanging.
Dealing With Other Types of Frames
For canvas pictures stretched over a frame, follow the same steps but position the screw eyes inside the frame, pointing towards the centre.
If the frame is plastic, it often comes with built-in cut-outs or hooks for easy hanging.
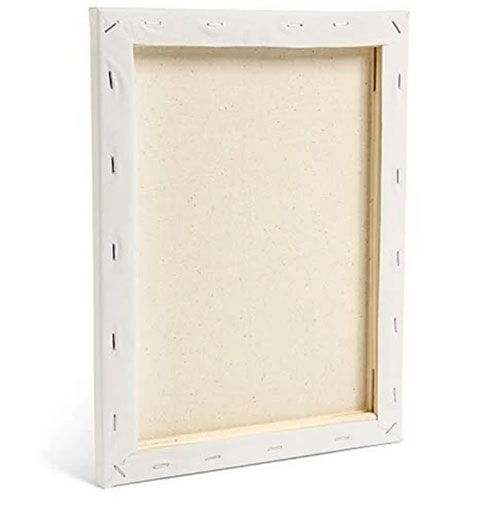
Rear of a canvas frame showing inside edges of frame
Hanging a picture may seem tricky at first, but with these simple steps, you can achieve a clean and secure hang every time. Whether you’re decorating a new space or refreshing an old one, taking the time to properly hang your pictures ensures they’ll stay in place and look great for years to come.