When doing any form of DIY or construction, in pretty much all cases, ensuring what you’re working on or installing is straight and level is of upmost importance. Without using the right tools, this can be almost impossible.
In this project we take a look at the different types of laser level and how these indispensable tools are used to check and maintain levels during pretty much any and all DIY projects.
What is a Laser Level and What’s it Used for?
A laser level serves as a crucial tool for projecting a consistent dot or level line of light onto a surface, either horizontally or vertically. This functionality proves invaluable when transferring a level from one area to another, such as fitting picture rails, dado rails, skirting boards, and many other similar jobs.
Whether setting out on a building site or setting the exact position for a new stud wall or tiling a bathroom, a laser level becomes an indispensable companion. It facilitates the accurate transfer of measurements across a room or similar space, making it a must-have for any builder.
While there are various types of levelling devices, they all operate on a common principle. A light-emitting diode produces a beam of light, which is then amplified and projected from the device as a simple dot or, through mirrors and other techniques, to form a solid line.
To ensure the accuracy of any lines or markings produced by these tools, the emitted light must be relatively small. This small size ensures that the width of the line or dot is minimised, as the actual point of reference can be anywhere across the width of the beam.
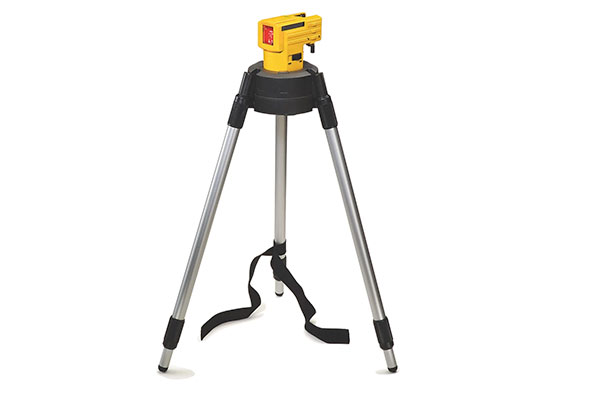
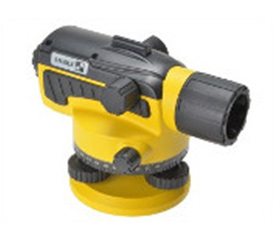
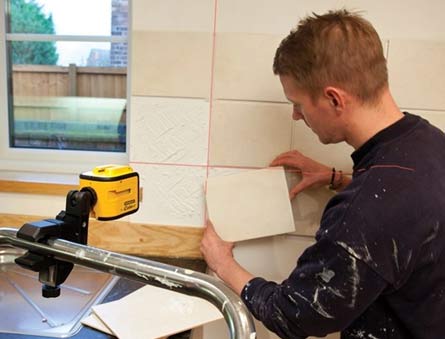
Good quality laser level mounted on tripod
What Types of Laser Level are There?
There are several different types of laser level and, although each different type can be used for most levelling tasks, some are more suited to a particular type of job than other varieties.
In the section below, we look at the different type of level and what they can be used for.
Fixed or Spot Laser Levels
A Fixed or Spot Laser Level is precisely what it sounds like – a laser level securely positioned to project a straight line of light on a single plane. Its primary purpose is to create a visible line for markings, aiding in accurate positioning and calculations.
This type of laser level operates by pointing a laser spot at the wall, allowing you to transfer the spot by adjusting the laser head. Setting up and using these levels is straightforward, making them an economical choice compared to more advanced options.
While Fixed or Spot Laser Levels are less versatile, they are ideal for DIY and home use. For continuous on-site usage, especially in more complex projects, a fully-featured device might be preferable despite the additional cost.
Spot levels are generally limited to only transferring a level or position around a room for 1 item through the projection of a dot or series of dots. Common applications include aligning new sockets with existing ones or setting levels for new stud walls. Spot levels are generally well-suited for internal work.
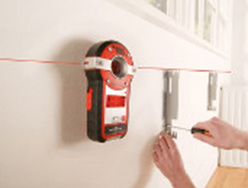
Using a Spot Laser Level to align and level brackets on a wall
Line or Cross Line Laser Levels
A Line or Cross Line Laser Level represents a step up from the spot level, projecting solid lines (both horizontal and vertical) onto a surface rather than a single dot or series of dots. This advanced feature proves beneficial when precision demands both a vertical and horizontal reference.
Generally operating as a static laser that you manually move to reposition lines, it allows you to transfer a point or continuous line across a room, with an additional line at a 90° angle to the horizontal line displayed on the wall. Although slightly more complex to set up than a basic spot laser level, most modern models are user-friendly. While they may come at a slightly higher cost, they offer enhanced convenience and speed for completing tasks.
Similar to fixed or spot laser levels, cross line levels are ideal for tasks such as installing shelves, picture hooks, and skirting boards – anything that requires precise levelling. They also provide a quick visual check of an object’s level, making them useful for projects like wall construction where maintaining a constant level is crucial.
Line levels are particularly valuable for projects involving the installation of multiple sockets, a dado rail, floor screed, or floor slab. When consistent and constant levelling is essential, a line laser level becomes the go-to tool.
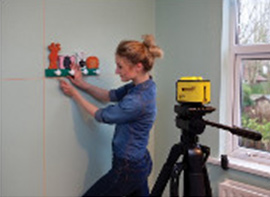
How to use a cross line laser to put pictures or hooks
Automatic Rotation or Rotary Laser Levels
Automatic Rotation or Rotary Laser Levels employ advanced technology to project a laser line of light using a rotating projection unit and a series of mirrors. The spinning unit swiftly projects a continuous line around an enclosed space, commonly in red or green laser lights.
This method provides a uniformly drawn line on a wall, making it immensely valuable for achieving precise levels across an entire room. Rotary laser levels excel in tasks such as aligning skirting, dado rails, and levelling windows, doors, various openings and many similar tasks.
These levels become indispensable when an accurate measurement is crucial for setting out, measuring, and calculating required distances. For projects demanding high precision, it’s advisable to use a device with a built-in self-levelling action (most modern units now feature this).
The primary application of a Rotary Laser Level is establishing a constant height level around a room, allowing for vertical measurements (up or down) from the illuminated laser line. This is particularly useful for creating level floor surfaces, ceilings, and suspended ceilings. During projection, marks can be made on wall surfaces or other fixed points.
While Rotary laser levels may be a more complex to set up and come with a higher price tag, their ability to save time and ensure accurate levels from the start makes them an invaluable asset for any project.
An Automatic Rotation Level
Optical Levels: A Tool for Professional Surveying
Optical Levels, a preferred tool among professional surveyors on large construction sites, play a key role in setting accurate levels across expansive areas. This surveying instrument is equipped with a viewer through which, once levelled, you can mark a level on a batten or “staff”.
The process involves moving the staff to another location on the site. When the level is aimed at the staff in its new position, marking the staff again allows you to determine the height difference between point B and point A. This functionality is crucial for ensuring precision in construction projects.
While these tools may be less commonly used by DIY enthusiasts, they prove highly valuable for self-builders undertaking significant projects. In the realm of surveying, it’s common to enlist the expertise of a professional surveyor due to the skill and accuracy required for the job, so you would probably not perform this task yourself. However as it is a form of levelling tool, we have to mention it so that you are aware of it.
An Optical Level
Ensuring Laser Level Accuracy: A Quick Guide
When using a laser level, the success of your project relies on the accuracy of the lines or dots it projects. To guarantee precision, it’s crucial to understand the accuracy of the level you’re using and essentially this is down to the size of the beam it emits per metre.
For optimal and reliable results, aim for a laser level that is accurate to between 0.5 and 0.2mm per meter. The lower this figure, the more accurate the level will be in your applications.
While laser levels typically don’t require frequent recalibration (most suggest once every 12 months), a severe drop or impact can affect their accuracy. In such cases, it’s essential to recalibrate or test the accuracy to ensure precise readings.
If you find yourself in a situation where recalibration is needed or you simply want to maintain accuracy, you can perform a quick accuracy test yourself. For a step-by-step guide on how to test the accuracy of your laser level, you can refer to this comprehensive guide on laser level testing.
Ensuring the accuracy of your laser level is a fundamental step in achieving successful and precise results in any project.
Ensuring Your Laser Level is Spot On
The precision of the line or dot projected by a laser level hinges on its own levelness. Simply put, if the laser level isn’t level, your measurements won’t be accurate. Ensuring its proper setup is key to achieving reliable results.
In the past, older laser levels required manual levelling using built-in bubble levels for the vertical and horizontal axes. This ensured that the points you worked with were accurate. However, modern laser levels, even the more affordable ones, typically come with a convenient feature – self-levelling. With self-levelling laser levels, you only need to place them on a semi-level surface or, when using a tripod, on a semi-level section of ground, and they automatically find their own level.
When considering purchasing a laser level, always opt for one with self-levelling capability. This feature not only saves you a significant amount of time but also more importantly ensures more accurate and reliable results for your projects.
Accessories for Laser Levels
In order to get the very best out of your laser level, sometimes it’s best to use it in conjunction with an accessory. The most popular of these can be seen below:
Laser Level Tripods
As I’m sure you can imagine, a laser level tripod is very much the same as any other tripod and it used in exactly the same way. The level is mounted to the top and can then be operated off of the ground.
To set up a laser level on a tripod you must firstly erect the tripod. Most modern tripods come with a levelling bubble built in and individually adjustable legs. Although most levels today self adjusting, it’s a good idea to get the tripod as level as possible.
Most levels of reasonable quality today will come bundled with their own tripod, it’s mainly only the very cheap models that don’t or those that are mounted in another way. If your’s does not we would strongly recommend you get one.
On the whole, mounting the level on a tripod is the best way to use it and the one that will yield the best results.
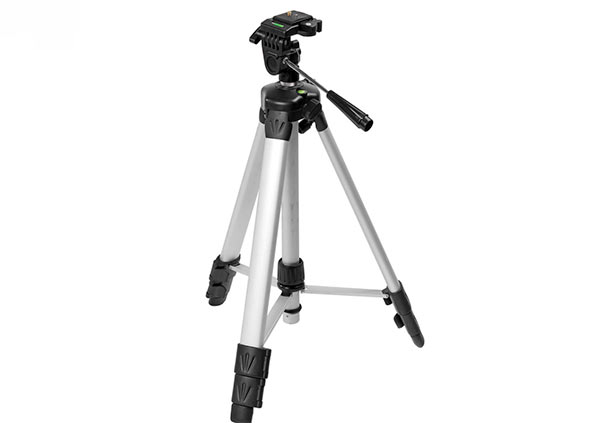
Tripod suitable for laser level
Laser Viewing Glasses
In certain lighting conditions it can sometimes be quite tricky to see the line that a laser level produces, which can lead to inaccuracies and mistakes. This is also the case if you are trying to view laser lines or dots in less than perfect light conditions, either too low or too hight.
To remedy this you can buy specific laser viewing glasses that help to enhance the visibility of any lines or dots, making them much easier to see. As glasses such as these are relatively cheap, they’re well worth shelling out for.
It’s also worth noting that they can also be used as safety goggles and generally feature UV ray protection.

Laser level viewing glasses
Levelling Staff
Sometimes, taking accurate measurements over long distances can be very challenging without a fixed, solid point of reference. Using trees and similar objects are ok, however they don’t have accurately marked measuring increments that can be referred to.
in situations like this, the tool to use is a telescopic levelling staff. This tool features an incremented set of measurements along its length, that can be referenced by the line or dot produced by your laser level.
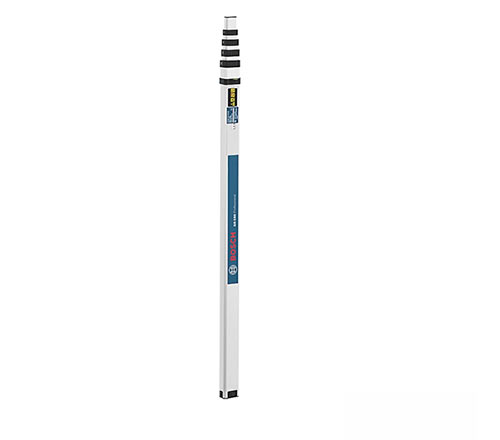
Laser level levelling staff
Buying a Laser Level – What to Look for
Laser levels are relatively inexpensive and can eliminate a great deal of possible error when transferring levels.
Firstly, evaluate your frequency or usage and required accuracy. For occasional tasks like hanging pictures, a spot level provides satisfactory results. However, for more frequent and demanding projects, investing in a rotary level is worthwhile, especially when aiming for a perfectly level room without wonky floors or ceilings.
Device accuracy is a crucial factor influencing cost. On-site precision often requires +/- 2mm over 50m, while home improvement projects typically thrive with +/- 5mm over 30m, making mid-range laser levels suitable for most tasks.
Aside form the accuracy of the device, most good quality brands now offer additional accessories, such as tripod stands and protective cases, enhancing the overall value of your purchase. Although neither of these are absolutely essential to the tools operation, you should certainly go for a package containing them, especially a protective case.
Where possible, always opt for a self-levelling version to save time and ensure consistently accurate results. This feature is a game-changer, especially for users new to laser levels.
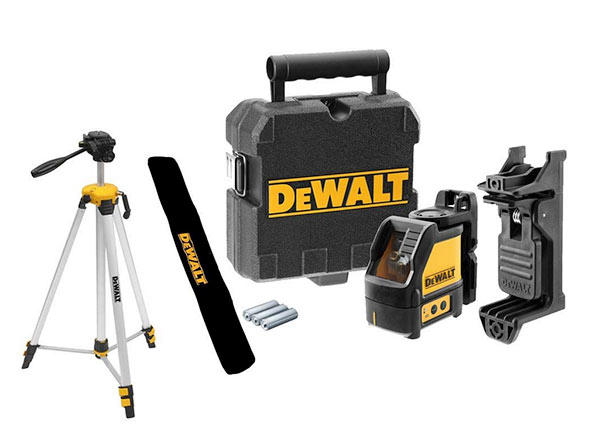
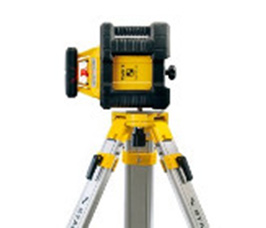
DeWalt laser level starter kit
How to Use a Laser Level: A Step-by-Step Guide
Now that we’ve covered the ins and outs of various laser levels and key features, let’s dive into the practical side of using one correctly.
While specific instructions may vary by model, the general process for using a laser level typically includes the following steps:
- Step 1 – Setup: Position the laser level in your workspace, either on a sturdy tripod stand or securely fastened to a rail or wall using a bracket (position on a solid, sturdy object if no bracket or stand). Ensure it’s stable and won’t be easily knocked or moved. Next, level the device to guarantee accuracy.
- Step 2 – Level Up: If your laser level isn’t self-levelling, you’ll need to level it manually. Use the built-in bubble levels or a pendulum (bubble levels are more common) to adjust the unit using the height adjusters (if featured) until it is perfectly level.
- Step 3 – Turn On and Position: Power on the laser level and wait for the line or dot to stabilise on a nearby surface. If it’s self-levelling, allow it a few moments to find its own level. Once steady, adjust the position until the line or dot aligns with your desired location. Most devices offer controls for fine adjustments.
- Step 4 – Mark off the Level: Confirm that the device is perfectly level and the line or dot is precisely where you need it. Mark the level point indicated by the dot/line on your working surface, ensuring that even if the laser level is disturbed, you can resume work confidently.
- Step 5 – Reposition if Needed: After completing your current task, you may need to move the laser level to another area of the room. If so, repeat steps 1 to 4 for the new location.
Laser level fixed to a rail and levelled
A laser level can save you an enormous amount of time and effort and more importantly, ensure that any measurements or markings that are transferred around a room or space are totally accurate, we highly recommend them, so if you have any spare funds, pick yourself up one, you won’t regret it!