Finding timber joists, timber studs, pipes and cables behind plasterboard walls is a necessary part of most DIY fixing to wall jobs as finding a sturdy stud to fix into provides the most solid and secure fixing.
If you have ever drilled into a wall only to hit a water pipe or electrical cable you will know it is one of the most expensive mistakes you can make and a potentially dangerous one too!
Using a stud finder can make fitting shelves, pictures, television brackets, microwave brackets and the similar so much easier. For the sake of a couple of pounds can save you so much time in filling unwanted investigation holes, you can simply wave it across the wall and bingo, there’s your stud!
In a similar vein, checking a wall for any hidden pipes and cables before you start drilling can be the difference between a simple straightforward job and a total nightmare. Finding and marking any cable and pipe positions on a wall will ensure you don’t accidentally hit them.
Find out about the various different types of pipe, cable and stud finder below and how they can be used to avoid any nasty accidents. Stud, pipe and cable finder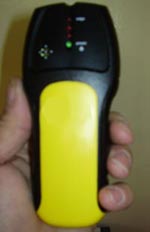
What Types of Stud, Pipe and Cable Finder are There?
Most good detectors and finders operate on a similar principle, they either flash a light, make a sound or in some cases do both when you have found what ever it is you are trying to detect in a given wall.
The type of audible or visual notification you get will in most cases depend on the type of finder you have. When it comes to the different types of stud, pipe and cable finders there are essentially 2 – the electronic stud finder and the magnetic stud finder.
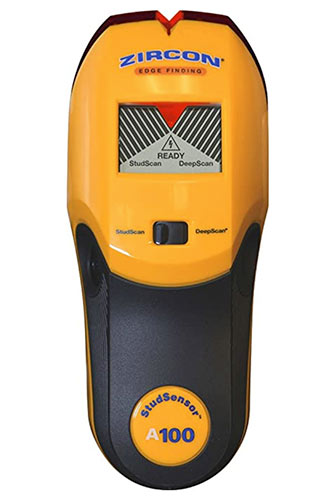
Electronic Stud Finders
Electronic stud finders are a more modern innovation than the traditional magnetic stud finder and are often regarded as being more accurate. This in turn has generally made them the more popular choice between the two different types.
One of the main advantages with the electronic stud finder is that they feature at least an audible notification such as a buzzer when a stud is detected and in many cases also some sort of visual display.
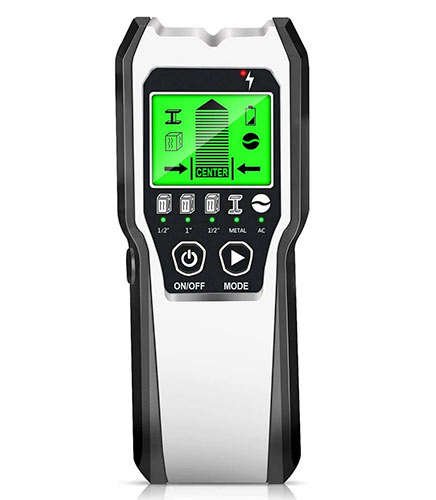
Aside from the audible and visual notifications, other very useful features that can be found on an electronic stud finder include an edge or centre finder so that you more accurately find the best point to fix into e.g. the centre of a stud.
In terms of operation, electronic stud finders utilise a capacitor plate that is used to pickup changes in the electrostatic field that exists in different materials, particularly timber. The sensitive plate can use the differing amounts of electrostatic energy to determine the thickness of an object and in turn it’s type.
Some of the more expensive electronic stud finders can sense the difference between material types and not just their density. Through this they can identify the differences between pipes, electrical cables and screws or nails.
The one major disadvantage with electronic stud finders that generally get flagged up is the fact they need batteries to operate. As is often the case, once a stud finder has been used it’s then put back in the toolbox and often not turned off. If it’s a while until it’s use again, in many cases the batteries are dead and you’re left floundering trying to locate some batteries with some charge in them.
Additionally some electronic stud finders can also struggle locating joists and studs in walls that have been plastered due to the density as cheaper versions struggle to penetrate through the dense plaster. Standard electronic stud finder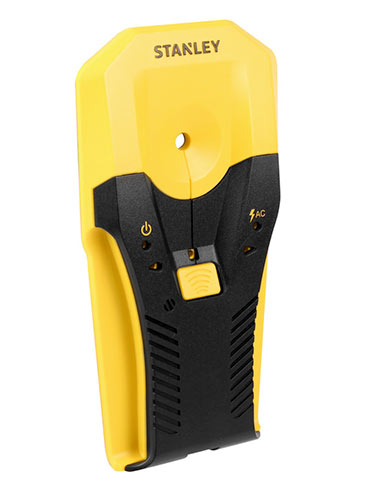
As the electronic stud detector has become one of the more common stud detecting tools today this has led to further developments and innovations that include the following:
- Edge finders: The edge finder is probably one of the most common electronic stud detectors and in the majority of cases, it also tends to be one of the cheapest variants. They work by detecting the edge of a stud so you have to pass the tool over a fairly wide area and the narrow down to find both edges of the stud and once you have you can then mark them on the wall and determine the centre. As mentioned these do tend to be rather cheap and due to this some aren’t that accurate
Electronic edge finder
- Centre finders: The electronic centre finder works in a similar way to the above edge finder only as opposed to the above, the centre finder uses 2 sensors to detect both edges of a stud or joist and in turn the centre. These tend to be even more popular than the edge finder due to the speed in which they can identify stud centres and also as they are pretty quick at doing so
Centre stud and joist finder
- Whole stud finder: As the name suggests the whole stud detector is capable of detecting not just the edges or the centre but the whole stud. This handy piece of kit can tell you fairly precisely where both edge of your stud are and also the centre. The indication is normally given through a horizontal light bar. One additional handy feature with these tools is the depth scan feature. This can tell you how thick the walls surface is and in some cases also the thickness of your stud
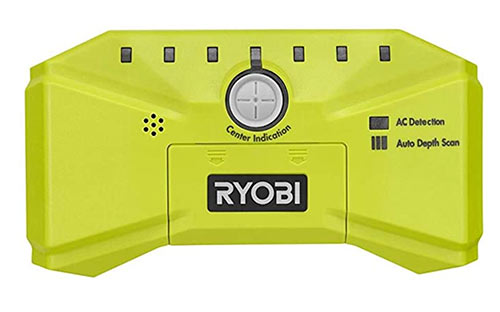
Whole stud detector
Magnetic Stud Finders
The magnetic stud finder is the original concept for the stud finder and is also the simplest to use as it doesn’t use batteries, rarely has any buttons and in most cases has no moving parts (accept for a moving magnetic stud finder).
In terms of operation, magnetic stud finders or detectors effectively detect the screws and or nails that have been used to fix the plasterboard or similar to the studs. Theoretically, any fixings should be inserted into the centre of a stud or joist so locating the nails or screws should indicate the centre line of a stud or joist. Stationary magnet stud finder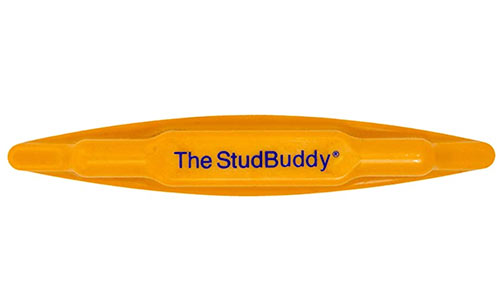
As we have mentioned briefly above there are 2 types of magnetic stud finder, the stationary stud finder and the moving magnetic stud finder. We have looked at how stationary magnetic stud finders work and how simple they are but moveable magnetic finders work in a slightly different way.
They feature in most cases a neodymium magnet (the strongest type of commercially available magnet) that is suspended in a free moving part of the finder. As you pass the finder over the walls surface the magnet remains moveable, but as soon as a metallic object comes into range, particularly when you pass over the top, the magnet springs into life and stands rigid or in a upright position in the finder, depending on the type of finder or detector you have.
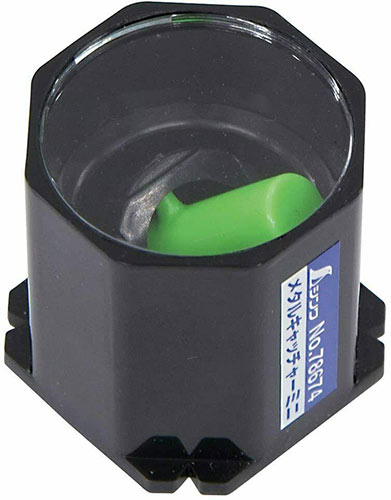
Moving magnet stud finder
Regardless as to which type of magnetic stud finder you have they are all fairly effective at detecting metal work and in turn studs within a wall and as with everything, the slightly more expensive variations tends to be more reliable and effective.
Despite there being only 2 main types of stud finder, electronic and magnetic, as you can see from the above there is in fact quite a wide variety of different types and variations, with each having its own unique features. With this in mind if you are looking to purchase a stud finder, go for the one that best suits your usage needs and how often it will be used.
As we have also mentioned as with all things you get what you pay for and this is no different when it comes to stud detectors. There are plenty of cheap offerings out there but be aware, they really aren’t that great. As with all tools, always go for the best you can afford.
How to use a Stud Finder
To use a stud finder the first port of call is to read the manufacturers instructions first. Most of them will tell you to practice on a section of wall or other surface where you know there to be timber, pipes or cables. This gives you the hang of setting the machine to the required sensitivity and volume for the job you intend to do.
The instructions will also tell you about the type notification that your finder has and when it will sound or flash to indicate the presence of a stud.
If you have an electronic detector with additional features such as the type of object you would like to detect you will also learn about how to set the finder to detect each of these types.
In order to use a stud finder, follow the steps below. In this example we are using an electronic edge finder, one of the simplest electronic locators. In the majority of cases, which ever electronic detector you have it should work in a similar manner:
How to use a Electronic Stud Finder (Edge Finder)
As an outline to what you will need to do, pass the finder over the area and listen and watch for the indication of your search. For a thin wire or pipe, one signal should be enough but if it is a timber joist, noggin or stud you are looking for you will need to know its width and where it starts and ends. This is usually shown by a variation in pitch or colour on the finder.
- The first job is to check your stud finder over and ensure it’s in full working order. Check for any damage etc. that could affect the readings given. One of the most important jobs is to also check the batteries have plenty of charge. Weak batteries can seriously affect the reading provided
- The next job is to identify the area that you are looking to fix your object in. Briefly check the area for sockets or light switches where cables may be running horizontally or vertically. If any fall within the area you are looking to fix in it may be an idea to look for an alternate location (find out more about electrical cable safe zones in our project here)

Fixing location to be checked with stud finder
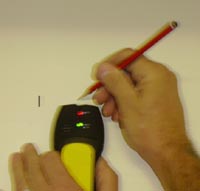
- With the fixing area identified and roughly checked the next job is to thoroughly check it. Take your stud finder and position it to the far left border of your proposed installation area and turn it on. Holding any required buttons down (as indicated in the manufacturers instructions) pass it to the right over the wall until it shows both a red and green light. This means it has detected a variation in wall thickness, which in turn indicates the presence of a stud. Use a pencil to mark this point
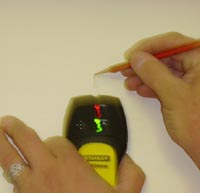
Mark outside of stud
- Once the first edge has been identified continue moving over to the right over the surface of the wall and you will notice that one light goes out or a buzzer continuously sounds to show the thickness detected is not varying. This indicates the other edge of the stud or joist and the light display and/or sound reflects this. The position of the hidden timber can be identified and you can now be sure you have something solid to fix to. Again, use a pencil to mark this point
Furthest edge of stud
- Once you have identified the stud in the wall it’s a good idea to repeat the above steps over the same area further up or down the wall. By doing so you should find that your second set of markings should fall vertically in the same place as your first set of markings
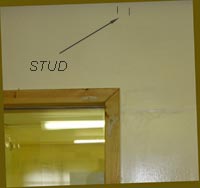
Stud outlined
- Once you have checked and verified your stud position in the wall you can then measure and mark the centre point of the joist ready for fixing
In the above we have walked through the steps on how to use an electronic stud finder. The exact operation that you have may vary slightly to those outlined above but in the majority of cases they shouldn’t be too far off. If they do differ slightly, refer to the manufacturers instructions that came with your stud finder on how to use it correctly.
How to use a Magnetic Stud Finder
In the above steps we have looked at how to use an electronic stud detector or finder. In the below steps we will run through how to use a traditional magnetic stud finder.
- Firstly, identify the area that you want to fix you object in and as above, check over the area and identify any sockets or light switches that may have wires running close to or over your proposed fixing area.
- Take your chosen tool and place it flat on the wall towards the left side of your proposed fixing area. Ensure it is totally flat on the wall as this can affect the reading it produces
- Holding the finder on the wall gently start sliding it over to wall to the right all the way across your proposed fixing area. If you reach the opposite side with nothing detected, drop it down an inch or so and then work your way back to the left. Ensure that you cover roughly a 600mm horizontal area to be sure that you cover enough area to detect any studs
- Keep moving your finder across the wall until you feel the tool start to pull slightly. The magnets used in most magnetic stud detectors are very strong and can detect any metal buried in the wall from a good few inches away.
- When a metallic object is close you will start to feel the magnet pull towards it. Once over the top of it, it will effectively become stuck to the wall indicating the screw, nail or other metal object is directly below the magnet. Use a pen or pencil to mark the position
- With one screw or nail found this will then give you a good idea of where the stud lies so in most cases if you work your way directly down the wall from your mark then you should then start finding more nails or screws indicating exactly where the stud resides
If you are using a movable magnetic stud finder as soon as you start to near a metal object you should start to see the magnet start twitching or moving. As soon as you move over the top of it the magnet will stand firmly upright.
As we have mentioned previously above when looking for a stud finder to purchase it’s a good idea to go for one that can also locate electrical cables and pipes. As both of these contain metallic elements a magnetic stud finder should work regardless but you should check to ensure that any electrical finders you are looking at can also accurately differentiate between the various different objects.
In a similar vein, although a magnetic tool will detect a metal object within a wall by indicating its position it can’t necessarily tell you exactly what the object is e.g. whether it’s a nail, water pipe or electric cable. This is potentially an issue as if you presume it’s a nail or screw and want to fix to a stud you could inadvertently drill or screw straight through the pipe or cable, so tis is something to be very aware of!
A stud finder is one of the best tools to use when checking a wall for a solid fixing point. Whether you have a basic magnetic version or a fully featured electronic version as long as you take you time to learn how your finder works and test it on an area where you know metal objects exist you will be sure to be locating all manner of objects in your walls in no time.