In wet or moist areas, slipping is a serious risk if floors aren’t designed to prevent it.
To address this, non-slip flooring is available to enhance safety. This guide covers the types of non-slip flooring and how they are installed.
What is Non-Slip Flooring?
Non-slip flooring is designed to prevent slips and falls in areas prone to water and moisture and regular foot traffic. Unlike regular flooring, non-slip surfaces provide enhanced traction, reducing the risk of slipping accidents. This type of flooring is particularly useful in environments such as kitchens, bathrooms, hospitals, and industrial settings where wet conditions are common place.
Non-slip flooring comes in various materials, each tailored for different needs. For example, vinyl and rubber flooring are popular choices for their durability and ease of maintenance. Vinyl non-slip flooring often features textured surfaces or embedded particles to improve grip.
Rubber flooring, on the other hand, offers excellent shock absorption and is ideal for high-traffic areas.
Other options include anti-slip tiles and treated wood, which are specially designed to handle wet conditions without compromising on style or functionality.
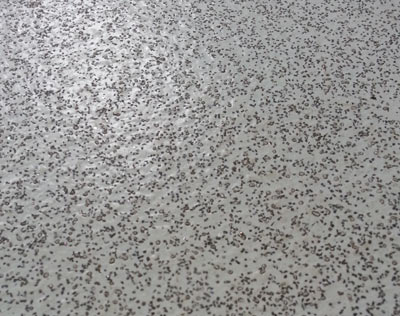
Non-slip vinyl flooring
Can I Use Non-Slip Flooring in My Home?
Non-slip flooring is essential for any surface that becomes slippery when wet, and it’s increasingly important for home safety. While many businesses in the UK already prioritise non-slip surfaces, this approach is becoming more common in residential settings as well.
Housing associations often install non-slip flooring in bathrooms and wet rooms during renovations to enhance safety. With the increase in household slip hazards—such as in kitchens, bathrooms, and on decking—non-slip flooring can significantly reduce the risk of accidents, especially in homes with children and pets.
Although there is no specific legislation for domestic flooring, it’s clear that slip prevention is just as crucial at home as in industrial environments. Modern non-slip flooring products are now available for residential use, offering the same high standards of safety as commercial options, but with a wider variety of styles and patterns.
Non-slip flooring comes in several forms, including sheets, tiles, and coatings, making it versatile for various surfaces. Whether you’re updating stair treads or covering large areas, these products help ensure a safer home environment, reducing the likelihood of slips and falls.
Benefits of Non-Slip Flooring
Non-slip flooring offers more than just improved safety. Here are some key benefits:
- Ensures compliance with health and safety laws, especially important for businesses and public spaces.
- Often comes with a manufacturer’s guarantee, adding extra peace of mind.
- More durable than traditional tiles or vinyl, resisting impacts, high foot traffic, and temperature changes without tearing or ripping.
- Can be applied over existing surfaces like tiles, slate, marble, and stone, or used as a paint-on coating.
- Easy to clean and highly hygienic, making it ideal for kitchens, bathrooms, and commercial environments such as hospitals and leisure centres.
While these benefits are crucial for commercial settings, non-slip flooring’s durability and resistance to wear and tear make it a smart choice for home use too. Its long-lasting qualities mean it can serve your home effectively for many years.
How Rough Should a Surface Be to Be Non-Slip?
The roughness needed for non-slip flooring depends on the location and type of potential spills. It all comes down to "microroughness", which is the texture of the surface that prevents slipping.
To ensure safety, the surface must be rough enough to break through spills, allowing feet to maintain grip and reducing slip risk. The rougher the surface, the better it handles thicker spills.
Several tests determine a surface’s slip resistance:
- Ramp Testing: This involves walking over a wet or oily surface at increasing angles, both barefoot and with shoes. Surfaces are rated on an "R" scale from R9 (lowest) to R13 (highest) based on when slipping occurs. The "DIN" test, which uses safety footwear and measures slip resistance with oil or soap solutions, rates from A to C, with C being the highest. Opt for flooring with the best rating, like R13 or C.
- Pendulum Testing: A pendulum swings a dummy foot over the surface to measure how much force is needed to break traction. The Slip Resistance Value (SRV) indicates the flooring’s effectiveness. The UK Health and Safety Executive recommends a minimum SRV of 36.
Additionally, the "V Rating" measures how quickly a surface disperses liquids. V0 is the worst, and V10 is the best.
Health and Safety and Floor Slip Risks
Under the Health and Safety at Work Act 1974 (HSWA), employers must protect employees and others from slip and trip hazards. For detailed guidelines, visit the Health and Safety Executive.
The UK Health and Safety Executive (HSE) recommends:
- Barefoot Areas: Floors should have at least an A, B, or C rating. Opt for the highest rating available.
- Shod Foot Areas: Floors should have a minimum R rating. Again, choose the highest rating possible.
Regulations can change, so regularly check the Management of Health and Safety at Work Regulations 1999 and HSWA updates. For more details, visit here.

Warning sign identifying a potential slip hazard
Choosing the right non-slip flooring depends on its location and whether you’re installing a new floor or adding a non-slip coating to an existing surface.
Here’s a quick overview of the main non-slip flooring options and their applications:
Non-Slip Floor Tiles
Non-slip floor tiles come in various styles, including ceramic and porcelain. Unlike glossy standard tiles, non-slip tiles have a textured, stone-like surface that prevents slipping.
Using standard glossy tiles in areas prone to water, like kitchens or bathrooms, can make floors dangerously slippery, similar to an ice rink, and increase the risk of falls.
Think of the rough texture at the bottom of a swimming pool; it’s the texture that helps you maintain grip. Similarly, non-slip tiles use texture to ensure safety.
Non-slip tiles are ideal for wet rooms, bathrooms, kitchens, swimming pools, and outdoor spaces.
Installing Non-Slip Floor Tiles
Installing non-slip floor tiles is similar to installing standard tiles, with no special techniques required unless specified by the manufacturer. Learn more about the laying non-slip floor tiles in our guide here.
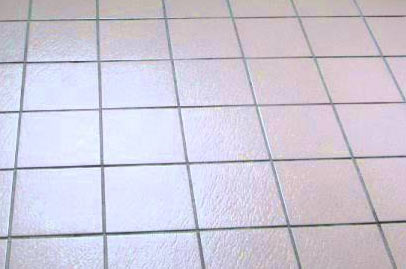
Non-slip floor tiles installed in a bathroom
Non-Slip Vinyl Flooring
Non-slip vinyl flooring has come a long way, overcoming its previous reputation for being cheap and unattractive. Modern advances have greatly enhanced its appearance and durability.
Today, vinyl flooring rivals other options and offers several advantages:
- Typically available as a roll, it can be cut to fit any size or shape.
- Cutting and shaping can be done outside the installation area for greater accuracy.
- Usually more affordable than other flooring types while maintaining cost-effectiveness.
- Joints and edges can be sealed with silicone for water resistance.
- Easy to clean, making it a hygienic choice.
Vinyl flooring is a great option for both experienced and novice DIYers. The main challenge is cutting and sealing around drains, grates, or built-in features to ensure a proper fit.
It’s ideal for kitchens, bathrooms, wet rooms (check with the manufacturer), and some industrial settings. When ordering vinyl flooring, it’s wise to oversize by at least an inch to allow for adjustments during installation, ensuring a precise fit.
Installing Non-Slip Vinyl Flooring
- Remove Items: Take out removable items like sink pedestals and bath panels to simplify the installation. Any remaining items will need the vinyl to fit around or slide under them.
- Draw a Plan: Sketch the room layout on paper, including all fixed objects like shower trays and kitchen units.
- Measure the Area: Accurately measure the room and any objects, noting these dimensions on your plan.
- Lay Out Flooring: Spread the vinyl in a large area to ensure it’s flat. Compare its size to the room and cut sections as needed. If your vinyl has multiple sections, lay them out to fit the room.
- Mark for Doors: Measure and mark the door position on the vinyl, including an extra inch for overlap. This ensures accurate cutting and fitting.
- Mark for Other Objects: Similarly, mark the positions of other fixed items on the vinyl, including an extra inch for adjustments.
- Note: For fixed items like toilets, consider sliding the vinyl underneath rather than cutting around them for a cleaner finish.
- Roughly Cut Around Objects: Cut out rough sections around marked objects using scissors or a hobby knife, allowing extra material where possible.
- Move Flooring to Room: Roll up the vinyl and transport it into the room. Lay it out carefully, ensuring sections and joints align properly.
- Accurately Position Flooring: Adjust the flooring to ensure it fits perfectly in the room. Verify it’s aligned correctly before making final cuts.
- Make Accurate Cuts: Use a hobby knife to cut the vinyl precisely along the wall joins. Make sure to push the vinyl into the joint for a tight fit.
- Cut in Corners: Make necessary cuts around corners and angles to ensure the vinyl fits well.
- Make Final Cuts: Once positioned, make final cuts carefully. Avoid moving the flooring during cutting to ensure accurate fit.
- Join Sections: If using multiple sections, join them with the provided paste or cement. Allow it to set, normally for a good few hours, for a water-tight finish.
- Seal Edges: Seal all edges with the manufacturer’s recommended product or a suitable silicone sealant to complete the installation.
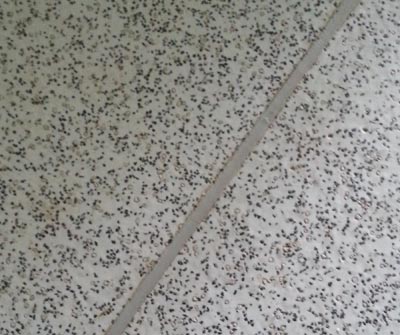
Non-slip vinyl flooring joined with jointing compound
For more detailed instructions, check out our tutorial video at the bottom of this page.
Non-Slip Resin Flooring
Non-slip resin flooring, also known as textured or epoxy flooring, is ideal for high-traffic areas like car parks, warehouses, gyms, and commercial spaces.
Typically, the resin is clear and, once cured, maintains the original appearance of the floor. This makes it suitable for surfaces like block paving, though you should always check the manufacturer’s guidelines before application.
Installation usually involves three components: the resin, hardener, and anti-slip coating.
Installing Non-Slip Resin Flooring
- Prepare the Surface: Ensure the surface is dry, clean, and free of contaminants. Follow the manufacturer’s cleaning instructions for best results.
- Mix Resin and Hardener: Combine the resin and hardener according to the manufacturer’s directions. This mixture will start setting quickly, so work efficiently.
- Apply the Resin: Apply the mixed resin to the surface using a brush or roller. Aim for an even layer and allow it to cure for 24 hours.
- Add Non-Slip Coating: Depending on the manufacturer, you might need to apply a separate non-slip coating, such as glass beads, embedded aggregate, or specialist sand. This step is crucial for creating a non-slip surface.
- Apply a Second Resin Layer: After the non-slip coating, sprinkle it evenly over the cured resin. Then, apply a second layer of resin and hardener. Allow it to cure for another 24 hours before use.
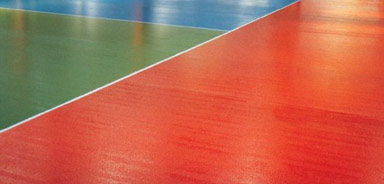
Non-slip resin flooring installed in a factory area – Image courtesy of aclindustrialflooring.co.uk
Other Non-Slip Floor Coatings
With growing awareness of slip hazards due to health and safety regulations, a variety of non-slip coatings are now available to enhance safety on various surfaces. Here are some popular options:
Non-Slip Floor Paint and Varnish
Non-slip floor paints and varnishes are available in a wide range of colours, making them easy to match with your home’s style. These coatings often use aggregates like stone mixed into the paint, creating a rough surface that enhances grip when wet.
Ideal for home use, non-slip paint can be applied to doorsteps, stairs, garage floors, and other surfaces. Application is straightforward—brush or roll the paint on and allow it to dry. For best results, apply at least two coats and let it cure for about 24 hours.
Non-slip varnishes, which use resin or glass beads for traction, offer similar benefits without altering the appearance of the surface. They are commonly used on decking but are suitable for a variety of surfaces.
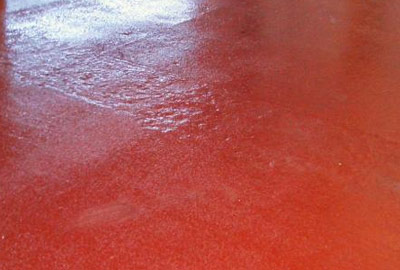
Garage floor painted with non-slip floor paint – Image courtesy of maintenance-contracts.co.uk
Non-Slip Decking Solutions
Non-slip paints and varnishes are great for decking, but specialised products are also available for added safety on these commonly slippery surfaces.
One popular and cost-effective option is non-slip decking strips. These strips, made from plastic or metal and coated with fine grit like sand or aggregate, are screwed or fixed into the decking. Some metal strips can be installed in the grooves of decking boards, as shown in the image below.
While these strips don’t cover the entire deck, they are highly effective when placed in critical areas like steps, significantly reducing the risk of slips.
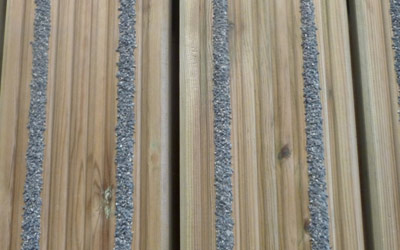
Anti-slip decking strips fixed to deck boards
If you’re a DIY enthusiast, Installing non-slip flooring should be well within your skill-set and getting a great finish should be more than achievable. However, if you’re new to DIY or lack confidence, you can get professional help through our Find a Tradesman service.
For questions about non-slip flooring, visit our Q&A forum.
Check out Part 1 of our vinyl flooring tutorial below. For further guidance, watch Part 2 here and the final Part 3 here.