Living in an older home? You may be lucky enough to have original natural stone floors. When properly cleaned and sealed, these can become a standout feature, adding timeless style, charm and character.
Use the guide below to learn how to clean, seal, and maintain natural stone floors the right way. With just a bit of care, your floors can stay looking their best for years to come.
Why Clean Your Natural Stone Surface?
Natural stone may look solid, but its surface contains many tiny pores, some visible, some not. Over time, these trap dust, dirt and grime from the air and foot traffic, leaving your floors looking dull, stained and grubby.
To keep your stone floors looking their best, regular cleaning is essential. Once clean, you can apply a sealer to block those pores and protect the surface from future dirt buildup.
But sealing a dirty surface can cause problems. If grime is trapped under the sealer, it may lead to a cloudy, milky finish that can only be fixed by stripping and resealing.
That’s why proper cleaning and prep must come before sealing. It’s the key to long-lasting results and a beautifully preserved stone finish.
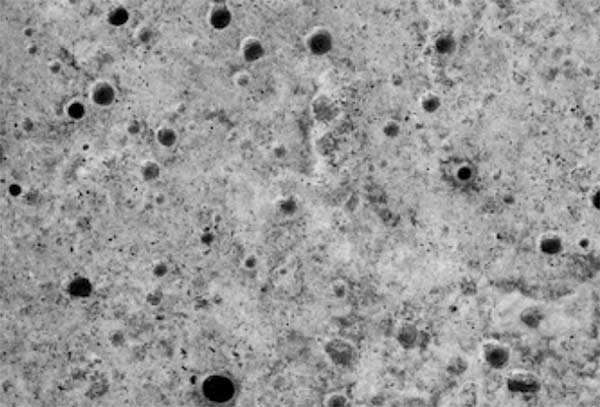
Microscopic pores on natural stone surface
Why and When Should You Seal a Stone Surface?
As we have mentioned, natural stone is porous, meaning it easily absorbs dirt, grime, and spills. Over time, this leads to staining, marking and a worn appearance.
Sealing your stone surface blocks these pores, protecting it from everyday mess and helping maintain both its looks and hygiene levels.
Most natural stone will stain quickly if left unsealed. A good sealer acts as a barrier, reducing the risk of permanent damage. That said, it’s still important to wipe up any spills immediately, just to be safe.

Sealed and polished granite sink worktop area
How Often Should You Re-Seal Natural Stone?
A well-prepared and properly sealed stone surface should last up to five years before needing to be re-sealed.
When it’s time to re-seal, use a dedicated sealant remover to strip off the old layer. This ensures the new sealant bonds cleanly and offers full protection.
With the right care and products, your natural stone floor can keep its finish for decades. Just be sure to use sealants suited to your specific stone type to avoid accidental damage. (More on this below.)
How to Tell if Your Stone Surface Is Already Sealed
You can check if your stone floor, worktop, or tiles are sealed using a quick and simple water test.
Just pour a small amount of water onto the surface and spread it with your finger.
If the water soaks in, the surface is unsealed and needs protection.
If the water beads up into droplets, your stone is already sealed and protected.
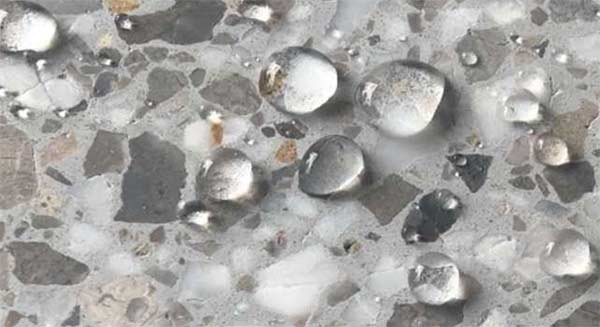
Water balling up on a sealed stone surface – Image courtesy of sydneyhardware.com.au
Tools and Products Needed for Cleaning and Sealing Stone Surfaces
In order to correctly seal a natural stone surface you will need the following tools and products:
- Stiff bristled brushes of different sizes
- Floor mop
- Bucket
- Plenty of clean water
- Clean, dry rags
- Correct cleaning solution for the type of floor you have
- Clean paint brush or roller
- Dustpan and brush
- Long handled brush
- Vacuum cleaner
How to Clean a Natural Stone Surface
Before sealing, it’s essential to give your stone surface a decent, deep clean. Follow the simple steps below to ensure this is done correctly:
Important: Always use a cleaner designed for your specific stone type. The wrong product, such as anything acidic on the likes of Travertine and similar can cause permanent damage. Test in a hidden area first.
- Step 1 – Sweep and Vacuum: Start by sweeping thoroughly, getting into corners and cracks. Follow up with a full vacuum to lift out dust, grit, and debris, especially from any gaps or imperfections.
- Step 2 – Wash the Surface: Mix a suitable stone cleaner with water as per the instructions. Mop the solution onto the surface, rinsing the mop regularly. For tough spots, scrub gently with a stiff brush.
- Step 3 – Dry Thoroughly: Use a clean rag to wipe down the surface, then let it air dry fully, ideally overnight, to make sure no moisture remains before sealing.
- Step 4 – Final Check and Vacuum: Once dry, inspect for leftover grime. Give it a final vacuum to ensure the surface is completely clean and dust-free.
The strength of your cleaning solution depends on the type of stone. For tougher surfaces like terracotta, unpolished marble, or granite, use a stronger mix. For polished or honed finishes, such as limestone, a much milder solution is usually enough.
Once all dirt and residue are removed, the stone surface is ready to be sealed.
If you’re restoring a neglected or previously covered stone surface, expect some extra effort. Old coatings, adhesives, or paint layers may need to be stripped away before cleaning and sealing.
Common materials that may need removing include:
- Removing Efflorescence: This white, chalky salt is caused by moisture in masonry. Before removal, fix any damp issues first. Light deposits can be brushed or chipped away. For stubborn patches, use a dedicated efflorescence remove, always test on a hidden area first.
- Removing Bitumen: If you’re lucky, it may lift off in sheets with a scraper. But since bitumen often soaks into the stone, mechanical removal (like wire brushing or sandblasting) may be needed.
- Removing Screed: Screed can sometimes be chipped off in sections. However, if it’s bonded or has softened over time, sandblasting is usually the safest way to expose the original stone without causing damage.
- Removing Cement and Grout: Use a sharp scraper for hardened residue on smooth surfaces. If it’s still fresh, wipe it off with a damp cloth. Remove grout haze using the same method. For tougher stains, use a cleaner suited to your stone type, test first to avoid damage.
- Removing Paint: Water-based paints can be loosened with water and wiped off. For dried or stubborn paint, use a window scraper on smooth surfaces or a stiff brush for rough stone. Always work gently to avoid scratching.

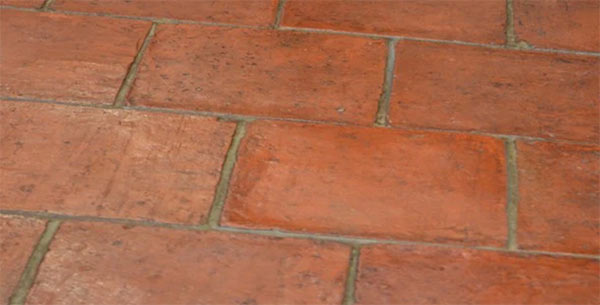
Fully cleaned stone tile floor – Image courtesy of floorseal.co.uk
How to Seal Stone Surfaces
Once your natural stone surface is properly cleaned, the next step is sealing it to protect against stains, moisture, and long-term damage.
The sealing method depends on the type of stone, such as limestone, marble, slate, or granite and its finish (polished, honed, or rough-cut).
Important: Before applying any sealant, the surface must be completely clean and fully dry. Any trapped dirt or moisture can ruin the finish and reduce protection.
Sealing Different Types of Natural Stone
Limestone, Sandstone, and Terracotta are highly porous and should be sealed on all sides before laying if used as tiles. This prevents water from adhesives and grout soaking in and leaving stains.
Terracotta is especially absorbent and prone to deep staining, so extra care is needed. Always seal the front, back, and edges before installation.
Limestone can stain easily, even from handling. Wear gloves during installation to avoid permanent fingerprint marks.
Granite, Marble, Slate, and Travertine should be sealed after installation and grouting. Clean surfaces thoroughly first, then apply sealant to protect against water, fingerprints, and general wear.
For kitchen worktops made from granite or natural stone, sealing is essential to stop moisture and staining.
Natural Terracotta stone tiled floor
How to Seal Natural Stone Surfaces
Start by choosing the right sealer for your stone type, or use one labeled safe for all natural stone surfaces. Refer to your manufacturers guidelines if you are unsure.
Follow these steps to seal your floor or surface properly:
- Step 1 – Clean and Dry: The surface must be spotless and completely dry before sealing. Any trapped dirt will ruin the finish.
- Step 2 – Apply the Sealer: Pour sealer into a paint tray. Use a clean roller or brush to apply an even coat. Work in small sections and smooth out any excess.
- Step 3 – Seal the Entire Area: Continue section by section, working toward the exit to avoid stepping on sealed areas.
- Step 4 – Let It Cure: Allow the sealer to dry fully. While many dry within hours, leaving it overnight ensures a durable, long-lasting seal.
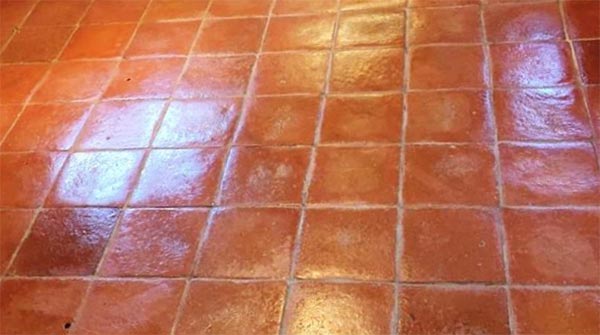
Sealed natural stone floor – Image courtesy of tilecleaning.co.uk
Sealing Other Stone Features
Stone isn’t just for floors, many homes feature stone stairs, tables, pillars, baths, surrounds, and fireplaces.
Fireplaces are especially prone to stains from smoke, soot and UV exposure. To protect these surfaces, follow the same cleaning and sealing steps outlined above to keep them looking their best and prevent long-term damage.
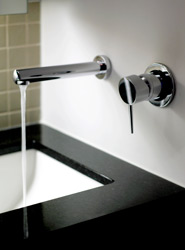
Sealed and polished granite bathroom worktop
Cleaning and sealing natural stone surfaces, particularly floors is an essential job if you want to ensure they stay in prime condition.