Garages these days are more often used for storage or work areas than they are for their original use of storing cars.
With the emergence of the many domestic and self storage companies that allow you to pay for storage space to keep all of the items that you would have traditionally stored in the garage, garage spaces are actually now becoming clean and accessible spaces. After all, it is in a way a room in your home so why wouldn’t you want to use the space for something other than storing items you rarely use!
If you have undergone the arduous task of clearing out your garage or want to repurpose it as a DIY workshop, car maintenance area or other then before getting the area set up just as you want, your first job should be to sort the floor out with a suitable garage floor covering.
It’s essential to do it now as once it’s full of kit, trying to paint or lay flooring around often heavy objects can be a total nightmare, so get it sorted while it’s clear!
Due to the porous nature of concrete, if left unprotected then it can easily absorb any substances that are spilt on to it and this can lead to unsightly staining and damage (if chemicals are spilt), therefore to keep your garage floor in tip top condition it’s a great idea to apply a protective covering over it.
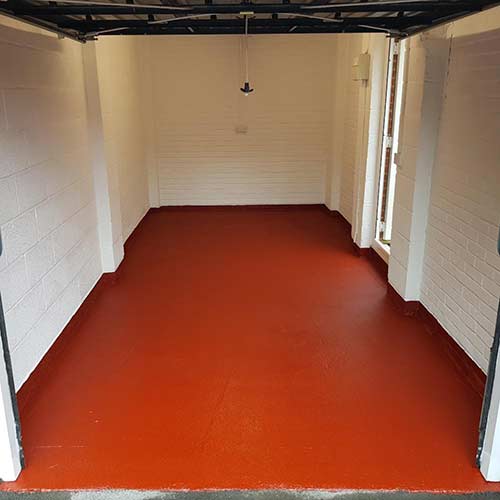
Nicely painted garage floor – Image courtesy of paintpeople.co.uk
Why Should you Cover a Garage Floor?
In pretty much all cases you garage floor is going to be constructed from concrete and come in the form of a solid concrete slab.
As it goes, this is about as strong in terms of compressive strength and load bearing (being able to support heavy weights) as you can get, other than using a stronger concrete mix such as a C40 mix as opposed to the standard C25, C30 mix – more on types of concrete in our mixing concrete project here.
So, with the above in mind you may be asking; If a concrete base is about as strong as it gets, then why the need to put a covering over it?
Well in answer to this bare concrete surfaces do have the tendency to be a bit dusty, so if you’re wanting to use your garage as a gym or play area for example, the last thing you want is for anyone to be breathing in dust, so a coating of some kind to seal it is a good way to go.
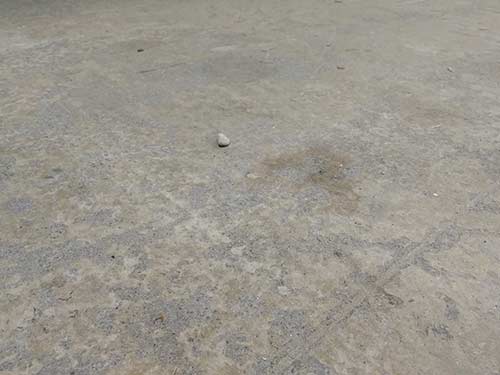
Dusty untreated garage floor
Another good reason for painting, sealing or adding some type of covering over your garage floor is to actually protect the floor itself.
If you’re planning on using your garage space as a workshop for either DIY and home improvement jobs or for working on cars or motorbikes, at some stage you are going to be using paints, chemicals, engine oil and potentially a whole host of other substances.
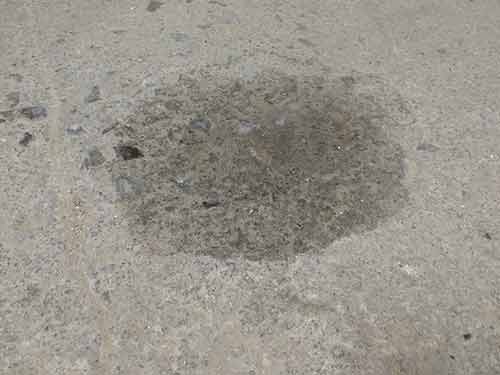
Oil spilt on garage floor and causing staining
At the very minimum most of these can cause staining and defects in appearance but at the extreme end some can physically damage the concrete itself. As this is a little outside the scope of this DIY project, if you would like to know more, information on this can be found here on concrete degradation.
As hopefully you can now see, adding a protective coating to you garage floor is a great idea.
Repairing Damage to a Garage Floor
Before you start coating your garage floor with your chosen covering it’s a good idea to repair any damage first as depending on what you choose as your floor covering, if holes and depressions are present then this can affect the finish and also how long the covering lasts.
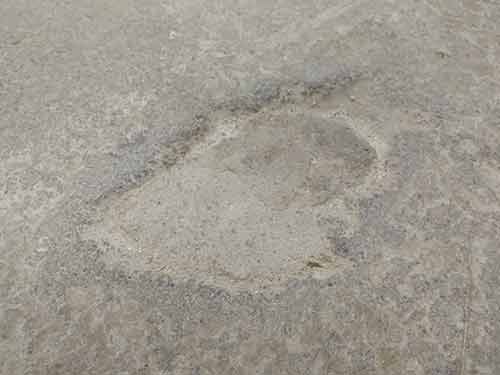
Impact damage caused to garage floor
Typically, garages, especially their floors, are subjected to quite a bit of punishment.
If you use your garage for storage, this often involves the stacking of heavy boxes, bulky objects and, if you’re organized, metal shelving units, all of which can have sharp edges, corners or feet that can easily dig into the concrete surface.
This is also true if you use the space as a gym or for car maintenance. Heavy weights benches, exercise equipment, car jacks, tools and chunky metal car parts can all very easily gauge chunks out of your floor, creating holes and cracks, so ideally, you want to get these repaired before covering the floor itself.
In terms of actually repairing damage to a concrete floor, this is a fairly straightforward job, but to ensure the repair actually lasts it’s important that it’s done correctly.
Depending on the type and size of the damaged area e.g. is it’s a hair line crack, fairly wide crack or large depression, this will essentially dictate the repair method that’s used.
For small, hair line cracks and damage it is possible to use a pourable epoxy compound or specialist fine crack repair compound, but as is often the case, cracks of this size are never wide enough for the compound to actually work it’s way in to and create the necessary mechanical and chemical bond with the existing concrete, so inevitably it just cracks again in time.
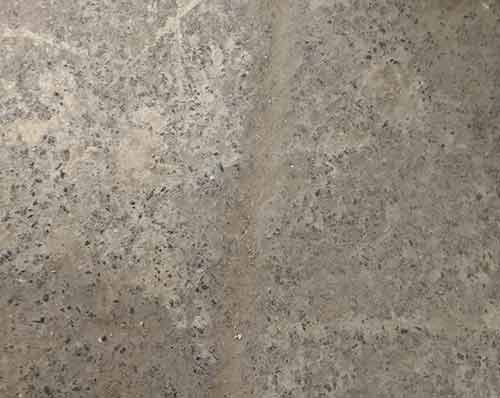
Repaired crack damage to garage floor
With the above in mind, the very best and longest lasting repair will be to use an epoxy repair mortar. Before just filling the crack with the mortar you will need to widen the crack or hole and make it a bit deeper.
For the mortar to create the necessary bond with the surrounding concrete it needs a decent “key”, not just at surface level but also deeper, so use a club hammer and cold chisel or breaker to widen the hole to at least 20mm and go down at least 30mm.
Remove all the debris and loose material using a wire brush, hand brush and hoover and once totally clear you can then mix up your repair mortar and get it in the hole. Once applied, leave for the manufacturers curing time.
For a full run down on how to repair concrete using an epoxy mortar, see our project here.
Levelling a Garage Floor
Aside from repairing any damage that your floor has sustained over the years, before adding your final floor finish you may want to consider levelling your garage floor.
As garages are considered more of an outbuilding than actually part of the home, it can be said that during construction they may not necessarily receive the same level of attention that, say, the floor slab in your actual home may have received.
Don’t get us wrong, it will still have been constructed to the same quality levels as your home, but where perfectly level floors in your actual home will be of high consideration, their not necessarily essential in the garage.
In reality, any slight differences in level will be pretty much unnoticeable, but if you want to take the “belt and braces” approach to things and get your garage floor as level as possible to ensure your shelving, workbench, pool table, exercise bike etc sit level without rocking that’s totally fine.
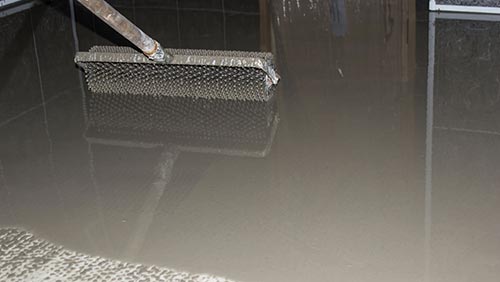
Levelling a concrete garage floor
In terms of actually how to level a garage floor you do have a few options:
The Final Garage Floor Finish
There are some garage floor finishes that not only provide the actual complete floor finish but also help to level the floor and cure any minor imperfections.
These types of “self levelling” finish tend to be the thicker snap together tile-type or the roll out type as the depth and thickness of the floor covering compensates for any slight damage or areas that aren’t totally level.
On the whole these types of floor finish that also help to level out a floor at the same time do a fairly good job, but if you want a guaranteed level and sturdy finish to your garage floor, it’s best to go with one of the options below.
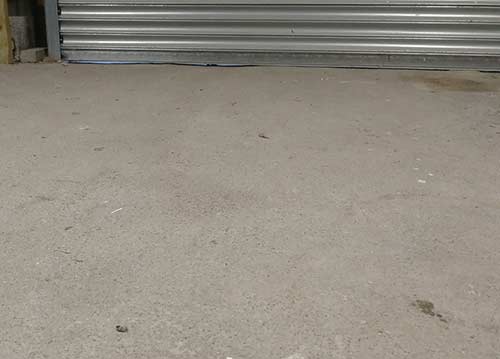
Fairly level concrete garage floor
Self Levelling Floor Screed
The second option, and probably the most widely used of garage floor coatings is what is called a self leveling floor screed.
There are several different types of self levelling screed that includes latex self levelling floor screeds and acrylic emulsion (mixed with a powder made from limestone-silica).
In the majority of cases latex self levelling compounds are generally the best to go for as most pour very easily and also self-level once poured. The latex also allows the floor a certain amount of flex over time so this helps to prevent cracking and shrinkage.
Most latex self levelling screeds can also be used to level floors from 1mm up to 10mm (but this will depend on manufacturer) and can also be used at greater thicknesses by adding some sharp sand to your mix.
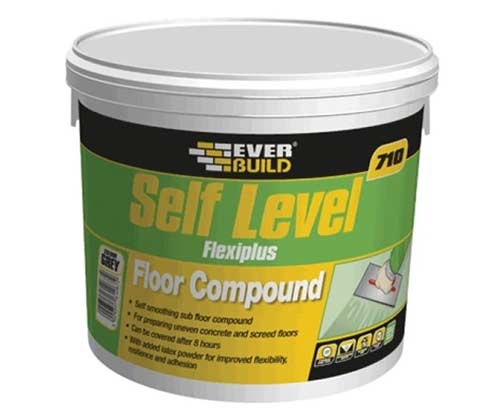
Self levelling screed
Once poured, the surface is very hard wearing and easy to lay. It can be walked on within one hour and will provide you with a dust free surface for your garage or workshop. The coverage is approx 5m per pack, and with the average garage being 5m long x 2.5m wide you will, need 3 packs.
The self leveling floor screed is used a lot by flooring companies to create a perfect surface when laying floor tiles and laminates.
The screed can be used for leveling out shallow “dents” in a concrete floor and will give you a surface to which tiles and floor coverings will stick easily.
For an extra hard wearing floor granite grit can be mixed with the screed and for deeper applications granite chippings will provide the strength needed.
One great advantage of latex screeds is that, once the floor is covered it will seal any dust produced from the existing concrete floor below.
If you want to find out more about how to use a self levelling screed to level your garage floor, see our project here.
Sand and Cement Floor Screed
There is also a third option; The sand and cement floor screed.
At this point, we will mention this option just for completeness so that you are aware of all the options, but would suggest that this solution is left to the professionals or those that have laid sand and cement floor screeds before.
The reason for this is that it’s not easy and if you’re not familiar with the techniques involved, it’s best to go for one of the above options.
If you are interested in find out more about what’s involved, see our screeding a floor project here.
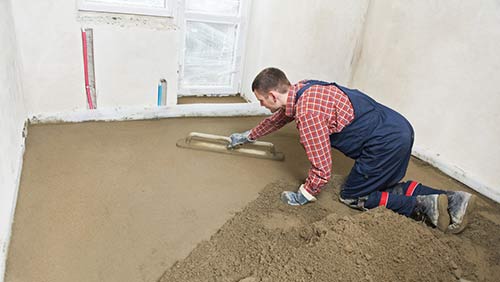
Laying a sand and cement floor screed to level an existing concrete floor
What’s the Best Garage Floor Covering?
Now that you know all about levelling garage floors and how to repair a damaged concrete floor, the next question we need to answer is; What should I put on my garage floor?
In terms of what the best covering to use is, this very much depends on how you intend to use your garage and also what your budget allows. Certain coverings may perform better for your intended use, but can be considerably more expensive so there may be a trade off when it comes comparing costs against performance.
With this in mind, here follows a list of the most popular types of floor covering for your garage and what uses each different type works best with:
Garage Floor Paint (Concrete Floor Paint)
Essentially, there are a few different types of garage floor or concrete floor paint, formulated from a range of different substances such as Polyurethane (pure base, water based or Alkyd), water-based acrylic or solvents:
- Polyurethane Floor Paints: Can be used internally or externally and has great UV resistance, but chemical and impact resistance is not quite as good as an epoxy-based coating, however provides good protection in areas subjected to high traffic, provides a fully waterproof covering and is also flexible so helps to prevent cracking. Available in water-based and solvent/alkyd based, solvent/alkyd being a little more sturdy, but will require suitable breathing/filter apparatus when applying due to the dangerous fumes and high concentration of volatile organic compounds. Due to this, Solvent/alkyd varieties are not suitable for use in small and confined spaces. Once applied it should be well ventilated and left for 24 hours to cure
- Epoxy Floor Paints: Arguably the most common form of concrete floor paints are the epoxy-based paints. Available in both water-based and solvent-based versions, they provide an excellent finish that’s hardwearing, water and chemical resistant, durable and handles impact damage very well. In most cases epoxy paint comes as a two-part coating so needs to be mixed before applying. Can also be mixed with flakes to give a unique visual finish or aggregate such as sand to give a non-slip finish. One downside is that it doesn’t provide very good UV resistance. Ideally, each applied coat should be left for at least 12 hours to cure with plenty of ventilation to assist it
- Polyurea: This type of concrete floor paint is quite a new idea and aims to combine the best of all the traditional floor paints into one solution. Due to this, polyurea paints have very high levels of resistance to wear, chemicals and oils, water and moisture and impact. It’s also flexible so will prevent cracking as it moves with the surface beneath it and can also be applied in low temperature areas. In pretty much all cases it’s heated before it’s applied through a special spray gun where it dries almost instantly. Due to this it’s not really a DIY job and ideally will need to be applied by a specialist used to handling it
From a domestic point of view e.g. getting a decent, hardwearing coating on your garage floor, all of the above solutions will certainly do this, but be aware of the slight downsides of each in respect to how their applied and their respective drying times.
In most cases, both epoxy and polyurethane coatings should feel fairly dry after a few hours, but to get the very best and longest lasting results, each should be left for at least 12 and 24 hours respectively.
Additionally, steer well clear of any solvent or alkyd-based versions and anything with high levels of VOC’s due to the hideous fumes and potentially damaging effect they can have on the environment.
As with most paints they can either be brushed on or rolled on with the exception of the polyurea coatings that need to be sprayed on. For help with choosing and using paint rollers, check out our project here.
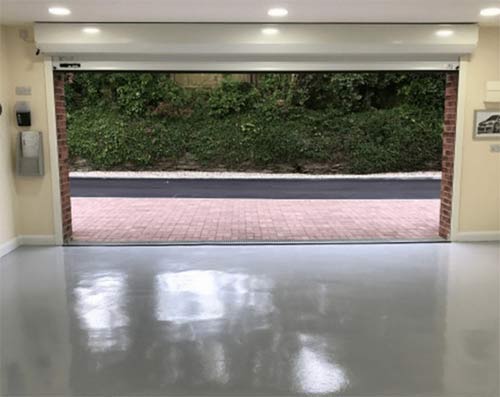
Concrete garage floor levelled off and painted with epoxy floor paint – Image courtesy of resincoat.co.uk
Concrete Floor Sealer (Water or Solvent Based)
Concrete floor sealers are in a way, pretty similar to concrete paints in that they provide an effective solution to sealing over and protecting a bare concrete floor.
Unlike paints that feature a pigment that adds colour, sealers tend to be translucent (clear) so you will still get the greyish colour of the concrete showing through but what they do add is a nice “sheen” to the floor. Depending on the type of sealer, this will either be a glossy or satin finish.
In terms of physical make up, sealers are generally available as acrylic, latex or urethane based:
- Acrylic: Available in both water based and solvent based versions, they both contain traces of acrylic to provide a stable, solid sealant layer for pretty much all concrete surfaces. Generally, the water based versions are better to use in domestic situations as the solvent-based versions emit toxic fumes so a full respirator is required during application, although water-based versions don’t tend to be quite as hard wearing so can require reapplication on an annual basis. If maintained correctly, acrylic sealers provide great protection form water and moisture, although not great with UV resistance
- Latex: Very similar in terms of application and performance as acrylic floor sealers, latex-based floor sealers also offer great resistance to water and moisture and produce a satin or gloss sheen finish. Unfortunately, like acrylic, latex-based sealers suffer when exposed to UV regularly
- Urethane: When comparing performance levels, urethane floor sealers are much tougher and more resistant to moisture and chemical spillages than both acrylic and latex, but due to this tend to be more expensive. Additionally, they don’t create a good bond when applied to bare concrete so in most cases are used as an additional sealant layer over the top of epoxy coatings and concrete floor stain
When looking at the many different types of concrete sealers available on the market, pay attention to whether the particular product you’re looking at is a surface coating or a penetrating coating.
As you may imagine, surface coatings sit on top of the existing surface whereas a penetrating coating will actually “penetrate” down into the surface creating a much stronger bond.
As with concrete floor paints, we would always suggest going with a water-based variety of sealer. In reality they won’t last as long as their solvent-based counterparts but their much safer to apply and kinder on the environment.
Again as with paints, sealers can easily be brushed or rolled on.
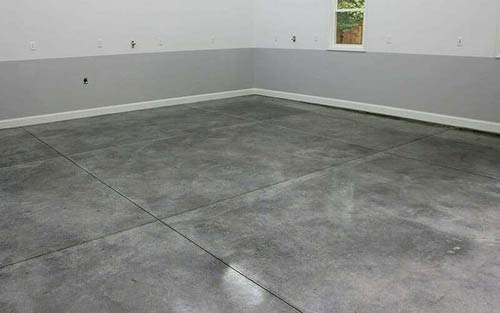
Garage floor sealed with concrete floor sealer – Image courtesy of allgaragefloors.com
Concrete Floor Stain
If you have ever done any form of DIY carpentry, chances are that at some point you have used a stain to either add colour to an item of furniture or protect a shed or fence.
Concrete floor stain is essentially the same – It penetrates down into a concrete surface and adds colour and depth to the finish.
Unlike the shed and fence stain mentioned above, concrete stain exists purely to provide an aesthetic finish to your concrete floor and due to this, unfortunately does not provide any protection, therefore it needs to be used along with a sealer.
Once brushed on to a surface and then worked in using a stiff brush, the stain is then left for a period of time to dry off (stated in the manufacturers usage instructions) and then any remnants washed or wiped away and then a couple of coats of sealer are applied over it to provide the protection.
Ideally, you would want to use a tough and hardwearing sealer such as urethane, however acrylic/latex can be used. Be aware though, that these aren’t as tough and if damaged by chemicals, these can also seep in and affect the appearance of the stain.
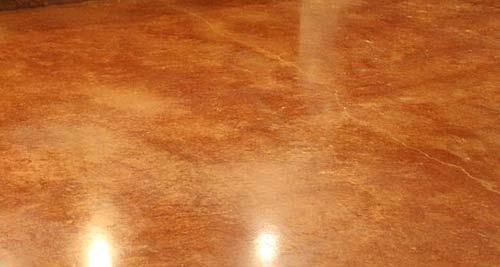
Stained and sealed concrete floor
Carpeting a Garage Floor (including carpet tiles)
If you’re not keen on painting or sealing your garage floor then another option is to carpet it.
Although more commonly used actually in your home, carpeting your garage floor might be a good option if you are planning on using the space as an “extension” to your living space e.g. using it as a gym, games room or “man cave”.
On the whole, garages don’t tend to be that well insulated so the addition of some decent underlay and a carpet can add some much needed insulation to the floor area.
However, if you’re planning on carrying out car maintenance or DIY projects then carpet probably isn’t the way to go.
Typically both of these involve the use of chemicals, paints, oil, water any many other liquids and due to the very nature of carpet, any spillages will quickly be absorbed by the carpet, totally ruining it.
Additionally, carpet is also very flammable so would present quite a substantial fire hazard if used around activities that involve hot implements.
When it comes to fitting, firstly remove any trace of dust of debris from the original floor surface first and then you can lay out the carpet and cut to fit.
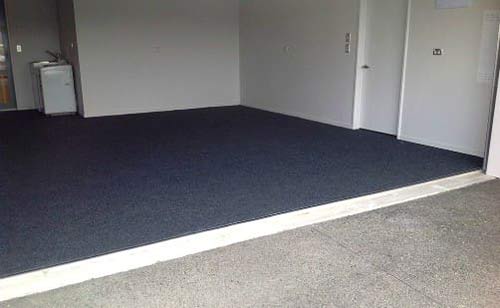
Carpet laid on garage floor – Image courtesy of allgaragefloors.com
Vinyl, Lino and Specialist Rollout Garage Floor Mats
Using vinyl and lino as a garage floor covering has pretty much the same benefits and drawbacks as using carpet (see above), but does in fact have a few more plus-points.
Unlike carpet, vinyls, lino and rollout mats are waterproof so any spillages can easily be mopped or wiped up without causing any significant damage, however some chemicals can easily melt or stain surfaces such as these.
As vinyls, lino and garage mats tend to be fairly flexible and soft, they can be easily damaged by heavy and sharp objects and as heavy objects tend to sink down into the surface, this can cause some resistance when trying to push them around e.g. trying to push a heavy engine crane with an engine on it can be much trickier.
Also, as heavy objects sink down they can also become unstable and can easily tip over!
As with carpet, using vinyl etc as a garage floor solution is probably more suited if the space is being used as a gym, games room or similar and not for more substantial activities.
One important point to make is that, although they are water proof and prevent liquids from being absorbed as they are with carpets, they do present a bit of a slip hazard as the liquid sits on top the surface, this makes it rather slippery.
When it comes to fitting lino on the floor of your garage, you will have to make sure that any trace of dust or debris is removed from the surface first.
Once done, you can then lay over the top and use a utility knife to cut to fit.
Unlike laying vinyl or lino in your home, it’s recommended that you do not glue it down.
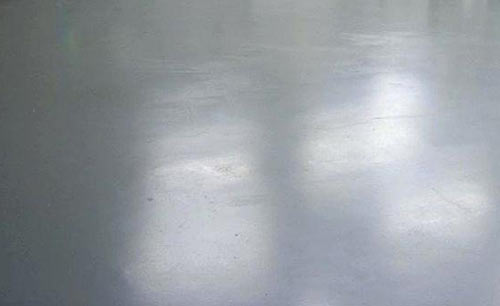
Interlocking or Snap Together Tiles
Interlocking or snap together tiles are a relatively new form of flooring for garages, More popular in the US, they are just starting to emerge in the UK.
Essentially they are available in two different types:
- Rigid plastic
- Flexible rubber
Again, depending on how you are going to use your garage will go some way in deciding which type of tile is best to use.
The flexible rubber mats are easy to fit – just lay them out, snapping together the interlocking edges where they meet and simply cut to fit with a utility knife where needed.
Due to their flexible rubber construction they are fairly slip-resistant and deal with spillages quite well in that the snap together edges form a tight water proof seal, but they can expand and contract quite a bit in extreme temperatures which can affect their sealing abilities.
One further drawback is that as they are fairly soft, they’re not terribly great with heavy weights.
When it comes to the rigid plastic tiles, these are much more suited to coping with heavy weights due to their more solid construction, so if you are considering carrying out vehicle maintenance and using items such as car jacks that will apply a fair amount of pressure onto the surface, these are the tiles to go for.
Their tough construction also ensures that they are more resistant to chemicals and other damaging substances but on the flip side the joints don’t seal quite as well so any spillages can easy seep down on to the surface below.
If allowed to sit there, this in turn can also cause damp and mold issues.
In terms of fitting, again this is fairly easy in that you lay them down and clip the edges together. Fitting is a little more tricky as they are thicker so need to be cut with a saw.
On the whole, interlocking tiles are a good choice when it comes to covering a garage floor. They offer a sturdy, fairly solid surface, although costs can rise depending on how big your garage is.
One big advantage is that if any tiles become damaged, they can simply be unclipped, removed and replaced with a new one!
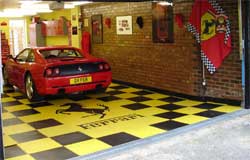
Garage floor tiles using snap together rigid plastic floor tiles
Porcelain and Quarry Tiles
Using porcelain or heavy quarry tiles as a garage floor covering may be quite extravagant and possibly a little over the top but, if you have the funds available to do so, then, in terms of appearance, you’ll certainly struggle to get a better and more visually appealing finish.
Although the finish itself will be exceptional, this will come at a price – tiles of this type are expensive!
Also, both porcelain and quarry tiles, despite their tough and dense makeup are fairly brittle and if heavy objects are dropped on them, they can easily crack or smash leading to very costly repairs.
Additionally they’re also not that resistant to chemicals and oils and can stain so unless you have to store a classic Ferrari in an area befitting its visual and financial value, this flooring solution is probably worth leaving until you win the lottery.
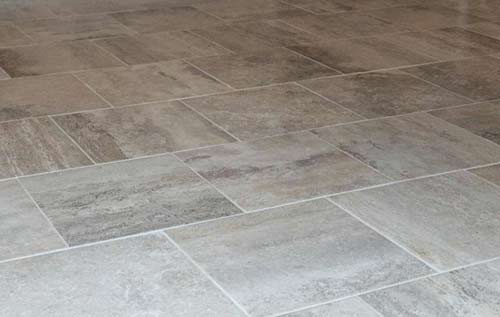
Porcelain tiles laid on to garage floor
As a summary, as you can see from the above, there are numerous different solutions to levelling, repairing and covering a garage floor and which solution is best, will depend on how you intend to use your garage.
On the whole we would suggest a two-part epoxy-based paint as it’s one of the cheapest coverings, it provides excellent wear, chemical and spill resistance, cures quickly and looks good. Additionally if applied correctly it can easily last up to 10 years!

