Boarding a loft out is a fantastic way to gain more storage space for items that are rarely used such as suitcases and Christmas decorations that would otherwise take up more useful storage locations.
Laying loft flooring is a relatively cheap and cost effective way of creating storage space and one that can be easily done yourself so in this DIY guide we look at how to board a loft.
Loft Flooring is for Loft Storage Only
Before going any further it must be stated that, when boarding a loft it must only be used to store items such as empty suitcases and other similar items. Unless your loft or attic has been converted professionally, it is not designed to carry loads heavier than this.
The horizontal rafter, or ceiling joist timbers in your loft are there purely to hold up the ceiling below, not carry weights beyond normal domestic storage items.
Types of Loft Boarding and Flooring
There are 3 main methods for boarding out a loft; Laying boards directly over the existing ceiling joists, laying batten over existing ceiling joists and then boarding over the battens and laying a raised loft flooring system.
Boarding Directly Over Joists
This is the easiest and cheapest method for boarding a loft and simply involves laying boards over the existing ceiling joists at 90° and then screwing them in place. This can be done by pretty much anyone.
There are, however, some points to be aware of in that it doesn’t allow you to lay the recommended minimum of 270mm of insulation as the joists depth is only a maximum of 100mm.
Additionally it will also probably squash any existing insulation present making it less effective at actually insulating and it also won’t provide any air gap between the underside of the boards and the insulation which will then lead to condensation, damp and mould!
With the above in mind, this is certainly not the way to go!
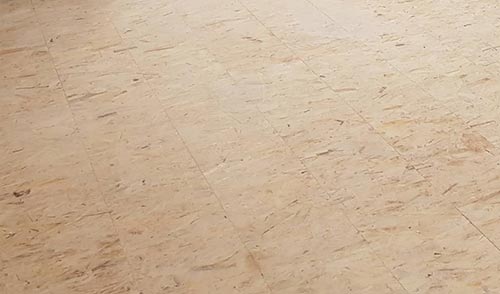
Boards laid directly over ceiling joists
Laying Battens Over Existing Joists
This method involves laying additional battens across the existing ceiling joists at 90° and then boarding over the top of the battens. This raises the floor enough to allow for some additional insulation and also allow the required air gap.
However, the amount of insulation you can lay and air gap that remains depends on the thickness of timbers that you lay. To get to the required 270mm of insulation you would need to lay around 200mm deep joists as this would give you an additional 170mm and 30mm air gap.
As you may imagine, buying a lot of timber that thick is going o be very expensive and very heavy which could in extreme cases cause your ceiling to collapse.
With this method, to ensure an adequate air gap you will need to replace all of the old soft insulation with hard insulation such as Celotex or Kingspan.
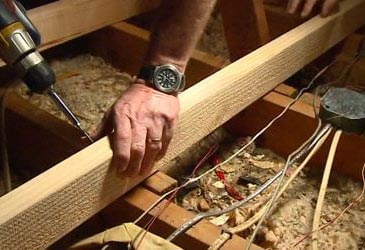
Additional batten laid over ceiling joists to raise loft floor – Image courtesy of todayshomeowner.com
Laying a Raised Loft Flooring System
This method of loft boarding involves installing a specially made system that uses light weight plastic stilts and light weight metal beams to construct a raised deck that is then boarded over.
As the system is specially made for this job it allows the necessary height to achieve 270mm of insulation plus the all important air gap.
Considering all the different choices, although it may cost a bit more you will end up with a sturdy loft that’s boarded for storage, well insulated and free from any condensation issues, certainly the one to go for.
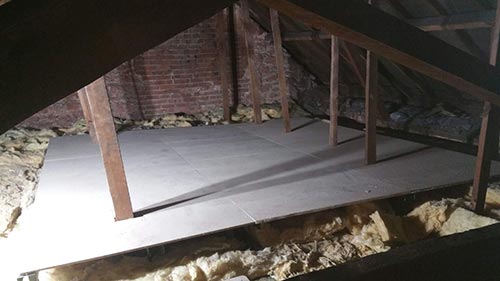
Loftzone raised loft boarding system
What Boards to use to Board a Loft Floor?
The best boards to use to board a loft are specific chipboard loft boards. They are available in several different sizes, the most common being 1220 x 320mm and 18mm or 22mm thick and the alternate being 2400 x 600mm and again 18mm or 22mm thick.
The larger 2400 x 600mm boards are generally sold separately whereas the 1220 x 320mm boards come in packs of 3. These are generally preferred due to the fact they’re smaller and can fit easily through most loft hatches.
You can obviously use other boards such as OSB or ply, but the big advantage of using specific loft boards is that they are tongue and groove and slot together to provide additionally strength to the floor as a whole and they’re cut to the right size to fit through any hatch.
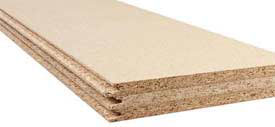
Standard 3 pack 1220 x 320mm loft boards
Check Your Existing Loft Insulation
Pretty much every loft in every home in the UK should have some form of loft insulation already installed, however old and inefficient it may be.
When you access your loft it should be fairly obvious if you have any insulation already in place. If it’s been topped up over the years it will be laid out over the top of the ceiling joists, if not then it will be laid in between the joists.
New Building Regulations Rules for Loft Insulation
Building Regulations have recommended an increase in depth of loft insulation to make sure you do not lose too much heat energy from your home. The new recommended depth of insulation for your loft is a minimum of 270mm.
As loft insulation should not be squashed down, this means raising the height of your loft floor so that you can benefit from the increased insulation plus still have a solid storage area. This can be done in a number of ways, more on this below.
For more information read our project on loft insulation to make sure you have enough insulation in your loft before fixing down floorboards.
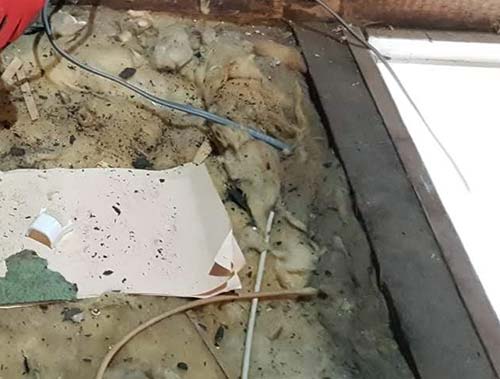
Old loft insulation between ceiling joists
Tools and Equipment Needed for Boarding a Loft
To board your loft successfully you will need the following products and tools:
- Loft boards – enough to board your loft area, either 1220 x 320mm or 2400 x 600mm
- Insulation (if required)
- Circular saw, jig saw or hand saw
- Drill driver
- 3mm or 4mm drill bit
- Countersink drill bit
- Screws – preferably chipboard screws around 4 x 30 or 40mm in size
- Hammer
- Pen or pencil
- Tape measure
- Disposable overalls – a must as lofts are dirty places
- Good quality FFP3 mask – lofts are very dusty places
- Suitable size timber battens or raised loft boarding system
- Scissors / knife to cut insulation
How to Board a Loft
As we have suggested the very best method today of boarding your loft is to install a raised decking system, however for completeness we will go through the principles of each method below.
Note: One point to be aware of when boarding a loft is that you should never board all the way to the edge of your loft, you should always leave a 200 – 300mm at the eaves to allow for air flow to prevent any condensation issues.
Laying Loft Boards Directly on to Ceiling Joists
As we have commented above, laying loft boards directly on top of ceiling joists is not the way to go and can lead to numerous issues, however if you have absolutely no choice then here’s how it’s done.
- Step 1 – Clear the Area: Clear away and objects that are already being stored and any dust or debris (bag it up and dispose of it) from the installation area. It’s best to keep the storage area as close to the hatch as possible and board out into the loft
- Step 2 – Prepare Insulation: You need an air gap between the top of the insulation and underside of the boards so remove all the soft insulation and replace with solid insulation e.g. Celotex, Kingspan etc. Depending on the depth of your existing joists will depend how much insulation you add as you will still need to leave at least a 25mm air gap
- Step 3 – Position Cables: Where any electrical cables are present try to create some slack so that boards can slide underneath or position them so that they run over the top of the insulation and under any loft boards
- Step 4 – Lay First Row of Loft Boards: With everything prepared start laying your loft boards. Starting by the hatch, lay your first board across the ceiling joists and position it so each end is sitting at the centre of the joist it’s resting on. Drill pilot holes and countersink each hole and then screw the board in place using 8 x 40mm chipboard screws. Position the next board so that it butts up to the shorter end and fix this in place also. Continue until you reach the end of the run
- Step 5 – Lay Second Row of Boards: Lay a new board on the second row, but this time move to the left (or right depending which way you’re working) a pair of joists so that any joints are staggered and then push the tongue and groove joints together. Use an old piece of timber as a drift and a hammer to knock them together if they’re stiff. Once fitted drill and countersink pilot holes and screw the board in place. Continue to the end of the run
- Step 6 – Cut Boards to Size: As you have staggered the boards there will now a gap of around a 1/3rd of a board. Measure the gap and then cut a board to this size and then slot it in place, drill and countersink pilot holes and then screw it down. Continue this technique until you have laid all your boards and fixed them in place
- Step 7 – Fix Upstands: Once all the boards are laid, cut 2 x 1 inch batten and then fix this all around the edge of the boarding. This will keep boxes in place and prevent them from falling on to un-boarded areas
Clear any objects or debris from the loft area
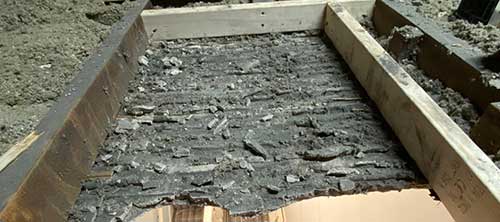
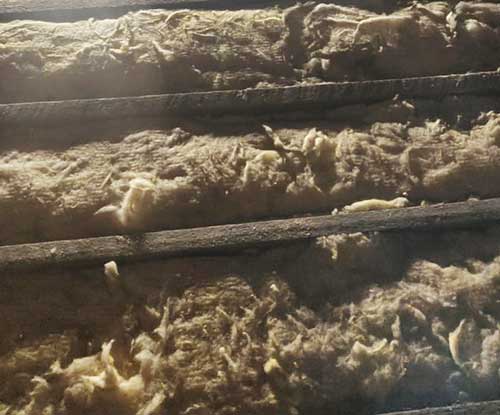
Remove all old insulation
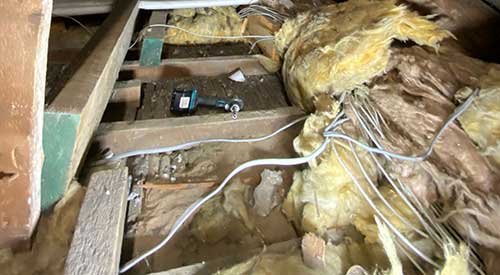
Try to move electrical cables out of the way
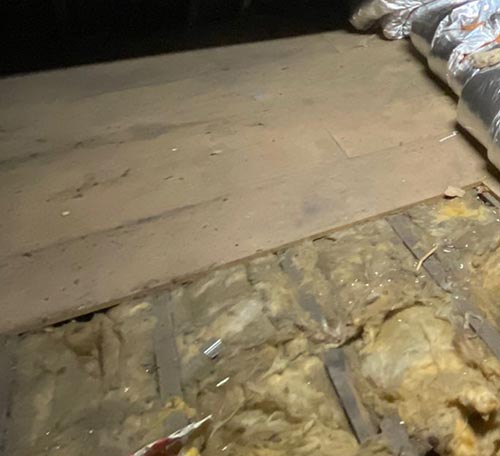
Rows of loft boards laid with staggered joints
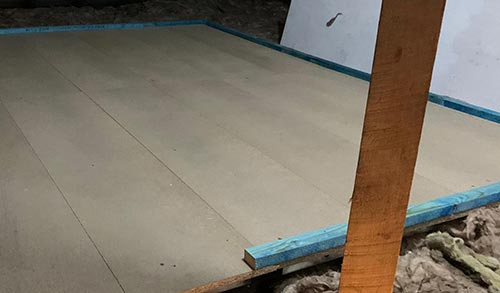
Upstands fixed around edge of loft boards
Laying Battens Over Ceiling Joists
Other than fitting the below raised deck system, this is the preferred method to use when boarding a loft, however it will only work correctly if you use hard insulation as opposed to soft, which unfortunately can be very expensive.
In terms of the insulation, the one advantage of hard insulation is that you can use less depth to achieve the same “U-value”. In fact you only need to use around 150mm of hard insulation to achieve the same U-value as 270mm of soft insulation.
- Step 1 – Prepare Area: Clear the installation area of any objects including already stored items, debris, dust etc. The clearer you can make the area the easier it will be to work
- Step 2 – Move Cables: Where any cables are in the way, try to create some slack and move them out of the way where any timbers will sit. Clip them up to any existing joists if you can
- Step 3 – Remove Existing Insulation: Due to needing an air gap it is necessary to use hard insulation for this method, so first remove all of teh existing soft insulation from between the joists. Once removed cut and install hard insulation in its place, ensuring cuts are tight and there are no gaps. You will need to fill all the way to the top of the existing joists, normally around 3 – 4 inches
- Step 4 – Lay and Fix First Timbers: Starting by the hatch, measure the total width of your boarded area (running from joist to joist) and then using preferably 4 x 2 (3 x 2 if you can’t) timbers, cut your first one to this length and position it and then shoe screw it down (screwing diagonally through the side) using 8 x 50mm to the existing joists below. As you fix it in place ensure that it is fully square
- Step 5 – Lay and Fix Remaining Timbers: With the first timber fixed, measure out along the existing joist 400mm and make a mark. Do this for all other joists and then cut another timber to length and screw it down ensuring that its centre is over each of the 400mm marks. Repeat this for the remaining timbers
- Step 6 – Add More Insulation: With more depth now created lay an additional layer of the hard insulation between the new joists. Again make cuts tight to avoid any air gaps. Depending on how deep you existing joists are (75mm 3 inch or 100mm 4 inch) will depend how much more you need to lay to reach the overall required depth of 150mm, which will either be 50 or 75mm
- Step 7 – Lay and Fix Boards: The final stage now is to fix the boards in place over the new deck. Position the first loft board on the new deck, ensuring that each thin end is sat at the centre of each new joist. Drill and countersink pilot holes and then screw it in place using 8 x 40mm chipboard screws. Repeat this until the end of the run
- Step 8 – Lay Second Row of Boards: For the second row of boards move the first board along one set of joists so that you are staggering the tongue and groove joint. Knock the joints together and continue the run of boards, cutting a smaller board to size for the end. For the third row move the first board back to the first set of joists staggering the tongue and groove joints again. Repeat this pattern until all the boards have been laid. Once positioned, drill and countersink pilot holes and screw each board in place
- Step 9 – Fix Upstands in Place: Using 2 x 1 inch roofing batten, cut a piece to length and fix it along the length of one side of the boarding and then repeat this for the remaining 3 sides
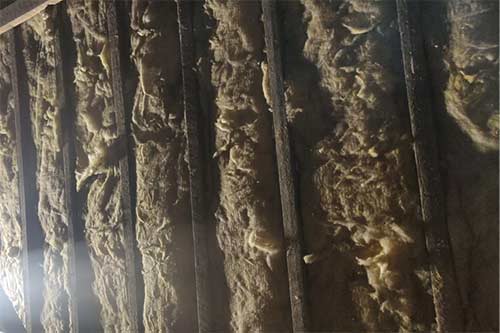
Clear any objects out of the way before starting
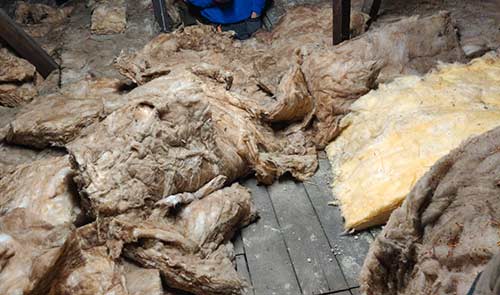
Remove any and all old insulation from the loft and replace with hard insulation between the existing joists
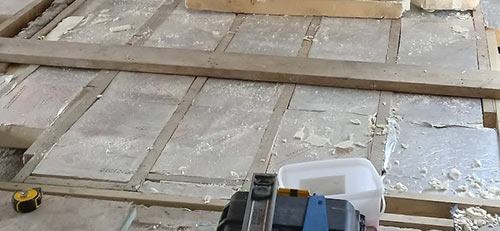
Top up new joists with solid insulation but leave at least a 25mm air gap
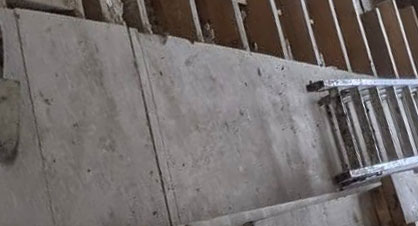
First row of loft boards laid
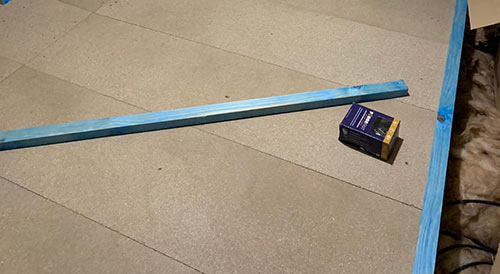
Fix upstands all around the edge of the loft boarding
Laying a Raised Loft Boarding System
The preferred method of boarding a loft is to use a kit which lifts the boards up from the joists enough to get a good amount of insulation down but still allow a good ventilation flow to avoid condensation and also provide a solid storage area.
Part of DIY Doctor’s sister company, Foundations Up Construction Ltd, specialises in installing these raised loft boarding systems. As official installers for the Southwest for Loftzone we have a full project dedicated to installing the Loftzone raised loftboarding system, so check out the project for full fitting instructions.
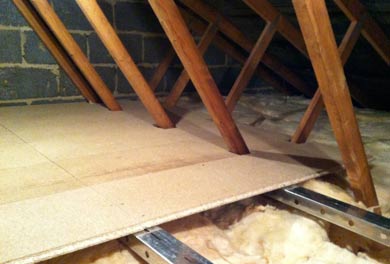
Successfully boarded loft using LoftZone kit
Making Your Loft Floor Boarding as Strong as Possible
It is very rare for the loft boards to meet naturally on a joist, especially when laying boards over existing joists (which you shouldn’t do). In the best-case scenario the joists will be perfectly parallel to one another and laid at exactly the same centres every time.
This however does not mean that the end of a loft board will “land” on a joist. In the worst-case scenario the joists will not be parallel and will have been laid at differing centres.
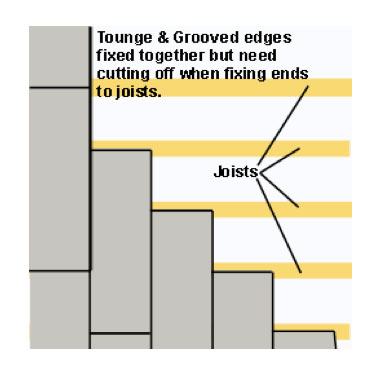
Laying loft boards or loft panels on ceiling joists
To ensure your loft floor is as strong as possible, all loft boards, no matter how they’re laid or what system you use, should meet at the centre of a joist.
When laid correctly like this, the edge of any loft board that meets a joist can then be screwed down and fully supported.
Cutting and Screwing Loft Boards and Flooring Panels to Board out the Loft
Normally a board has to be cut so it finishes in the middle of the joist as shown in the above diagram. This sometimes means that the tongue and groove need to be cut off both boards where they meet.
This does not matter as the joint will be very strong when it sits on the joist. Do not be tempted to join boards between joists as they will soon sag and cause a weak spot in the floor.
When cutting loft boards the best tool to use is a circular saw, it’s both quick and accurate. If you don’t have one then it’s certainly worth getting one as you will always find a use for it.
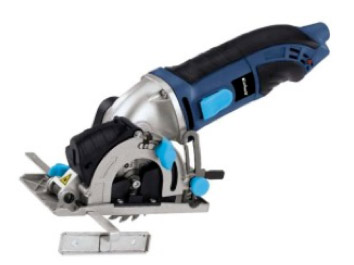
Circular saw
If you don’t have any means of getting a circular saw then you can also use a jigsaw or a traditional handsaw.
When it comes to screwing loft boards down, each screw should be countersunk and a pilot hole drilled.
This makes fixing the boards easier and takes the heads of the screws below the level of the floor so when you slide suitcases along the floor they do not catch and tear on the screws. Another good reason for using pilot holes is so the boards do not split when you screw them close to the edge.
What are the benefits of Boarding a Loft?
The major benefit of boarding a loft out is the extra storage space that you gain. In most cases the loft is used to store items that are rarely used such as suitcases, Christmas decorations and the similar. If items such as these are not stored in the loft then they end up taking up valuable storage space in other areas of the home.
Another knock-on benefit of boarding a loft is the fact that you can add additional insulation at the same time, if you are correctly raising the boards up off of the joists. By adding more insulation you reduce the amount of heat loss from your homem making it warmer and reducing your heating costs.
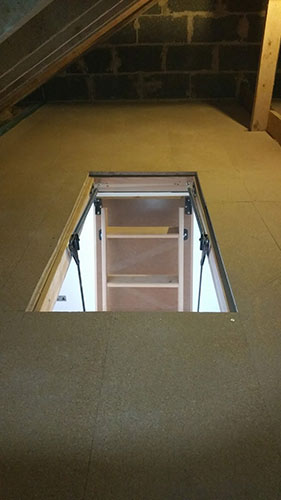
Boarded loft creating more storage space
What to Consider Before Boarding a Loft?
Before laying any boards or installing any insulation there are a few points that you need to be aware of that can effect how the work is carried out.
Cables and Pipes
One of the easiest routes for running central heating pipes and electrical cables is through the loft and over the top of the ceiling joists. Due to this most lofts have said electrical cables and pipework running all over the place.
This obviously causes a problem when you want to lay timbers across the joists, install raised decking or fix loft boards in place as you can lay anything on top of the cables or pipes as they will get squashed.
If there is enough slack with any cables, it may be possible to move them out of the way. If not then it’s possible to notch the joist so the cable sits down in, however there are very strict rules on this as you can easily weaken them. For more information see our notching joists project here.
On the whole it’s best to avoid notching any joists at all and to plan your boarding to avoid any tricky areas, or better still use a raised deck system so that it’s much easier to work around existing obstacles.
When laying new insulation you should always try and lay the insulation underneath any cables present.
Unfortunately as pipes aren’t flexible, if there are any in the way then you will either have to move the boarding or get a plumber to move the pipe.

Electrical cables laying over the top of existing ceiling joists
More Insulation
Adding more insulation when boarding your loft really goes hand in hand and should always be done if you don’t already have the minimum recommended 270mm of insulation.
The only reason you wouldn’t install more insulation is if you are boarding directly over the joists, but as we have explained, this is not a good idea and should not be done.
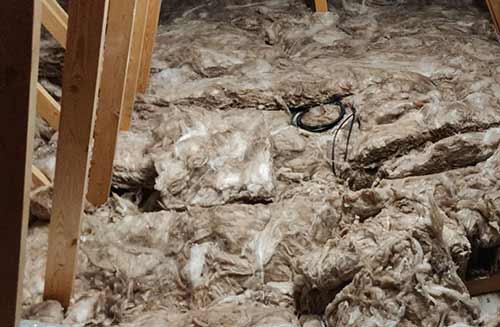
Additional insulation laid out in loft
Light Fittings
Light fittings of various types are also common in lofts, They will either appear as a wire or collection of wires going down through the ceiling to a ceiling rose or in the case of down lighters, the fitting itself protruding up through the ceiling.
The belt and braces approach here is to always install a fire hood over the fitting to protect any loft insulation from the heat generated by the light. This is certainly the case for any halogen lights as these typically generate a great deal of heat.
In reality, most of todays low voltage LED lighting generates very little heat, but you should still protect each using a hood.
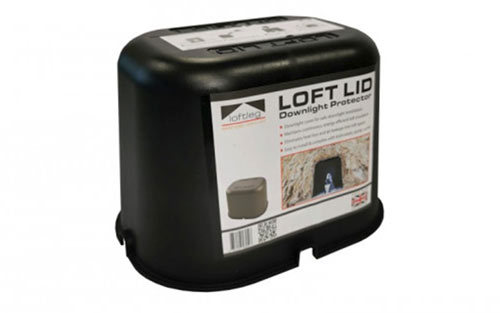
Protect loft insulation from heat sources such as lights using a fire hood
What to Consider After Boarding Your Loft?
Once your loft has been fully boarded out and you now have a nice new storage area to fill up you need to ensure that you can access it easily and more importantly safely. Holding and balancing a heavy box whilst climbing up a shaky step ladder is not the way to go.
Instead it’s well worth considering fitting a timber loft hatch and ladder. Although not cheap, they are extremely sturdy and easy to fold up and pull down. See our project here on installing a loft hatch and ladder for more help.
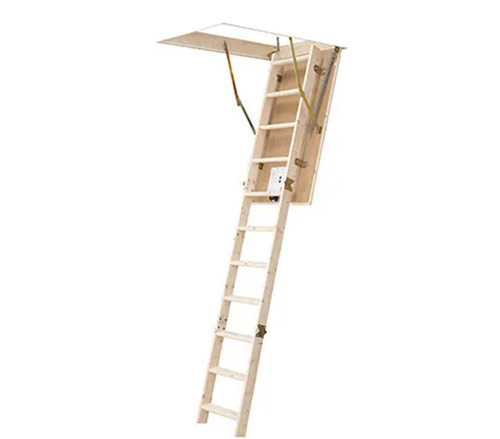
Integrated folding timber hatch and ladder
Another addition you may want to consider is adding some truss shelves. These are basically shelves that are created between the roof trusses either side of or around the boarding that can be used for additional storage.
Truss shelves are ideal for use with fink trusses as these take up quite a bit of space in the loft, limiting the amount of space you have for boarding so where you loose with boarded space you can regain by installing some truss shelves.
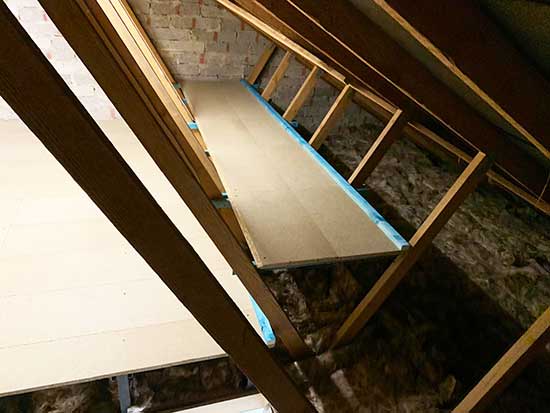
Truss shelves installed between roof trusses
What Weight or Load can be Placed on a Normal Loft Floor?
When your house was built, the upstairs ceiling, which forms the loft floor, was designed to be able to carry 25kg per square metre in accordance to British Standard 6399-1:1996. A 10 stone human being weighs 64kg. Conclusion, lofts are not designed for parties!
There are parts of normal lofts which (before the popularity of combination boilers grew) are strengthened to hold water tanks for the normal domestic cold water and sometimes a header, or feed and expansion tank for the central heating.
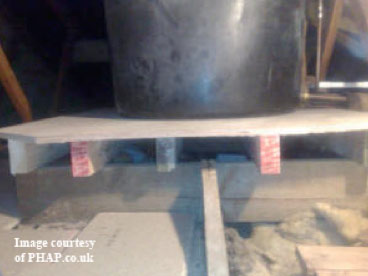
Additional loft boards supporting water tank – Image courtesy of phap.co.uk
You will see that in any part of the loft where there is, for example, a water tank, the floor is reinforced and, in a lot of cases, the rafters are given additional support by hanging timbers attached to the pitched section of the trusses.
If you mean to convert your loft into living accommodation of some kind (please note, even using it as an office or study counts as living accommodation) you will certainly need Building Regulation approval to convert your loft into anything other than a storage space.
For more information please also read our projects on loft conversions and building regulations.
What Weight is Allowed on a Converted Loft Floor?
A floor in a loft that’s been converted must be designed to carry a minimum of 150kg per square m. This is 5 times more than a loft that’s simply been boarded for storage.
Just to confirm, when we say converted, we mean converted into living space by carrying out all the necessary building work, following all the required regulations and then ensuring everything has been checked and signed off by building control.
How to Create Greater Load Bearing Capacity in the Loft
Clearly to achieve the greater load bearing capacity of 150kg per square m, stronger (usually larger) timbers have to be placed over the existing joists (or in some cases replace them) that are mounted on suitable structural supports.
It is essential that weight of any consequence in a loft is transferred to such a support which in turn takes that weight right down to the foundations.
This is usually done by either adding additional support beams, or RSJ’s to reduce the span of the existing timbers, or simply enlarging the timbers which sit on the load bearing walls on either side, or either end of the property.
This is a sizable job and will require you to contact your local building control office for advice and possible a structural engineer. You will also most likely need planning permission.
You can find out more about load bearing walls and safe floor joist spans in this project page.
Staying Safe While Working in the Loft
Lofts are dangerous places, especially when they’re not boarded as all you have to stand on are the ceiling joists, everything else is non-structural plasterboard that does not support any form of weight at all.
If there is already insulation laid over the top of the joists hiding them it’s even more tricky as you can’t see where to stand.
As we’ve also mentioned above there will also be electrical cables, junction boxes, light fittings etc. littered all around the place that you can easily trip over or even get a shock from if touched in the wrong place.
With this in mind always take extreme care when working in a loft. It’s often a good idea to lay some loft boards loose over the top of any joists just so you have something solid to stand on and work from.
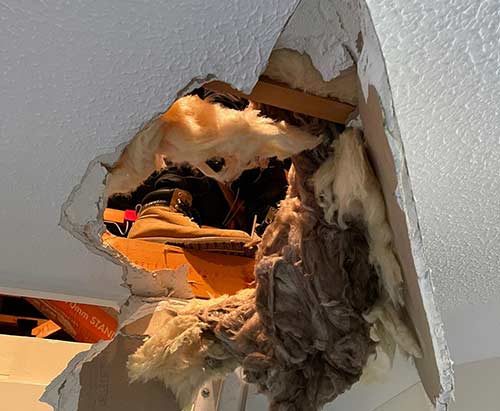
Hole in ceiling where someone’s put their foot through from in the loft
As we have mentioned, if you are intending to use the loft a lot for storage it is as well to fit a sturdy and safe loft ladder. You may well have to enlarge your loft hatch to do so, so take a look at our project page on enlarging a loft hatch.
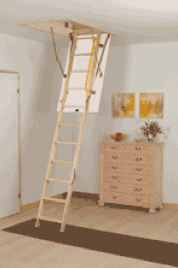
Stay safe getting into and out of the loft with a loft ladder
In the majority of cases lofts are dirty and very dusty. All the dust in the air seeps through the tiles and roofing felt joints to settle on your ceiling. Add to that the dust created by old insulation and you have a pretty unhealthy environment.
Make sure you can breathe properly in the loft by using a filter mask and, where there are fibres from insulation flying around where you have disturbed the loft insulation you might want to wear some eye protection, gloves and also some disposable hooded overalls.
Additionally, the dust created from cutting, drilling etc. High Density Fibreboard such as standard loft boards (especially if you are using MDF boards, where MDF dust has been proven to be carcinogenic) can also be very hazardous to your health.
When cutting MDF and HDF loft boards you should always use a minimum of an FFP3 mask or mask with a P3 particle filter and only cut in a well ventilated area, preferably outside..

Disposable masks should be worn in the loft
Once your loft is boarded out properly you will be able to, with the correct access and lighting, store and remove all your suitcases and other storage boxes easily, quickly and, most importantly, Safely. Good luck with your loft boarding and storage project.

