How do I Remove Lino or Tiles From my Floor?
There is only one tool for this job and its below. Its hard work however you attempt it and despite many years of trying we have never found an "easy" way.
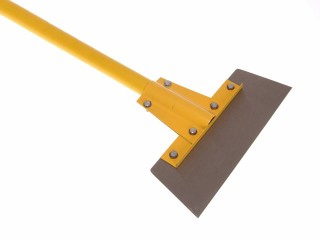
Floor scrapper
The tiles or lino should come up relatively easily using a floor scraper. To start, you might find it easier to remove just one tile and then you can get the floor scraper under the of the floor tiles to prise them up.
If you are dealing with lino sheet flooring, in order to get the scraper underneath to lever it up you may want to cut a section out.
Using a utility knife, score a section roughly a metre square and using the floor scraper lift the corner and prise the cut section up and off.
You can then access the rest with the scraper to get it off. Obviously if you want to keep the lino you are removing then cutting a section out may not be the best way to go.
When using the scraper, scrape a little at a time using a back and forward motion pushing the scraper blade further and further underneath the lino on the floor.
It is a good idea that once you are 6 – 8 inches under each section of lino to tear it off (or cut it if it is quite tough). This way, most of the time you will be able to clearly see what you are doing and where you are scraping.
Continue with the above steps until you have removed all of the lino on the floor.
Although quite a boring and monotonous job, there are a few things that you should bear in mind:
- Base Units and Appliances: In most cases you will be doing this job in a kitchen or bathroom and there may be base units, cabinets or appliances on top of the lino. The majority of these will feature a plinth that covers the front of the void at the base of the cabinet or base unit. Most allow you to easily remove this so that you can remove any lino that is under the item itself (where appliances are involved you can simply remove it). Where the sides of the cabinet have been placed on top of the lino it may not be possible to remove the cabinet as it may be screwed to the wall or joined to other adjacent cabinets – obviously its best to move it and then remove the lino but if this is not possible you can use a Stanley or hobby knife to cut around the lino leaving only that under each side
- When Using a Scraper: Be very careful at what angle you use the scraper at. Scrapers tend to be quite sharp and when you are using a fair amount of force to drive the scraper forwards, if your are pushing down rather than forwards and along you can very easily damage the surface of the floor. If you are removing the lino to expose the nice boarded floor below it, to and it and varnish it as a feature of the room then any damage could destroy the finish
In most cases, once all the lino has gone, you will still be left with some nasty adhesive on the floor. To remove this is a similarly long and painful business and can either be done (if the adhesive has gone rock hard) with a hammer and bolster chisel (the smaller pieces you attempt to break off, the better) or by following the instructions below.
How Do I Remove the Lino or Tile Adhesive That is Left?
Once the tiles or lino sheeting has been removed, the only method we have found which successfully removes most (not all) adhesives is to warm it gently with a hot air gun.
When the adhesive starts to go soft, it can be scraped off using a stripping knife.
When using a heat or hot air gun as they are known, again, you need to be careful. Do not dwell too long in one spot as they pump out quite a bit of heat and this can damage the surface.
Hold the heat gun about 6 – 8 inches away from the surface and sweep it from side to side, gently heating the adhesive.
As when removing the lino itself, work on a small area at a time, around 8 inches square. Heat the area for a few minutes until the glue softens and then get stuck in with the scraper.
Due to the nature of glue, it’s sticky stuff so after you have scraped an area clear, wipe the residue off the scraper with an old damp cloth, keep the scraper as clean as possible.
Once the whole area has been cleared, you will still have a small residue or film of the adhesive left on the surface and this can usually be removed by rubbing very hard with a cloth, or green scouring pad, dipped in solvent thinners.
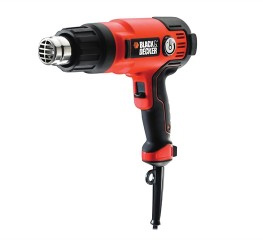
Hot air gun
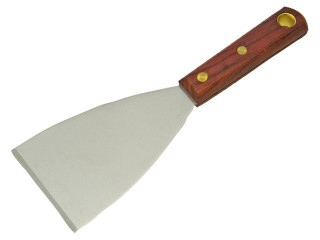
Stripping knife
Make sure you are wearing rubber gloves for this job and safety specs may not be a bad idea as solvent can splash. Solvent thinners can be bought from your local DIY store.
If the adhesive is particularly well stuck you can lay ceramic or quarry tiles over the top of it. If you choose to do this then a good coat of undiluted PVA adhesive is a very good idea. See our project on using PVA adhesive for more information. Laminate flooring, or timber flooring can also be laid straight over the floor as long as the floor is not uneven and a good quality underlay is used.