Although not hugely popular, cork is in fact a fantastic natural material for flooring and walls. It is a natural product, very durable, insulates very well, insulates sound well, can be repaired easily and when installed correctly can look fantastic. Despite this it is a bit of a marmite covering – you either love it or hate it.
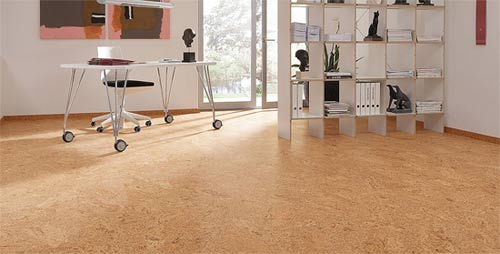
Correctly laid cork flooring – When installed correctly, cork flooring can look great – Image courtesy of meister.com
If you are more in agreement with the latter part of the above then you might be wanting to remove your cork flooring or cork wall coverings.
In light of this, a common question that we get asked here at DIY Doctor is "How do I easily remove cork tiles from a floor or wall?". Many people are looking for a miracle answer to this horrible job.
We’re sorry to say there isn’t one! It’s just hard work with a wide scraper to remove the tiles and then even harder work to remove the adhesive underneath.
The area that you are removing the tiles from will also come into play. If you are removing them from the floor this will be slightly easier than removing from a wall. When dealing with floors, normally cork tiles will have been stuck onto a concrete or solid base meaning it is just a case of getting stuck in with the scraper.
If, however, you are wanting to remove them from a wall there are a whole host of issues you could potentially face, namely, damage to the walls plastered surfaces. This is pretty much inevitable as, not only will the adhesive itself mark the surface, the act of scraping it off will also cause damage.
If any of the plaster is slightly loose the act of prying the cork tiles off of the wall can also result in the plaster being taken with it.
So, as you might be able to tell this is not a fun job in the slightest, especially if it’s on a wall, but if it’s got to be done it’s got to be done.
When dealing with the removal of cork tiles from walls, one work around can be to plasterboard over the entire walls surface and essentially start from scratch. This can be done using 8 or 9mm plasterboard and can be done on both solid walls and stud walls.
Simply fix the plasterboard over the surface using the correct screw fixings and then plaster over that to give yourself a fresh wall to decorate from scratch.
This might sound like a great solution but it is an expensive one so if you are working within a budget the only choice is to arm yourself with a scraper and prepare yourself for some hard work.
Removing Cork Tiles from Walls and Floors
The below principles can be used for both floors and walls and a variety of different surfaces including timber and concrete. Again, be cautious when scraping as you don’t want to damage any underlying surfaces.
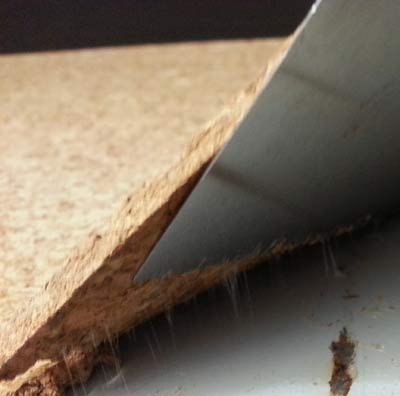
When removing cork tiles, the first task is to lever up a corner so that you can get your scraper underneath. Using a hobby knife score down the join between two tiles so that you can wiggle the scraper into the gap.
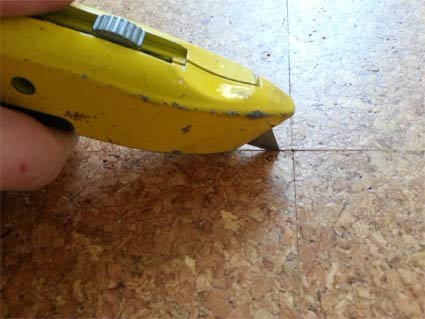
Use a hobby knife to score down the joint between the tiles
Starting at a corner, lift it slightly using the scraper pushing the scraper is as you go to lever more of the tile off the surface.
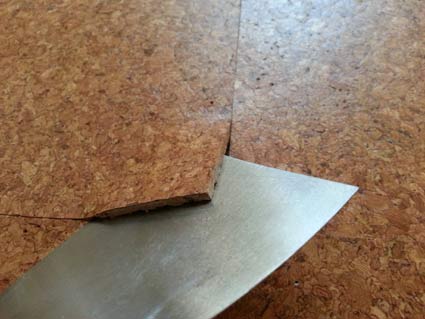
Use your scraper to lever up a corner of the cork tile
If you are working on a floor a great tool to use is a floor scraper. Normally these will feature a long handle so that you can stand up while scraping and avoid the inevitable knee-pain due to kneeling all day. If you have no choice but to use a hand scraper, make sure you either wear knee pads or rest on something with some padding.
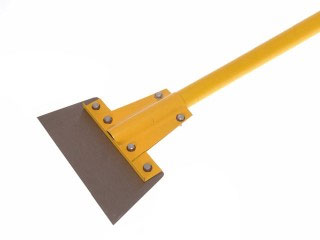
Long handled floor scraper
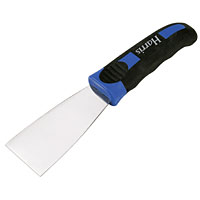
Stripping knife or scraper
If you have a large floor area to clear it might be worth getting in a mechanical floor scraper. These can be rented from most hire shops and will save you hours for the sake of a few quid.
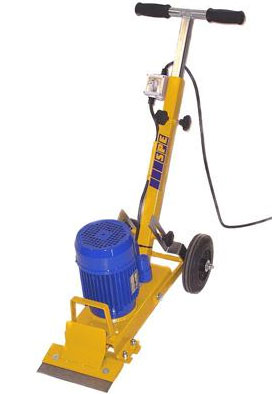
Mechanical floor scrapers can be rented from your local hire shop
If the tiles have been down for some time you may find that the adhesive has actually deteriorated quite a bit so the tiles come up easier the more you work at them. When old, it tends to turn a little brittle and crack off as the tiles are levered up.
This is fine when taking the tiles up but makes things trickier when it comes to getting the adhesive residue off the surface afterwards.
If you encounter a particularly stubborn patch of glue then you have a couple of choices:
- Hammer and Bolster: Holding the bolster at around a 15 ° angle to the floor or wall surface, gently tap on the striking plate with the hammer. Don’t put too much force behind it instead use short taps to work the blade of the bolster into the adhesive to loosen it. Make sure that the corners of the bolster do not dig into the surface below and cause any damage
- Hair Dryer: Instead of the hammer and bolster that can be a bit heavy-handed you can use a hair dryer. Turn the dryer up to it’s highest setting and gently wave it from side to side over the surface of the tile, heating it through. Ensure that the end of the dryer is around 3 – 4 inches from the surface of the tile as to not dwell too long in one place. Do this for about 5 minutes and then try the adhesive again. If it’s still quite solid you will need to reheat for a while longer. Ensure that you do not overheat your drier of the surface you are working on
- Heat Gun: This is pretty much the same process as the one outlined above except that heat guns kick out a lot more heat than the average hair dryer so you will need to hold it around 6 – 8 inches from the surface you are working on. Evenly heat the area for a few minutes and then get stuck in with the scraper. If it’s stil quite solid reheat for a minute or so and try again
- Wallpaper Steamer: Success using this tool will depend on the type of adhesive that has been used. If it’s a particularly strong adhesive then you might not achieve the amount of heat required. On weaker glues the moisture generated may be enough to loosen the adhesive allowing you to lift the tile. Take care when working on plastered surfaces as you don’t want to saturate the surface too much and damage the plaster. For more information on using a wallpaper steamer check out our project
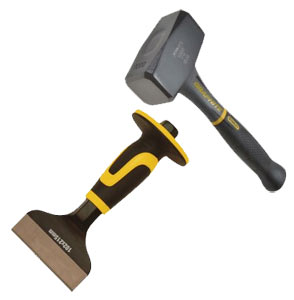
Lump or club hammer and bolster
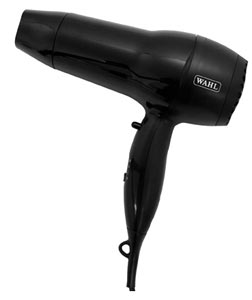
Standard domestic hairdryer
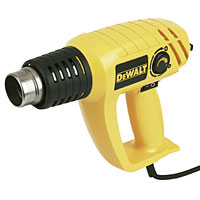
Hot air or heat gun
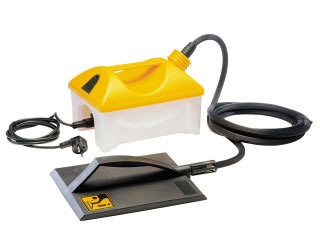
Wallpaper steamer
Continue to work your way around your wall or floor surface a tile at a time. As you lever the tiles up you may find it easier to break off the sections that you have removed allowing you to work directly on the areas that are still stuck to the surface.
This way you can also keep an eye on where you are working and make sure that you are not causing damage to any surfaces.
Once all the tiles are up and in a bin bag sweep or brush over the surface to remove any final debris.
Unfortunately we’re not quite done yet. If you used a heating device such as one of those mentioned above you may have been lucky enough to have taken most of the adhesive residue off along with the tiles. If not, then this will now need to be removed.
How to Remove Adhesive from Walls and Floors
The only method we have found which successfully removes most (not all) adhesives is to warm it gently with a hot air gun or hair dryer. A wallpaper steamer will be of little use here.
Working in small areas at a time, take your heat gun or hair dryer and heat over the surface of the adhesive, waving your chosen heating tool from side to side to spread the heat evenly over the surface.
When the adhesive starts to go soft you can get stuck in with the scraper. Using the same short-thrusting motion as you used to life the tiles up, scrape the adhesive off, periodically reheating it to keep it supple and workable.
Adhesive goes stringy and supple when heated and softened
If it cools down it will start to go solid again in which case you will need to stop and spend a few minutes heating it back up.
In quite a short space of time you will get quite a buildup of adhesive residue on your scraper so an old cloth will come in handy to wipe it off as eventually if too much is allowed to build up you will just end up spreading it back over the surface again.
Work your way over the entire area until all traces of the adhesive have been removed.
Removing the Remaining Adhesive Residue
Once the adhesive has gone, regrettably there is still more to do!
You will still have a small residue left on the surface. Fear not, removing this isn’t as bad as the previous tasks above.
In most cases this can usually be removed by rubbing quite hard with a cloth, or green scouring pad, dipped in solvent thinners. The thinners will help to dissolve the remaining adhesive that can then be rubbed off with a cloth leaving you with a clear surface. You may need to repeat this several times to ensure that you get all the residue off.
Thinners can be bought from most DIY sheds but one point to note is that you should check the manufacturers specifications on exactly what surfaces it is safe to use on as the thinners itself may cause damage to some surfaces it’s applied to.
After every trace of the tiles and adhesive are gone, have a good sweep up and then wash the floor over with a warm water and washing up liquid solution then leave to air dry and you’re done!
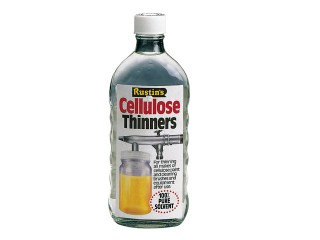
Cellulose thinners
Make sure you wear sturdy gloves for this job! Not only to protect your hands from the adhesive and thinners but also from the sharp scraper and scalding heat from the heat gun (if you use one). Safety specs are also a good idea as you are using solvents also old cloths as it is a mucky job!
Now that you know how to remove cork tiles from a floor or walls surface you can also apply the same principles to removing carpet tiles, vinyl tiles and other flooring types that are typically glued down.