Laminate flooring is incredibly versatile, suitable for almost any surface as long as it’s dry, firm, and level. It’s also durable, easy to clean, and ideal for busy households.
With its popularity over the past decade, laminate flooring now comes in a vast array of styles and finishes to suit any taste. In this DIY guide, you’ll learn how to properly lay laminate flooring.
What is Laminate Flooring?
Laminate flooring consists of a printed design, often mimicking wood or stone, adhered to a plywood backing and coated with a protective resin top layer for durability.
Durability of laminate flooring is graded on a scale from AC1 to AC5, with AC5 being the most durable option.
Quality varies, with thicker laminate (around 14mm) generally indicating higher quality, and lesser quality being around 6mm, although some top-quality options may be thinner.
It’s important to differentiate laminate flooring from real wood engineered flooring, as laminate is a printed reproduction, not real wood.
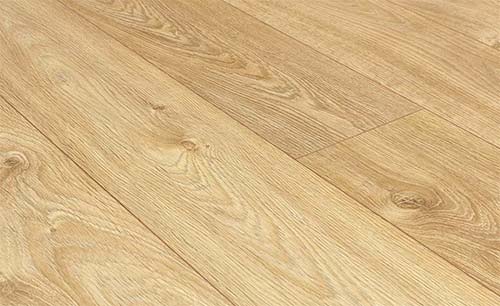
Good quality laminate flooring
Types of Laminate Flooring Installation
Laminate flooring can be installed using different methods, each with its own unique characteristics and fitting method:
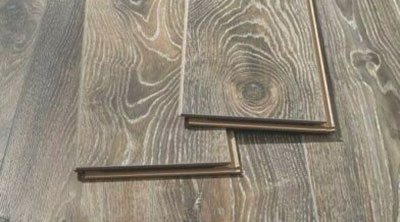
- Tongue and Groove: Adhesive is applied to the tongue section, creating a secure joint when pushed into the groove.
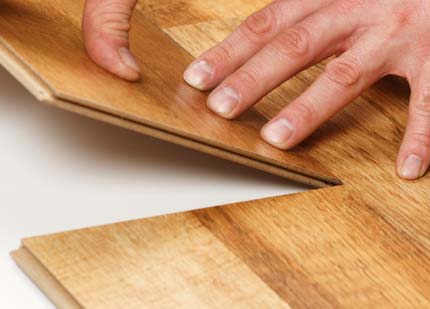
- Clip Together: Generally the most popular, it utilises a double clip setup to quickly and easily lock the joints together. Boards are slid in at an angle and then lowered to snap and lock the tongues in place.
- Self-Adhesive: Each plank has adhesive backing, making installation simple by peeling off the backing and laying the plank in place.
Tongue and groove laminate flooring
Clip together laminate flooring
Adhesive backed laminate flooring
Types of Laminate Flooring Finishes
Laminate flooring offers various finish options, including:
- Smooth/Polished: The most common finish, providing a sleek appearance.
- Textured: Mimics an aged or worn effect, though less common and typically more expensive.
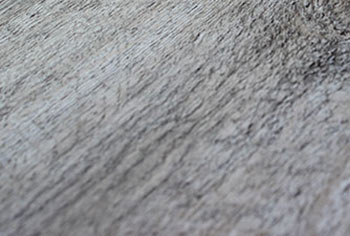
- Distressed: Provides an antique or aged appearance, similar to textured finishes.
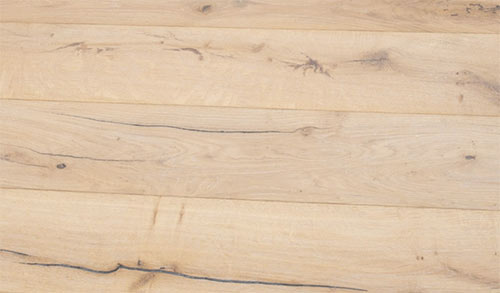
- Embossed in Registration (EIR): Offers texture that matches real wood, simulating grains and knots.
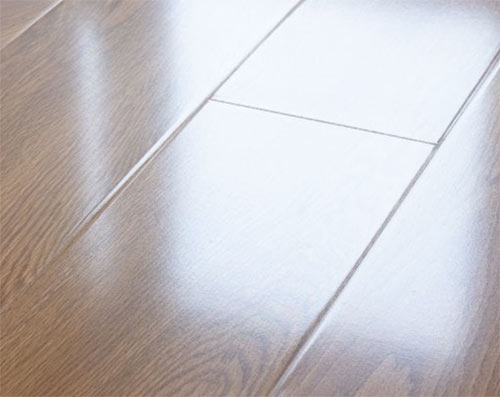
Polished finish laminate flooring
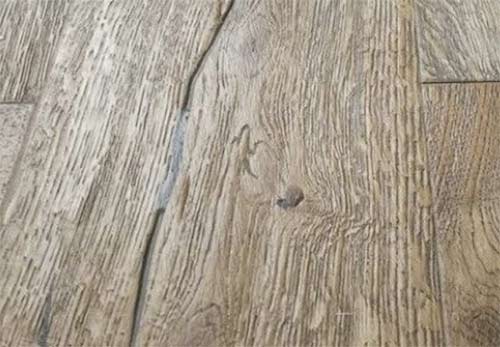
Textured finish laminate flooring
Distressed finish laminate flooring
Embossed in registration or EIR laminate flooring
With a wide range of styles and finishes available, laminate flooring can complement any home or decor.
Standard Laminate Flooring Plank Widths
In addition to the wide range of styles available, laminate flooring planks also come in various widths, including thin strips and wide planks.
You can mix and match planks of different sizes to create unique visual effects. Instead of laying them in a straight line along the longest wall, consider arranging them in a herringbone or parquet pattern for added interest.
The main width types are:
- Thin planks – typically 3 inches wide
- Medium planks – typically 5-7 inches wide
- Wide planks – typically 7 inches or wider
Types of Laminate Flooring Underlay
There are several types of underlay available for laminate flooring. These underlays are essential to provide a stable base for the laminate, iron out small dips and offer various benefits:
- Timber Subfloors: Use a breathable underlay for timber floors like OSB or plywood to allow the natural material to breathe. Moisture barriers can trap moisture, causing future issues.
- Concrete Subfloors: Concrete is porous, so a moisture barrier is necessary to prevent moisture from damaging laminate surfaces by rising from the ground.
In high-moisture areas like bathrooms, always install a moisture barrier even for timber surfaces.
- Poly Foam: Thinner and popular for firm, dry, and level surfaces like wooden floors. Ensure the floor is prepared and add a damp-proofing layer if needed. Poly foam layers should be stuck together to prevent movement.
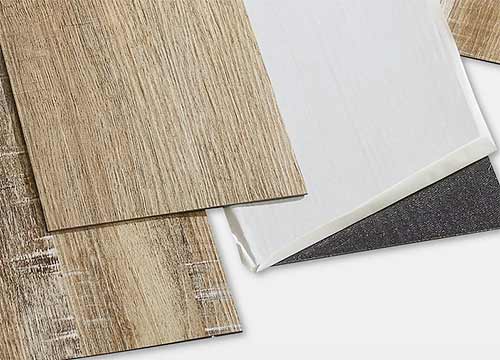
- Combined Underlay: Combines a foil backing as a damp-proofing layer and underlay in one. Slightly thicker than poly foam, it offers better sound insulation and can be laid on slightly uneven floors. Tape the joins for effective damp-proofing.
- Wood Fibre Boards or Cork: Thickest underlay suitable for more uneven floors. Provides good sound and heat insulation. Requires an initial damp-proofing layer if necessary.
Combined foam and foil underlay
Preparation for Installing Laminate Flooring
Before laying laminate flooring, it’s crucial to prepare the floor surface properly:
- Ensure the floor surface is clear, clean, dry, and level regardless of the type of floor you’re working on.
- For concrete subfloors, sweep and vacuum thoroughly to remove any dirt or debris that could affect how joints fit together and any lumps.
- If the floor is uneven or has deep depressions, level it using a self-levelling compound or by laying a floor screed.
- For timber floors like OSB, plywood, or floorboards, push down any nail or screw heads below the surface to prevent interference with the laminate.
- Screw down any loose OSB or ply sheets, ensuring the surface is stable and doesn’t move.
- Allow the laminate flooring boards to acclimatise to the room for 5-7 days to prevent expansion after installation.
Sort through the flooring, removing damaged boards and grouping similar ones together for easy mixing during installation.
Proper preparation ensures the success and longevity of your laminate flooring project.
What Tools and Products do you Need?
In order to successfully install your new laminate flooring you will need a selection of tools and products to complete the job. Here follows a list of the essentials:
- Set of floor tensioners
- Good quality wood glue
- Cork expansion strips
- Good quality laminate flooring
- Skirting board or flooring trim/quadrant
- Decent sharp hand saw or mitre saw
- Tape measure
- Pen or pencil
- Good quality underlay
- Hammer
- Punch
- Spirit level
- jigsaw
Installing Laminate Flooring: Step-by-Step Guide
Now that we’ve gathered all the necessary products and tools, selected the appropriate underlay, and prepped the floor surface, it’s time to start laying the laminate flooring.
Consider installing underfloor heating before laying the laminate for added comfort. Electric underfloor heating is an efficient option and easy to integrate. Explore our detailed project on underfloor heating for insights.
To ensure the floor remains stable and joints stay intact, we’ll be gluing all the joints in our laminate floor. This ensures the floor moves as one unit during expansion and contraction, preventing individual joints from splitting apart.
Step 1: Prepare and Level the Floor
Begin by thoroughly sweeping and vacuuming the existing surface, whether it’s concrete or timber.
Check the floor’s level. Timber floors usually require minimal levelling, but concrete floors, especially in older buildings, may need more attention.
Use a long spirit level (at least 1200mm) to identify any dips or depressions. Check multiple locations across the length and width of the floor.
If you notice any issues, refer to the tips under the “Preparing for Laying Laminate Floor” section above for solutions.
Step 2: Install the Underlay
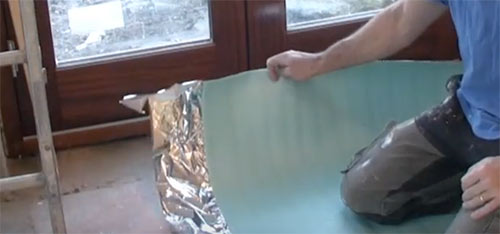
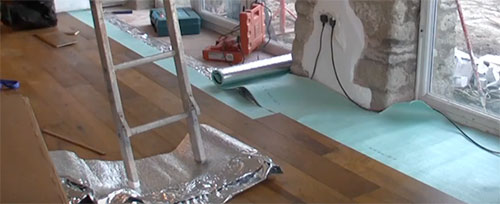
After preparing the floor, it’s time to lay out the underlay. Start by rolling out the underlay along one of the longest walls, ensuring it covers the entire span of the room.
In a new build, where walls are generally square, you can cut the underlay to fit squarely against the walls. However, in older properties with uneven walls, such as our example in an old barn, cut the underlay slightly longer at each end. Then, use a utility knife to follow the curve of the wall for a precise fit.
Repeat this process for the rest of the room until the entire floor is covered. To maintain the moisture barrier, tape each joint using aluminium or gaffer tape.
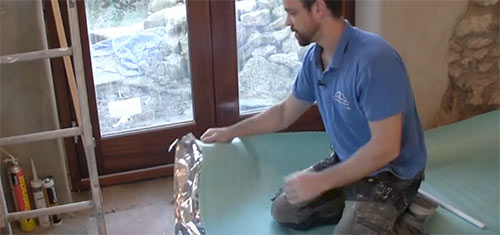
Laying laminate flooring underlay
Step 3: Mark Board Widths on Underlay
Prior to laying any boards, plan how your new laminate floor will fit into the room. Lay full-width boards across the room, leaving a uniform gap around the perimeter, with a 10mm expansion gap.
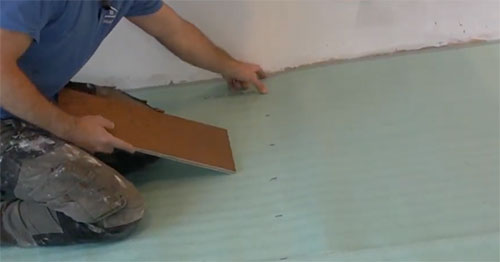
To ensure neatness and uniformity, take a board and mark its width on the underlay, then move it over and repeat this process across the width of the room.
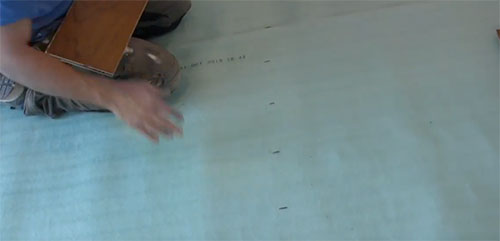
Mark laminate board widths on floor
Once you’ve marked the board widths, measure the gap between the last width mark and the wall. Deduct 20mm for the expansion gap on each side, then divide by 2. This will ensure an even gap for cuts at either side of the room
From a new starting point, mark the board widths again, this time starting from the wall with the adjusted measurement plus 10mm for the expansion gap. Repeat this across the width of the room to ensure equal gaps, or cuts, on both sides.
Checking cut in gap around perimeter of floor
Repeat these marks along the floor’s length in 3 or 4 locations for easy alignment during the next steps.
Step 4: Lay the First Course of Laminate Floor Boards
The initial course of laminate boards sets the foundation and ultimately, the success for your floor. Lay them precisely to avoid a messy outcome. In a new build, this is relatively straightforward, but in older buildings like our barn example, uneven walls present challenges.
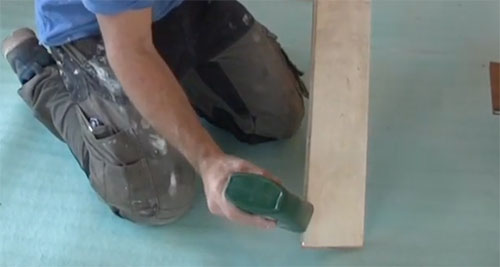
Begin along a long wall, roughly laying out the first course of boards. Ensure tight joints and square alignment to the wall. Use tensioners or a small piece of laminate to tap joints closed without damaging the boards.
Using a laminate cut off as a drift to knock joints between laminate floor boards together without causing damage
Lay a second course against the first to secure it. Start the second course with half a board to stagger joints and strengthen the floor.
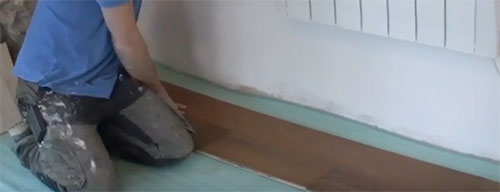
First few courses of laminate floor boards roughly laid out
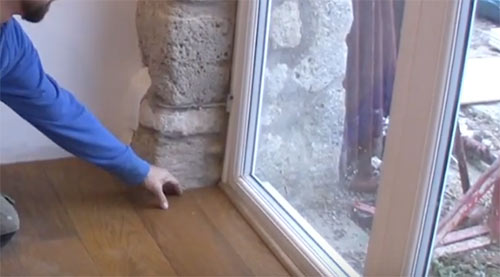
Now, scribe the cut-ins to fit against the wall undulations precisely. Apply glue to the edges, leaving a 10mm expansion gap, then join them firmly. This will ensure the flooring is square to the wall.
Apply glue to the rear of the tongue when gluing laminate floor boards
Position the first board 10mm from the wall, aligning it with the underlay marks along the wall’s length. Cut or scribe and fix the cut-ins between the boards and the wall.

Scribing cut ins for laminate flooring
As said, make sure that all joints are staggered to add strength to the floor.
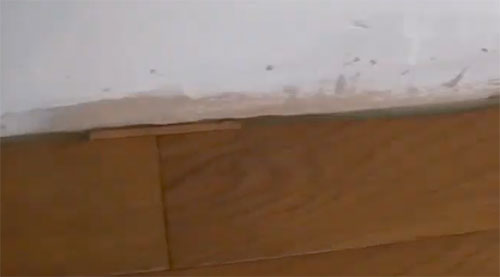
Expansion gap between scribed cut in and wall when laying laminate flooring
Use tensioners to close gaps between boards and cut-ins. To ensure the expansion gaps remains, cut and use 10mm chocks to prevent the floor from shifting during installation.
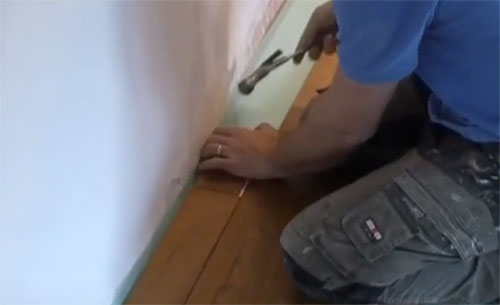
Note: If you need to knock joints together using a hammer, don’t hit the boards directly, use a flooring off cut or other piece of timber up against the board and hit that to prevent damaging the board.
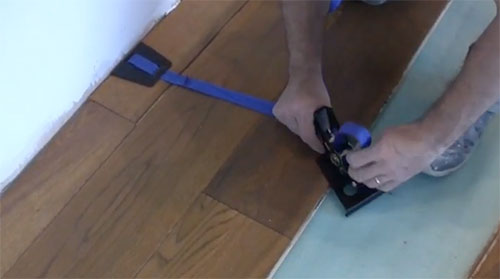
Use floor tensioners to close laminate floor plank gaps in hard to access spaces
For cutting, use a handsaw or mitre saw for straight cuts, and a jigsaw for precise scribed marks.
Step 5: Complete Laminate Flooring Installation
After laying the initial rows and cutting them to fit the wall, proceed to install the rest of the laminate flooring.
Ensure all joints are glued and tightly closed together. Use a chock and hammer or floor tensioners to secure them.
Stagger each row by half a board to maintain structural integrity.
For a uniform look, mix different shades of laminate boards throughout the floor.
Joints staggered and different shade laminate floor boards mixed in when laid
When reaching the opposing wall, scribe cut-ins around objects with precision.
For end-of-row cut-ins, use the same technique.
Tip: If closing tight cut-in joints at the opposing wall, use a pry bar and chock. Place the chock in the expansion gap and lever the pry bar against the wall or object to close the joint.

Using a pry bar to close a joint in a laminate floor
Step 6: Install Expansion Strips, Skirting Boards, and Floor Trims
After completing the floor installation and cut-ins, the next step is fitting cork expansion strips around the perimeter to fill the expansion gap.
Then, install skirting boards or floor trims to cover the expansion gap. If the laminate reaches existing skirting, use trim or quadrant strips to cover the gap.
Fitting quadrant or floor trim strip in doorway
Secure trims or quadrant to the skirting or surface behind the flooring, not to the flooring itself, allowing it to float above the floor for expansion.
Similarly, apply the same principles to fitting skirting boards, which primarily cover the expansion gap.
With skirting boards or quadrant properly installed, your job is nearly complete. Well done!
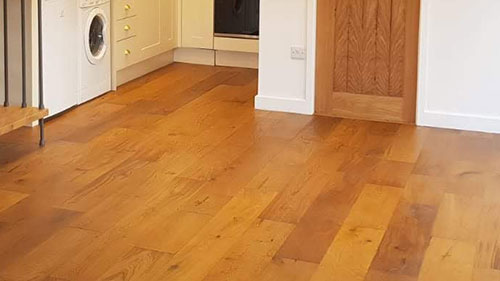
Completed laminate flooring job
Laying laminate flooring may seem daunting for beginners, but with proper surface preparation and precise first-row installation, the process becomes more than manageable.